


一、实现效果

文章目录
二、引入依赖
在app的build.gradle在添加以下代码
1、implementation 'com.github.CymChad:BaseRecyclerViewAdapterHelper:3.0.6',这个里面带的适配器,直接调用就即可
BaseRecyclerViewAdapterHelper简称BRVAH
Android SDK | 是否支持BaseRecyclerViewAdapterHelper:3.0.6 |
|---|---|
android compileSdkVersion 29 | 是 |
android compileSdkVersion 30 | 是 |
android compileSdkVersion 31 | 是 |
android compileSdkVersion 32 | 是 |
android compileSdkVersion 33 | 是 |
这依赖包还需要得到要添加,在Project的build.gradle在添加以下代码,不添加就不行
allprojects {
    repositories {
        ...
        maven { url "https://jitpack.io" }//加上
    }
}
2、TabLayout:implementation 'com.google.android.material:material:1.1.0'
3、implementation 'com.github.li-xiaojun:StateLayout:1.3.4' //allprojects {…增加:maven { url ‘https://jitpack.io’ }…}
三、实现源码
● 可点击可滑动顶部导航栏与左右滑动页面
1、实体类
左右滑动页面PageInfo.java
package com.example.myapplication3.bean;

import com.example.myapplication3.fragment.BaseFragment;

public class PageInfo {
    public String title;
    public BaseFragment fragment;

    public PageInfo(String title, BaseFragment fragment) {
        this.title = title;
        this.fragment = fragment;
    }
}
2、页面适配器
MyViewPager.kt
package com.example.myapplication3.view

import android.content.Context
import android.util.AttributeSet
import android.view.View
import androidx.annotation.Nullable
import androidx.viewpager.widget.ViewPager


class MyViewPager : ViewPager {
    constructor(context: Context) : super(context) {}
    constructor(context: Context, @Nullable attrs: AttributeSet?) : super(context, attrs) {}

    override fun onMeasure(widthMeasureSpec: Int, heightMeasureSpec: Int) {
        var heightMeasureSpec = heightMeasureSpec
        var height = 0
        for (i in 0 until childCount) {
            val child: View = getChildAt(i)
            child.measure(widthMeasureSpec, MeasureSpec.makeMeasureSpec(0, MeasureSpec.UNSPECIFIED))
            val h: Int = child.measuredHeight
            if (h > height) height = h
        }
        heightMeasureSpec = MeasureSpec.makeMeasureSpec(height, MeasureSpec.EXACTLY)
        super.onMeasure(widthMeasureSpec, heightMeasureSpec)
    }
}
3、列表适配器
RvAdapter.kt
package com.example.myapplication3.adapter

import com.chad.library.adapter.base.BaseQuickAdapter
import com.chad.library.adapter.base.viewholder.BaseViewHolder
import com.example.myapplication3.R
import kotlinx.android.synthetic.main.rv_item.view.*

class RvAdapter (layoutResId: Int = R.layout.rv_item) :
    BaseQuickAdapter<String, BaseViewHolder>(layoutResId) {
    override fun convert(holder: BaseViewHolder, item: String) {
        holder.itemView.run {
            tv_content.text = item
        }

        if (mCallBack != null) {
            mCallBack!!.convert(holder)
        }
    }
    //回调
    private var mCallBack: LastItemViewCallBack? = null

    fun setLastItemViewCallBack(CallBack: LastItemViewCallBack?) {
        mCallBack = CallBack
    }

    interface LastItemViewCallBack {
        fun convert(holder: BaseViewHolder?)
    }
}
item布局rv_item.xml
<?xml version="1.0" encoding="utf-8"?>
<LinearLayout xmlns:android="http://schemas.android.com/apk/res/android"
    android:id="@+id/ll_layout"
    android:layout_width="match_parent"
    android:layout_height="50dp"
    android:background="@drawable/item_bg">

    <TextView
        android:id="@+id/tv_content"
        android:layout_width="wrap_content"
        android:layout_height="wrap_content"
        android:textColor="@color/red"
        android:text="菜单" />
</LinearLayout>
item样式item_bg.xml
<?xml version="1.0" encoding="utf-8"?>
<selector xmlns:android="http://schemas.android.com/apk/res/android">
    <item android:state_pressed="true">
        <shape android:shape="rectangle">
            <stroke android:width="1.0px" android:color="@color/line" /><!--<color name="line">#fff5f5f5</color>-->

            <gradient android:angle="270.0" android:endColor="#ffe8ecef" android:startColor="#ffe8ecef" />
        </shape>
    </item>

    <item android:state_focused="true">
        <shape android:shape="rectangle">
            <gradient android:angle="270.0" android:endColor="#ffe8ecef" android:startColor="#ffe8ecef" />

            <stroke android:width="1.0px" android:color="@color/line" />
        </shape>
    </item>

    <item>
        <shape android:shape="rectangle">
            <gradient android:angle="270.0" android:endColor="#ffffffff" android:startColor="#ffffffff" />

            <stroke android:width="1.0px" android:color="@color/line" />
        </shape>
    </item>

</selector>
4、Fragment
六个Fragment页面代码
TestFragment1.kt
package com.example.myapplication3.fragment

import android.view.View
import android.widget.Toast
import androidx.recyclerview.widget.LinearLayoutManager
import com.example.myapplication3.R
import com.example.myapplication3.adapter.RvAdapter
import kotlinx.android.synthetic.main.testfragment1.*

class TestFragment1 : BaseFragment(){

    private val mAdapter2 by lazy {
        RvAdapter().apply {
//            setOnItemLongClickListener(activity)
        }
    }

    override val layoutId: Int = R.layout.testfragment1
    override fun init(view: View?) {
        val itemList: MutableList<String> = ArrayList()
        for (i in 0..19) {
            itemList.add("菜单$i")
        }
        val layoutManager = LinearLayoutManager(activity)
        layoutManager.orientation = LinearLayoutManager.VERTICAL
        recyclerView.layoutManager = layoutManager
        recyclerView.adapter = mAdapter2
        mAdapter2.setList(itemList)
        mAdapter2.setOnItemClickListener { adapter, view, position ->
            Toast.makeText(activity,"$position",Toast.LENGTH_SHORT).show()
        }
    }
}
testfragment1.xml
<?xml version="1.0" encoding="utf-8"?>
<FrameLayout xmlns:android="http://schemas.android.com/apk/res/android"
    android:layout_width="match_parent"
    android:layout_height="match_parent">

    <androidx.recyclerview.widget.RecyclerView
        android:id="@+id/recyclerView"
        android:layout_width="match_parent"
        android:layout_height="match_parent"/>
</FrameLayout>
TestFragment2.kt
package com.example.myapplication3.fragment

import android.view.View
import com.example.myapplication3.R

class TestFragment2 :BaseFragment(){
    override val layoutId: Int = R.layout.testfragment2
    override fun init(view: View?) {
    }
}
testfragment2.xml
<?xml version="1.0" encoding="utf-8"?>
<LinearLayout xmlns:android="http://schemas.android.com/apk/res/android"
    android:layout_width="match_parent"
    android:layout_height="match_parent">

    <TextView
        android:layout_width="match_parent"
        android:layout_height="wrap_content"
        android:layout_gravity="center"
        android:gravity="center"
        android:text="测试2"
        android:textSize="30dp" />
</LinearLayout>
和其他的四个页面一样,布局一样,太简单,可以自己改
六个页面代码要继承父类BaseFragment(),BaseFragment.kt
package com.example.myapplication3.fragment

import android.os.Bundle
import android.view.LayoutInflater
import android.view.View
import android.view.ViewGroup
import androidx.fragment.app.Fragment
import com.lxj.statelayout.StateLayout

abstract class BaseFragment : Fragment() {
    var vieww: View? = null
    var isInit = false
    var stateLayout: StateLayout? = null
    override fun onCreateView(
        inflater: LayoutInflater,
        container: ViewGroup?,
        savedInstanceState: Bundle?
    ): View? {
        if (vieww == null) {
            vieww = inflater.inflate(layoutId, container, false)
            stateLayout = StateLayout(requireContext()).wrap(vieww).showLoading()
        }
        return stateLayout
    }

    override fun onResume() {
        super.onResume()
        safeInit()
    }

    private fun safeInit() {
        if (userVisibleHint && vieww != null) {
            if (!isInit) {
                isInit = true
                init(vieww)
                stateLayout!!.postDelayed({ stateLayout!!.showContent() }, 300)
            }
        }
    }

    override fun setUserVisibleHint(isVisibleToUser: Boolean) {
        super.setUserVisibleHint(isVisibleToUser)
        safeInit()
    }

    protected abstract val layoutId: Int
    abstract fun init(view: View?)
    fun toast(msg: String?) {
//        Toast.makeText(XPopupApp.context, msg, Toast.LENGTH_SHORT).show();
    }
}
5、视图实现
FragmentActivity.kt
package com.example.myapplication3

import android.os.Bundle
import androidx.appcompat.app.AppCompatActivity
import androidx.fragment.app.FragmentManager
import androidx.fragment.app.FragmentPagerAdapter
import android.view.View
import androidx.fragment.app.Fragment
import com.example.myapplication3.bean.PageInfo
import com.example.myapplication3.fragment.*
import kotlinx.android.synthetic.main.activity_design_scroll.*

//顶部导航栏与左右滑动页面
class FragmentActivity : AppCompatActivity() {

    override fun onCreate(savedInstanceState: Bundle?) {
        super.onCreate(savedInstanceState)
        setContentView(R.layout.activity_design_scroll)
        viewPager.adapter = MainAdapter(supportFragmentManager)
        tv_header.visibility = View.GONE
        recyclerview.visibility = View.GONE
        tablayout.setupWithViewPager(viewPager)

//        viewPager.setOnTouchListener (View.OnTouchListener{ v, event ->
//            true //设置为true禁止左右滑动,false默认左右滑动
//        })

    }

    class MainAdapter(fm: FragmentManager?) : FragmentPagerAdapter(fm!!) {

        val pageInfos = arrayOf(
            PageInfo("测试", TestFragment1()),
            PageInfo("测试测试", TestFragment2()),
            PageInfo("测试测", TestFragment3()),
            PageInfo(
                "测试测试测试测试",
                TestFragment4()
            ),
            PageInfo("测试", TestFragment5()),
            PageInfo("测试测试测试", TestFragment6())
        )

        override fun getItem(i: Int): Fragment {
            return pageInfos[i].fragment
        }

        override fun getCount(): Int {
            return pageInfos.size
        }

        override fun getPageTitle(position: Int): CharSequence? {
            return pageInfos[position].title
        }
    }
}
activity_design_scroll.xml
<?xml version="1.0" encoding="utf-8"?>

<androidx.coordinatorlayout.widget.CoordinatorLayout xmlns:android="http://schemas.android.com/apk/res/android"
    xmlns:app="http://schemas.android.com/apk/res-auto"
    android:layout_width="match_parent"
    android:layout_height="match_parent">

    <com.google.android.material.appbar.AppBarLayout
        android:layout_width="match_parent"
        android:layout_height="wrap_content"
        android:background="#009688">

        <TextView
            android:id="@+id/tv_header"
            android:layout_width="match_parent"
            android:layout_height="200dp"
            android:background="@android:color/holo_orange_light"
            android:gravity="center"
            android:text="这是头部滚动部分"
            app:layout_scrollFlags="scroll" />

        <com.google.android.material.tabs.TabLayout
            android:id="@+id/tablayout"
            android:layout_width="match_parent"
            android:layout_height="wrap_content"
            app:tabIndicatorColor="#F44336"
            app:tabMode="scrollable"
            app:tabSelectedTextColor="#FF9800"
            app:tabTextColor="#9C27B0" />

    </com.google.android.material.appbar.AppBarLayout>

    <androidx.recyclerview.widget.RecyclerView
        android:id="@+id/recyclerview"
        android:layout_width="match_parent"
        android:layout_height="match_parent"
        app:layout_behavior="@string/appbar_scrolling_view_behavior" />

    <androidx.core.widget.NestedScrollView
        android:id="@+id/nestedScrollView"
        android:layout_width="match_parent"
        android:layout_height="match_parent"
        android:fillViewport="true"
        app:layout_behavior="@string/appbar_scrolling_view_behavior">

        <androidx.viewpager.widget.ViewPager
            android:id="@+id/viewPager"
            android:layout_width="match_parent"
            android:layout_height="match_parent" />
    </androidx.core.widget.NestedScrollView>
</androidx.coordinatorlayout.widget.CoordinatorLayout>
● 滚动悬停Tab(TabLayout)
1、视图实现
FragmentAndTabScrollActivity.kt
package com.example.myapplication3

import android.os.Bundle
import android.view.View
import androidx.appcompat.app.AppCompatActivity
import androidx.fragment.app.Fragment
import androidx.fragment.app.FragmentManager
import androidx.fragment.app.FragmentPagerAdapter
import com.example.myapplication3.bean.PageInfo
import com.example.myapplication3.fragment.*
import kotlinx.android.synthetic.main.activity_design_scroll.*

//顶部导航栏、左右滑动页面和滚动Tab悬停
class FragmentAndTabScrollActivity : AppCompatActivity() {

    override fun onCreate(savedInstanceState: Bundle?) {
        super.onCreate(savedInstanceState)
        setContentView(R.layout.activity_design_scroll)
        viewPager.adapter = MainAdapter(supportFragmentManager)
//        tv_header.visibility = View.GONE
        recyclerview.visibility = View.GONE
        tablayout.setupWithViewPager(viewPager)
    }

    class MainAdapter(fm: FragmentManager?) : FragmentPagerAdapter(fm!!) {

        val pageInfos = arrayOf(
            PageInfo("Rv列表", TestFragment1()),
            PageInfo("测试", TestFragment2()),
//            PageInfo("测试测", TestFragment3()),
//            PageInfo("测试测试测试测试", TestFragment4()),
//            PageInfo("测试", TestFragment5()),
//            PageInfo("测试测试测试", TestFragment6())
        )

        override fun getItem(i: Int): Fragment {
            return pageInfos[i].fragment
        }

        override fun getCount(): Int {
            return pageInfos.size
        }

        override fun getPageTitle(position: Int): CharSequence? {
            return pageInfos[position].title
        }
    }
}
● 滚动悬停Tab与RecyclerView绑定和锚点定位
1、视图实现
AnchorAndTabScrollActivity.kt
package com.example.myapplication3

import android.content.Context
import android.os.Bundle
import android.util.Log
import android.view.*
import android.view.View.OnTouchListener
import android.widget.LinearLayout
import androidx.appcompat.app.AppCompatActivity
import androidx.recyclerview.widget.LinearLayoutManager
import androidx.recyclerview.widget.RecyclerView
import com.chad.library.adapter.base.viewholder.BaseViewHolder
import com.example.myapplication3.adapter.RvAdapter
import com.google.android.material.tabs.TabLayout
import com.google.android.material.tabs.TabLayout.OnTabSelectedListener
import kotlinx.android.synthetic.main.activity_design_scroll.*
import kotlinx.android.synthetic.main.rv_item.view.*

//1、TabLayout与RecyclerView绑定和锚点定位,2、滚动Tab悬停
class AnchorAndTabScrollActivity : AppCompatActivity() {

    private val mAdapter2 by lazy {
        RvAdapter().apply {
//            setOnItemClickListener(this@AnchorActivity)
        }
    }

    //用于recyclerView滑动到指定的位置
    private var canScroll = false
    private var scrollToPosition = 0

    private val tabTxt = arrayOf("测试0", "测试1", "测试2", "测试3", "测试4", "测试5", "测试6", "测试7")

    //判读是否是recyclerView主动引起的滑动,true- 是,false- 否,由tablayout引起的
    private var isRecyclerScroll = false

    //记录上一次位置,防止在同一内容块里滑动 重复定位到tablayout
    private var lastPos = 0
    private val mList: MutableList<String> = ArrayList()

    private var statuBarHeight = 0 //状态栏高度

    override fun onCreate(savedInstanceState: Bundle?) {
        super.onCreate(savedInstanceState)
        setContentView(R.layout.activity_design_scroll)
        init()
    }

    private fun init() {
//        tv_header.visibility = View.GONE
        nestedScrollView.visibility = View.GONE
        for (element in tabTxt) {
            //tablayout设置标签
            tablayout.addTab(tablayout.newTab().setText(element))
            //
            mList.add(element)
        }
        val layoutManager = LinearLayoutManager(this@AnchorAndTabScrollActivity)
        layoutManager.orientation = LinearLayoutManager.VERTICAL
        recyclerview.layoutManager = layoutManager
        recyclerview.adapter = mAdapter2
        mAdapter2.setList(mList)

        tablayout.addOnTabSelectedListener(object : OnTabSelectedListener {
            override fun onTabSelected(tab: TabLayout.Tab?) {

                Log.i("tablayout", "pos => ${tab!!.position}")

                //点击标签,使recyclerView滑动,isRecyclerScroll置false
                val pos = tab!!.position
                moveToPosition(layoutManager, recyclerview, pos)
            }

            override fun onTabUnselected(tab: TabLayout.Tab?) {

            }

            override fun onTabReselected(tab: TabLayout.Tab?) {

            }
        })

        recyclerview.setOnTouchListener(OnTouchListener { v, event ->
            //当滑动由recyclerView触发时,isRecyclerScroll 置true
            if (event!!.action == MotionEvent.ACTION_MOVE) {
                isRecyclerScroll = true
            }
            false //默认左右滑动,设置为true禁止左右滑动
        })

        mAdapter2.setLastItemViewCallBack(object : RvAdapter.LastItemViewCallBack {
            override fun convert(holder: BaseViewHolder?) {
                holder!!.itemView.run {

                    //判断最后一个item的view
                    if (holder!!.adapterPosition == tabTxt.size - 1) {
                        val params = LinearLayout.LayoutParams(
                            LinearLayout.LayoutParams.MATCH_PARENT,
                            LinearLayout.LayoutParams.WRAP_CONTENT
                        )

                        //屏幕高度
                        val screenH: Int = getScreenHeight(this@AnchorAndTabScrollActivity)
                        //状态栏
                        window.decorView.setOnApplyWindowInsetsListener(View.OnApplyWindowInsetsListener { v: View?, insets: WindowInsets ->
//                            val statuBarHeight = insets.stableInsetTop
                            statuBarHeight = insets.stableInsetTop
                            insets
                        })
                        //滚动悬停Tab高度
                        val tabH: Int = tablayout.height
                        val lastH = screenH - statuBarHeight - tabH

                        params.height = lastH
                        ll_layout.layoutParams = params
                        ll_layout.setBackgroundColor(resources.getColor(R.color.purple_200)) //<color name="purple_200">#FFBB86FC</color>
                    }
                }
            }
        })

        recyclerview.addOnScrollListener(object : RecyclerView.OnScrollListener() {
            override fun onScrollStateChanged(recyclerView: RecyclerView, newState: Int) {
                super.onScrollStateChanged(recyclerView, newState)
                if (canScroll) {
                    canScroll = false
                    moveToPosition(layoutManager, recyclerView, scrollToPosition)
                }
            }

            override fun onScrolled(recyclerView: RecyclerView, dx: Int, dy: Int) {
                if (isRecyclerScroll) {
                    //第一个可见的view的位置,即tablayou需定位的位置
                    val position = layoutManager.findFirstVisibleItemPosition()
                    if (lastPos != position) {
                        tablayout.setScrollPosition(position, 0F, true)
                    }
                    lastPos = position
                }
            }
        })
    }

    private fun moveToPosition(layoutManager: LinearLayoutManager, mRecyclerView: RecyclerView?, position: Int) {
        // 第一个可见的view的位置
        val firstItem = layoutManager.findFirstVisibleItemPosition()
        // 最后一个可见的view的位置
        val lastItem = layoutManager.findLastVisibleItemPosition()
        if (position <= firstItem) {
            // 如果跳转位置firstItem 之前(滑出屏幕的情况),就smoothScrollToPosition可以直接跳转,
            mRecyclerView!!.smoothScrollToPosition(position) //向下滑到下面
        } else if (position <= lastItem) {
            // 跳转位置在firstItem 之后,lastItem 之间(显示在当前屏幕),smoothScrollBy来滑动到指定位置

//            val top = mRecyclerView!!.getChildAt(position - firstItem).top
            val top = mRecyclerView!!.layoutManager!!.findViewByPosition(position)!!.top

            mRecyclerView.smoothScrollBy(0, top) //向上滑到下面
        } else {
            // 如果要跳转的位置在lastItem 之后,则先调用smoothScrollToPosition将要跳转的位置滚动到可见位置
            // 再通过onScrollStateChanged控制再次调用当前moveToPosition方法,执行上一个判断中的方法
            mRecyclerView!!.smoothScrollToPosition(position)
            scrollToPosition = position
            canScroll = true
        }
    }

    private fun getScreenHeight(context: Context): Int {
        return context.resources.displayMetrics.heightPixels
    }
}
主页视图
MainActivity.kt
package com.example.myapplication3

import android.content.Intent
import android.os.Bundle
import androidx.appcompat.app.AppCompatActivity
import kotlinx.android.synthetic.main.activity_main.*

class MainActivity :AppCompatActivity(){

    override fun onCreate(savedInstanceState: Bundle?) {
        super.onCreate(savedInstanceState)
        setContentView(R.layout.activity_main)

        //顶部导航栏与左右滑动页面
        button1.setOnClickListener {
            val intent = Intent(this@MainActivity, FragmentActivity::class.java)
            startActivity(intent)
        }

        //顶部导航栏、左右滑动页面和滚动Tab悬停
        button2.setOnClickListener {
            val intent = Intent(this@MainActivity, FragmentAndTabScrollActivity::class.java)
            startActivity(intent)
        }

        //1、TabLayout与RecyclerView绑定和锚点定位,2、滚动Tab悬停
        button3.setOnClickListener {
            val intent = Intent(this@MainActivity, AnchorAndTabScrollActivity::class.java)
            startActivity(intent)
        }
    }
}
activity_main.xml
<?xml version="1.0" encoding="utf-8"?>
<LinearLayout xmlns:android="http://schemas.android.com/apk/res/android"
android:layout_width="match_parent"
android:layout_height="match_parent"
android:gravity="center"
android:orientation="vertical">
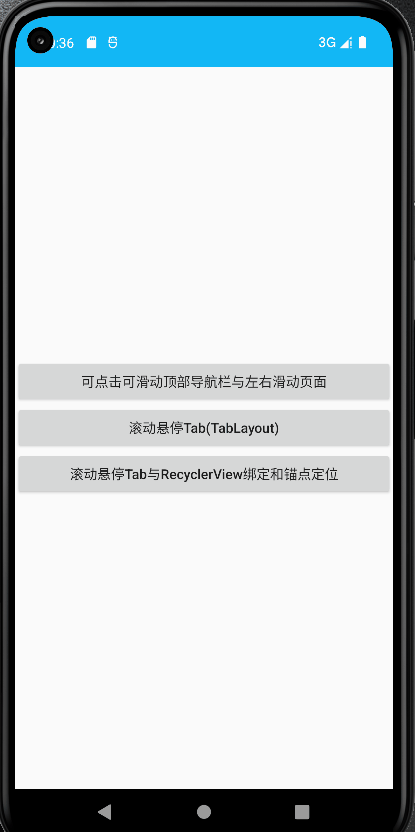
<Button
android:id="@+id/button1"
android:layout_width="match_parent"
android:layout_height="wrap_content"
android:text="可点击可滑动顶部导航栏与左右滑动页面"/>
<Button
android:id="@+id/button2"
android:layout_width="match_parent"
android:layout_height="wrap_content"
android:textAllCaps="false"
android:text="滚动悬停Tab(TabLayout)"/>
<Button
android:id="@+id/button3"
android:layout_width="match_parent"
android:layout_height="wrap_content"
android:textAllCaps="false"
android:text="滚动悬停Tab与RecyclerView绑定和锚点定位"/>
</LinearLayout>
四、代码解析
1、布局中AppBarLayout与TabLayout的画解

2、滚动悬停Tab与RecyclerView绑定和锚点定位,最后的一个item
		mAdapter2.setLastItemViewCallBack(object : RvAdapter.LastItemViewCallBack {
            override fun convert(holder: BaseViewHolder?) {
                holder!!.itemView.run {

                    //判断最后一个item的view
                    if (holder!!.adapterPosition == tabTxt.size - 1) {
                        val params = LinearLayout.LayoutParams(
                            LinearLayout.LayoutParams.MATCH_PARENT,
                            LinearLayout.LayoutParams.WRAP_CONTENT
                        )

                        //屏幕高度
                        val screenH: Int = getScreenHeight(this@AnchorAndTabScrollActivity)
                        //状态栏
                        window.decorView.setOnApplyWindowInsetsListener(View.OnApplyWindowInsetsListener { v: View?, insets: WindowInsets ->
//                            val statuBarHeight = insets.stableInsetTop
                            statuBarHeight = insets.stableInsetTop
                            insets
                        })
                        //滚动悬停Tab高度
                        val tabH: Int = tablayout.height
                        val lastH = screenH - statuBarHeight - tabH

                        params.height = lastH
                        ll_layout.layoutParams = params
                        ll_layout.setBackgroundColor(resources.getColor(R.color.purple_200))
                    }
                }
            }
        })
这代码中说是:最后的一个item布局需要填满对应TabLayout选中“测试7”的下面,不填满就不是锚点定位


 3966
3966

 被折叠的 条评论
为什么被折叠?
被折叠的 条评论
为什么被折叠?
 到【灌水乐园】发言


