


1,新建spring boot项目,过程百度
2,引入maven依赖
<dependency>
   <groupId>org.springframework.boot</groupId>
   <artifactId>spring-boot-starter-amqp</artifactId>
   <version>1.5.2.RELEASE</version>
</dependency>
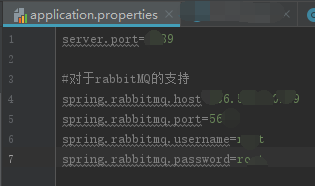
3,修改rabbitmq配置文件
4,新建direct配置类
import org.springframework.amqp.core.*;
import org.springframework.context.annotation.Bean;
import org.springframework.context.annotation.Configuration;


@Configuration
public class DirectConfig {

    @Bean
    public Queue directQueue(){
        return new Queue("direct",false); //队列名字,是否持久化
    }

    @Bean
    public DirectExchange directExchange(){
        return new DirectExchange("direct",false,false);//交换器名称、是否持久化、是否自动删除
    }

    @Bean
    Binding binding(Queue queue, DirectExchange exchange){
        return BindingBuilder.bind(queue).to(exchange).with("direct");
5,新建消息发送类
import org.springframework.amqp.core.AmqpTemplate;
import org.springframework.beans.factory.annotation.Autowired;
import org.springframework.stereotype.Component;

/**
 * 消息发送--生产消息
 */
@Component
public class Sender {

    @Autowired
    AmqpTemplate rabbitmqTemplate;

    public void send(String message){
        System.out.println("发送消息:"+message);
        rabbitmqTemplate.convertAndSend("direct",message);
    }

    public void send2(String message){
        System.out.println("发送消息:"+message);
        rabbitmqTemplate.convertAndSend("direct2",message);
    }

}
6,新建消息接收类
import org.springframework.amqp.rabbit.annotation.RabbitHandler;
import org.springframework.amqp.rabbit.annotation.RabbitListener;
import org.springframework.stereotype.Component;


@Component
@RabbitListener(queues = "direct")
public class Receiver {

    @RabbitHandler
    public void handler(String message){
        System.out.println("接收消息:"+message);
    }

}
新建controller测试接口
import org.springframework.beans.factory.annotation.Autowired;
import org.springframework.stereotype.Controller;
import org.springframework.web.bind.annotation.RequestMapping;
import org.springframework.web.bind.annotation.ResponseBody;

@Controller
@RequestMapping("/rabbitmq")
public class MyRabbitmqController {


    @Autowired
    Sender sender;

    @RequestMapping("/sender")
    @ResponseBody
    public String sender(){
        System.out.println("send string:hello world");
        sender.send("hello world");
        return "sending...";
    }

    @RequestMapping("/sender2")
    @ResponseBody
    public String sender2(){
        System.out.println("send string:hello world");
        sender.send2("hello world2");
        return "sending2...";
    }

}
浏览器输入:http://localhost:8089/rabbitmq/sender

成功
Fanout Exchange
3.3.2.1 配置队列
创建FanoutConfig.java代码如下:
package com.example.rabbitmq.mq;
import org.springframework.amqp.core.*;
import org.springframework.context.annotation.Bean;
import org.springframework.context.annotation.Configuration;

@Configuration
public class FanoutConfig {
    final static String QUEUE_NAME = "fanout"; //队列名称
    final static String QUEUE_NAME2 = "fanout2"; //队列名称
    final static String EXCHANGE_NAME = "myfanout"; //交换器名称
    @Bean
    public Queue queueFanout() {
        return new Queue(FanoutConfig.QUEUE_NAME);
    }
    @Bean
    public Queue queueFanout2() {
        return new Queue(FanoutConfig.QUEUE_NAME2);
    }
    //配置交换器
    @Bean
    FanoutExchange fanoutExchange() {
        return new FanoutExchange(FanoutConfig.EXCHANGE_NAME);
    }
    // 绑定队列到交换器
    @Bean
    Binding bindingFanoutExchangeQueue(Queue queueFanout, FanoutExchange fanoutExchange) {
        return BindingBuilder.bind(queueFanout).to(fanoutExchange);
    }
    // 绑定队列到交换器
    @Bean
    Binding bindingFanoutExchangeQueue2(Queue queueFanout2, FanoutExchange fanoutExchange) {
        return BindingBuilder.bind(queueFanout2).to(fanoutExchange);
    }
}
3.3.2.2 发送消息
创建FanoutSender.java代码如下:
package com.example.rabbitmq.mq;
import org.springframework.amqp.core.AmqpTemplate;
import org.springframework.beans.factory.annotation.Autowired;
import org.springframework.stereotype.Component;

@Component
public class FanoutSender {
    @Autowired
    private AmqpTemplate rabbitTemplate;
    public void send(String message) {
        System.out.println("发送消息:" + message); this.rabbitTemplate.convertAndSend(FanoutConfig.EXCHANGE_NAME,FanoutConfig.QUEUE_NAME, message);
    }
    public void send2(String message) {
        System.out.println("发送消息2:" + message); this.rabbitTemplate.convertAndSend(FanoutConfig.EXCHANGE_NAME,FanoutConfig.QUEUE_NAME2, message);
    }
}
3.3.2.3 消费消息
创建两个监听类,第一个FanoutReceiver.java代码如下:
package com.example.rabbitmq.mq;
import com.rabbitmq.client.Channel;
import org.springframework.amqp.core.Message;
import org.springframework.amqp.rabbit.annotation.RabbitHandler;
import org.springframework.amqp.rabbit.annotation.RabbitListener;
import org.springframework.stereotype.Component;
import java.io.IOException;

@Component
@RabbitListener(queues = "fanout")
public class FanoutReceiver {
    @RabbitHandler
    public void process(String msg) {
        System.out.println("Fanout(FanoutReceiver)消费消息:" + msg);
    }
}
第二个FanoutReceiver2.java代码如下:
package com.example.rabbitmq.mq;
import org.springframework.amqp.rabbit.annotation.RabbitHandler;
import org.springframework.amqp.rabbit.annotation.RabbitListener;
import org.springframework.stereotype.Component;

@Component
@RabbitListener(queues = "fanout2")
public class FanoutReceiver2 {
    @RabbitHandler
    public void process(String message) {
        System.out.println("Fanout(FanoutReceiver2)消费消息:" + message);
    }
}
3.3.2.4 测试代码
创建FanoutTest.java代码如下:
package com.example.rabbitmq.mq;
import com.example.rabbitmq.RabbitmqApplication;
import org.junit.Test;
import org.junit.runner.RunWith;
import org.springframework.amqp.core.AmqpTemplate;
import org.springframework.beans.factory.annotation.Autowired;
import org.springframework.boot.test.context.SpringBootTest;
import org.springframework.test.context.junit4.SpringRunner;
import java.text.SimpleDateFormat;
import java.util.Date;

@RunWith(SpringRunner.class)
@SpringBootTest(classes = RabbitmqApplication.class)
public class FanoutTest {
    @Autowired
    private FanoutSender sender;

    @Test
    public void Test() throws InterruptedException {
        SimpleDateFormat sf = new SimpleDateFormat("yyyy-MM-dd");
        sender.send("Time1 => " + sf.format(new Date()));
        sender.send2("Date2 => " + sf.format(new Date()));
    }
}
运行测试代码,输出结果如下:
发送消息:Time1 => 2018-09-11
发送消息2:Date2 => 2018-09-11
Fanout(FanoutReceiver2)消费消息:Time1 => 2018-09-11
Fanout(FanoutReceiver2)消费消息:Date2 => 2018-09-11
Fanout(FanoutReceiver)消费消息:Time1 => 2018-09-11
Fanout(FanoutReceiver)消费消息:Date2 => 2018-09-11
总结: 可以看出fanout会把消息分发到所有订阅到该交换器的队列,fanout模式是忽略路由键的。
3.3.3 Topic Exchange
3.3.3.1 配置队列
@Configuration
public class TopicConfig {
    final static String QUEUE_NAME = "log";
    final static String QUEUE_NAME2 = "log.all";
    final static String QUEUE_NAME3 = "log.all.error";
    final static String EXCHANGE_NAME = "topicExchange"; //交换器名称
    @Bean
    public Queue queuetopic() {
        return new Queue(TopicConfig.QUEUE_NAME);
    }
    @Bean
    public Queue queuetopic2() {
        return new Queue(TopicConfig.QUEUE_NAME2);
    }
    @Bean
    public Queue queuetopic3() {
        return new Queue(TopicConfig.QUEUE_NAME3);
    }
    // 配置交换器
    @Bean
    TopicExchange topicExchange() {
        return new TopicExchange(TopicConfig.EXCHANGE_NAME);
    }
    // 绑定队列到交换器,并设置路由键(log.#)
    @Bean
    Binding bindingtopicExchangeQueue(Queue queuetopic, TopicExchange topicExchange) {
        return BindingBuilder.bind(queuetopic).to(topicExchange).with("log.#");
    }
    // 绑定队列到交换器,并设置路由键(log.*)
    @Bean
    Binding bindingtopicExchangeQueue2(Queue queuetopic2, TopicExchange topicExchange) {
        return BindingBuilder.bind(queuetopic2).to(topicExchange).with("log.*");
    }
    // 绑定队列到交换器,并设置路由键(log.*.error)
    @Bean
    Binding bindingtopicExchangeQueue3(Queue queuetopic3, TopicExchange topicExchange) {
        return BindingBuilder.bind(queuetopic3).to(topicExchange).with("log.*.error");
    }
}
3.3.3.2 发布消息
@Component
public class TopicSender {
    @Autowired
    private AmqpTemplate rabbitTemplate;
    public void topicSender(String message) {
        String routingKey = "log.all.error";
        System.out.println(routingKey + " 发送消息:" + message);
        this.rabbitTemplate.convertAndSend(TopicConfig.EXCHANGE_NAME, routingKey, message);
    }
}
3.3.3.3 消费消息
@Component
@RabbitListener(queues = "log")
public class TopicReceiver {
    @RabbitHandler
    public void process(String msg) {
        System.out.println("log.# 消费消息:" + msg);
    }
}
@Component
@RabbitListener(queues = "log.all")
public class TopicReceiver2 {
@RabbitHandler
public void process(String msg) {
System.out.println("log.* 消费消息:" + msg);
}
}@Component
@RabbitListener(queues = "log.all.error")
public class TopicReceiver3 {
@RabbitHandler
public void process(String msg) {
System.out.println("log.*.error 消费消息:" + msg);
}
}3.3.3.4 测试代码
@RunWith(SpringRunner.class)
@SpringBootTest(classes = RabbitmqApplication.class)
public class FanoutTest {
    @Autowired
    private FanoutSender fanoutSender;
    @Test
    public void Test() {
        SimpleDateFormat sf = new SimpleDateFormat("yyyy-MM-dd");
        fanoutSender.send("Time1 => " + sf.format(new Date()));
        fanoutSender.send2("Date2 => " + sf.format(new Date()));
    }
}
输出结果:
log.all.error 发送消息:time => 2018-09-11
log.# 消费消息:time => 2018-09-11
log.*.error 消费消息:time => 2018-09-11


 6364
6364


 被折叠的 条评论
为什么被折叠?
被折叠的 条评论
为什么被折叠?
 到【灌水乐园】发言


