


前言
现在很多可视化项目大屏都涉及到了三维, 所以近期学习了一些关于three.js的内容,发现three.js对于小白入门来说还是比较友好的,暂时还没有涉及到webgl相关的。下面的案例用到的都是一些比较基础的,所以对于入门练手来说比较友好的,下面带你实现一下汽车的选购展示。
项目初始化
首先我们初始化一个vite项目
npm create vite@latest
//安装依赖
npm install
//安装three.js
npm install --save three
// 启动项目
npm run dev
接下来就需要我们初始化threejs了,也就是三件套,相机,场景,渲染器
// 初始化 three.js 基础环境
import * as THREE from 'three'
//轨道控制器
import { OrbitControls } from 'three/addons/controls/OrbitControls.js'
export let scene, camera, renderer, controls
//  app 标签作为 three.js 的画布容器
const app = document.querySelector('.app')
function init() {
  // 创建场景
  scene = new THREE.Scene()
  // 创建相机  //视野角度 宽高比,远截面 近截面
  camera = new THREE.PerspectiveCamera(75, app.clientWidth / app.clientHeight, 0.1, 1000)
  // 设置相机的位置
  camera.position.set(3, 1.5, 3)
  // 创建渲染器 //开启反锯齿
  renderer = new THREE.WebGLRenderer({ antialias: true })
  // 开启渲染器加载阴影
  renderer.shadowMap.enabled = true
  // 设置渲染器的宽高
  renderer.setSize(app.clientWidth, app.clientHeight)
  // 将渲染器添加到 app 标签中
  document.querySelector('.app').appendChild(renderer.domElement)
}
function createControls() {
  // 创建轨道控制器
  controls = new OrbitControls(camera, renderer.domElement)
}
function createHelper() {
  // 创建辅助线
  const axesHelper = new THREE.AxesHelper(5)
  scene.add(axesHelper)
}
function resizeRender() {
  // 创建窗口适应
  window.addEventListener('resize', () => {
    renderer.setSize(app.clientWidth, app.clientHeight)
    camera.aspect = app.clientWidth / app.clientHeight
    camera.updateProjectionMatrix()
  })
}

function renderLoop() {
  // 渲染
  renderer.render(scene, camera)
  controls.update()
  requestAnimationFrame(renderLoop)
}

function start() {
  init()
  createControls()
  createHelper()
  resizeRender()
  renderLoop()
}
//  执行创建再main内导入
start()
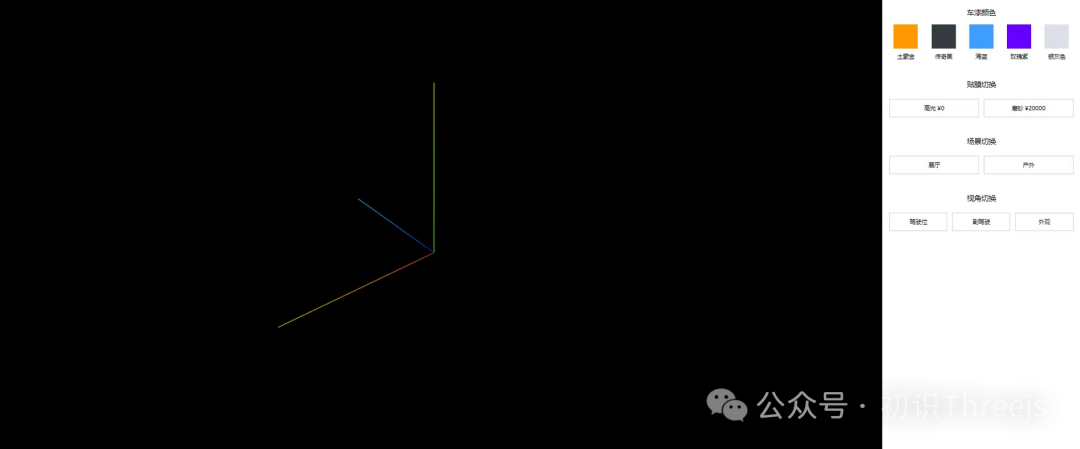
这样就可以看到一个三维场景了,现在内部什么都没有,只有一条辅助线,接下来就要进行模型的加载
模型加载
模型加载可以单独封装一个函数,再init时候进行调用添加,添加事件可以封装为一个类,因为后面会涉及到模型的颜色变化,模型的旋转等。
/**
 * @param {*} pash 模型文件路径
 * @param {*} callback 加载成功回调
 */
 //这里引入模型加载器
import { GLTFLoader } from 'three/addons/loaders/GLTFLoader.js'
export function loadManager(pash, callback) {
  const loader = new GLTFLoader()
  loader.load(
    pash,
    (e) => {
      callback(e)
    },
    (e) => {
      // console.log('加载中', e),
      ;(e) => {
        throw new Error(e)
      }
    }
  )
}
模型加载器是一个附加需要做单独的引入,loadManager函数会接受一个路径和回调函数,当加载成功以后执行回调函数传入加载成功的模型
  // 加载汽车模型
  loadManager('glb/Lamborghini.glb', (model) => {
    new Car(model, scene, camera, controls)
  })
Car为单独封装的一个类,后期大部分逻辑都在此处处理,主要包含颜色的切换,视角的切换,材质切换等,这些都需要用到model,直接在模块内进行单独的处理
/**
 * @param {*} model 物体
 * @param {*} scene 场景
 * @param {*} camera 相机
 * @param {*} controls 轨道控制器
 */
export class Car {
  constructor(model, scene, camera, controls) {
    this.model = model
    this.scene = scene
    this.camera = camera
    this.controls = controls
    this.init()
  }
  init() {
    // 把车模型加入到场景中
    this.scene.add(this.model.scene)
  }
}
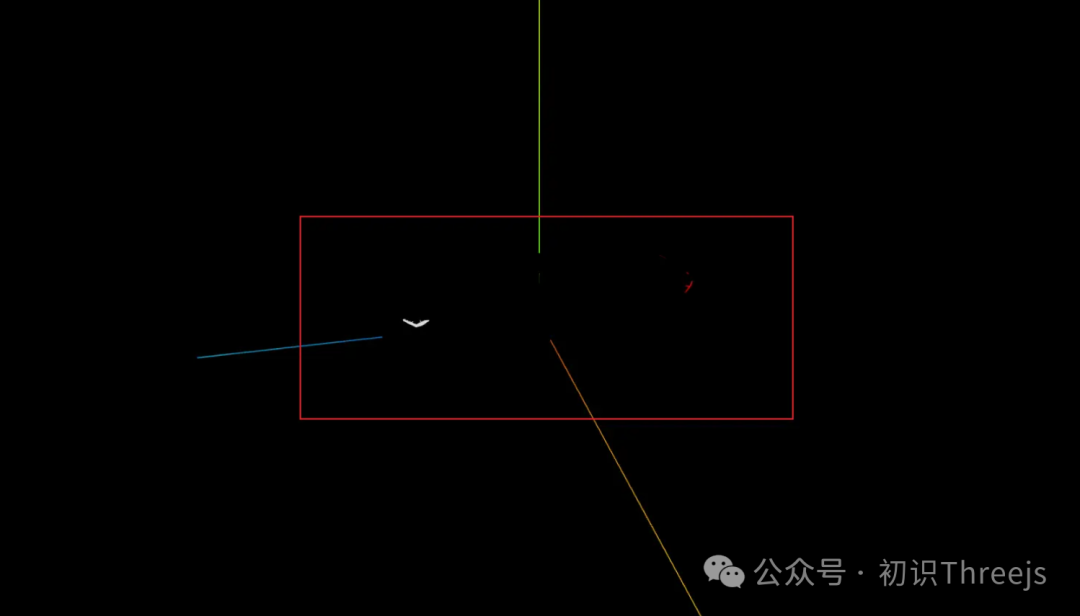
此时模型已经加入到场景内了,全黑色是因为没有灯光,什么也看不到造成的,接下来我们就需要对场景添加灯光
添加灯光
这里我们为灯光封装一个类 MyLigt 在车辆加入到场景内后进行调用添加灯光
// 灯光类
import * as THREE from 'three'
export class MyLight {
  constructor(scene) {
    this.scene = scene
    // 平行光的坐标位置
    this.dirPosList = [
      [0, 5, 10],
      [-10, 5, 0],
      [0, 5, -10],
      [10, 5, 0]
    ]
    this.init()
  }
  // 创建照亮汽车的平行光
  init() {
      //遍历所有位置
    this.dirPosList.forEach(positionArr => {
        //创建平行光
      const directionalLight = new THREE.DirectionalLight(0xffffff, 0.5)
      //设置位置
      directionalLight.position.set(...positionArr)
      this.scene.add(directionalLight)
    })
  }
}
MyLight在创建模型后进行调用,接收到场景对象,在模型的前后左右创建四个平行光来对车辆进行照亮
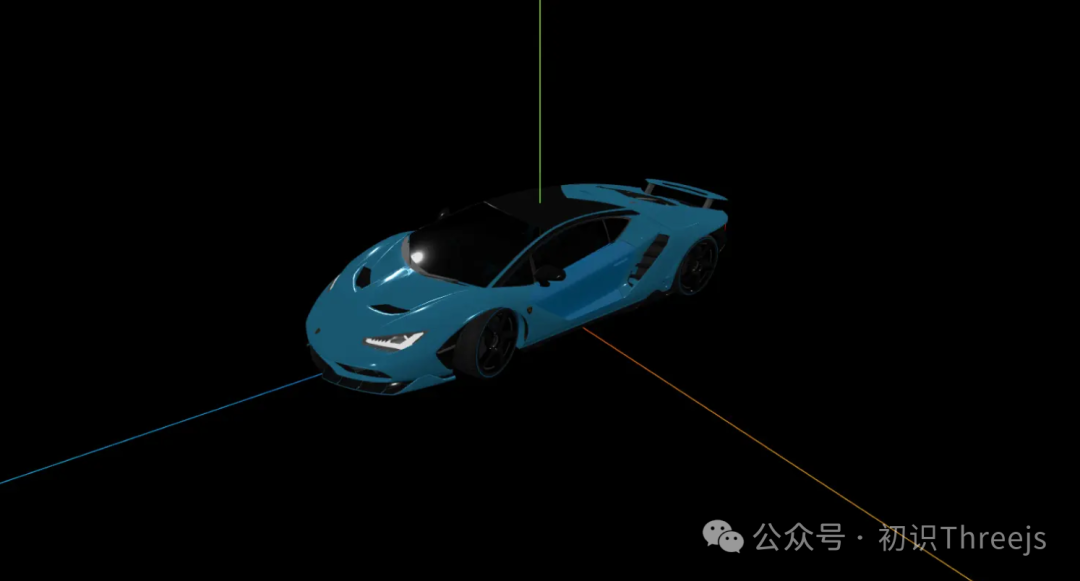
这下我们就可以清楚的看到模型的颜色样子了,初始的模型为蓝色,下面我们添加背景
添加背景
这里我们单独写一个类,用来添加背景,后期又背景的切换直接在类里面进行实现
import * as THREE from 'three'
export class Sky {
  constructor(scene) {
    this.scene = scene

    this.init()
  }
  // 初始化天空
  init() {
    // 默认-先创建室内展厅的背景环境
    this.createInDoor()
  }
  // 室内
  createInDoor() {
    // 球体
    const sphereGeo = new THREE.SphereGeometry(10, 32, 16)
    const material = new THREE.MeshBasicMaterial({ color: 0x42454c, side: THREE.DoubleSide })
    const sphere = new THREE.Mesh(sphereGeo, material)
    this.scene.add(sphere)
    // 地面
    const planeGeo = new THREE.CircleGeometry(10, 32)
    const standardMaterial = new THREE.MeshStandardMaterial({ color: 0x42454c, side: THREE.DoubleSide })
    const plane = new THREE.Mesh(planeGeo, standardMaterial)
    plane.rotation.set(- Math.PI / 2, 0, 0)
    plane.receiveShadow = true
    this.scene.add(plane)
  }
}
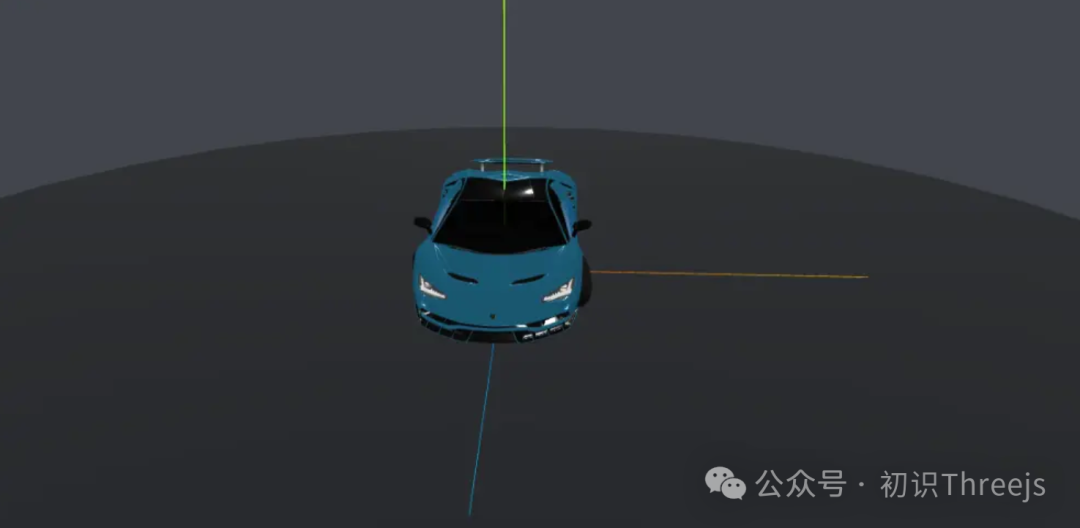
室内的场景内主要就是创建一个大的球形包住模型设置颜色为0x42454c再创建一个原型进行旋转90度,做到平放用来当作地面。效果如下:
下面需要在车辆上增加两个热点标记来做车门开关的效果
热点标记
热点标记用到的就是three的精灵物体,因为精灵物体的特性的默认行为。使得它在 3D 场景中无论相机如何移动,精灵的正面都会朝向相机。
import * as THREE from 'three'
export class MySprite {
  constructor({ name, url, position, scale }) {
    const map = new THREE.TextureLoader().load(url)
    const material = new THREE.SpriteMaterial({ map: map })
    const sprite = new THREE.Sprite(material)
    sprite.position.set(...position)
    sprite.scale.set(...scale)
    sprite.name = name
    return sprite
  }
}
MySprite接受名称,路径,位置,缩放比例,四个参数,Sprite是没有几何的,只需要创建一个SpriteMaterial进行贴图放入到场景内即可,TextureLoader对图片进行加载
车辆开关效果
上面精灵物体的类以及声明好了,下面就需要进行调用添加到父元素内了,为什么要添加到父元素内呢,因为他需要根据车门的旋转(打开)也进行旋转,那么如何再模型内找到左车门和右车门这个物体呢,就需要用到three里的一个工具了threejs.org/editor/ 在这里把模型到入进行查看
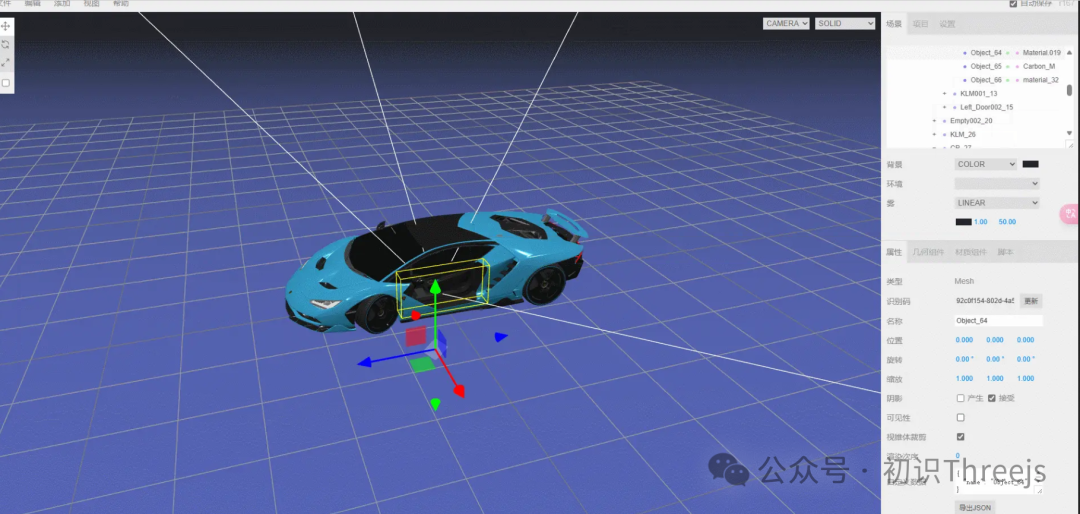
这样就可以知道左侧车门的名称,通过model.getObjectByName(obj.name)就可以拿到这个物体,然后通过mode.add加入到物体内,右侧同理,代码如下
this.carModel = {
    'body': {
        // ...
        'leftDoor': { // 左车门
          name: 'Object_64',
          model: {},
          mark: [
            {
              name: 'sprite',
              url: 'image/sprite.png',
              scale: [0.2, 0.2],
              position: [1.07, 1.94, -0.23] // 参考车门的原点相对位移
            }
          ]
        },
        'rightDoor': { // 右车门
          name: 'Object_77',
          model: {},
          mark: [
            {
              name: 'sprite',
              url: 'image/sprite.png',
              scale: [0.2, 0.2],
              position: [-1.05, 0.78, -0.23]
            }
          ]
        }
    }
}
  init(){
     Object.values(this.carModel.body).forEach((obj) => {
      obj.model = this.model.getObjectByName(obj.name)
     })
   }
   // 创建车门热点标记
  creatdDoorSprite() {
    const maskList = [
      this.carModel.body.leftDoor,
      this.carModel.body.rightDoor,
    ];
    maskList.forEach((obj) => {
      obj.mark.forEach((mask) => {
        const samll = new MySprite(mask);
        // 加入到父节点里 跟随父节点进行动画
        obj.model.add(samll);

      });
    });
  }

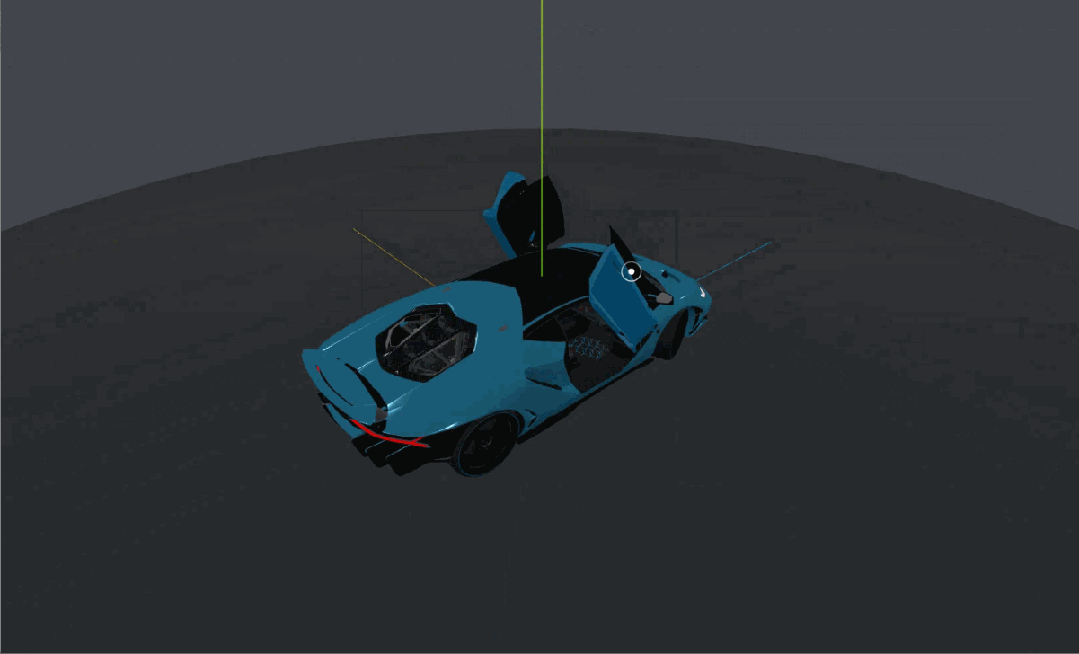
这样车辆得热点标记也就显示出来了,下面就需要声明一个点击事件得函数,点击这个热点标记后对车门进行旋转,做到打开车门的效果
import * as THREE from 'three'
export class ClickHandler {
  // 单例类  一个类只有一个实例 外部使用直接调用ClickHandler.getInstance()拿到公用实例
  static getInstance() {
    if (!this.instance) {
      this.instance = new ClickHandler()
    }
    return this.instance
  }
  init(camera) {
    // 接收传进来的相机  因为光射投影判断点击事件需要用到
    this.camera = camera
    // 声明一个数组  用来装需要组测点击事件的物体(否则就是遍历整个scene里面的物体数组  ,只遍历有事件的可以提高效率)
    this.list = []
    // 键值  map的键可以是任何类型  所以物体来标识键 值就是对应要执行的函数
    this.map = new Map()
    // 创建光射投影
    const raycaster = new THREE.Raycaster()
    // 二维向量
    const pointer = new THREE.Vector2()
    // 场景
    const app = document.querySelector('.app')
    window.addEventListener('click', (event) => {
      pointer.x = (event.clientX / app.clientWidth) * 2 - 1
      pointer.y = -(event.clientY / app.clientHeight) * 2 + 1
      raycaster.setFromCamera(pointer, this.camera)
      // 拿到所点击的物体数组
      const intersects = raycaster.intersectObjects(this.list)
      intersects.forEach((item) => {
        // 找到物体对应的函数
        const fn = this.map.get(item.object)
        // 给回调函数返回无图
        fn(item.object)
      })
    })
  }
  addMesh(mesh, fn) {
    // 添加物体
    this.list.push(mesh)
    this.map.set(mesh, fn)
  }
}
//main.js
import { ClickHandler } from '@/util/Clickhander'
ClickHandler.getInstance().init(camera)
这里使用单例模式,保证只有一个实例类存在,内部list用来存放事件物体map用来存放物体对呀的函数,内部addMesh用来添加物体函数,点击的时候拿到所点击的物体执行内部的函数并传入物体。这样就可以直接在其他地方调用addMesh直接写入物体和对应的函数便可以了。下面就在car内使用一下
  creatdDoorSprite() {
    const maskList = [
      this.carModel.body.leftDoor,
      this.carModel.body.rightDoor,
    ];
    maskList.forEach((obj) => {
      obj.mark.forEach((mask) => {
        const samll = new MySprite(mask);
        // 加入到父节点里 跟随父节点进行动画
        obj.model.add(samll);
        ClickHandler.getInstance().addMesh(samll, (mesh) => {
          if (mesh.userData.isShow) {
            const clickMesh = mesh.parent.parent.parent;
            this.setDoorAnimation(clickMesh, { x: 0 });
            mesh.userData.isShow = false;
          } else {
            // 如果为false则是关闭的 就打开
            const clickMesh = mesh.parent.parent.parent;
            this.setDoorAnimation(clickMesh, { x: Math.PI / 3 });
            mesh.userData.isShow = true;
          }
        });
      });
    });
  }
  setDoorAnimation(mesh, obj) {
    gsap.to(mesh.rotation, {
      x: obj.x,
      duration: 1,
      ease: 'power1.inOut',
    })
  }
}
这里使用ClickHandler.getInstance().addMesh加入两个物体然后再判断mesh.userData.isShow物体内的isShow是否为true,是的话则关闭,否则就是打开,setDoorAnimation主要是使用到了gsap这个库来进行动画效果的过度。这样就实现了下面的效果
事件总线
后面的颜色修改,贴膜切换及价格修改等都涉及到了跨模块,所以我们需要使用事件总线来进行任务的发布和执行,合理和上面的点击事件的类是有点相似的,也是进行事件的存储和执行
// 事件总线
export class EventBus {
 constructor() {
   // 声明一个对象  用来装所以的事件名称 和对应的事件
   this.eventList = {}
 }
 // 使用单例模式
 static getInstance() {
   if (!this.instance) {
     this.instance = new EventBus()
   }
   return this.instance
 }
 // 用来装入事件
 on(eventName, fn) {
   // 判断当前事件名是否存在
   if (!this.eventList[eventName]) {
     // 不存在则创建一个数组啊
     this.eventList[eventName] = []
   }
   // 往当前事件名内 加入事件
   this.eventList[eventName].push(fn)
 }
 emit(eventName, ...args) {
   // 调用事件
   this.eventList[eventName].forEach((fn) => {
     fn(...args)
   })
 }
}
这个就比较简单了,主要就是使用on来存储一个事件,事件名称作为key,把事件加入到数组内。听过emit来进行取值调用。
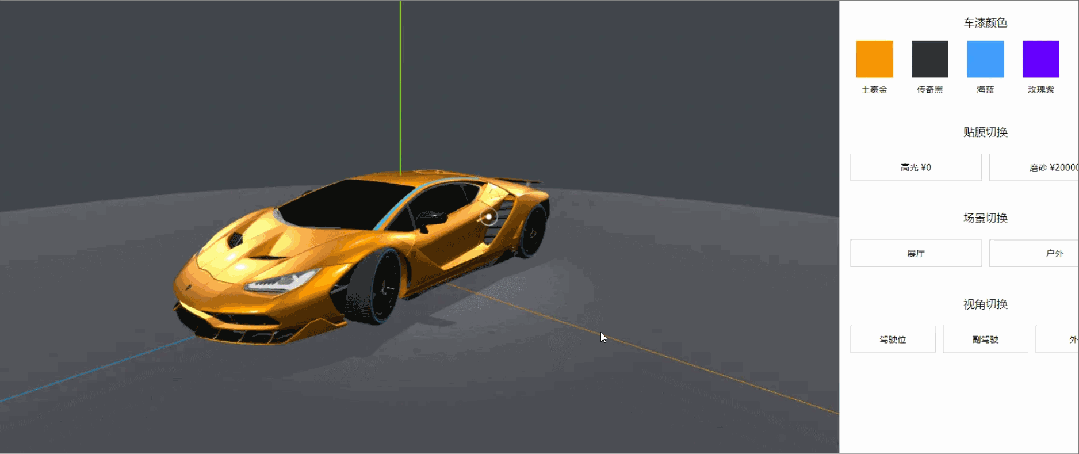
颜色修改
我们首先需要创建一个对象,对象内包含我们需要的颜色,颜色的名称,以及是否选中,然后通过上方写好的时间总线来进行注册事件,然后新建dom点击事件来触发颜色的修改逻辑
//car类内声明
 this.info = {
     price: 2444700,
     color: [
       {
         name: '土豪金',
         color: '#ff9900',
         isSelected: true,
       },
       {
         name: '传奇黑',
         color: '#343a40',
         isSelected: false,
       },
       {
         name: '海蓝',
         color: '#409EFF',
         isSelected: false,
       },
       {
         name: '玫瑰紫',
         color: '#6600ff',
         isSelected: false,
       },
       {
         name: '银灰色',
         color: '#DCDFE6',
         isSelected: false,
       },
     ],
     // 贴膜
     film: [
       {
         name: '高光',
         price: 0,
         isSelected: true,
       },
       {
         name: '磨砂',
         price: 20000,
         isSelected: false,
       },
     ],
   }

       // 颜色修改init内注册
   EventBus.getInstance().on('changeColor', (colorString) => {
     // 把模型更换颜色
     Object.values(this.carModel.body).forEach((obj) => {
       obj.model.material.color = new THREE.Color(colorString)
     })
     // 把选择的颜色的isSelented 改为true
     Object.values(this.info.color).forEach((obj) => {
       obj.isSelected = false
       if (obj.color == colorString) {
         obj.isSelected = true
       }
     })
   })
 }
 // main.js内注册颜色模块点击事件
let colorStringList = document.querySelectorAll('.col_group>div')
colorStringList.forEach((el) => {
 el.addEventListener('click', () => {
   EventBus.getInstance().emit('changeColor', el.dataset.col)
 })
})
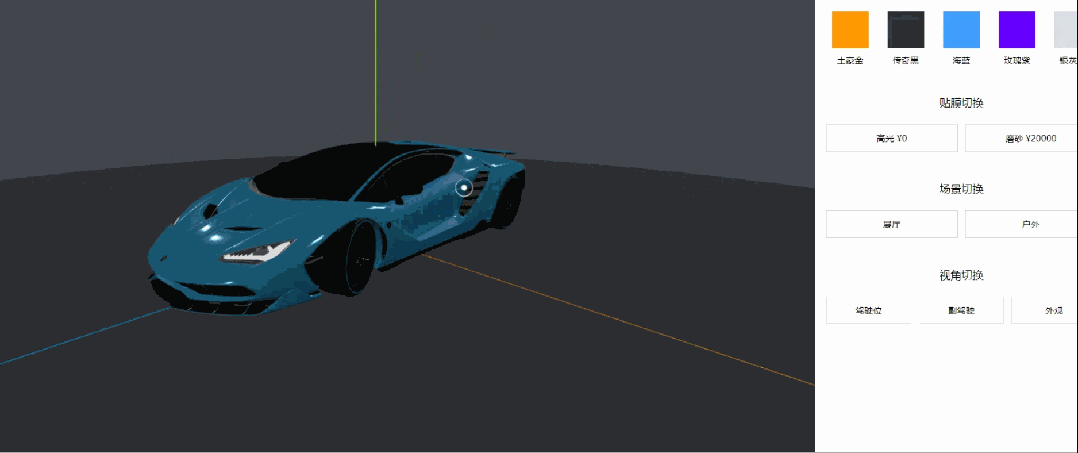
上面通过注册changeColor事件,然后拿到需要改变颜色的模型,对模型的材质颜色进行修改,在main内注册dom点击事件触发changeColor传入要变为的颜色,实现了以下效果:

贴膜切换
贴膜切换和上方的颜色切换其实是一样的,同样的注册事件进行然后点击dom进行事件的触发,只不过是修改材质的粗糙度,和金属度。
    // 订阅汽车贴膜修改的事件和函数体
    EventBus.getInstance().on('changeMaterial', (coatName) => {
      if (coatName === '高光') {
        Object.values(this.carModel.body).forEach((obj) => {
          obj.model.material.roughness = 0.5
          obj.model.material.metalness = 1
          obj.model.material.clearcoat = 1
        })
      } else if (coatName === '磨砂') {
        Object.values(this.carModel.body).forEach((obj) => {
          obj.model.material.roughness = 1
          obj.model.material.metalness = 0.5 // 如果为 0 显得很假
          obj.model.material.clearcoat = 0
        })
      }
      // 保存用户选择的贴膜类型
      Object.values(this.info.film).forEach((obj) => {
        obj.isSelected = false
        if (obj.name === coatName) obj.isSelected = true
        // 为后面计算总价做准备
      })
    })
    // 注册高光磨砂点击事件 main.js
let lightStringList = document.querySelectorAll('.coat_group>div')
lightStringList.forEach((el) => {
  el.addEventListener('click', () => {
    // 改变材质
    EventBus.getInstance().emit('changeMaterial', el.dataset.co)
  })
})
这里的逻辑和上方一样,都是通过事件总线来注册事件,点击DOM来触发函数执行。这里主要是修改材质的粗糙度做到不反光,粗糙度越高反光效果越差
价格计算
    // 注册总价改变事件
    EventBus.getInstance().on('changeTotalPrice', () => {
      const item = this.info.film.find((item) => item.isSelected)
      const price = item.price + this.info.allPrice
      document.querySelector('.price span').innerHTML = `¥ ${price.toFixed(2)}`
    })
    lightStringList.forEach((el) => {
  el.addEventListener('click', () => {
    // 改变材质
    EventBus.getInstance().emit('changeMaterial', el.dataset.co)
    // 改变总价
    EventBus.getInstance().emit('changeTotalPrice')
  })
})
这个和上方都是一样的都是通过事件总线来进行触发,动态计算价格
场景切换
上面我们创建的sky内只有一个室内的场景,现在在sky内增加一个户外场景,初始化的时候还是加载室内的场景
import * as THREE from 'three'
import { EventBus } from '@/util/EventBus'
export class Sky {
  constructor(scene) {
    this.scene = scene
    this.noMesh = []
    this.SkyName = '展厅' //当前场景名称  默认展厅
    this.init()
  }
  init() {
    this.indoor()
    EventBus.getInstance().on('changeSky', (skyName) => {
      if (this.SkyName == skyName) return //防止是相同的造成重复销毁和新建
      this.clear() //先清除现有的物体释放空间
      if (skyName == '户外') {
        this.outdoor()
        this.SkyName = skyName
      } else if (skyName == '展厅') {
        this.indoor()
        this.SkyName = skyName
      }
    })
  }
  // 室内场景
  indoor() {
    // 创建球体
    const geometry = new THREE.SphereGeometry(10, 32, 16)
    const material = new THREE.MeshBasicMaterial({ color: 0x42454c, side: THREE.DoubleSide })
    const sphere = new THREE.Mesh(geometry, material)
    this.scene.add(sphere)
    this.noMesh.push(sphere)
    // 创建地板
    const groundGeometry = new THREE.CircleGeometry(10, 32)
    const groundMaterial = new THREE.MeshStandardMaterial({
      color: 0x42454c,
      side: THREE.DoubleSide,
    })
    const groundSphere = new THREE.Mesh(groundGeometry, groundMaterial)
    groundSphere.rotateX(Math.PI / 2)
    groundSphere.receiveShadow = true
    this.scene.add(groundSphere)
    this.noMesh.push(groundSphere)
  }
  // 户外场景
  outdoor() {
    // 创建球体
    const geometry = new THREE.SphereGeometry(40, 32, 16)
    // 户外背景图
    const desert = new THREE.TextureLoader().load('image/desert.jpg')
    const material = new THREE.MeshBasicMaterial({ map: desert, side: THREE.DoubleSide })
    const sphere = new THREE.Mesh(geometry, material)
    this.scene.add(sphere)
    this.noMesh.push(sphere)
    // 创建地板
    const sand = new THREE.TextureLoader().load('image/sand.jpg')
    const groundGeometry = new THREE.CircleGeometry(20, 32)
    const groundMaterial = new THREE.MeshStandardMaterial({
      map: sand,
      color: 0xa0825a,
      side: THREE.DoubleSide,
    })
    const groundSphere = new THREE.Mesh(groundGeometry, groundMaterial)
    groundSphere.rotateX(Math.PI / 2)
    this.scene.add(groundSphere)
    this.noMesh.push(groundSphere)
  }
  // 清除物体
  clear() {
    this.noMesh.forEach((obj) => {
      obj.material.dispose()
      obj.geometry.dispose()
      obj.material.map && obj.material.map.dispose()
      obj.parent.remove(obj)
    })
    this.noMesh.splice(0, this.noMesh.length)
  }
}
这里我们初始化的时候默认加载室内的场景,然后通过事件总线来进行触发切换。室外场景和室内场景其实都是一个圆球,只不过室外场景在材质上进行了贴图,然后每次事件触发我们先判断是否为当前场景,如果是的话直接return就可以了,避免性能浪费,如果不是的话则清除当前场景物体,创建新的场景物体。
视角切换
接下来咱们就可以坐到车里唠了。视角切换的话主要就是拿到车内的视角的相机位置,我们可以通过注册轨道控制器的change事件来拿到所需要的观察点位和相机位置
  // 汽车各种视角坐标对象
    this.positionObj = {
      // 主驾驶
      main: {
        camera: {
          x: 0.36,
          y: 0.96,
          z: -0.16,
        },
        controls: {
          x: 0.36,
          y: 0.87,
          z: 0.03,
        },
      },
      // 副驾驶位
      copilot: {
        camera: {
          x: -0.39,
          y: 0.87,
          z: 0.07,
        },
        controls: {
          x: -0.39,
          y: 0.85,
          z: 0.13,
        },
      },
      // 外面观察
      outside: {
        camera: {
          x: 3,
          y: 1.5,
          z: 3,
        },
        controls: {
          x: 0,
          y: 0,
          z: 0,
        },
      },
    }
     // 注册视角切换事件
    EventBus.getInstance().on('changeCamera', (cameraType) => {
      this.setCameraAnimation(this.positionObj[cameraType])
    })
      // 摄像机和轨道控制器动画
  setCameraAnimation(obj) {
    // 相机
    gsap.to(this.camera.position, {
      ...obj.camera,
      duration: '1',
      ease: 'power1.inOut',
    })
    // 轨道控制器
    gsap.to(this.controls.target, {
      ...obj.controls,
      duration: '1',
      ease: 'power1.inOut',
    })
  }
}
通过change拿到不同视角的信息后通过setCameraAnimation修改相机的位置和轨道控制器的观察点位,就可以进行视角的切换:
玻璃透视效果
现在模型的顶棚是单面渲染需要改为双面渲染,玻璃是双面渲染需要修改为单面渲染,找到所有的玻璃物体和顶棚物体,修改他们的side
// 车小模型对象
    this.carModel = {
      'body': {
        // ...
      },
      'glass': { // 玻璃
        'front': { // 前玻璃
          name: 'Object_90',
          model: {}
        },
        'leftGlass': { // 左玻璃
          name: 'Object_68',
          model: {}
        },
        'rightGlass': { // 右玻璃
          name: 'Object_81',
          model: {}
        }
      }
    }
    //在 model/Car.js 的 init 方法,找到小物体保存
    // 玻璃相关
Object.values(this.carModel.glass).forEach(obj => {
  // 通过名字找到小物体
  obj.model = this.model.getObjectByName(obj.name)
})
  // 更改模型改材质颜色 //初始化模型时调用
  modifyCarBody() {
    // 更改模型默认颜色
    Object.values(this.carModel.body).forEach((obj) => {
      obj.model.material = new THREE.MeshPhysicalMaterial({
        color: 0xff9900,
        roughness: 0.5,
        metalness: 1,
        clearcoat: 1,
        clearcoatRoughness: 0,
      })
    })
    // 更改模型玻璃为单面渲染
    Object.values(this.carModel.glass).forEach((obj) => {
      obj.model.material.side = THREE.FrontSide //改为单面渲染
    })
    // 车顶改为双面渲染
    this.carModel.body.roof.model.material.side = THREE.DoubleSide
  }
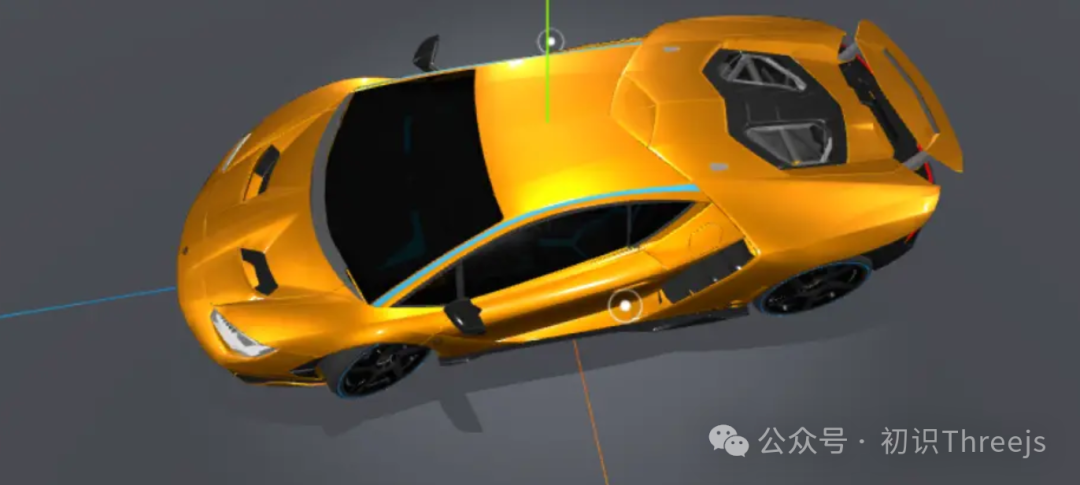
通过修改玻璃和顶棚的渲染面现在就可以清晰的看到外面了:

聚光灯阴影效果
首先我们先实现一个聚光灯的创建,然后让模型内的每个小都设置castShadow为true开启阴影渲染,且渲染器开启了阴影的加载
   this.nowSpotLight = {} // 聚光灯光源对象
   this.createSportL()
  // 创建聚光灯
  createSportL() {
    this.nowSpotLight = new THREE.SpotLight(0xffffff, 1)
    this.nowSpotLight.angle = 0.16 * Math.PI // 设置聚光灯光源角度(0 - Math.PI / 2)
    this.nowSpotLight.penumbra = 1 // 光的衰减程度(0 - 1)
    this.nowSpotLight.castShadow = true // 开启阴影支持
    this.nowSpotLight.shadow.mapSize.set(4096, 4096)//阴影贴图大小宽高
    this.nowSpotLight.position.set(0, 5, 0)
    this.scene.add(this.nowSpotLight)
  }
    // 遍历所有子项开启阴影
    this.model.scene.traverse((obj) => {
      obj.castShadow = true
      console.log(obj.castShadow)
    })
首先我们创建一个聚光灯加入到场景内,并且设置聚光灯开启阴影效果,然后遍历模型内所有的小物体都开启阴影支持,这个时候我们就已经可以看到车辆的阴影了
聚光灯的切换
我们默认只有室内才有聚光灯,所有在切换场景的时候需要把聚光灯给删除。先声明一个删除聚光灯的函数,然后再通过事件总线注册事件,再切换场景的时候进行触发,删除聚光灯效果
    EventBus.getInstance().on('changeSky', (skyName) => {
      if (this.nowSpotName == skyName) return
      if (skyName == '展厅') {
        this.createSportL()
      } else if (skyName == '户外') {
        this.removeSportL()
      }
      this.nowSpotName = skyName
    })
  // 删除聚光灯
  removeSportL() {
    this.nowSpotLight.dispose() //释放空间
    this.scene.remove(this.nowSpotLight)
    this.nowSpotLight = {}
  }
先判断当前场景和要切换的场景是否一致,一致的话则直接return,如果不一致的话为户外再删除聚光灯,室内则创建聚光灯。然后复制当前的场景name为传入的skyName
效果总览
结尾
这个小案例主要包含了汽车模型和灯光的加载,颜色切换,贴膜切换,场景切换,镜头切换,价格统计等。涉及到的都是一些three的基础入门api,非常适用于入门练习


 2506
2506

 被折叠的 条评论
为什么被折叠?
被折叠的 条评论
为什么被折叠?
 到【灌水乐园】发言


