


既然Netty这么好用这么多优点,那么肯定要把它给用起来的。
上节分析了HTTP协议的原理以及原生Socket实现的tomcat,这篇文章就使用Netty来改造,相信看完这篇文章就能知道Netty的使用了。
1.项目架构
-
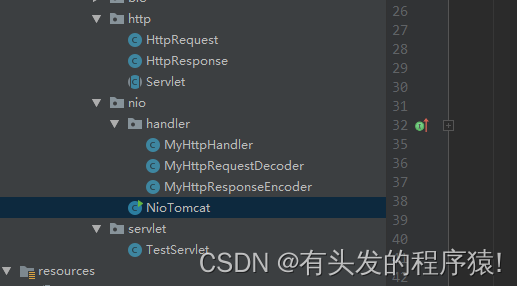
java结构,仅NIO目录下是新增,其他的和上节中的贴图一致,本文就不贴了
-
pom.xml
<dependency>
	<groupId>io.netty</groupId>
	<artifactId>netty-all</artifactId>
	<version>4.1.42.Final</version>
</dependency>
2.Netty打造tomcat
2.1 Netty服务的启动
	static Map<String, String> mapping = new ConcurrentHashMap<>();
    public static void main(String[] args) {
        //initMapping();
        mapping.put("/test.do", "com.example.demo.tomcat.servlet.TestServlet");
		//服务端需要创建两个分组 一个分发 一个处理
        NioEventLoopGroup bossGroup = new NioEventLoopGroup();
        NioEventLoopGroup workGroup = new NioEventLoopGroup();
        //Netty是链式编程
        ServerBootstrap bs = new ServerBootstrap()
        		//设置分组
                .group(bossGroup, workGroup)
                //设置channel 有NIO和BIO之分
                .channel(NioServerSocketChannel.class)
                //业务处理的handler
                .childHandler(new ChannelInitializer<SocketChannel>() {
                    @Override
                    protected void initChannel(SocketChannel channel) throws Exception {
	                    //获取管道链
                        ChannelPipeline p = channel.pipeline();
                        //自定义的响应编码器
                        //Netty有支持HTTP的编解码器 这里为了能够更加深入了解其中的机制,采取自定义实现
                        p.addLast(new MyHttpResponseEncoder());
                        //自定义的请求解码器
                        p.addLast(new MyHttpRequestDecoder());
                        //自定义的逻辑处理器
                        p.addLast(new MyHttpHandler(mapping));
                    }
                });
        try {
        	//绑定一个端口开启socket服务
            ChannelFuture f = bs.bind(19900).addListener(future -> {
                if (future.isSuccess()) {
                    System.out.println("已启动netty服务:" + 19900);
                }
            });
            //保存同步关闭
            f.channel().closeFuture().sync();
        } catch (Exception e) {
        	//关闭线程分组
            bossGroup.shutdownGracefully();
            workGroup.shutdownGracefully();
        }
    }
2.2 HTTP请求解码器
解码器,顾名思义将对应的协议报文转换成我们熟悉的HttpRequest,可参考源码HttpObjectDecoder#decode
/**
 * 自定义的Http解码器
 */
public class MyHttpRequestDecoder extends ByteToMessageDecoder {
    @Override
    protected void decode(ChannelHandlerContext ctx, ByteBuf in, List<Object> out) throws Exception {
        //从ByteBuf流中读取到Http协议头
        int length = in.readableBytes();
        byte[] bytes = new byte[length];
        in.readBytes(bytes, 0, length);
        //读取到HTTP的请求报文
        String str = new String(bytes, 0, bytes.length, Charset.defaultCharset());
        System.out.println("请求头信息:" + str);
        //只取第一行 GET /test.do?type=1 HTTP/1.1
        String content = str.split("\r\n")[0];
        //解析成自定义的HttpRequest
        HttpRequest request = new HttpRequest();
        request.handlerRequest(content);
        //这里写入会到自定义的handler处理器
        out.add(request);
    }
}
2.3 Handler业务处理
//泛型是自定义的HttpRequest
public class MyHttpHandler extends SimpleChannelInboundHandler<HttpRequest> {
	//通过构造方法传入mapping
    Map<String, String> mapping;

    public MyHttpHandler(Map<String, String> mapping) {
        this.mapping = mapping;
    }

    @Override
    protected void channelRead0(ChannelHandlerContext ctx, HttpRequest httpRequest) throws Exception {
        //Netty自带HTTP编辑器 如果使用自带的用这个强转 (DefaultHttpRequest) msg;
        System.out.println("收到请求:" + httpRequest.getMethodType() + "," + httpRequest.getMethodName() + "," + httpRequest.getParamMap());
        HttpResponse response = new HttpResponse();
        //判断路由 构造方法传入
        if (mapping.containsKey(httpRequest.getMethodName())) {
            String className = mapping.get(httpRequest.getMethodName());
            //反射调用
            Servlet servlet = (Servlet) Class.forName(className).newInstance();
            servlet.service(httpRequest, response);
        } else {
            response.write("404 NOT FOUND");
        }
        //这里写入后会到HttpResponse的编码器
        ctx.writeAndFlush(response);
        ctx.close();
    }

    @Override
    public void handlerAdded(ChannelHandlerContext ctx) throws Exception {
        System.out.println("打开连接:" + ctx.channel());
    }

    @Override
    public void handlerRemoved(ChannelHandlerContext ctx) throws Exception {
        System.out.println("关闭连接:" + ctx.channel());
    }

    @Override
    public void exceptionCaught(ChannelHandlerContext ctx, Throwable cause) throws Exception {
        System.out.println("连接异常:" + ctx.channel());
        cause.printStackTrace();
    }
}
HttpResponse#write -> this.msg = str;仅仅只是保存了返回的报文
2.4 HTTP响应编码器
编码器就是将我们自定义返回的内容编码成浏览器能够识别的报文格式,可参考源码HttpObjectEncoder#encode
//同样泛型是自定义的HttpResponse了
public class MyHttpResponseEncoder extends MessageToMessageEncoder<HttpResponse> {

	//编码成网页可识别的响应报文
    @Override
    protected void encode(ChannelHandlerContext ctx, HttpResponse httpResponse, List<Object> list) throws Exception {
        StringBuilder sb = new StringBuilder()
                .append("HTTP/1.0 200 OK\n")
                .append("Content-Type: text/html\n")
                .append("\r\n")
                .append(httpResponse.getMsg());
        //使用ByteBuf写出 这里不要问为什么,是从源码中找到的 直接add无法响应成功
        ByteBuf buf = ctx.alloc().buffer(256);
        buf.writeBytes(sb.toString().getBytes());
        list.add(buf);
    }
}
3.测试
浏览器输入http://127.0.0.1:19900/test.do?type=3&name=hello
网页输出:
hello, my name is TestServlet,requestParam:{name=hello, type=3}
日志输出:
打开连接:[id: 0x0febeb51, L:/127.0.0.1:19900 - R:/127.0.0.1:51072]
请求头信息:GET /test.do?type=3&name=hello HTTP/1.1
Host: 127.0.0.1:19900
Connection: keep-alive
Cache-Control: max-age=0
sec-ch-ua: " Not A;Brand";v="99", "Chromium";v="96", "Google Chrome";v="96"
sec-ch-ua-mobile: ?0
sec-ch-ua-platform: "Windows"
Upgrade-Insecure-Requests: 1
User-Agent: Mozilla/5.0 (Windows NT 10.0; Win64; x64) AppleWebKit/537.36 (KHTML, like Gecko) Chrome/96.0.4664.110 Safari/537.36
Accept: text/html,application/xhtml+xml,application/xml;q=0.9,image/avif,image/webp,image/apng,*/*;q=0.8,application/signed-exchange;v=b3;q=0.9
Sec-Fetch-Site: none
Sec-Fetch-Mode: navigate
Sec-Fetch-User: ?1
Sec-Fetch-Dest: document
Accept-Encoding: gzip, deflate, br
Accept-Language: zh-HK,zh-CN;q=0.9,zh;q=0.8


收到请求:GET,/test.do,{name=hello, type=3}
参数:{name=hello, type=3}
关闭连接:[id: 0x0febeb51, L:/127.0.0.1:19900 ! R:/127.0.0.1:51072]
当然Netty已经内置了很多常见的协议,能直接用的,我们不用自己重复造轮子。
以上就是本章的全部内容了。
上一篇:通信框架之Netty第二话 - 终极理解HTTP协议以及手写一个Tomcat
下一篇:通信框架之Netty第四话 - Netty深入了解之简易群聊功能的实现
读书之法,在循序而渐进,熟读而精思


 1303
1303


 被折叠的 条评论
为什么被折叠?
被折叠的 条评论
为什么被折叠?
 到【灌水乐园】发言


