


以前这个监控都是领导去加,我顶多去修改一些时间参数,让我自己加还是头一次
正经踩了不少坑啊
1.依赖引入
先说配置过程
不对 先说我们项目结构
我们有一个common项目,作为一个公共项目。各种项目公用的依赖,都配置在common中
然后这个监控是各个项目都要加的,所以我也把actuator这个依赖放到common中了
        <dependency>
            <groupId>org.springframework.boot</groupId>
            <artifactId>spring-boot-starter-actuator</artifactId>
        </dependency>
2.冲突解决
项目里边本来有knife4j了,然后现在加了 actuator之后,启动报错
org.springframework.context.ApplicationContextException: Failed to start bean 'documentationPluginsBootstrapper'; nested exception is java.lang.NullPointerException
找了半天,都说是swagger什么问题,终于找到了一个靠谱的博客
引入springboot actuator和spring boot 2.7.1和knife4j 3.0 依赖版本冲突错误解决_白YY的博客-CSDN博客
2.1 yml文件
management:
  endpoint:
    health:
      show-details: always
2.2 配置类
    @Bean
    public WebMvcEndpointHandlerMapping webEndpointServletHandlerMapping(
            WebEndpointsSupplier webEndpointsSupplier, ServletEndpointsSupplier servletEndpointsSupplier,
            ControllerEndpointsSupplier controllerEndpointsSupplier, EndpointMediaTypes endpointMediaTypes,
            CorsEndpointProperties corsProperties, WebEndpointProperties webEndpointProperties,
            Environment environment) {
        List<ExposableEndpoint<?>> allEndpoints = new ArrayList<>();
        Collection<ExposableWebEndpoint> webEndpoints = webEndpointsSupplier.getEndpoints();
        allEndpoints.addAll(webEndpoints);
        allEndpoints.addAll(servletEndpointsSupplier.getEndpoints());
        allEndpoints.addAll(controllerEndpointsSupplier.getEndpoints());
        String basePath = webEndpointProperties.getBasePath();
        EndpointMapping endpointMapping = new EndpointMapping(basePath);
        boolean shouldRegisterLinksMapping = shouldRegisterLinksMapping(webEndpointProperties,
                environment, basePath);
        return new WebMvcEndpointHandlerMapping(endpointMapping, webEndpoints, endpointMediaTypes,
                corsProperties.toCorsConfiguration(), new EndpointLinksResolver(allEndpoints, basePath),
                shouldRegisterLinksMapping, null);
    }

    /**
     * shouldRegisterLinksMapping
     * @param webEndpointProperties webEndpointProperties
     * @param environment environment
     * @param basePath /
     * @return boolean
     */
    private boolean shouldRegisterLinksMapping(WebEndpointProperties webEndpointProperties,
                                               Environment environment, String basePath) {
        return webEndpointProperties.getDiscovery().isEnabled() && (StringUtils.hasText(basePath)
                || ManagementPortType.get(environment).equals(ManagementPortType.DIFFERENT));
    }
2.3 配置类引入
配置类是加到common里边了,但是我其他的项目没有扫描到这个配置类,应该是不在扫描路径中
打断点都不进那个class
解决方式
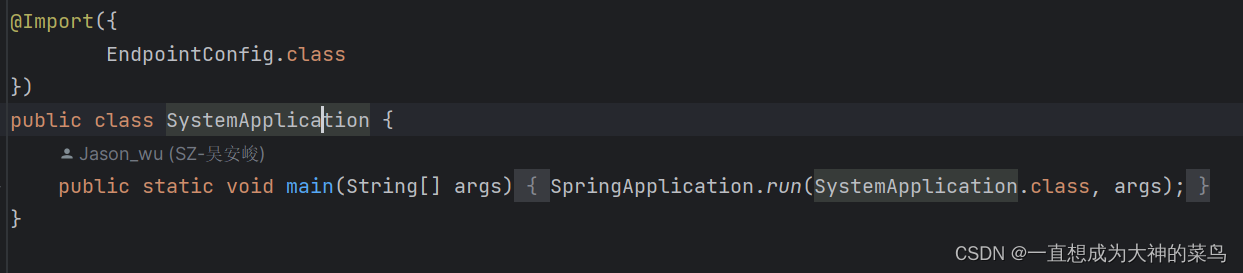
@Import
3.权限接口放开
监控接口肯定是不经过权限校验的,所以要过滤掉跟监控有关的接口
.antMatchers("/actuator/**").permitAll()3.1踩坑点
/** 和/* 的区别
/* 是拦截所有的文件夹,不包含子文件夹
/** 是拦截所有的文件夹及里面的子文件夹
如果你配置的是/actuator/*
那你访问/actuator/health是可以的,但是你想访问/actuator/health/liveness,会报权限不够
但是如果你配置的是/actuator/**
那你访问/actuator/health 以及/actuator/health/liveness 都是可以的
4.引入不到最新的包
4.1问题发现
console引用了common
我本地没有问题,验证通过之后才部署线上,不管怎么重新构建,都没有效果
所以我怀疑肯定是没有引用到最新的common包
为了验证自己的猜想,我去github上把压缩包下载下来,去找class,一看,果然代码是旧的
那个按钮是可以下载的

4.2 问题解决
1.2 修改mvn编译命令
修改打包命令,添加-U参数,如:mvn clean install package -U -DskipTests=true,-U参数的含义是update-snapshots,保证可以更新快照包。
把线上的编译命令改了就好了
5.配置文件修改
1,开启健康检查的liveness和readiness的接口访问
2.关闭一些不需要检查的项
management:
  endpoint:
    health:
      probes:
        enabled: true
  health:
    livenessstate:
      enabled: true
    readinessstate:
      enabled: true


    rabbit:
      enabled: false

    Solr:
      enabled: false
    elasticsearch:
      enabled: false
6.线上验证
通过线上的命令行
wget http://localhost:8800/actuator/health/liveness
wget http://localhost:8800/actuator/health/readiness

其实wget就是下载,你执行这两个之后,在当前路径可以看到两个文件,cat命令可以查看文件内容


 1万+
1万+

 被折叠的 条评论
为什么被折叠?
被折叠的 条评论
为什么被折叠?
 到【灌水乐园】发言


