


 本文介绍如何通过添加站点地图、蜘蛛协议及验证站点等方式进行SEO优化,使博客文章能在谷歌和百度等搜索引擎中更好地被检索。
刚搭建完博客,发现自己发表的文章在谷歌或者百度都搜索不到,今天看了一些文章,原来是需要seo优化的,所以就来总结一下seo优化的方法,让自己的博文能在谷歌百度上搜索到。
本文主要以谷歌搜索为主。
添加站点地图
–安装sitemap站点地图自动生成插件
npm install hexo-generator-sitemap --save
npm install hexo-generator-baidu-sitemap --save
–修改站点配置文件
将sitemap文件添加到站点配置文件_config.yml中,并修改url字段的值,其值默认为http://yoursite.com。
sitemap:
  path: sitemap.xml
baidusitemap:
  path: baidusitemap.xml

url: https://hoxis.github.i
配置好后,执行hexo g 就能在站点public\目录中生成sitemap.xml 和 baidusitemap.xml了;其中第一个是一会要提交给google的,后面那个看名字当然就是提交给Baidu的了;
添加蜘蛛协议
在站点source文件夹下新建robots.txt文件,文件内容如下:(参考我的)
User-agent: *
Allow: /
Allow: /archives/
Allow: /categories/
Allow: /tags/
Allow: /resources/
Disallow: /vendors/
Disallow: /js/
Disallow: /css/
Disallow: /fonts/
Disallow: /vendors/
Disallow: /fancybox/

Sitemap: https://abner0101.github.io/sitemap.xml
Sitemap: https://abner0101.github.io/baidusitemap.xml
其中Allow后面的就是你的menu
请自行将abner0101.github.io改成自己的域名,然后hexo d -g提交一下
提交站点到Google
打开Google Search Console,根据提示注册好之后,添加你的博客域名。

站点验证
我选择了备用方法中的HTML 标记,将给出的元标记复制到\themes\hexo-theme-next\layout_partials\head.swig文件中。添加后运行hexo d -g将改动提交。稍后就可以验证成功了。
<meta charset="UTF-8"/>
<meta http-equiv="X-UA-Compatible" content="IE=edge" />
<meta name="viewport" content="width=device-width, initial-scale=1, maximum-scale=1"/>
<meta name="theme-color" content="{{ theme.android_chrome_color }}">
<meta name="google-site-verification" content="xxxxxxxxxxxxx" />
<meta name="baidu-site-verification" content="xxxxxxxxx" />
测试robots.txt
点击左侧的robots.txt测试工具,根据提示提交你的robots.txt,其实刚才我们已经提交了。

注意要0错误才可以,如果有错误的话,会有提示,改正确就可以了。
提交站点地图
还记得我们刚才创建创建sitemap.xml文件吧,现在它要派上用场了。点击左侧工具栏的站点地图

Google 抓取方式
提交站点地图之后,点击左侧的Google 抓取方式
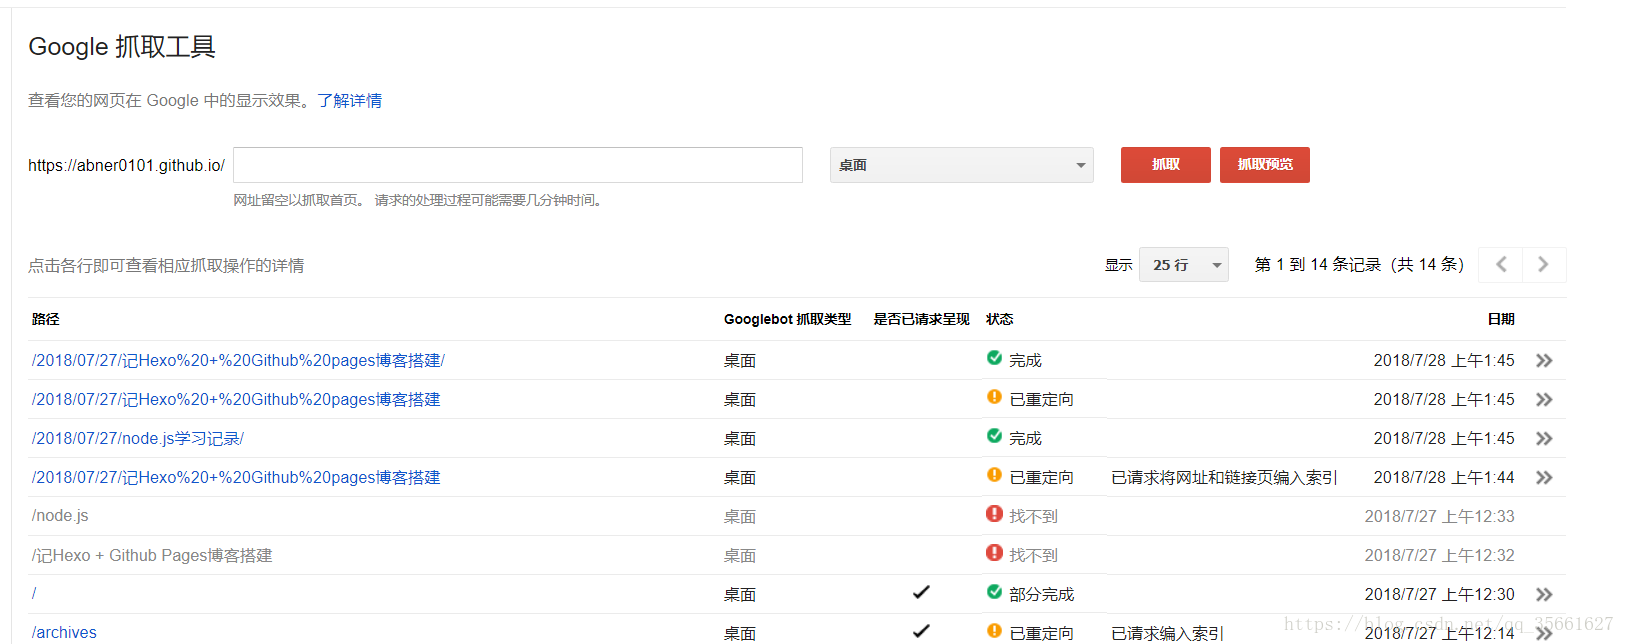
这一步很重要!这一不很重要!这一步很重要!

在这里我们填上我们需要抓取的url,不填这表示抓取首页,抓取方式可以选择桌面,智能手机等等,自行根据需要选择。填好url之后,点击抓取。
然后可能会出现几种情况,如:完成、部分完成、重定向等,自由这三种情况是可以提交的。
提交完成后,提交至索引,根据提示操作就可以了。
网站结构自身优化
出站链接添加nofollow标签
网络爬虫会在当前页面搜索所有的链接,然后一个个查看,所以就很有可能跳到别的网站就不回来了。这个时候就需要nofollow起作用了。
nofollow标签是由谷歌领头创新的一个反垃圾链接的标签,并被百度、yahoo等各大搜索引擎广泛支持,引用nofollow标签的目的是:用于指示搜索引擎不要追踪(即抓取)网页上的带有nofollow属性的任何出站链接,以减少垃圾链接的分散网站权重。
修改footer.swig文件
路径在your-hexo-site\themes\next\layout_partials,将下面代码中的a标签加上rel=”external nofollow”属性。
{{ __('footer.powered', '<a rel="external nofollow" class="theme-link" target="_blank" href="https://hexo.io">Hexo</a>') }}<a rel="external nofollow" class="theme-link" target="_blank" href="https://github.com/iissnan/hexo-theme-next">修改sidebar.swig文件
路径在your-hexo-site\themes\next\layout_macro,将下面代码中的a标签加上rel=”external nofollow”属性
<a href="https://creativecommons.org/{% if theme.creative_commons === 'zero' %}publicdomain/zero/1.0{% else %}licenses/{{ theme.creative_commons }}/4.0{% endif %}/" rel="external nofollow" class="cc-opacity" target="_blank"><a href="{{ link }}" title="{{ name }}" rel="external nofollow" target="_blank">{{ name }}</a><a rel="external nofollow" href="{{ link.split('||')[0] | trim }}" target="_blank" title="{{ name }}">至此,seo优化得差不多了,还有很多可以优化的地方,博主日后再更新。马上上google搜索一下你的关键词和博客title测试一下吧!


 1643
1643

 被折叠的 条评论
为什么被折叠?
被折叠的 条评论
为什么被折叠?
 到【灌水乐园】发言


