


 本文详细介绍了在Windows系统中手动搭建WNMP(Windows、Nginx、MySQL、PHP)环境的步骤,包括下载组件、配置文件、安装过程、环境变量设置以及集成WNMP环境的方法,最后通过批处理脚本实现一键启动。
第一步:先做准备工作,下载压缩包
php-7.zip + mysql-5.7.zip + nginx-1.zip 文件官网下载,注意根据windows系统,选择32或者64位,下面是下载地址,找到download,选择版本,自行下载
PHP官网:PHP For Windows: Binaries and sources Releases
MYSQL官网:MySQL :: Begin Your Download
NGINX官网:nginx: download
第二步、逐一安装,先从MYSQL开始安装
创建配置文件:
mysql压缩包解压后,在 MySQL 根目录下新建 data 文件夹和 my.ini 配置文件,其中 my.ini
配置文件内容如下,其他参数可自行配置:
[mysql]

# 设置mysql客户端默认字符集
default-character-set=utf8

[mysqld]

#设置3306端口
port = 3306

# 设置mysql的安装目录
basedir=G:\wnmp\mysql

# 设置mysql数据库的数据的存放目录
datadir=G:\wnmp\mysql\data

# 允许最大连接数
max_connections=200

# 服务端使用的字符集默认为8比特编码的latin1字符集
character-set-server=utf8

# 创建新表时将使用的默认存储引擎
default-storage-engine=INNODB
初始化和安装
使用管理员身份进入 cmd ,进入 MySQL 安装目录下的 bin 目录,依次输入以下命令:
mysqld --initialize

mysqld --install其中,mysqld --initialize 进行初始化,在 data 目录下生成相关的文件;在初始化成功之后,使用 mysqld --install 命令进行安装。
cmd启动服务和修改密码
# 启动服务
net start mysql

# 登录后立即修改密码
# 打开 .err 文件,找到 A temporary password is generated for root@localhost: yourpassword

# 登录
mysql -hlocalhost -uroot -p123456

# 修改密码
set password for root@localhost = password('your password');
第三步、安装PHP
解压后 PHP 根目录下,找到 php.ini-development 文件复制一份改为 php.ini,作为 PHP 的配置文件。然后编辑一下 php.ini 配置文件,开启一些PHP扩展,可自行添加。
# 设置时区
date.timezone=Asia/Shanghai

# 扩展目录
extension_dir ="G:/wnmp/php/ext"

# 开启扩展
extension=curl
extension=mysqli
extension=pdo_mysql
配置环境变量
计算机 右键选择属性 高级系统设置 环境变量 系统变量 选择path 编辑内容,增加;G:wnmp\php 编辑增加新的环境变量,用英文;然后重启电脑,cmd键入 php -v
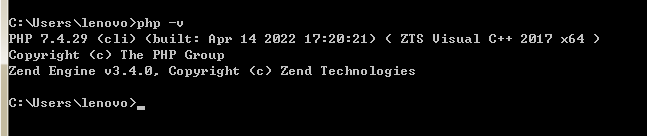
如显示
$ arc diff --create
PHP Warning:  'vcruntime140.dll' 14.0 is not compatible with this PHP build linked with 14.16 in Unknown on line 0
支持的最新Visual C++ 可再发行程序包下载 | Microsoft Docs
php7.4,它的编译已经从vc++15 变成了vc++16
直接下载个全的:
Visual Studio 2015、2017 和 2019
支持的最新Visual C++ 可再发行程序包下载 | Microsoft Docs 安装重启就可以了,然后在cmd查看,此时就正常了
第四步、安装nginx
配置
Nginx解压后,根目录下 编辑conf/nginx.conf ,相关参数自行修改,增加一行 include vhosts/*.conf 方便配置独立网站域名指向
#user  nobody;
worker_processes  1;

#error_log  logs/error.log;
#error_log  logs/error.log  notice;
#error_log  logs/error.log  info;

#pid        logs/nginx.pid;


events {
    worker_connections  1024;
}


http {
    include       mime.types;
    default_type  application/octet-stream;

    #log_format  main  '$remote_addr - $remote_user [$time_local] "$request" '
    #                  '$status $body_bytes_sent "$http_referer" '
    #                  '"$http_user_agent" "$http_x_forwarded_for"';

    #access_log  logs/access.log  main;

    sendfile        on;
    #tcp_nopush     on;

    #keepalive_timeout  0;
    keepalive_timeout  65;

    #gzip  on;

    server {
        listen       80;
        server_name  localhost;

        #charset koi8-r;

        #access_log  logs/host.access.log  main;

        location / {
            root   html;
            index  index.html index.htm;
        }

        #error_page  404              /404.html;

        # redirect server error pages to the static page /50x.html
        #
        error_page   500 502 503 504  /50x.html;
        location = /50x.html {
            root   html;
        }

        # proxy the PHP scripts to Apache listening on 127.0.0.1:80
        #
        #location ~ \.php$ {
        #    proxy_pass   http://127.0.0.1;
        #}

        # pass the PHP scripts to FastCGI server listening on 127.0.0.1:9000
        #
        #location ~ \.php$ {
        #    root           html;
        #    fastcgi_pass   127.0.0.1:9000;
        #    fastcgi_index  index.php;
        #    fastcgi_param  SCRIPT_FILENAME  /scripts$fastcgi_script_name;
        #    include        fastcgi_params;
        #}

        # deny access to .htaccess files, if Apache's document root
        # concurs with nginx's one
        #
        #location ~ /\.ht {
        #    deny  all;
        #}
    }


    # another virtual host using mix of IP-, name-, and port-based configuration
    #
    #server {
    #    listen       8000;
    #    listen       somename:8080;
    #    server_name  somename  alias  another.alias;

    #    location / {
    #        root   html;
    #        index  index.html index.htm;
    #    }
    #}

	include vhosts/*.conf;

    # HTTPS server
    #
    #server {
    #    listen       443 ssl;
    #    server_name  localhost;

    #    ssl_certificate      cert.pem;
    #    ssl_certificate_key  cert.key;

    #    ssl_session_cache    shared:SSL:1m;
    #    ssl_session_timeout  5m;

    #    ssl_ciphers  HIGH:!aNULL:!MD5;
    #    ssl_prefer_server_ciphers  on;

    #    location / {
    #        root   html;
    #        index  index.html index.htm;
    #    }
    #}

}
独立站域名配置,新建vhosts文件夹,新增以.conf后缀的文件:
server {
        listen         80;
        server_name    www.myweb.com;
        root           "G:\wnmp\www\myweb";
        location / {
			try_files $uri $uri/ /index.php?$query_string;
            index index.php index.html;
        }
        location ~ \.php(.*)$ {
            fastcgi_pass   127.0.0.1:9000;
            fastcgi_index  index.php;
            fastcgi_split_path_info  ^((?U).+\.php)(/?.+)$;
            fastcgi_param  SCRIPT_FILENAME  $document_root$fastcgi_script_name;
            fastcgi_param  PATH_INFO  $fastcgi_path_info;
            fastcgi_param  PATH_TRANSLATED  $document_root$fastcgi_path_info;
            include        fastcgi_params;
        }
}配置环境变量,同PHP环境变量操作流程,G:wnmp\nginx
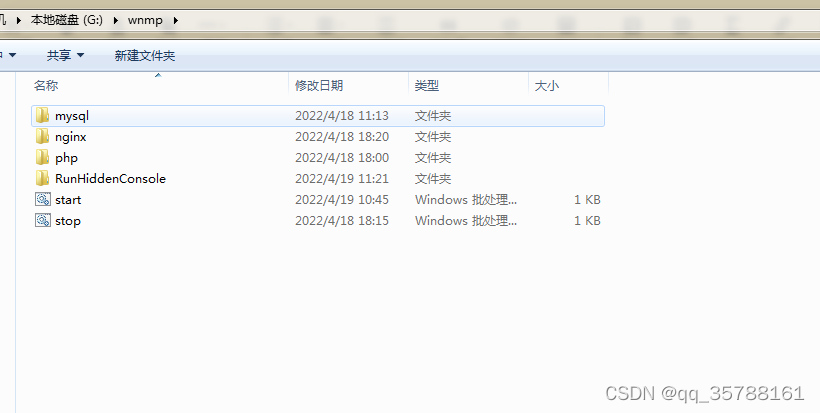
第五步、集成wnmp环境
1、在 G:\wnmp\www 目录下新建index.php文件,输入以下内容
<?php

phpinfo();
2、修改host文件,C:\Windows\System32\drivers\etc\host
127.0.0.1       localhost
127.0.0.1 www.myweb.com3、启动php-cgi,注意,这里用到了环境变量,可以cmd进到G:wnmp\php文件夹下输入命令
php-cgi -b 127.0.0.1:9000 -c G:\nginx\php\php.ini
4、启动nginx
// 启动
nginx

// 软停止
nginx -s quit
然后进入浏览器,输入,www,myweb.com 就可以看到phpinfo的信息了,至此wnmp集成完毕
5、利用RunHiddenConsole.exe 启动
为了便捷启动wnmp开发环境,我们可以利用bat文件,实现手动启动,或者开机自启动,下面详细介绍下,手动双击bat启动wnmp环境,首先,下载一个RunHiddenConsole.exe文件,配置环境变量:G:\wnmp\RunHiddenConsole,然后设置start.bat
@echo off
set PHP_FCGI_MAX_REQUESTS=1000
echo Starting PHP FastCGI...
RunHiddenConsole G:\wnmp\php\php-cgi.exe -b 127.0.0.1:9000 -c G:\wnmp\php\php.ini
echo Starting nginx...
RunHiddenConsole G:\wnmp\nginx\nginx.exe -p G:\wnmp\nginx
设置stop.bat
@echo off
echo Stopping nginx...
taskkill /F /IM nginx.exe > nul

echo Stopping PHP FastCGI...
taskkill /F /IM php-cgi.exe > nul

exit
重启电脑,双击start.bat就可以一键启动wnmp环境了,如果文章对您有帮助,欢迎评论区留意,您的支持,就是作者的精神粮食,感谢点个赞......


 486
486

 被折叠的 条评论
为什么被折叠?
被折叠的 条评论
为什么被折叠?
 到【灌水乐园】发言


