


MVVM与Binding
MVVM,即Model-View-ViewModel的首字母缩写,在这种开发模式下常用binding来对View和ViewModel进行绑定。
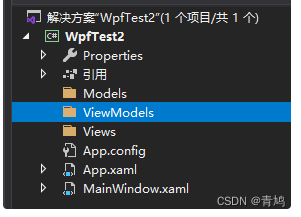
添加三个文件夹,分别命名为Models、Views、ViewModels。
在Model文件夹中,添加Student类,并将Student.cs代码替换为如下代码:
//Student.cs
using System;
using System.Collections.Generic;
using System.Linq;
using System.Text;
using System.Threading.Tasks;

namespace WpfTest2.Models
{
    public class Student
    {
        //以下两个都是属性,不是字段;因为教程的不规范没有首字母大写
        public string id { get; set; }
        public string name { get; set; }
    }
}
在Models文件夹中,添加Score类,并将Score.cs代码替换为如下代码:
//Score.cs
using System;
using System.Collections.Generic;
using System.Linq;
using System.Text;
using System.Threading.Tasks;

namespace WpfTest2.Models
{
    public class Score
    {
        public string stuId { get; set; }
        public string subject { get; set; }
        public int score { get; set; }
    }
}
在ViewModels文件夹中添加CardViewModel类,并将代码替换为如下代码:
//CardViewModel.cs
using System;
using System.Collections.Generic;
using System.Linq;
using System.Text;
using System.Threading.Tasks;
using WpfTest2.Models; //注意这里

namespace WpfTest2.ViewModels
{
    public class CardViewModel
    {
        public Student student { get; set; }
        public Score score { get; set; }
    }
}
从上面的步骤可以看出,我们有了两个Model,一个ViewModel。实际开发中,Model一般是数据库表映射的实体,而ViewModel是我们自定义的与一个View完全绑定的数据模型。下面我们在Views文件夹中,添加一个用户控件,命名为Card。并将Card.xaml代码替换为:
<!--Card.xaml-->
<UserControl x:Class="WpfTest2.Views.Card"
             xmlns="http://schemas.microsoft.com/winfx/2006/xaml/presentation"
             xmlns:x="http://schemas.microsoft.com/winfx/2006/xaml"
             xmlns:mc="http://schemas.openxmlformats.org/markup-compatibility/2006"
             xmlns:d="http://schemas.microsoft.com/expression/blend/2008"
             xmlns:local="clr-namespace:WpfTest2.Views"
             mc:Ignorable="d"
             d:DesignHeight="300" d:DesignWidth="300">
  <UserControl.Resources>
    <Style TargetType="TextBlock">
      <Setter Property="FontSize" Value="20"></Setter>
      <Setter Property="Margin" Value="10"></Setter>
      <Setter Property="Foreground" Value="White"></Setter>
      <Setter Property="Width" Value="100"></Setter>
      <Setter Property="Height" Value="35"></Setter>
    </Style>
    <Style TargetType="StackPanel" x:Key="sp-h">
      <Setter Property="Background" Value="Black"></Setter>
      <Setter Property="Margin" Value="5"></Setter>
    </Style>
  </UserControl.Resources>
  <Grid Margin="10">
    <Grid.RowDefinitions>
      <RowDefinition Height="50"></RowDefinition>
      <RowDefinition></RowDefinition>
    </Grid.RowDefinitions>
    <Border Grid.RowSpan="2" BorderThickness="0" Background="Black" CornerRadius="20">
    </Border>
    <StackPanel Orientation="Horizontal" Grid.Row="0" Style="{StaticResource sp-h}" Margin="10,5,10,5">
      <TextBlock Text="{Binding student.name}"></TextBlock>
    </StackPanel>
    <StackPanel Orientation="Vertical" Grid.Row="1" Margin="5,10,5,10">
      <StackPanel Orientation="Horizontal" Style="{StaticResource sp-h}">
        <TextBlock Text="id:"></TextBlock>
        <TextBlock Text="{Binding score.stuId}"></TextBlock>
      </StackPanel>
      <StackPanel Orientation="Horizontal" Style="{StaticResource sp-h}">
        <TextBlock Text="subject:"></TextBlock>
        <TextBlock Text="{Binding score.subject}"></TextBlock>
      </StackPanel>
      <StackPanel Orientation="Horizontal" Style="{StaticResource sp-h}">
        <TextBlock Text="score:"></TextBlock>
        <TextBlock Text="{Binding score.score}"></TextBlock>
      </StackPanel>
    </StackPanel>
  </Grid>
</UserControl>
将Card.xaml.cs代码替换为以下代码:
//Card.xaml.cs
using System;
using System.Collections.Generic;
using System.Linq;
using System.Text;
using System.Threading.Tasks;
using System.Windows;
using System.Windows.Controls;
using System.Windows.Data;
using System.Windows.Documents;
using System.Windows.Input;
using System.Windows.Media;
using System.Windows.Media.Imaging;
using System.Windows.Navigation;
using System.Windows.Shapes;
using WpfTest2.ViewModels; //注意这里

namespace WpfTest2.Views
{
    /// <summary>
    /// Card.xaml 的交互逻辑
    /// </summary>
    public partial class Card : UserControl
    {
        public Card()
        {
            InitializeComponent();
        }

        //这里是构造函数的重载,有参数的构造函数需要执行无参构造器中的代码,为了省去重复代码的编写,这里就继承了。
        public Card(CardViewModel vm) : this()
        {
            //DataContext属性是绑定的默认源。它允许指定一个绑定的基。
            //详细的在这里:https://blog.csdn.net/seanbei/article/details/53207620
            this.DataContext = vm;
        }
    }
}
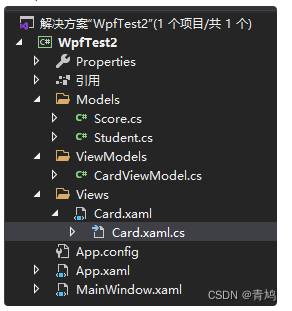
此时,我们的解决方案视图如下:
下面我们将在MainWindow中使用我们的Card。
打开MainWindow.xaml,将代码替换为:
<!--MainWindow.xaml-->
<Window x:Class="WpfTest2.MainWindow"
        xmlns="http://schemas.microsoft.com/winfx/2006/xaml/presentation"
        xmlns:x="http://schemas.microsoft.com/winfx/2006/xaml"
        xmlns:d="http://schemas.microsoft.com/expression/blend/2008"
        xmlns:mc="http://schemas.openxmlformats.org/markup-compatibility/2006"
        xmlns:local="clr-namespace:WpfTest2"
        mc:Ignorable="d"
        Title="MainWindow" Height="450" Width="800">
  <Grid>
    <WrapPanel Name="wpCardList">
    </WrapPanel>
  </Grid>
</Window>
WrapPanel用法:https://blog.csdn.net/seanbei/article/details/52893767
打开MainWindow.xaml.cs,将代码替换为:
using System;
using System.Collections.Generic;
using System.Linq;
using System.Text;
using System.Threading.Tasks;
using System.Windows;
using System.Windows.Controls;
using System.Windows.Data;
using System.Windows.Documents;
using System.Windows.Input;
using System.Windows.Media;
using System.Windows.Media.Imaging;
using System.Windows.Navigation;
using System.Windows.Shapes;

namespace WpfTest2
{
    /// <summary>
    /// MainWindow.xaml 的交互逻辑
    /// </summary>
    public partial class MainWindow : Window
    {
        public MainWindow()
        {
            InitializeComponent();

            Models.Student stu = new Models.Student() { id = "111", name = "吴凡" };
            Models.Score sc = new Models.Score() { stuId = "111", subject = "语文", score = 100 };
            ViewModels.CardViewModel cardVm = new ViewModels.CardViewModel() { student = stu, score = sc };
            Views.Card card = new Views.Card(cardVm);
            wpCardList.Children.Add(card);

            Models.Score sc1 = new Models.Score() { stuId = "111", subject = "数学", score = 99 };
            ViewModels.CardViewModel cardVm1 = new ViewModels.CardViewModel() { student = stu, score = sc1 };
            Views.Card card1 = new Views.Card(cardVm1);
            wpCardList.Children.Add(card1);
        }
    }
}
运行效果:
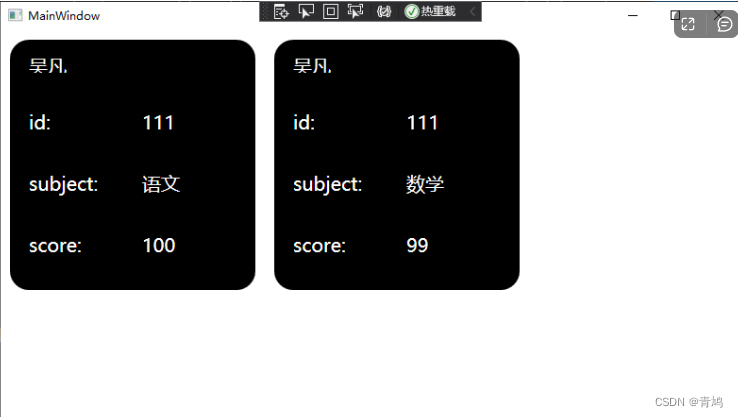
分析以上代码,不难发现,通过MVVM的开发模式,使用数据库表映射实体作为Models,使用UserControl作为Views,使用自定义类作为ViewModel,可以让代码整体结构非常清晰,而且通过UserControl的动态创建、删除等操作,可以很容易的实现子页面的跳转、复杂的自定义列表等操作。
关于Binding的使用,在上面的代码中也有体现。对于用户控件Card,首先在后台代码中设置this.DataContext = vm,然后在xaml页面中使用{Binding 属性值}进行数据绑定。这其实是简写方式,写全后为{Binding Path=属性值}。除了使用这种方法绑定后台设置的DataContext的值外,还可以通过{Binding ElementName=name Path=prop}来绑定页面内的其他控件的指定属性值。如:
<TextBlock Text={Binding ElementName="btn1" Path="Content"}></TextBlock>
比如,使MainWindow的title显示为wpCardList的Children的数量,则可以将MainWindow.xaml替换为如下代码:
<Window x:Class="WpfTest2.MainWindow"
        xmlns="http://schemas.microsoft.com/winfx/2006/xaml/presentation"
        xmlns:x="http://schemas.microsoft.com/winfx/2006/xaml"
        xmlns:d="http://schemas.microsoft.com/expression/blend/2008"
        xmlns:mc="http://schemas.openxmlformats.org/markup-compatibility/2006"
        xmlns:local="clr-namespace:WpfTest2"
        mc:Ignorable="d"
        Title="{Binding ElementName=wpCardList, Path=Children.Count}" Height="800" Width="1000">//这里是新增的
  <Grid>
    <WrapPanel Name="wpCardList">
    </WrapPanel>
  </Grid>
</Window>


 1452
1452


 被折叠的 条评论
为什么被折叠?
被折叠的 条评论
为什么被折叠?
 到【灌水乐园】发言


