


这里对昨天的shiro项目做个说明,整个项目主要参考的是GitHub的一个项目,他是基于session会话的,有集成redis,如果需要的话大家可以参考下:https://github.com/lovelyCoder/springboot-shiro。
我的项目GitHub地址:https://github.com/rhettpang/Springboot-Shiro。
现在说下我的无状态的shiro,先把项目结构列出来好做说明:
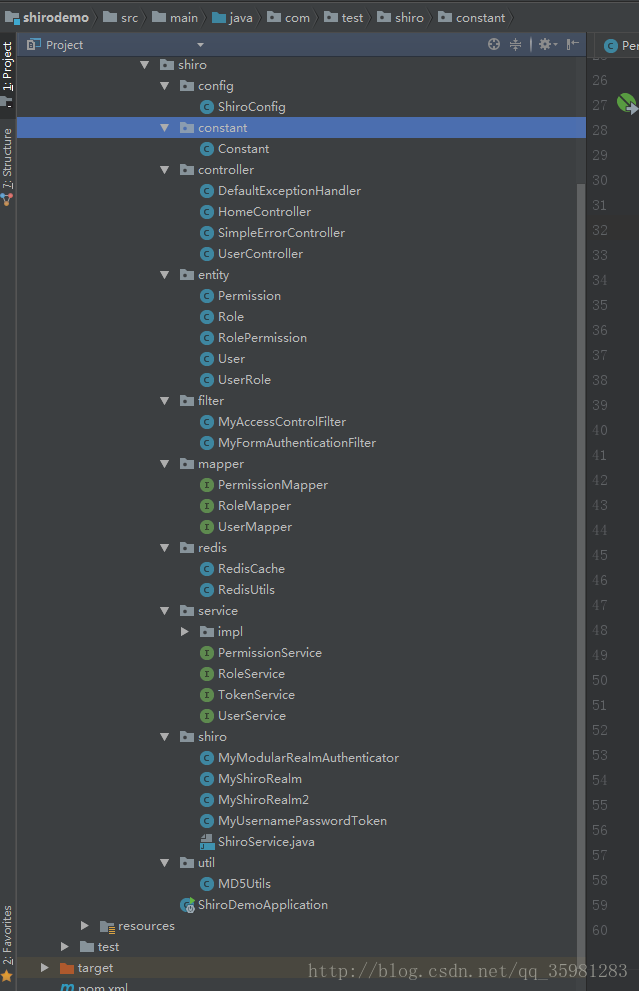
- config:shiro的配置;
- constant:自己用到的常量;
- controller:为测试用的接口:DefaultExceptionHandler这个类专门用来处理shiro抛出的异常,SimpleErrorController捕获项目异常,返回一个友好的json格式;
- filter:自己重写的shiro的filter
- redis:对redis的集成(原打算用的,需求有变化,后来发现暂时用不到了,这里提供出来给大家参考下)
- shiro:shiro的realm和相关的一些实现 util:这里目前只有一个MD5加密工具类,用来对密码加密的
- mapper和service大家都理解
resources中还有些配置,大家自己把代码宕下来看看就好。
1. ShiroConfig
ShiroConfig中的部分代码:
*
     Filter Chain定义说明
     1、一个URL可以配置多个Filter,使用逗号分隔
     2、当设置多个过滤器时,全部验证通过,才视为通过
     3、部分过滤器可指定参数,如perms,roles
     *
     */
    @Bean
    public ShiroFilterFactoryBean shirFilter(SecurityManager securityManager){
        log.info("ShiroConfiguration.shirFilter()");
        ShiroFilterFactoryBean shiroFilterFactoryBean  = new ShiroFilterFactoryBean();

        // 必须设置 SecurityManager
        shiroFilterFactoryBean.setSecurityManager(securityManager);
        // 如果不设置默认会自动寻找Web工程根目录下的"/login.jsp"页面
        shiroFilterFactoryBean.setLoginUrl("/login");
        // 登录成功后要跳转的链接
        shiroFilterFactoryBean.setSuccessUrl("/usersPage");
        //未授权界面;
        shiroFilterFactoryBean.setUnauthorizedUrl("/403");

        //自定义拦截器
        Map<String, Filter> filtersMap = new LinkedHashMap<String, Filter>();
        filtersMap.put("myAccessControlFilter", new MyAccessControlFilter());
        shiroFilterFactoryBean.setFilters(filtersMap);

        //拦截器.
        Map<String,String> filterChainDefinitionMap = new LinkedHashMap<String,String>();

        //我做的是无状态的,这里的东西实际上是用不到的,仅供参考
        //配置退出 过滤器,其中的具体的退出代码Shiro已经替我们实现了
        filterChainDefinitionMap.put("/logout", "logout");
        filterChainDefinitionMap.put("/css/**","anon");
        filterChainDefinitionMap.put("/js/**","anon");
        filterChainDefinitionMap.put("/img/**","anon");
        filterChainDefinitionMap.put("/font-awesome/**",
最低0.47元/天 解锁文章


 1186
1186

 被折叠的 条评论
为什么被折叠?
被折叠的 条评论
为什么被折叠?
 到【灌水乐园】发言


