


React-Redux 将所有组件分成两大类:UI 组件(presentational component)和容器组件(container component)。
使用Redux架构的步骤:
1.先建action 描述用户意图 业务相关
2.再创建reducer(跟store相关联的) 纯函数 跟state在一起
3.使用connect将数据模型与界面view连接起来
import {connect} from 'react-redux';
//connect是react与redux的连接器 高阶函数
4.配置connect的map映射mapStateToProps
5.开始trigger事件action:this.props.dispatch(action)
6.根据reducer创建store 配置configureStore.js文件 把所有的reducer导入进来并combineReducers成rootReducer 用createStore创建store
7.在最外层引入react-redux的Provider
reducer:本质上是MVI的Model函数,负责描述数据如何变化
这些概念都是一样的:state model store 都代表数据的存储
dispatch:这个变量是由connect的高阶组件注入给低阶组件的
Provider:给下面的组件push各种更新事件 控制Redux的各种生命周期 更好的调试与控制 尤其是很复杂的Redux系统
创建action
export const plus=(number)=>({
    type:'PLUS',
    number:number
})
//plus(1) ---->{ type: 'PLUS', number:number}就是一个action
创建reducer(reducer指明了如何更新state)
const initiaState={c:0};
export const calculate=(state=initiaState,action)=>{

    switch(action.type){
        case 'PLUS':
            return{c:state.c+action.number}
        default:
            return state;
    }
}
其中initiaState为初始状态
创建store
import {createStore,combineReducers,applyMiddleware} from 'redux';
import {calculate} from './reducer';//导入所有的reducer

const rootReducer = combineReducers({
    calculate,

});


const logger = store => next => action => {
    console.log('dispatching', action)
    let result = next(action)
    console.log('next state', store.getState())
    return result
}

const crashReporter = store => next => action => {
    try {
        return next(action)
    } catch (err) {
        console.error('Caught an exception!', err)
        Raven.captureException(err, {
            extra: {
                action,
                state: store.getState()
            }
        })
        throw err
    }
}
const thunk = store => next => action =>
    typeof action === 'function' ?
        action(store.dispatch, store.getState) :
        next(action)


let store = createStore(
    rootReducer,
    applyMiddleware(
        thunk,
        logger,
        crashReporter
    )
)

export const getStore=()=>{
    return store;
}
其中combineReducers为整合所有的reducer。logger、crashReporter、thunk为中间件。
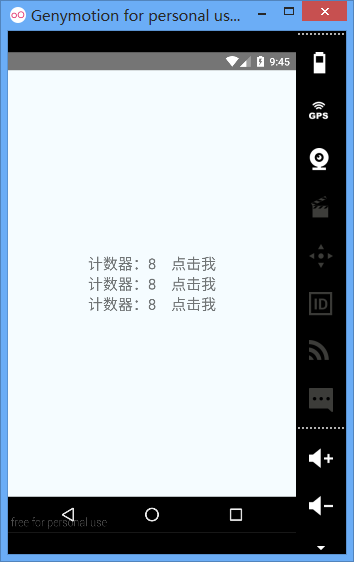
创建APP.jsimport React, { Component } from 'react'; import { AppRegistry, StyleSheet, Text, View } from 'react-native'; import {connect,Provider} from 'react-redux'; import {plus} from './redux/action' import {getStore} from './redux/configStore' export default class reduxDemo extends Component { constructor(props){ super(props); this.state={ store:null } } componentDidMount(){ const store = getStore(); this.setState({ store:store }); } render() { if(!this.state.store){ //store加载之前,加载完毕后跳出。 return( <View style={styles.container}> <Text>正在加载store....</Text> </View> ); } return ( <!--用Provider包裹根组件 --> <Provider store={this.state.store}> <View style={styles.container}> <Counter1 /> <Counter1 /> <Counter2 /> </View> </Provider> ); } } class _Counter1 extends Component{ render(){ return( <View style={{flexDirection:'row'}}> <Text style={{fontSize:20,marginRight:20}}>计数器:{this.props.calculate.c}</Text> <!--取出状态值 --> <Text style={{fontSize:20}} onPress={this.addCounter.bind(this)}>点击我</Text> </View> ); } addCounter(){ //用户点击后生成一个action 分发 this.props.dispatch(plus(1)); } } class _Counter2 extends Component{ render(){ return( <View style={{flexDirection:'row'}}> <Text style={{fontSize:20,marginRight:20}}>计数器:{this.props.calculate.c}</Text> <Text style={{fontSize:20}} onPress={this.addCounter.bind(this)}>点击我</Text> </View> ); } addCounter(){ //生成一个action 分发 this.props.dispatch(plus(1)); } } //配置;map映射表 const mapStateToProps = state=>{ return{ //state.xxx,必须与reducer同名(calculate) calculate:state.calculate } } let Counter1=connect(mapStateToProps)(_Counter1); //connect用于从 UI 组件生成容器组件 let Counter2=connect(mapStateToProps)(_Counter2); const styles = StyleSheet.create({ container: { flex: 1, justifyContent: 'center', alignItems: 'center', backgroundColor: '#F5FCFF', }, welcome: { fontSize: 20, textAlign: 'center', margin: 10, }, instructions: { textAlign: 'center', color: '#333333', marginBottom: 5, }, }); 效果图


 206
206

 被折叠的 条评论
为什么被折叠?
被折叠的 条评论
为什么被折叠?
 到【灌水乐园】发言


