Spring boot 集成thymeleaf
背景
自己通过Spring boot集成通义千问实现了一个智能问答系统。Spring boot集成通义千问已经完成,现在需要做一个简单的页面展示,作为一个八年没有摸过前端的后端开发人员,不得不又拿起了html和thymeleaf。
Spring boot 集成web和thymeleaf
Spring boot使用thymeleaf开发前端页面,首先Spring boot得是个web项目,也就是需要集成web功能,然后就需要支持thymeleaf。‘
第一步添加依赖
       <!--spring boot 对web的支持-->
       <dependency>
            <groupId>org.springframework.boot</groupId>
            <artifactId>spring-boot-starter-web</artifactId>
        </dependency>
        <!--Spring boot 对thymeleaf的支持-->
        <dependency>
            <groupId>org.springframework.boot</groupId>
            <artifactId>spring-boot-starter-thymeleaf</artifactId>
        </dependency>
        <!--Spring boot对lombok的支持-->
        <dependency>
            <groupId>org.projectlombok</groupId>
            <artifactId>lombok</artifactId>
            <optional>true</optional>
        </dependency>
Spring boot添加了这两个依赖之后,就具备了thymeleaf的web能力了。
第二步验证thymeleaf
添加完依赖,我需要写个controller实验一下,代码如下
@Controller
@RequestMapping("demo")
@Slf4j
public class DemoController {

    @RequestMapping("demo")
    public String demo(Model model){
        log.debug("demo ok");
        model.addAttribute("msg","hello thymeleaf");
        return "demo";
    }

}
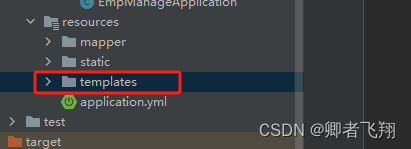
controller写完之后,我需要写一个html实验一下,html位置在

html页面内容如下
<!DOCTYPE html>
<html lang="en" xmlns:th="http://www.thymeleaf.org">
<head>
    <meta charset="UTF-8">
    <title>测试Thymeleaf</title>
</head>
<body>
  <h1>测试 Thymeleaf模板 </h1>
  <h4>获取数据: <span th:text="${msg}"></span></h4>
</body>
</html>
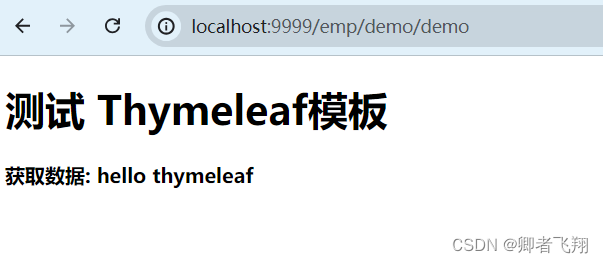
展示效果
把项目启动后,访问controller的地址,就可以跳转到html页面中,并且带去了controller中的数据

总结
Spring boot集成thymeleaf是比较简单的,虽然现在都是vue和前后端分离的开发模式,不过,有些小项目和小demo用thymeleaf做还是挺不错的。


 3万+
3万+

 被折叠的 条评论
为什么被折叠?


