


什么是Redis
redis是一个高性能的key-value存储系统,支持String,list,set等集合。为了保证读取效率,数据都是缓存在内存中。
通常我们将经常需要读取字典的数据,用户的登录的凭证信息,或者需要高速处理的并发数据可以使用redis进行读取,增加系统的性能,减少服务器的处理压力。
本教程使用版本及必要条件
spring boot 2.7.0
Redis-x64-3.2.100.rar
在使用spring boot连接redis连接前,首先保证您的redis服务正常运行,且可以使用工具或命令连接。可以使用RedisDesktopManager图形化工具连接并管理redis。
创建项目
新建一个spring boot 项目。可以通过我之前的教程创建一个空项目。
编辑pom文件
在idea中新建一个maven项目后,首先需要在pom文件中引入如下依赖。
主要包含:web 依赖,redis依赖
    <parent>
        <groupId>org.springframework.boot</groupId>
        <artifactId>spring-boot-starter-parent</artifactId>
        <version>2.7.0</version>
        <relativePath/>
    </parent>

    <dependencies>
        <dependency>
            <groupId>org.springframework.boot</groupId>
            <artifactId>spring-boot-starter-web</artifactId>
        </dependency>
        <dependency>
            <groupId>org.springframework.boot</groupId>
            <artifactId>spring-boot-starter-data-redis</artifactId>
        </dependency>
    </dependencies>

    <build>
        <plugins>
            <plugin>
                <groupId>org.springframework.boot</groupId>
                <artifactId>spring-boot-maven-plugin</artifactId>
            </plugin>
        </plugins>
    </build>
不要忘记重新加载一下依赖,防止找不到jar包!依次点击maven,项目名称=》右键=》Reimport

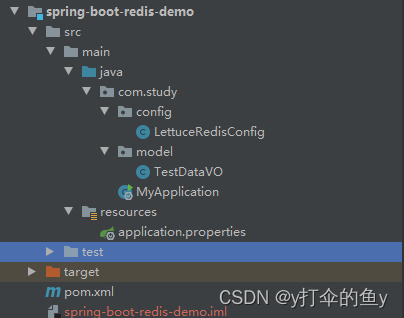
目录结构
建立好如下图的包目录结构,具体如下:
配置redis服务地址
修改application.properties配置文件中关于redis的配置。默认无密码。
################ Redis ##############
# Redis数据库索引(默认为0)
spring.redis.database=0
# Redis服务器地址
spring.redis.host=127.0.0.1
# Redis服务器连接端口
spring.redis.port=6379
# Redis服务器连接密码(默认为空)
spring.redis.password=
# 链接超时时间 单位 ms(毫秒)
spring.redis.timeout=3000ms
实体类
在com.study.model包下编写一个实体类TestDataVO,其中包含 姓名 和年龄两个字段,用于测试在redis中读写list。代码如下:
package com.study.model;

import java.io.Serializable;

public class TestDataVO implements Serializable {

    private String name;
    private int age;

    public TestDataVO(String name, int age) {
        this.name = name;
        this.age = age;
    }

    public String getName() {
        return name;
    }

    public void setName(String name) {
        this.name = name;
    }

    public int getAge() {
        return age;
    }

    public void setAge(int age) {
        this.age = age;
    }
}
Redis序列化器LettuceRedisConfig
在com.study.config包下编辑LettuceRedisConfig类,该类将RedisTemplate注入到spring中并设置key和value的序列化器,这里使用LettuceConnectionFactory获取连接。代码如下:
package com.study.config;
import org.springframework.context.annotation.Bean;
import org.springframework.context.annotation.Configuration;
import org.springframework.data.redis.connection.lettuce.LettuceConnectionFactory;
import org.springframework.data.redis.core.RedisTemplate;
import org.springframework.data.redis.serializer.GenericJackson2JsonRedisSerializer;
import org.springframework.data.redis.serializer.StringRedisSerializer;
import java.io.Serializable;
/**
 * LettuceRedis 配置文件
 * 设置序列化器
 */
@Configuration
public class LettuceRedisConfig {
    @Bean
    public RedisTemplate<String, Serializable> redisTemplate(LettuceConnectionFactory connectionFactory) {
        RedisTemplate<String, Serializable> redisTemplate = new RedisTemplate<>();
        redisTemplate.setKeySerializer(new StringRedisSerializer());
        redisTemplate.setValueSerializer(new GenericJackson2JsonRedisSerializer());
        redisTemplate.setConnectionFactory(connectionFactory);
        return redisTemplate;
    }
}
启动及测试类
在com.study 中编写MyApplication类,用于spring boot启动及测试数据存放redis中,代码如下:
package com.study;
import com.study.model.TestDataVO;
import org.springframework.boot.SpringApplication;
import org.springframework.boot.autoconfigure.EnableAutoConfiguration;
import org.springframework.data.redis.core.RedisTemplate;
import org.springframework.web.bind.annotation.RequestMapping;
import org.springframework.web.bind.annotation.RestController;
import javax.annotation.Resource;
import java.util.ArrayList;
import java.util.HashMap;
import java.util.List;
import java.util.Map;
import java.util.concurrent.TimeUnit;

@RestController
@EnableAutoConfiguration
public class MyApplication {

    @Resource
    private RedisTemplate redisTemplate;

    /**
     * 测试接口 先将time存入redis 再从redis取出该值并返回
     * 38081是配置文件默认端口 可以在 application.properties中修改端口号
     * http://localhost:38081/addKey
     * @return
     */
    @RequestMapping("addKey")
    public Map<String, Object> addKey(){
        Map<String, Object> rsMap = new HashMap<>();
        long time = System.currentTimeMillis();
        String key = "time";
        //time 为key 存入 redis 2分钟后失效 不失效请取消后两个参数
        redisTemplate.opsForValue().set(key,time,2, TimeUnit.MINUTES);
        //将键为time的值取出 存入返回map
        rsMap.put("time", redisTemplate.opsForValue().get(key));
        return rsMap;
    }

    /**
     * 测试接口 将对象数组存入redis 从redis取出该值后返回
     * http://localhost:38081/addList
     * @return
     */
    @RequestMapping("addList")
    public Map<String, List<TestDataVO>> addList(){
        Map<String, List<TestDataVO>> rsMap = new HashMap<>();
        TestDataVO testDataVO = new TestDataVO("张三", 16);
        TestDataVO testDataVO1 = new TestDataVO("李四", 18);
        List<TestDataVO> list = new ArrayList<>();
        list.add(testDataVO);
        list.add(testDataVO1);
        //将集合存入到list中
        redisTemplate.opsForList().rightPushAll("testList", list);

        //从redis中取出数据
        List<TestDataVO> redisData = redisTemplate.opsForList().range("testList",0,-1);
        rsMap.put("testList", redisData);
        return rsMap;
    }

    /**
     * 测试接口 删除key
     * http://localhost:38081/addList
     * @return
     */
    @RequestMapping("removeKey")
    public Map<String, Object> removeKey(){
        Boolean rs = redisTemplate.delete("testList");
        Map<String, Object> rsMap = new HashMap<>();
        rsMap.put("rs", rs);
        return rsMap;
    }

    /**
     * 启动入口
     * @param args
     */
    public static void main(String[] args) {
        SpringApplication.run(MyApplication.class);
    }
}
测试
右键运行MyApplication类。观察控制台输出如下,观察项目正常启动:
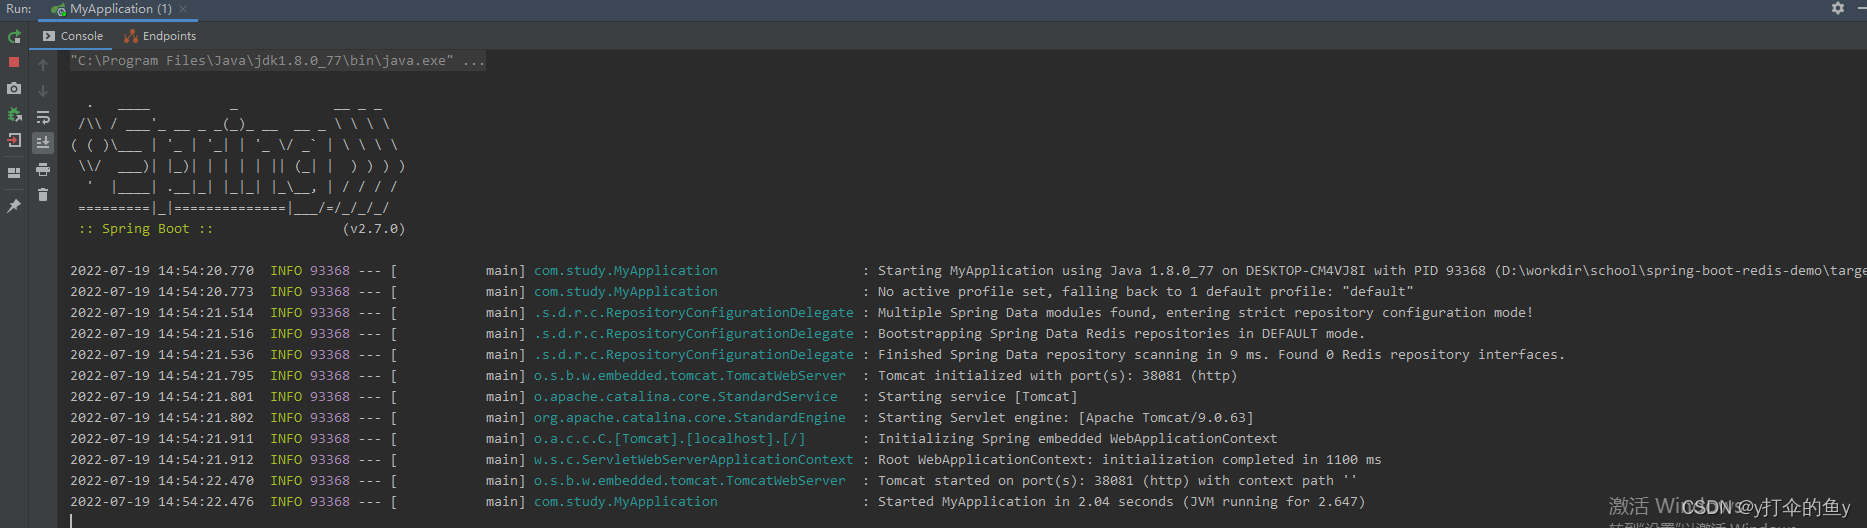
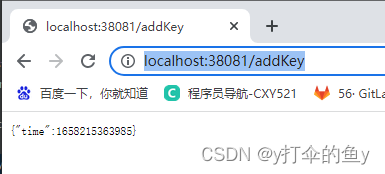
打开浏览器,输入如下地址进行接口测试,选择一个将数据插入redis的接口:http://localhost:38081/addKey
将对象数组存入redis并取出接口:http://localhost:38081/addList
删除key接口: http://localhost:38081/removeKey
好了,spring boot整合redis基本完成。
写在最后
开源是一种美德,尽早加入开源社区,共建美好生态!


 312
312


 被折叠的 条评论
为什么被折叠?
被折叠的 条评论
为什么被折叠?
 到【灌水乐园】发言


