


点赞多大胆,就有多大产!开源促使进步,献给每一位技术使用者和爱好者!
干货满满,摆好姿势,点赞发车
路漫漫其修远兮,吾将上下而求索
前言
本章节怼几个案例供读者小伙伴们练习,写不出东西就是写的少,多写就有思路,案例也懒得去搞CSS了,大家主要锤Vue就可以了。不废话直接上货!
案例1:选择登陆方式
需求
点击页面按钮可以选择使用邮箱登录或用户账号登录
代码
<!DOCTYPE html>
<html>
	<head>
		<meta charset="utf-8">
		<title></title>
		<script src="https://cdn.jsdelivr.net/npm/vue/dist/vue.js"></script>
	</head>
	<body>
		<div id="app">
			<span v-if="isTrue">
				<label for="username">用户账号</label>
				<input id="username"  placeholder="用户账号" />
			</span>
			<span v-else>
				<label for="email">用户邮箱</label>
				<input id="email"  placeholder="用户邮箱" />
			</span>
			<button type="button" @click="isTrue = !isTrue">点击切换</button>
		</div>
	</body>
	<script type="text/javascript">
		const app = new Vue({
			el: "#app",
			data:{
				isTrue: true
			}
		})
	</script>
</html>
运行结果

小问题
- 我们在输入框中输入数据之后,切换到邮箱选项中,发现输入的用户名还在
- 因为Vue在进行DOM渲染时,出于性能考虑,会尽可能的复用已经存在的元素,而不会重新创建元素
- 也就是它复用了input标签,并没有重新创建一个新的标签
- 我们可以给input标签添加key属性解决,如果key属性值不同则不会复用
<input id="username"  placeholder="用户账号" key="username"/>
<input id="email"  placeholder="用户邮箱" key="email"/>
如上,我们在input标签中添加key属性,值分别为username和email就可以解决,图就不放了!
案例2:发表评论
需求
提供一个输入框,点击发表情评论按钮,评论显示在评论区
代码
<!DOCTYPE html>
<html>
	<head>
		<meta charset="utf-8">
		<script src="https://cdn.jsdelivr.net/npm/vue/dist/vue.js"></script>
		<title></title>
	</head>
	<body>
		<div id="app">
			<input type="text" v-model="com"/>
			<button type="button" @click="sub">发表评论</button>
			<div id="com-content">
				<p v-for="msg in msgs">{{ msg }}</p>
			</div>
		</div>
	</body>
	<script type="text/javascript">
		var app = new Vue({
			el:"#app",
			data:{
				com:"",
				msgs:[]
			},
			methods:{
				sub:function(){
					this.msgs.push(this.com);
					this.com = "";
				}
			}
		})
	</script>
</html>
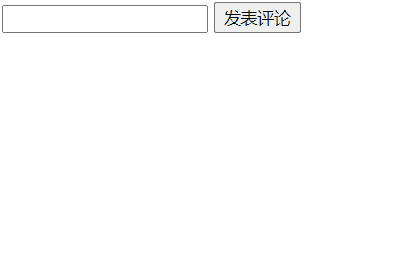
效果
步骤
- 使用v-model与data中com变量绑定
- 点击按钮之后触发sub函数
- 在函数中将com数据push追加到msgs数组中
- 使用v-for循环创建p标签展示msgs数组中数据
案例3:列表选中样式
代码
<!DOCTYPE html>
<html>
	<head>
		<meta charset="utf-8">
		<title></title>
		<script src="https://cdn.jsdelivr.net/npm/vue/dist/vue.js"></script>
		<style type="text/css">
			/* 定义样式 */
			.active {
				color: skyblue;
			}
		</style>
	</head>
	<body>
		<div id="app">
			<ul>
				<!--
				 1、使用v-for遍历数组生成多个li列表
				 2、同时获取数据和索引
				 3、使用@click绑定函数传入当前li的索引
				 4、在函数中将当前索引值赋值给currentIndex变量
				 5、使用:class添加样式
				 -->
				<li v-for="(item,index) in movies" @click="liClick(index)" :class="{active:currentIndex == index}">{{item}}</li>
			</ul>
		</div>
	</body>
	<script type="text/javascript">
		const app = new Vue({
			el: "#app",
			data: {
				movies:["悬崖之上","熊出没","迪迦","指环王"],
				currentIndex: 0
			},
			methods:{
				liClick(index){
					this.currentIndex = index;
				}
			}
		})
	</script>
</html>
效果

案例4:购物车
需求
- 展示商品列表,显示商品名,价格,购买数量,总价,移除操作
- 价格随购买数量增减而变化,但是商品数最少是1
- 点击移除则删除对应的商品
- 最后计算出总价
思路
- 首先创建html、css、js三个文件
- html文件中引入css和js,写table表格来展示商品
- 商品需要使用v-for指令循环展示,商品增减和移除分别对应三个函数
- 总价使用计算属性计算,并使用过滤器处理数据格式
- css中就是写样式不多赘述
- js中创建Vue实例,定义商品属性
- 三个函数对应商品数量增减和移除,定义计算属性计算总价,定义过滤器处理价格格式
代码
html
<!DOCTYPE html>
<html>
	<head>
		<meta charset="utf-8">
		<title>购物车案例</title>
		<!-- 引入css -->
		<link rel="stylesheet" type="text/css" href="./index.css"/>
	</head>
	<body>
		<div id="app">
			<div v-if="books.length">
				<table>
					<thead>
						<tr>
							<th></th>
							<th>书籍名称</th>
							<th>出版日期</th>
							<th>价格</th>
							<th>购买数量</th>
							<th>操作</th>
						</tr>
					</thead>
					<tbody>
						<tr v-for="(item,index) in books">
							<th>{{item.id}}</th>
							<th>{{item.name}}</th>
							<th>{{item.date}}</th>
							<th>{{item.price | finalPrice}}</th>
							<th>
								<button type="button" @click="decrement(index)" v-bind:disabled="item.count <= 1">-</button>
								{{item.count}}
								<button type="button" @click="increment(index)">+</button>
							</th>
							<th>
								<button type="button" @click="removeBook(index)">移除</button>
							</th>
						</tr>
					</tbody>
				</table>
				<h2>总价格{{totalPrice | finalPrice}}</h2>
			</div>
			<h2 v-else>
				购物车为空
			</h2>
		</div>
	</body>
	<script src="../../js/vue.min.js" type="text/javascript" charset="utf-8"></script>
	<script src="./main.js" type="text/javascript" charset="utf-8"></script>

</html>
css
table {
	border: 1px solid #e9e9e9;
	border-collapse: collapse;
	border-spacing: 0;
}

th,td {
	padding: 8px 16px;
	border: 1px solid #e9e9e9;
	text-align: left;
}

th{
	background-color: #f7f7f7;
	color: #5c6b77;
	font-weight: 600;
}
javascript
const app = new Vue({
	el: "#app",
	data: {
		books: [
			{
				id: 1,
				name: "《被讨厌的勇气》",
				date: "2006-2",
				price: 85.00,
				count: 1
			},
			{
				id: 2,
				name: "《人性的光辉》",
				date: "2008-2",
				price: 49.00,
				count: 1
			},
			{
				id: 3,
				name: "《活着》",
				date: "2006-2",
				price: 34.00,
				count: 1
			},
			{
				id: 4,
				name: "《当下的力量》",
				date: "2007-2",
				price: 42.00,
				count: 1
			},
			{
				id: 5,
				name: "《国富论》",
				date: "2001-2",
				price: 58.00,
				count: 1
			}
		]
	},
	methods: {
		decrement(index){
			this.books[index].count--
		},
		increment(index){
			this.books[index].count++
		},
		removeBook(index){
			this.books.splice(index,1)
		}
	},
	computed:{
		totalPrice(){
			//let totalPrice = 0;
			//for(let i = 0;i < this.books.length;i++){
				//totalPrice += this.books[i].price * this.books[i].count;
			//}
			//return totalPrice;

            // 或者使用reduce高阶函数
            return this.books.reduce(function(preValue,book){
				return preValue + book.price * book.count
			},0);
		}
	},
	// 使用过滤器处理价格保留两位和人民币符号
	filters:{
		finalPrice(price){
			return "¥" + price.toFixed(2)
		}
	}
})
效果

案例5:v-model绑定单选框、多选框等
说明
这里正好补充一下v-model绑定其他表单元素的写法,读者小伙伴可以写完之后自己调试一下看看效果
代码
<!DOCTYPE html>
<html>
	<head>
		<meta charset="utf-8">
		<title></title>
	</head>
	<body>
		<div id="app">
			<!-- 1、绑定单选框:性别案例 -->
			<input type="radio" name="sex" value="男" v-model="sex"/>男
			<input type="radio" name="sex" value="女" v-model="sex"/>女
			<h2>当前选择的性别:{{sex}}</h2>

			<!-- 2、多选框案例,选择爱好 -->
			<input type="checkbox" name="hobby" value="篮球" v-model="hobby"/>篮球
			<input type="checkbox" name="hobby" value="唱" v-model="hobby"/>唱
			<input type="checkbox" name="hobby" value="跳" v-model="hobby"/>跳
			<input type="checkbox" name="hobby" value="rap" v-model="hobby"/>rap
			<h2>爱好是:{{hobby}}</h2>

			<!-- 3、选择同意用户协议 -->
			<input type="checkbox" v-model="isAgree"/>同意协议
			<button type="button" :disabled="!isAgree">下一步</button>
			<br>
			<!-- select框 -->
			<select name="" v-model="fruit">
				<option value="苹果">苹果</option>
				<option value="香蕉">香蕉</option>
				<option value="橘子">橘子</option>
			</select>
			<h2>你选择的水果是:{{fruit}}</h2>

			<!-- 加上multiple,表示可多选 -->
			<select name="" v-model="fruits" multiple>
				<option value="苹果">苹果</option>
				<option value="香蕉">香蕉</option>
				<option value="橘子">橘子</option>
			</select>
			<h2>你选择的水果是:{{fruits}}</h2>
		</div>
	</body>
	<script src="../js/vue.js" type="text/javascript" charset="utf-8"></script>
	<script type="text/javascript">
		const app = new Vue({
			el: "#app",
			data: {
				sex: "男",
				hobby: [],
				isAgree: false,
				fruit: "香蕉",
				fruits: []
			}
		})
	</script>
</html>
说在最后
这里给大家分享5个vue的基础案例,大家一定要多多锤炼,觉得有所帮助或者疑问欢迎评论区留言!


 738
738


 被折叠的 条评论
为什么被折叠?
被折叠的 条评论
为什么被折叠?
 到【灌水乐园】发言


