


1、网页中直接使用
可以通过 unpkg.com/element-ui 获取到最新版本的资源在页面上引入 js 和 css 文件即可开始使用
引入样式到对应的位置
- <link rel="stylesheet" href="https://unpkg.com/element-ui/lib/theme-chalk/index.css">
- <script src="https://unpkg.com/vue/dist/vue.js"></script>
- <script src="https://unpkg.com/element-ui/lib/index.js"></script>
这里发现vue.js引入失败,element-ui样式不能正常显示,网页显示
Uncaught TypeError: Cannot read properties of undefined (reading 'prototype')
Uncaught ReferenceError: Vue is not defined
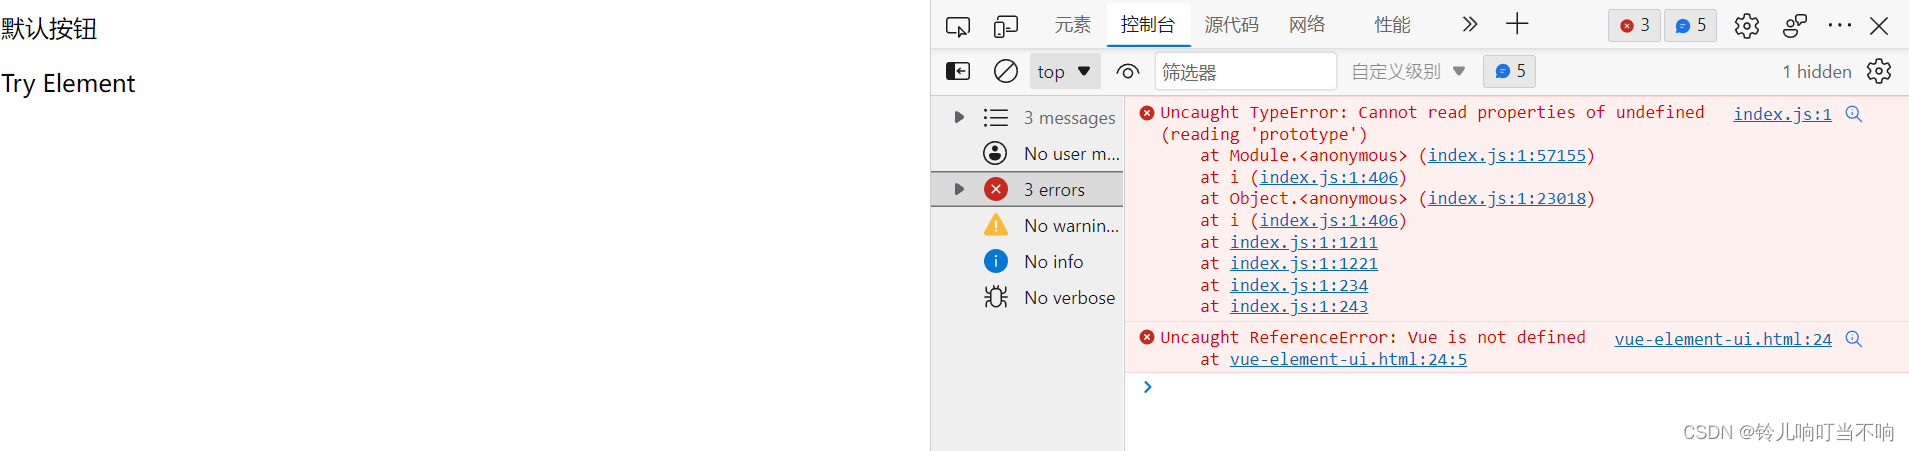
查阅资料说是 import vue 必须在引入element之前,正确引入后问题仍然存在。
点击https://unpkg.com/vue/dist/vue.js 链接 报错

因此我认为是CDN路径有问题,因此我更换了CDN路径
- BootCDN(国内)<script src=" https://cdn.bootcss.com/vue/2.2.2/vue.min.js"></script>
- cdnjs <script src="https://cdnjs.cloudflare.com/ajax/libs/vue/2.1.8/vue.min.js"></script>
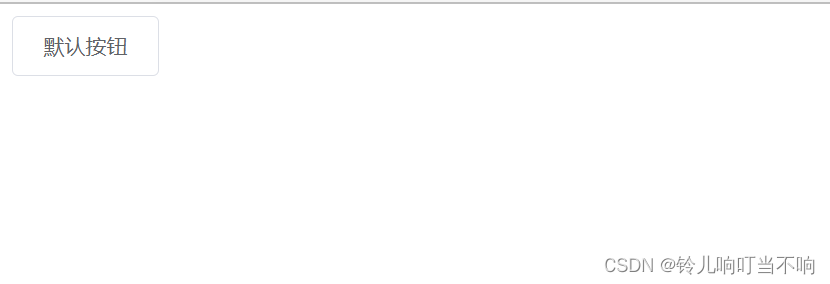
使用以上两种路径,页面可以正常显示。
完整代码
<!DOCTYPE html>
<html>
<head>
  <meta charset="UTF-8">
  <!-- import CSS -->
  <link rel="stylesheet" href="https://unpkg.com/element-ui/lib/theme-chalk/index.css">
</head>
<body>
  <div id="app">
    <el-row>
      <el-button>默认按钮</el-button>
    </el-row>
    <el-dialog :visible.sync="visible" title="Hello world">
      <p>Try Element</p>
    </el-dialog>
  </div>
</body>
  <!-- import Vue before Element -->
  <script src=" https://cdn.bootcss.com/vue/2.2.2/vue.min.js"></script>
  <!-- import JavaScript -->
  <script src="https://unpkg.com/element-ui/lib/index.js"></script>
  <script>
    new Vue({
      el: '#app',
      data: function() {
        return { visible: false }
      },
      methods:{
        open(){
          this.visible = true
        }
      }
    })
  </script>
</html>
2、vue-cli脚手架中使用
进入项目终端npm全局安装
npm i element-ui -S或者 npm i element-ui --save-dev
全局引入element-ui
main.js
import Vue from 'vue'
import App from './App.vue'
import ElementUI from 'element-ui';
import 'element-ui/lib/theme-chalk/index.css';

Vue.config.productionTip = false
Vue.use(ElementUI);

new Vue({
  render: h => h(App),
}).$mount('#app')
HelloWorld.vue
<template>
<div class="hello">
<el-button type="primary">主要按钮</el-button>
</div>
</template>
<script>
export default {
name: 'HelloWorld',
props: {
msg: String
}
}
</script>
<!-- Add "scoped" attribute to limit CSS to this component only -->
<style scoped>
h3 {
margin: 40px 0 0;
}
ul {
list-style-type: none;
padding: 0;
}
li {
display: inline-block;
margin: 0 10px;
}
a {
color: #42b983;
}
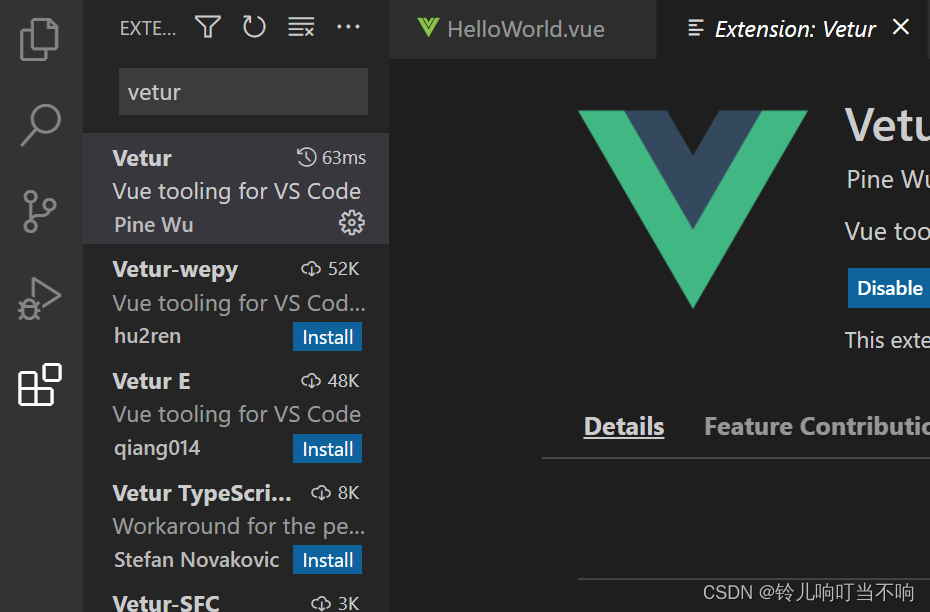
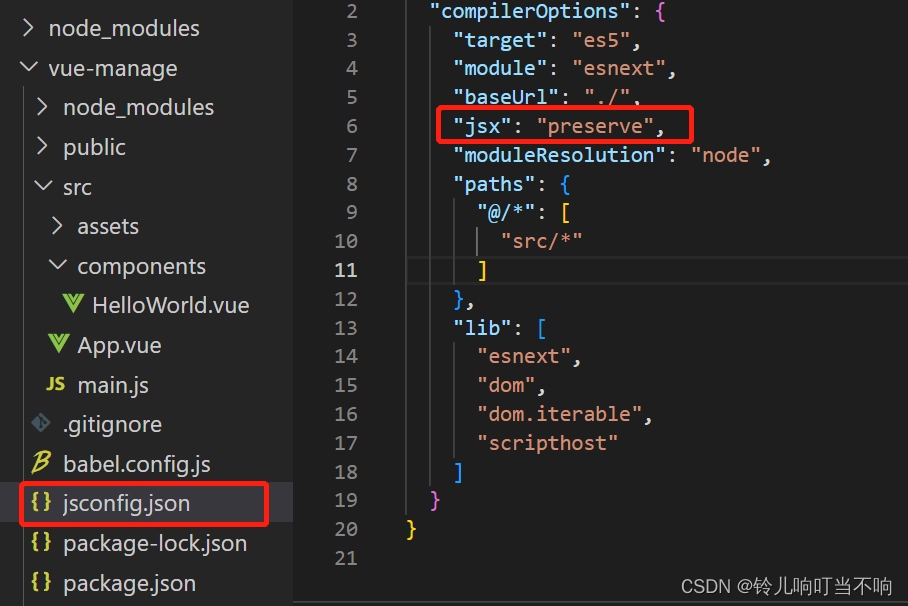
</style>如果此时代码显示为白色,点击vscode编辑器中的“方框样式图标安装vetur插件
如果此时template出现错误提示
TypeScript intellisense is disabled on template. To enable, configure `\"jsx\": \"preserve\"` in the `\"compilerOptions\"` property of tsconfig or jsconfig.
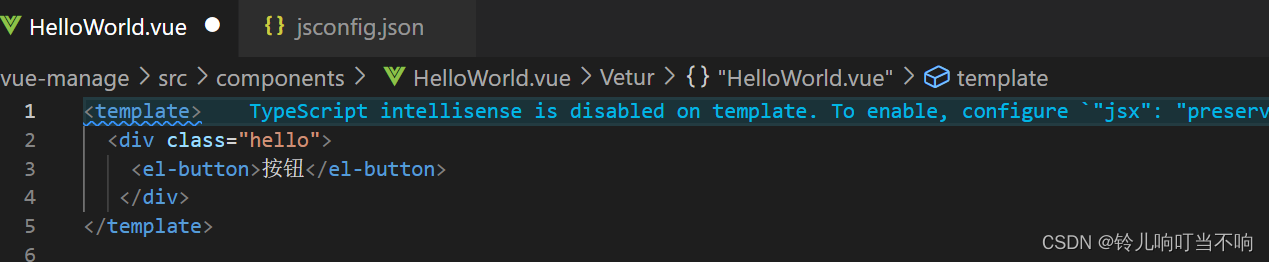
在jsconfig.json文件中,加上 "jsx": "preserve"; 保存js文件
在项目终端运行 npm run serve 执行完成以后
点击链接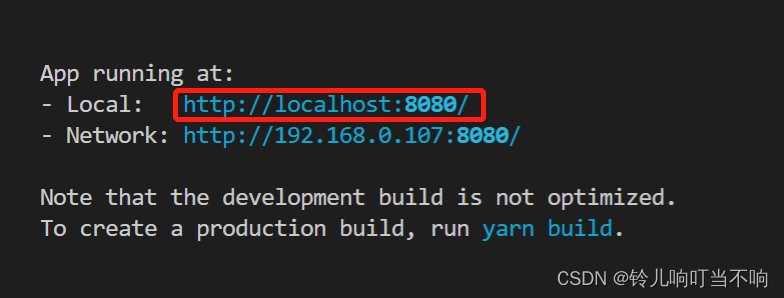
可以看到成功引入了element-ui样式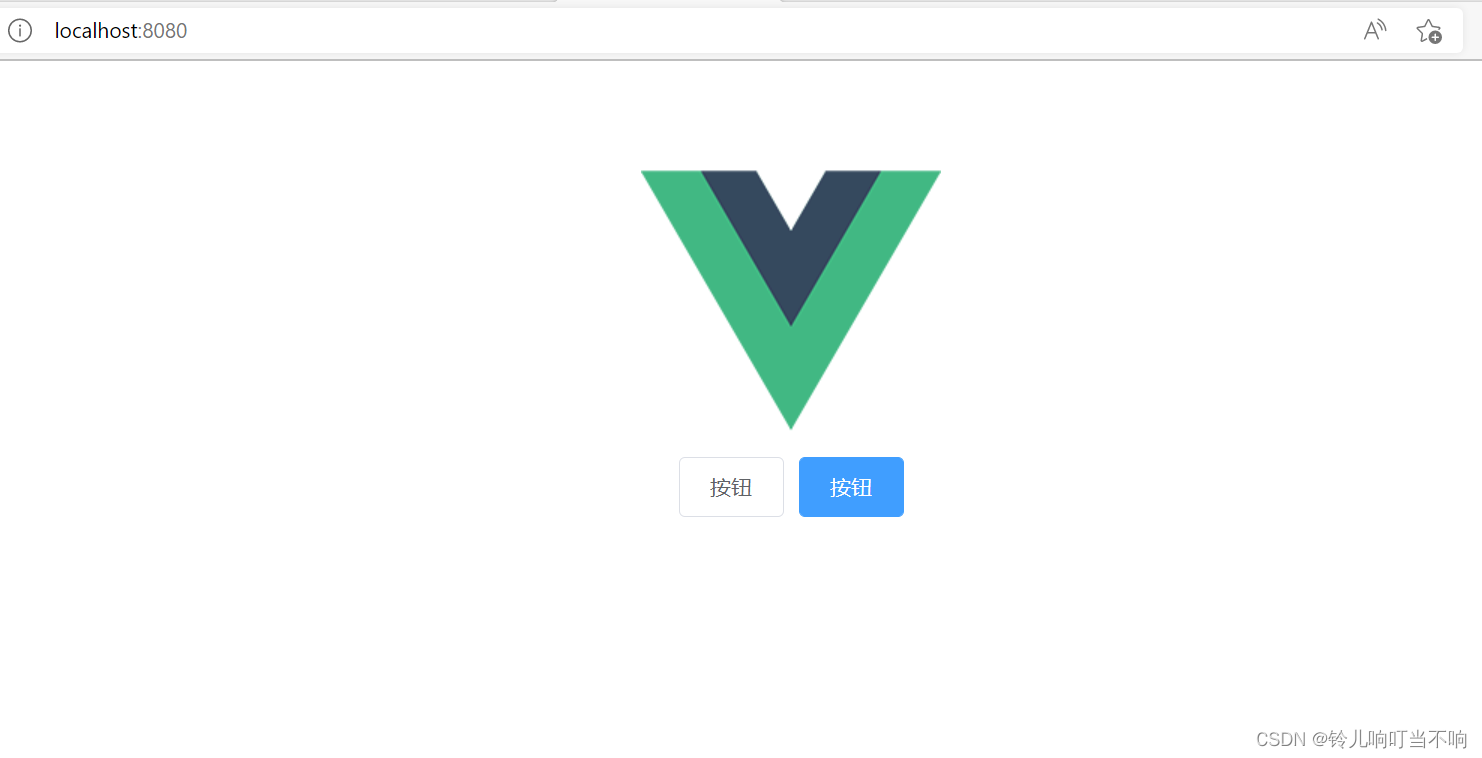
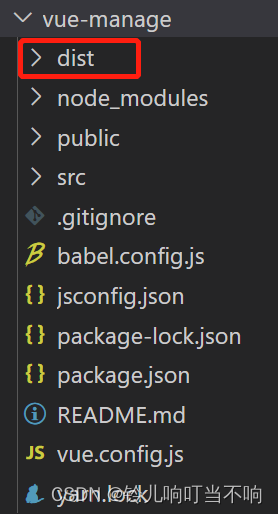
将项目打包 npm run build 项目里面会多一个dist文件夹
按需引入
借助 babel-plugin-component,我们可以只引入需要的组件,以达到减小项目体积的目的
npm install babel-plugin-component -D安装完成后找到 babel.config.js文件,增加以下部分
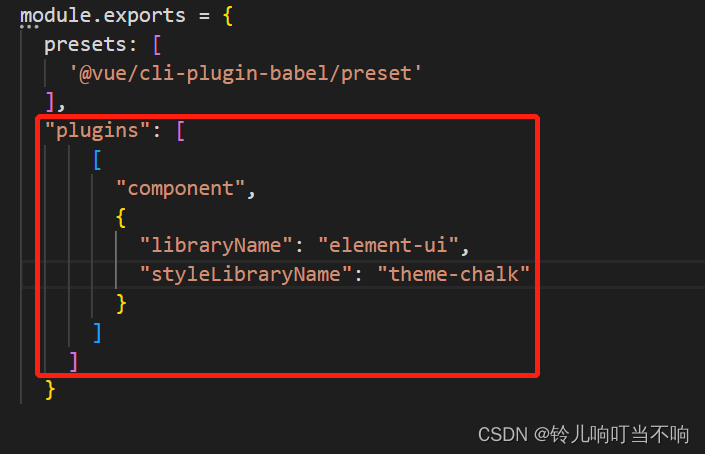
module.exports = {
  presets: [
    '@vue/cli-plugin-babel/preset'
  ],
  "plugins": [
      [
        "component",
        {
          "libraryName": "element-ui",
          "styleLibraryName": "theme-chalk"
        }
      ]
    ]
  }
接下来,按需引入部分组件,比如 Button 和Input,那么需要在 main.js 中写入以下内容:
HelloWorld.vue
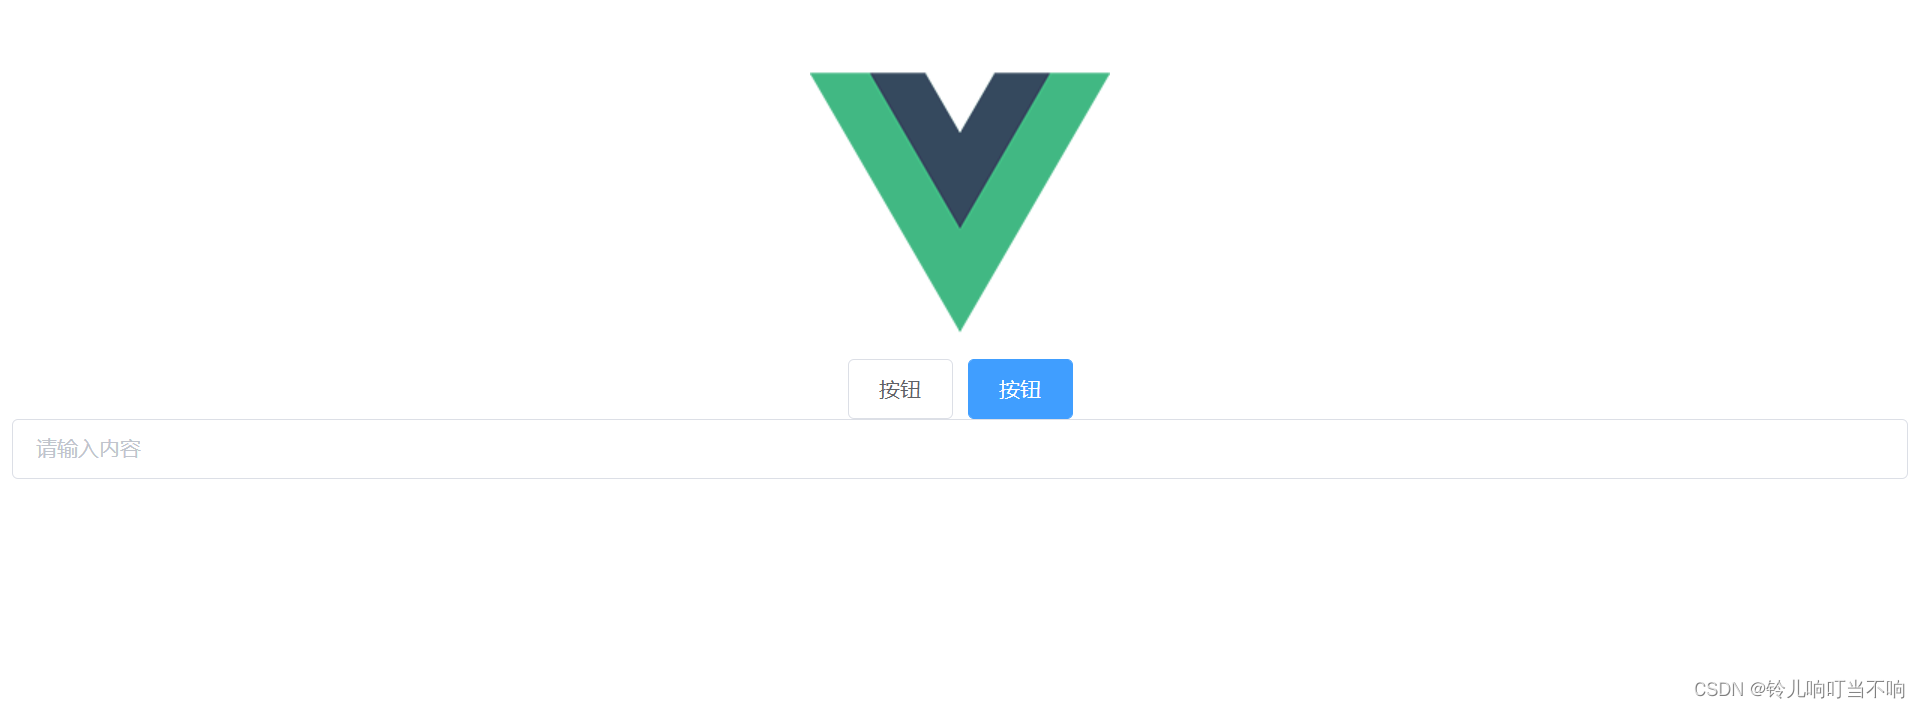
<template>
  <div class="hello">
    <el-button>按钮</el-button>
    <el-button type="primary">按钮</el-button>
    <el-input v-model="input" placeholder="请输入内容"></el-input>
   </div>
</template>

<script>
export default {
  name: 'HelloWorld',
  props: {
    msg: String
  }
}
</script>

<!-- Add "scoped" attribute to limit CSS to this component only -->
<style scoped>
h3 {
  margin: 40px 0 0;
}
ul {
  list-style-type: none;
  padding: 0;
}
li {
  display: inline-block;
  margin: 0 10px;
}
a {
  color: #42b983;
}
</style>
终端输入npm run serve 可以看到 以下的界面
此时使用 npm run build 打包项目查看dist文件夹大小 会比全局引入小很多


 1万+
1万+

 被折叠的 条评论
为什么被折叠?
被折叠的 条评论
为什么被折叠?
 到【灌水乐园】发言


