


概述
由于apache hadoop是开源的,任何人可以对其修改并作为开源或者商业的产品,所以出现很多发行版本,例如华为发行版、Cloudera发行版(CDH)等。
三大发行版本+
Hadoop三大发行版本:Apache、Cloudera、Hortonworks。 Apache版本最原始(最基础)的版本,对于入门学习最好。 Cloudera在大型互联网企业中用的较多。 Hortonworks文档较好。
选型
(1) Apache:运维麻烦,组件兼容性需要自己调研,适合于大公司 (2) CDH:国内使用最多的版本 (3) HDP:开源,可以二次开发,没有cdh稳定,使用较少
结论
目前CDH全面收费了 选择HDP3.1.4版本
二、准备工作
1、机器
安装虚拟机
省略
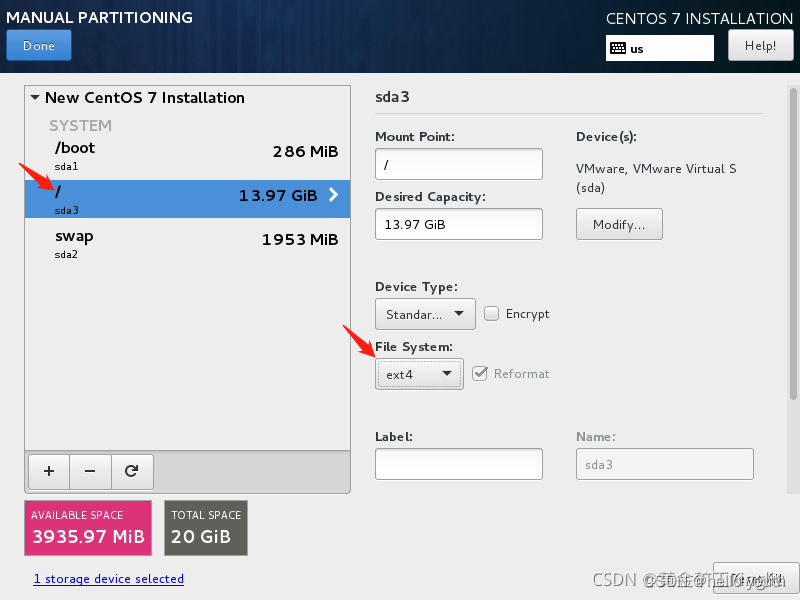
自定义磁盘节分区(重要)
/ 300g
/var 150g
/swap 4g
/home 150g
修改本机名,3台节点均为centos7系统,分别为hdp01,hdp02,hdp03
hostnamectl set-hostname hdp01设置好之后可以查看修改之后的本机名,注意要加上-f
hostname -f三台机器都打开 vim /etc/hosts文件,使3台机器之间可以通过hdp01,hdp02,hdp03访问,不要删除前2行
::1        localhost        localhost.localdomain        localhost6        localhost6.localdomain6
127.0.0.1        localhost        localhost.localdomain        localhost4        localhost4.localdomain4

172.19.230.101 hdp01
172.19.230.103 hdp02
172.19.230.105 hdp03
修改完之后,测试是否可以通过ping主机名找到对应服务器
ping hdp012.安装包
http://public-repo-1.hortonworks.com/ambari/centos7/2.x/updates/2.7.4.0/ambari-2.7.4.0-centos7.tar.gz
http://public-repo-1.hortonworks.com/HDP/centos7/3.x/updates/3.1.4.0/HDP-3.1.4.0-centos7-rpm.tar.gz
http://public-repo-1.hortonworks.com/HDP-UTILS-1.1.0.22/repos/centos7/HDP-UTILS-1.1.0.22-centos7.tar.gz
3.环境
CentOS 7 配置SSH免密登录详细步骤
参考链接:https://blog.csdn.net/Luxury_mao/article/details/119781574
1.生成公钥和私钥:在三台主机(hadoop01、hadoop02、hadoop03)上,分别输入以下命令
[root@hdp01 ~]$ ssh-keygen -t rsa

[root@hdp02 ~]$ ssh-keygen -t rsa

[root@hdp03 ~]$ ssh-keygen -t rsa
注:不要输入任何东西,直接敲三次回车
2.进入.ssh目录
// 进入.ssh目录下
cd ~/.ssh
3.拷贝公钥(在三台主机 上分别拷贝一份)
1)hdp01
//拷贝公钥(拷贝时,要输入主机密码)
ssh-copy-id hdp01
ssh-copy-id hdp01
ssh-copy-id hdp01
2)hdp02
//拷贝公钥(拷贝时,要输入主机密码)
ssh-copy-id hdp02
ssh-copy-id hdp02
ssh-copy-id hdp02
3)hdp03
//拷贝公钥(拷贝时,要输入主机密码)
ssh-copy-id hdp03
ssh-copy-id hdp03
ssh-copy-id hdp03
4.免密登录
//进入其他主机
ssh hdp01
ssh hdp02
ssh hdp03
5.退出登录
//退出
exit
三台机器都安装好java8
hdp01这台机器安装mysql7
4.修改YUM源,实现离线安装
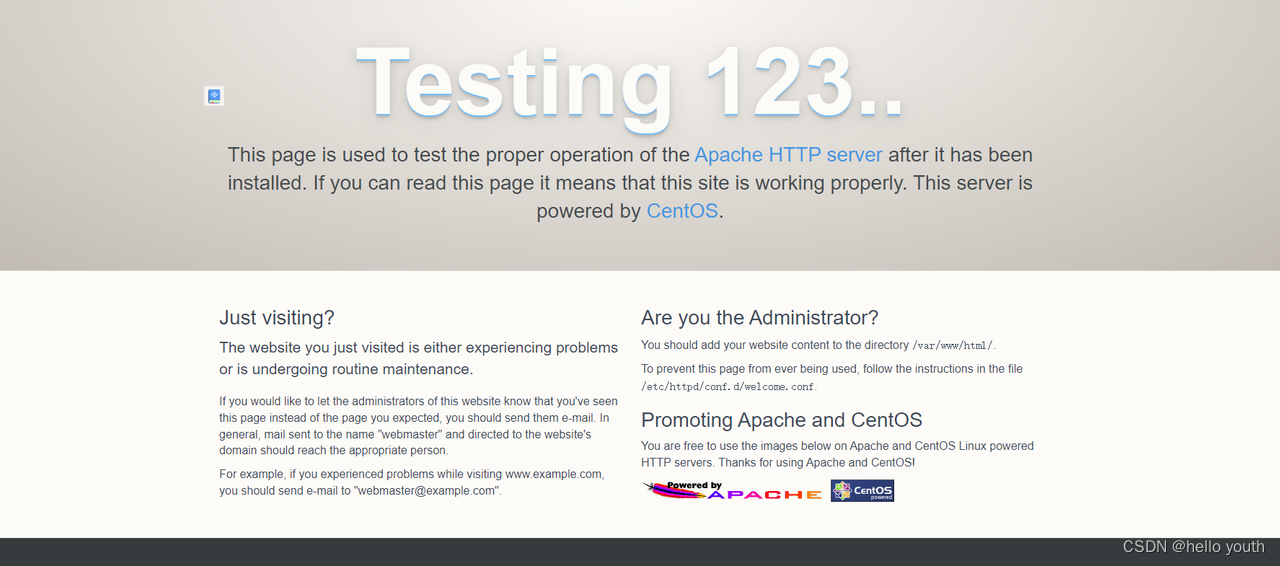
1.hdp01安装httpd服务
yum -y install httpd #安装

systemctl start httpd #启动

systemctl status httpd #查看启动状态

chkconfig httpd on #设置开机启动
安装后访问https://172.19.230.101出现服务测试页就好
2.把上传的ambari,HDP,HDP-UTILS都解压到/var/www/html这个目录下
##httpd安装好之后,可以看到原来目录下就有了/var/www/html这个目录,不用自己创建目录
tar -zxvf ambari-2.7.4.0-centos7.tar.gz -C /var/www/html/
tar -zxvf HDP-3.1.4.0-centos7-rpm.tar.gz -C /var/www/html/
tar -zxvf HDP-UTILS-1.1.0.22-centos7.tar.gz -C /var/www/html/
3.配置基础源
##在/etc/yum.repos.d/目录下创建ambari.repo

[ambari-2.7.4.0]
name=ambari
baseurl=http://hdp01/ambari/centos7/2.7.4.0-118
gpgkey=http://hdp01/ambari/centos7/2.7.4.0-118/RPM-GPG-KEY/RPM-GPG-KEY-Jenkins
gpgcheck=1
enabled=1
priority=1

[HDP-3.1.4.0]
name=HDP Version - HDP-3.1.4.0
baseurl=http://hdp01/HDP/centos7/3.1.4.0-315/
gpgcheck=1
gpgkey=http://hdp01/HDP/centos7/3.1.4.0-315/RPM-GPG-KEY/RPM-GPG-KEY-Jenkins
enabled=1
priority=1

[HDP-UTILS-1.1.0.22]
name=HDP-UTILS Version - HDP-UTILS-1.1.0.22
baseurl=http://hdp01/HDP-UTILS/centos7/1.1.0.22/
gpgcheck=1
gpgkey=http://hdp01/HDP-UTILS/centos7/1.1.0.22/RPM-GPG-KEY/RPM-GPG-KEY-Jenkins
enabled=1
priority=1
##安装createrepo
yum install yum-utils createrepo yum-plugin-priorities -y##生成本地源
createrepo ./##清除yum缓存
yum clean all
yum makecache
yum repolist## 将前面创建的ambari.repo复制到hdp02,hdp03
scp ambari.repo hdp02:$PWD
scp ambari.repo hdp03:$PWD三、安装ambari-server
1.安装ambari-server
##在hdp01执行
yum -y install ambari-server
2.安装jdbc驱动
## jdbc驱动在后面设置ambari时要用到
yum install -y mysql-connector-java
3.ambari-server设置
准备数据库用户的时候,密码可以使用字母、数字和下划线组合,不要有@类的其他字符,不然Ambari不允许通过校验
[root@hdp01 yum.repos.d]# ambari-server setup
Using python  /usr/bin/python
Setup ambari-server
Checking SELinux...
SELinux status is 'disabled'
Customize user account for ambari-server daemon [y/n] (n)? y
Enter user account for ambari-server daemon (root):root
Adjusting ambari-server permissions and ownership...
Checking firewall status...
Checking JDK...
[1] Oracle JDK 1.8 + Java Cryptography Extension (JCE) Policy Files 8
[2] Custom JDK
==============================================================================
Enter choice (1): 2
WARNING: JDK must be installed on all hosts and JAVA_HOME must be valid on all hosts.
WARNING: JCE Policy files are required for configuring Kerberos security. If you plan to use Kerberos,please make sure JCE Unlimited Strength Jurisdiction Policy Files are valid on all hosts.
Path to JAVA_HOME: /usr/lib/jvm/java-1.8.0
Validating JDK on Ambari Server...done.
Check JDK version for Ambari Server...
JDK version found: 8
Minimum JDK version is 8 for Ambari. Skipping to setup different JDK for Ambari Server.
Checking GPL software agreement...
GPL License for LZO: https://www.gnu.org/licenses/old-licenses/gpl-2.0.en.html
Enable Ambari Server to download and install GPL Licensed LZO packages [y/n] (n)? n
Completing setup...
Configuring database...
Enter advanced database configuration [y/n] (n)? y
Configuring database...
==============================================================================
Choose one of the following options:
[1] - PostgreSQL (Embedded)
[2] - Oracle
[3] - MySQL / MariaDB
[4] - PostgreSQL
[5] - Microsoft SQL Server (Tech Preview)
[6] - SQL Anywhere
[7] - BDB
==============================================================================
Enter choice (1): 3
Hostname (localhost):
Port (3306):
Database name (ambari):
Username (ambari): root
Enter Database Password (bigdata):
Re-enter password:
Configuring ambari database...
Should ambari use existing default jdbc /usr/share/java/mysql-connector-java.jar [y/n] (y)? y
Configuring remote database connection properties...
WARNING: Before starting Ambari Server, you must run the following DDL directly from the database shell to create the schema: /var/lib/ambari-server/resources/Ambari-DDL-MySQL-CREATE.sql
Proceed with configuring remote database connection properties [y/n] (y)? y
Extracting system views...
ambari-admin-2.7.4.0.118.jar
....
Ambari repo file doesn't contain latest json url, skipping repoinfos modification
Adjusting ambari-server permissions and ownership...
Ambari Server 'setup' completed successfully.
如果设置误操作,我们可以删除安装文件再重新安装
rpm -e ambari-server-2.7.4.0-118.x86_64

yum -y install ambari-server
四、创建ambari数据库
## 在前面安装好的数据库中创建ambari数据库,并初始化数据库ambari库

create database ambari;
use ambari;
source /var/lib/ambari-server/resources/Ambari-DDL-MySQL-CREATE.sql;
GRANT ALL PRIVILEGES ON ambari.* TO root@'%' IDENTIFIED BY '123456';#授权host hdp01可以访问这个库
五、启动ambari
##服务启动成功会监听8080端口,失败的话可以查看日志/var/log/ambari-server/ambari-server.log

[root@hdp01 yum.repos.d]# ambari-server start
Using python  /usr/bin/python
Starting ambari-server
Ambari Server running with administrator privileges.
Organizing resource files at /var/lib/ambari-server/resources...
Ambari database consistency check started...
Server PID at: /var/run/ambari-server/ambari-server.pid
Server out at: /var/log/ambari-server/ambari-server.out
Server log at: /var/log/ambari-server/ambari-server.log
Waiting for server start................................
Server started listening on 8080

DB configs consistency check: no errors and warnings were found.
Ambari Server 'start' completed successfully.
六、安装Hadoop集群
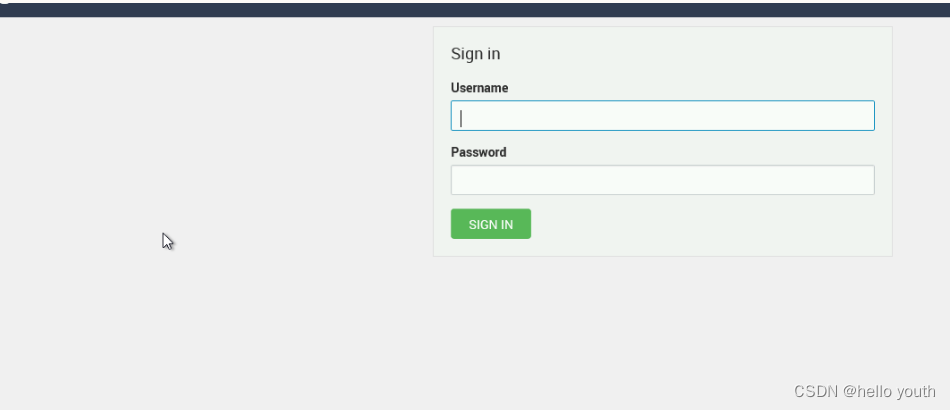
1.登录ambari web
使用浏览器登录http://hdp01:8080,账号密码admin/admin
2.开始安装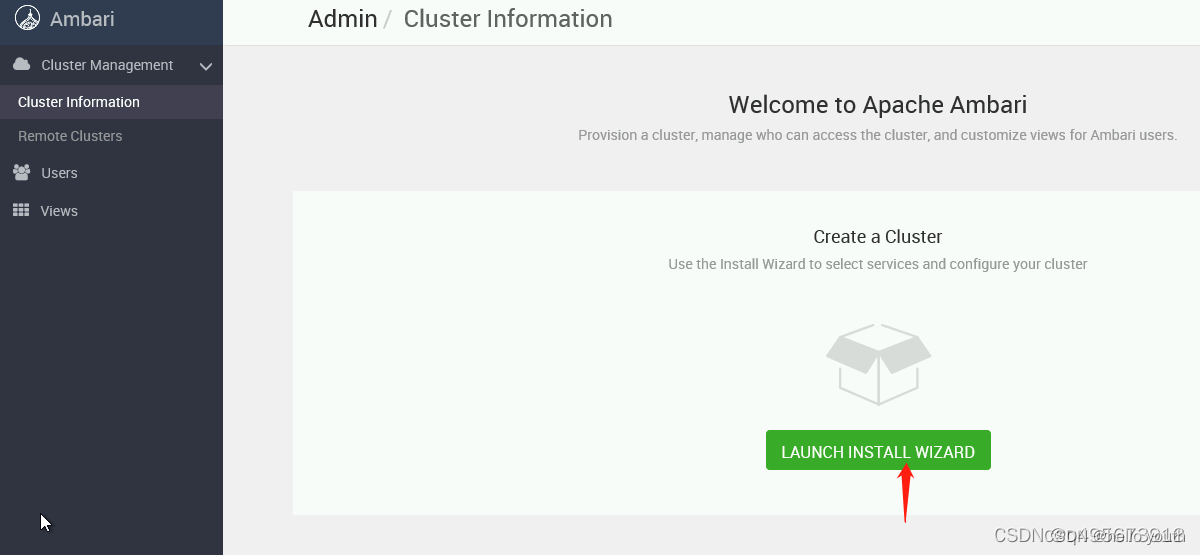
3.集群命名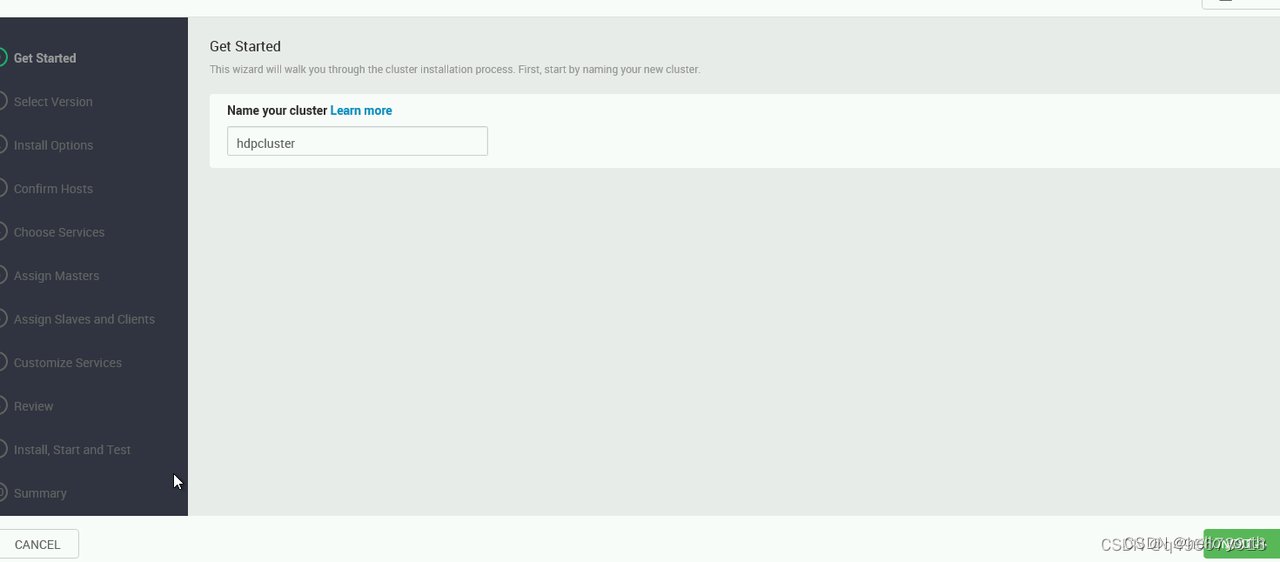
4.hdp版本选择
选择版本,我们服务器用的是centos7所以删除其他的保留redhat7就好,并修改本地源地址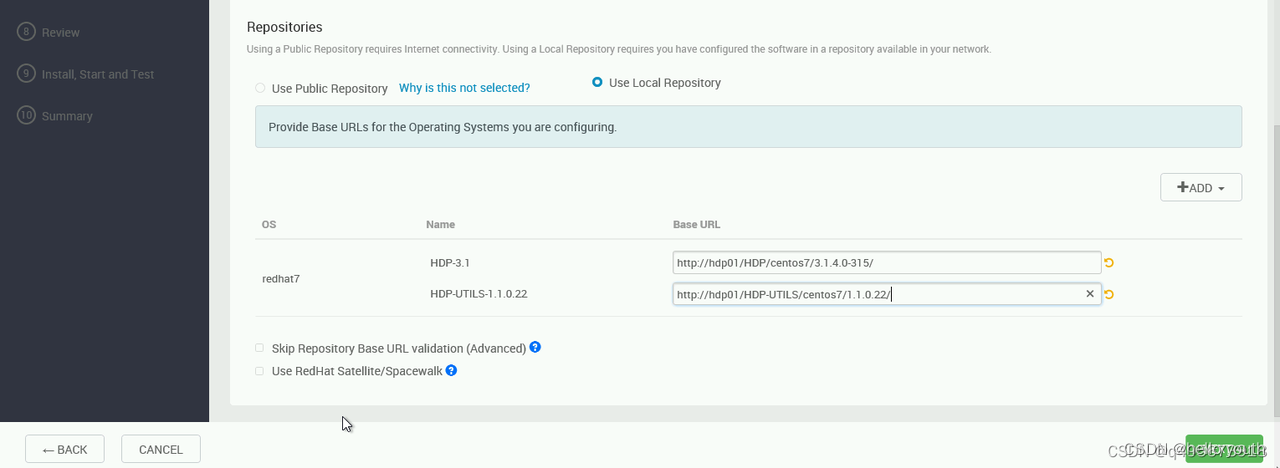
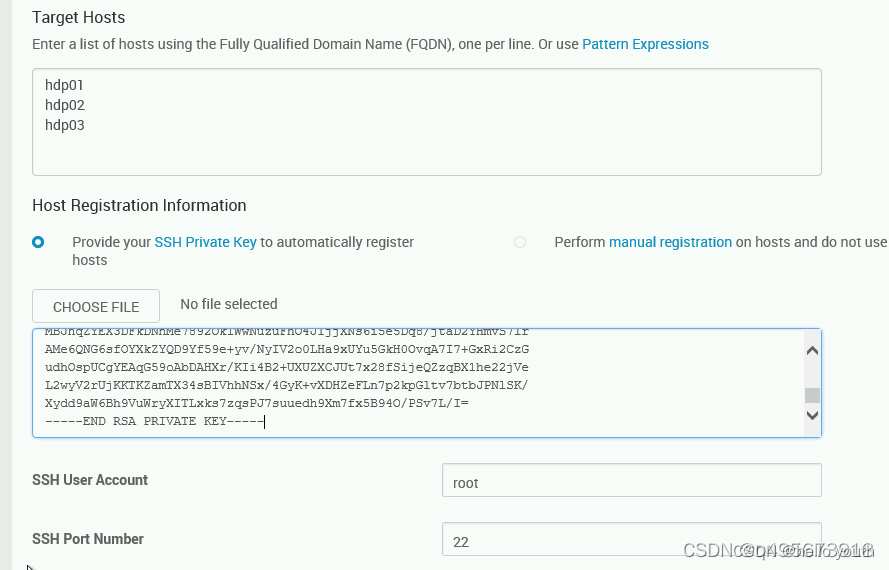
5.集群拥有的节点
加节点信息,并将主节点私钥信息填入,用于集群免密码登录
私钥地址:cat /root/.ssh/id_rsa
6.集群host验证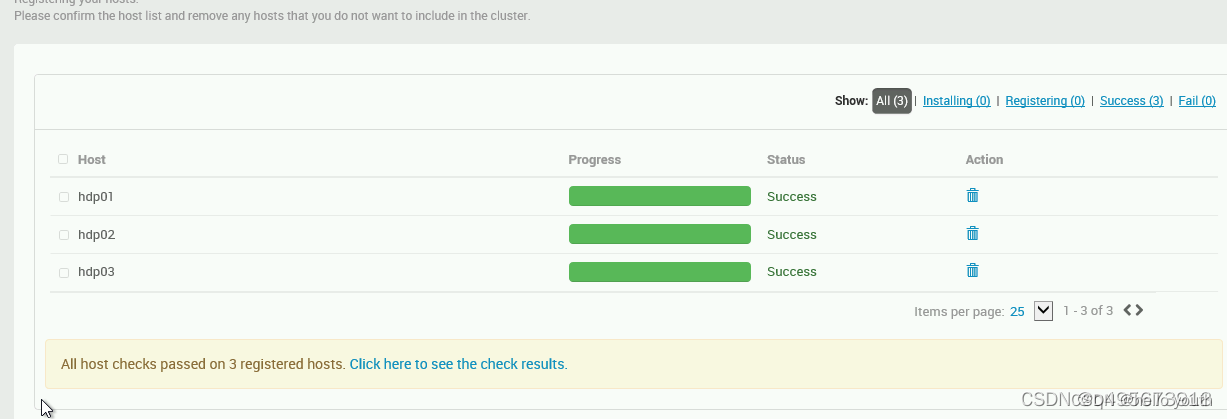
7.框架选择
进入自选服务界面,我们不要一次性全部安装,先安装必要的服务,防止安装太多而失败。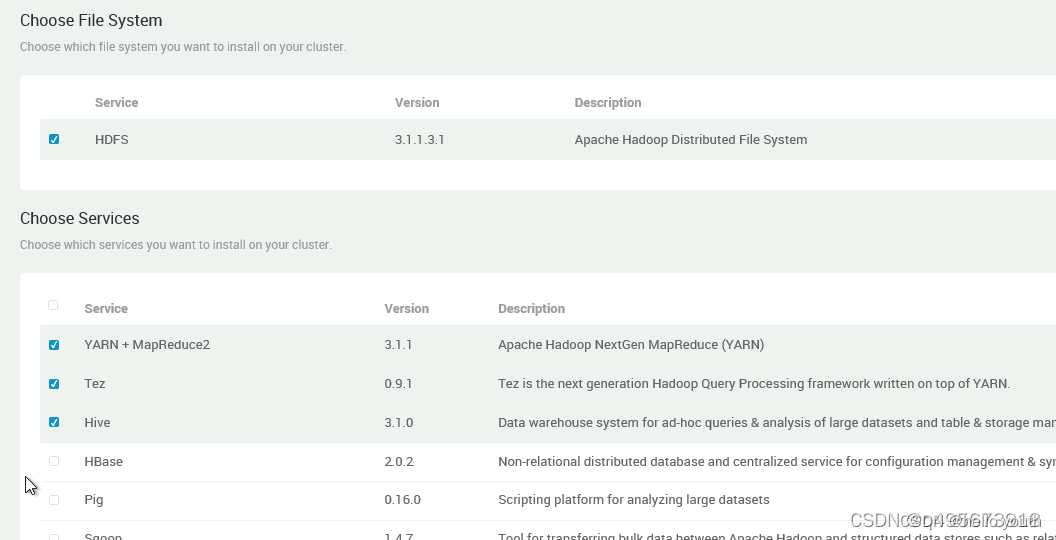
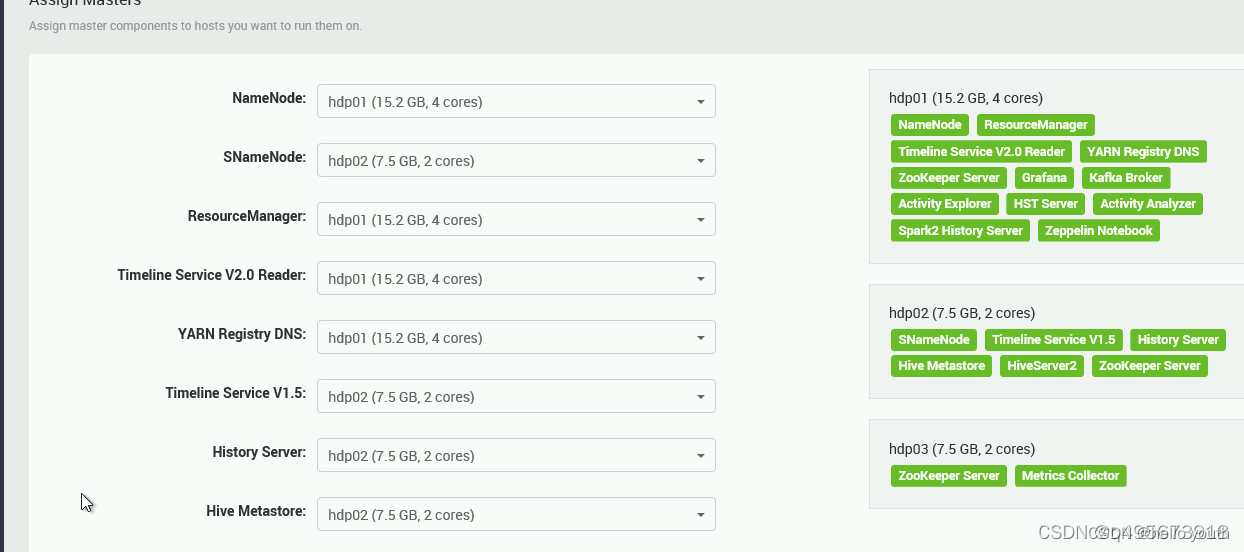
8.节点资源分配
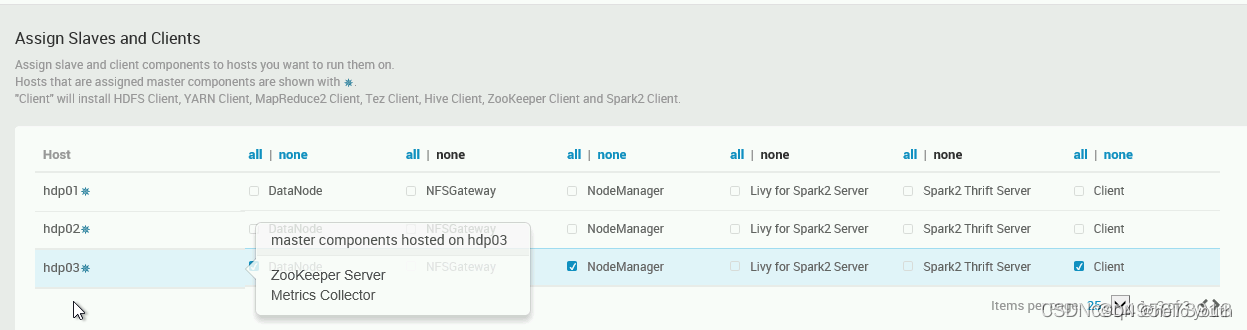
9.安装从机及客户端
10.账号设置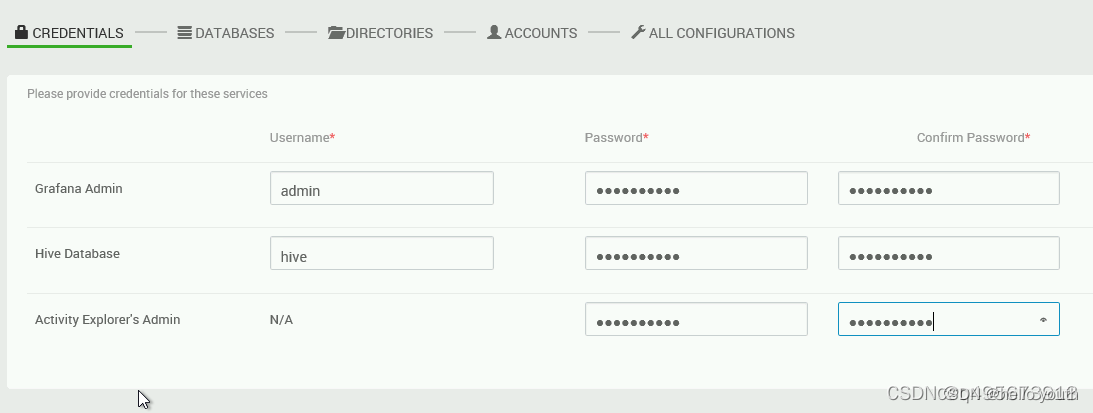
11.创建hive数据库
在mysql客户端创建hive用户及授权
create database hive;
CREATE USER 'hive'@'%'IDENTIFIED BY '123456';
GRANT ALL PRIVILEGES ON *.* TO 'hive'@'%';
FLUSH PRIVILEGES;
创建hive库之后填写连接信息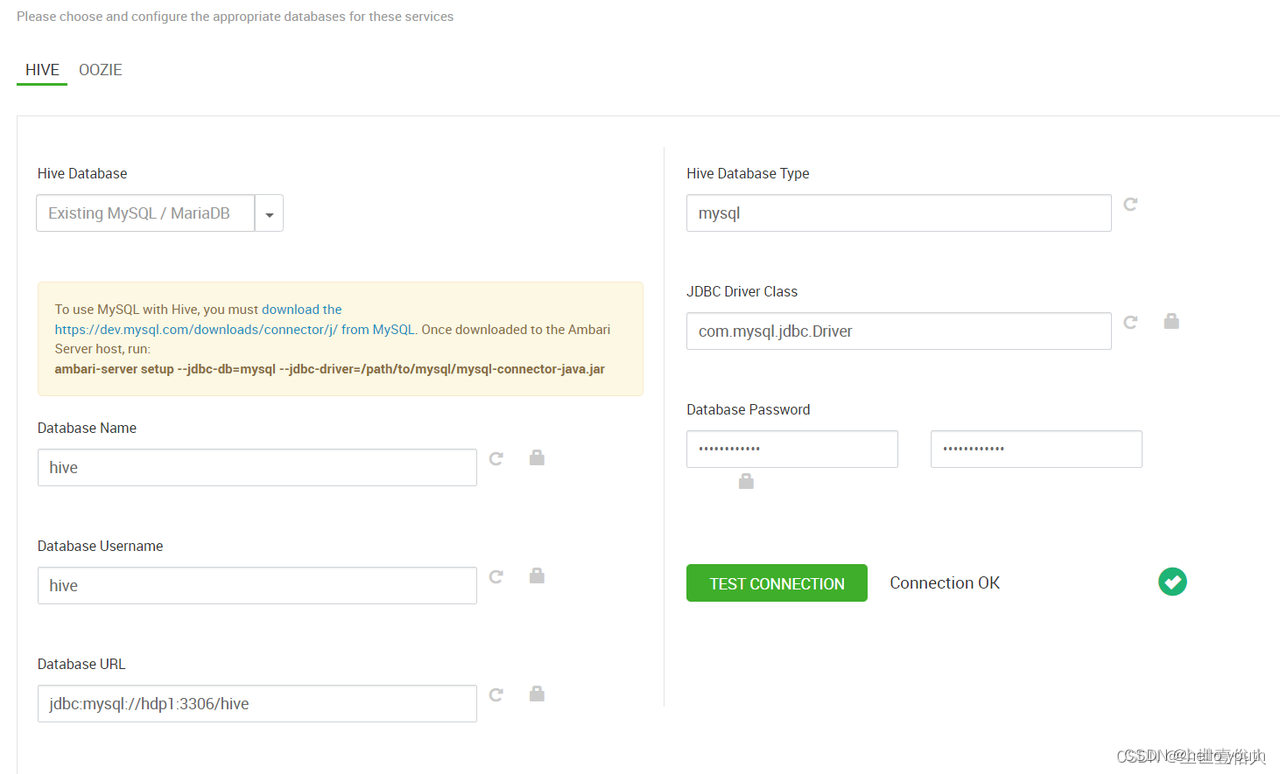
12.组件路径设置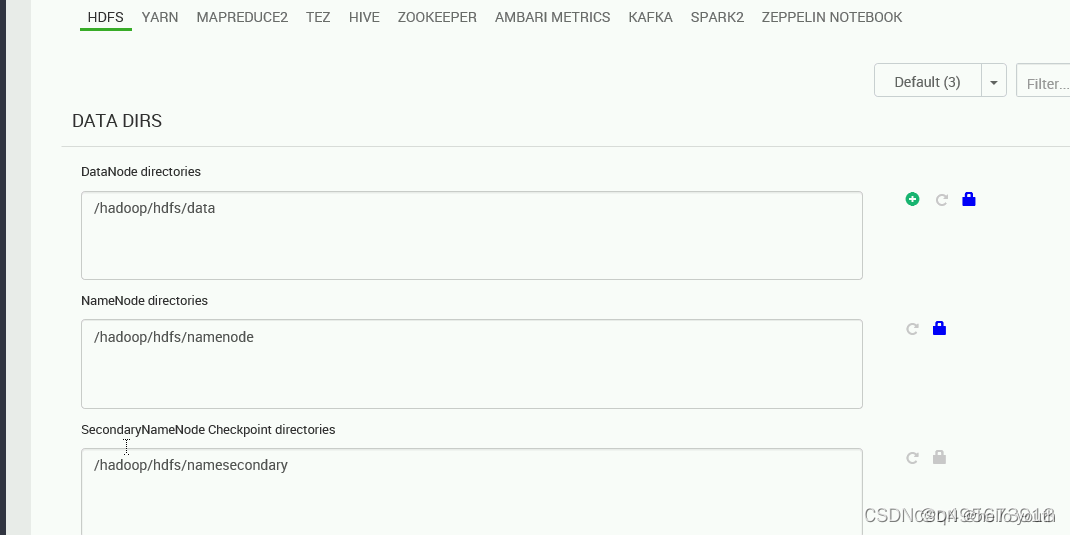
13.组件用户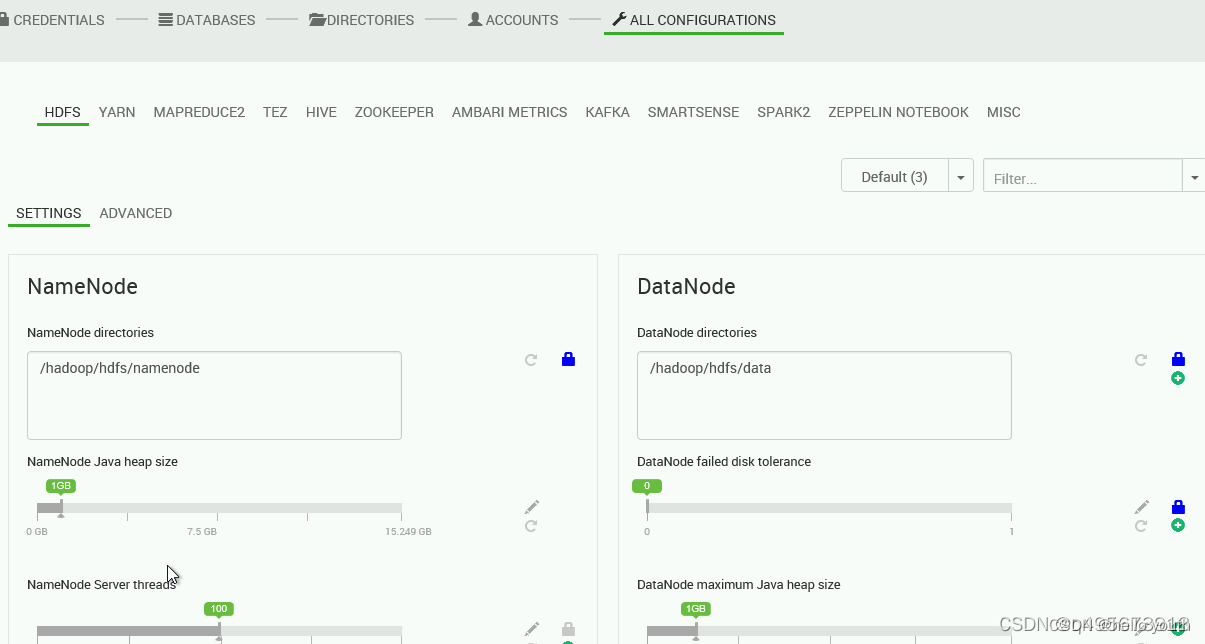
14.集群资源设置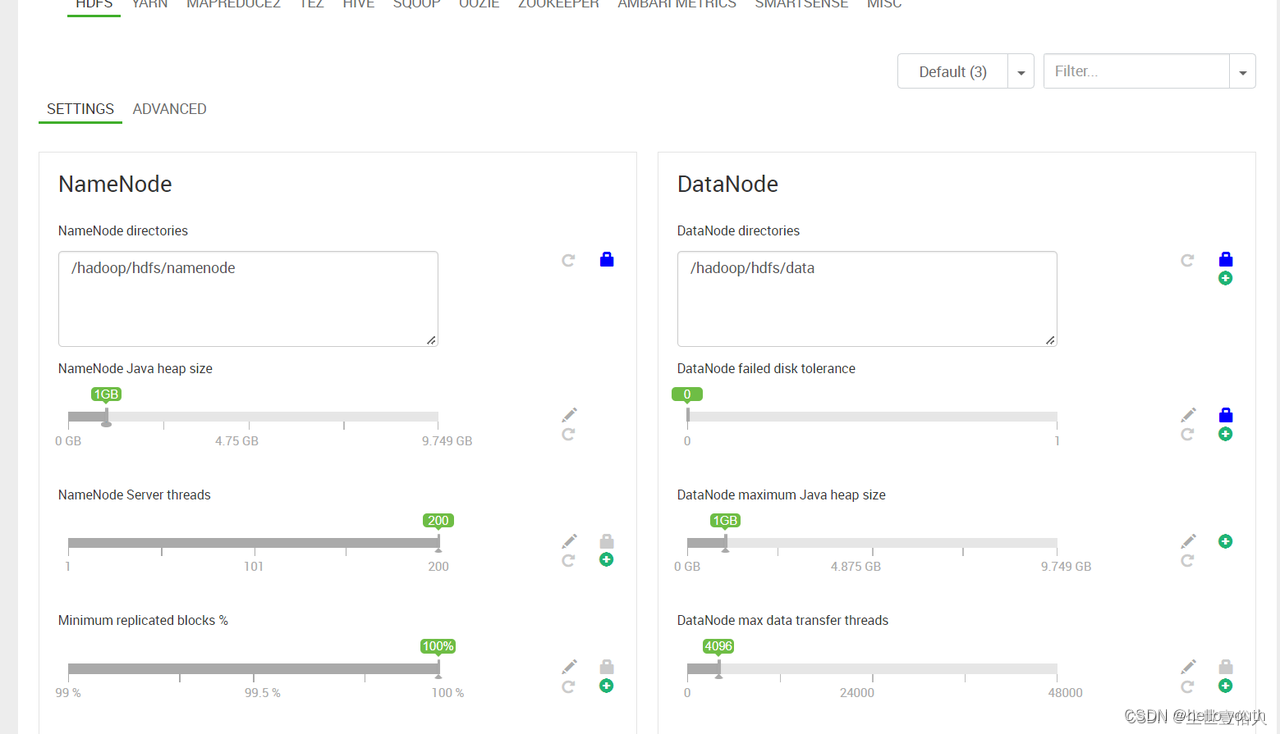
15.安装完成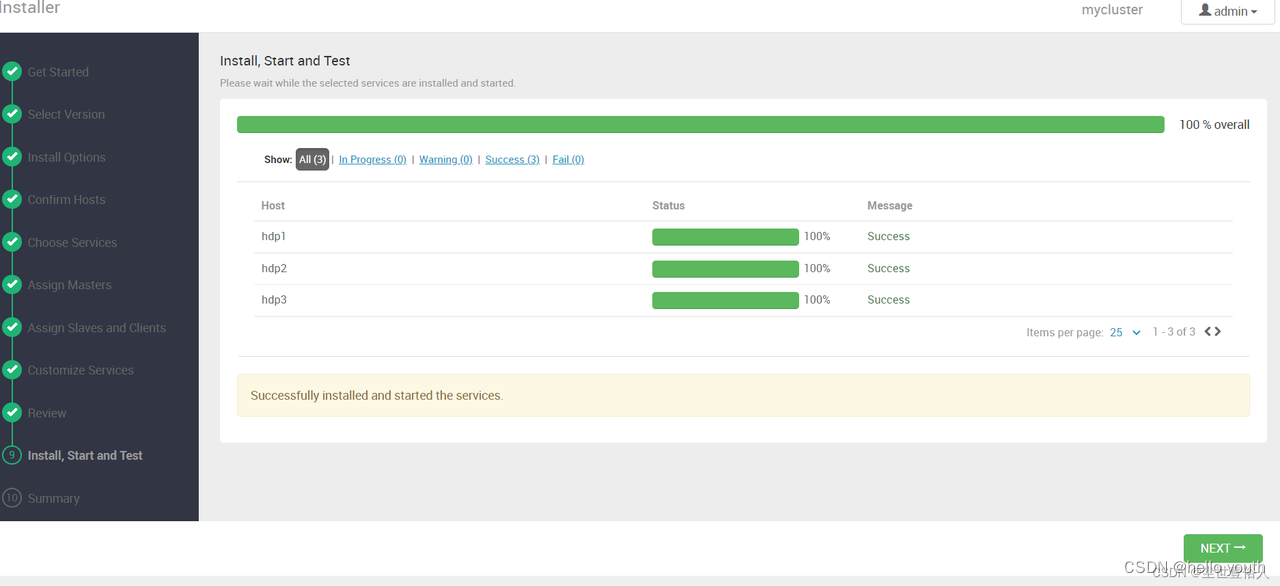
安装参考:
https://blog.csdn.net/q495673918/article/details/121626972
https://blog.csdn.net/dudadudadd/article/details/124909664


 381
381


 被折叠的 条评论
为什么被折叠?
被折叠的 条评论
为什么被折叠?
 到【灌水乐园】发言


