


第一个spring boot Demo 如果有不对的地方希望大家指导
参考:https://blog.csdn.net/u013066244/article/details/53747177
感谢博主的分享!
第一步:eclipse安装spring boot
1、查看Eclipse版本的eclipse--help--About Eclipse,在Eclipseplatfrom那行的Version可以看到Eclipse版本号
2、在https://spring.io/tools/sts/all找你Eclipse对应版本,(因为eclipse自己下载安装太慢,所以选择自己下载)下载
3、接着在Eclipse--help--Install New software,点击add--archive;然后选择刚才下载的STS插件,并给插件起个名字就ok
第二步:创建项目:
1、file -- new -- other -- spring start project --然后根据自己的需要选择一些选项(前提eclipse已经安装了maven)
2、创建好项目通过***Application中的main方法启动项目,测试:
在main方法外建一个方法如下
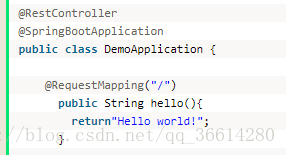
启动项目,浏览器访问:localhost:8080。可以看到"hello world"
3、项目创建成功
引入mybatis
1、加入:
<dependency>
<groupId>org.mybatis.spring.boot</groupId>
<artifactId>mybatis-spring-boot-starter</artifactId>
<version>1.1.1</version>
</dependency>
<dependency>
<groupId>mysql</groupId>
<artifactId>mysql-connector-java</artifactId>
<scope>runtime</scope><
/dependency>
2、配置properties:
spring.datasource.driver-class-name=com.mysql.jdbc.Driver
spring.datasource.url=jdbc:mysql://localhost:3306/mytest?useUnicode=true&characterEncoding=UTF-8&useSSL=false
spring.datasource.username=root
spring.datasource.password=root
spring.datasource.max-active=10
spring.datasource.max-idle=5
spring.datasource.min-idle=0
mybatis.mapper-locations=classpath:/example/**/*Impl.xml
mybatis.type-aliases-package=com.example.dao
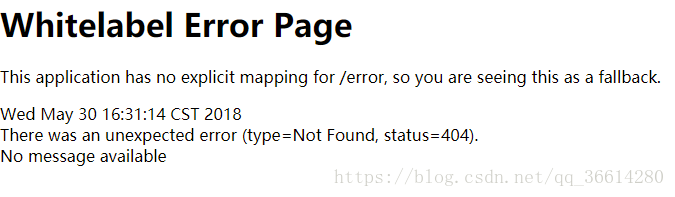
3、配置好文件其他和普通的mvc一样写。对应好目录就可以
注意!运行时没有报错,请求时页面显示


 1331
1331


 被折叠的 条评论
为什么被折叠?
被折叠的 条评论
为什么被折叠?
 到【灌水乐园】发言


