


注意:
nexus 3.x最新版好像不用下载索引了,目前我使用一些基本功能没有索引也能耍的很6
下载
nexus最新版下载https://www.sonatype.com/download-oss-sonatype
然后解压就好
安装
安装的时候直接双击bin目录下的exe文件是无法安装的,需要打开控制台跳转到该路径下,执行命令nexus.exe/run,回车之后会稍微停顿,然后出现这个就表示安装成功了

然后打开http://localhost:8081/就看到nexus主页了
登录
管理员登录,右上角的Sign in,账号/密码:admin admin123
创建仓库

主要就是创建这三种类型,一开始就先创建hosted类型的,group是组是把hosted、proxy包含住的,proxy记得把仓库链接换成阿里云的
http://maven.aliyun.com/nexus/content/groups/public/
注意这里选择Allow redeploy

上传jar
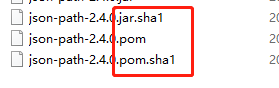
上传jar,图中蓝色图标点击后到这个页面


那三个文件的后缀如下
下载jar
从私服下载jar
①单个项目,在pom.xml的dependencies标签之前添加(注意:这里这样子配置讲道理是可以成功的,我偶尔也能成功,但也会失败,不知道咋回事,所以还是推荐使用第二种方案,毕竟就算这个可以成功,一个个项目这样子配置也太麻烦了)
另外注意看我代码里相应注释
<repositories>
        <repository>
            <id>nexus</id>
            <name>nexus</name>
            <!-- 注意:这里是nexus上自己建的仓库地址,直接在浏览器中打开已经上传有jar的仓库的页面,然后copy链接
                 验证这个url能不能使用:鼠标对准,然后按住ctrl键,url变蓝即为正确,点击鼠标左键可以在浏览器中打开对应仓库
                 如果url不能使用就无法下载jar
            -->
            <url>http://localhost:8081/#browse/browse:groupFirst</url>
            <!-- Release版本则代表稳定的版本 -->
            <releases>
                <enabled>true</enabled>
            </releases>
            <!-- Snapshot版本代表不稳定、尚处于开发中的版本,默认关闭,需要手动启动 -->
            <snapshots>
                <enabled>true</enabled>
            </snapshots>
        </repository>
    </repositories>

<!-- 指定插件仓库 -->
    <pluginRepositories>
        <pluginRepository>
            <id>nexus</id>
            <name>nexus</name>
            <url>http://localhost:8081/#browse/browse:groupFirst</url>
            <releases>
                <enabled>true</enabled>
            </releases>
            <snapshots>
                <enabled>true</enabled>
            </snapshots>
        </pluginRepository>
</pluginRepositories>②所有项目,直接修改setting.xml,另外注意看我代码里相应注释
<mirrors>
    <mirror>
      <id>maven-public</id>
      <name>maven-public</name>
      <!-- 注意:这个链接必须能在浏览器中正确跳转到自己创建的仓库,如果无法跳转就下载不了jar-->
      <url>http://localhost:8081/#browse/browse:groupFirst</url>
      <mirrorOf>*</mirrorOf>
    </mirror>
  </mirrors>
扩展:setting,xml中各标签的意义:接下来这部分内容来自于https://www.cnblogs.com/hanxiaohui/p/9420724.html
1.servers(服务器)
<servers>
    <server>
        <id>server001</id>
        <username>my_login</username>
        <password>my_password</password>
        <privateKey>${usr.home}/.ssh/id_dsa</privateKey>
        <passphrase>some_passphrase</passphrase>
        <filePermissions>664</filePermissions>
        <directoryPermissions>775</directoryPermissions>
        <configuration></configuration>
    </server>
</servers>
id与pom.xml中distributionManagement的id保持一致,服务器标识
username和password表示服务器认证需要的用户民和密码
privateKey, passphrase一组密钥 (不常用)
filePermissions, directoryPermissions如果在部署的时候会创建一个仓库文件或者目录,这时候就可以使用权限(不常用)
2.mirrors(镜像)
<mirrors>
    <mirror>
        <id>planetmirror.com</id>
        <name>PlanetMirror Australia</name>
        <url>http://downloads.planetmirror.com/pub/maven2</url>
        <mirrorOf>central</mirrorOf>
    </mirror>
</mirrors>
设置一个中央仓库的镜像,看仓库分类,也是远程仓库的一种配置方式。
3.profiles(构建环境)
这个可能比较难理解,maven权威指南一书中这样说:
Profile能让你为一个特殊的环境自定义一个特殊的构建;
构建环境的两个例子是产品环境和开发环境。当你在开发环境中工作时,你的系统可能被配置成访问运行在你本机的开发数据库实例,而在产品环境中,你的系统被配置成从产品数据库读取数据。Maven能让你定义任意数量的构建环境(构建profile),这些定义可以覆盖pom.xml中的任何配置。
简单理解就是你可以先profile中先构件好项目运行的环境,比如预设了A环境实在开发中使用,而实际上线是B环境,那么在上线的时候我们不需要一个个修改pom.xml中的配置,只需要激活改profile即可。
4.activation(激活构建环境 )
<activation>
    <activeByDefault>false</activeByDefault>
    <jdk>1.5</jdk>
    <os>
        <name>Windows XP</name>
        <family>Windows</family>
        <arch>x86</arch>
        <version>5.1.2600</version>
    </os>
    <property>
        <name>mavenVersion</name>
        <value>2.0.3</value>
    </property>
</activation>
指定profile中配置的环境在什么时候开始生效
5.activeProfiles(激活了的profile)
<activeProfiles>
    <activeProfile>env-test</activeProfile>
</activeProfiles>
在setting.xml最后的一个标签,表示env-test这个profile已被激活


 9万+
9万+


 被折叠的 条评论
为什么被折叠?
被折叠的 条评论
为什么被折叠?
 到【灌水乐园】发言


