


第一章:开发入门
- 基于 Spring 框架的“约定优先于配置(COC)”理念以及最佳实践之路。
- 提供了针对日常企业应用研发各种场景的 spring-boot-starter 自动配置依赖模块
1、优点
- 快速构建spring
依靠大量注解实现自动化配置
- 嵌入服务器
无需打WAR包,自动打包部署到服务器
- 依赖启动器
starter自动下载和拉去web相关JAR包
- 自动配置第三方库
提供默认自动化配置类
- 监控项目
指标和指控检查
- Java config
java配置类替换XML配置方式
2、老规矩:Hello World
java启动
1. jdk1.8
2. springboot 1.5.2.RELEASE
3. 开发工具(IntelliJ IDEA 2017.1.1)
4. 数据库管理工具(Navicat Premium 11.1.7)
5. 文本管理工具(sublime text 3)
6. apache maven(3.3.9,本章采用maven形式管理jar包,具体配置环境变量以及使用请自行查找资料)
a、使用IntelliJ IDEA构建
b、Create New Project来创建一个新的springboot应用程序
c、Next继续下一步操作
d、勾选Web依赖
注意:
如果选择了war形式,也添加了Web依赖并且使用Application形式启动,则需要注释pom.xml配置文件内tomcat依赖的scope属性
e、目录结构
LessonOneApplication:该类是程序的入口类内有个main方法,可以直接通过run as运行项目
application.properties:该配置文件是项目的核心配置文件
pom.xml:maven配置文件
- @SpringBootApplication注解
它是声明当前类为sprinboot的入口类。而一个springboot项目内有且只能有一个这个注解存在。
f、运行项目
入口程序类中右键->Run LessonOneApplication,通过内置的tomcat容器启动的,并且端口号默认是8080
g、编写HelloWordController
我们使用@RestController来声明我们新创建的HelloWordController是一个访问控制器
jsp启动
a、首先我们需要创建一个springboot项目
b、点击Next后输入一些项目的基本参数(包名,工程名,打包形式,maven形式构建等)
c、点击Next后选择我们预先加入到工程的springboot内置的jar包组件,我们这里选择一个web组件
d、Next输入项目名称后店家Finish既可以完成了项目的构建
e、配置pom.xml
- JSP maven
- Servlet maven
- JSTL maven
f、配置application.properties和jsp
g、webapps/jsp目录下创建一个index.jsp用于测试我们的配置是否已经支持了jsp
h、配置springmvc的控制器,我们新建indexController
i、启动项目我们尝试访问127.0.0.1:8080/index
3、Spring JavaConfig和常见Annotation
JavaConfig
xml
<?xml version="1.0" encoding="UTF-8"?>
<beans xmlns="http://www.springframework.org/schema/beans"
    xmlns:xsi="http://www.w3.org/2001/XMLSchema-instance"
    xmlns:context="http://www.springframework.org/schema/context"
    xsi:schemaLocation="http://www.springframework.org/schema/beans
        http://www.springframework.org/schema/beans/spring-beans.xsd
        http://www.springframework.org/schema/context
        http://www.springframework.org/schema/context/spring-context.xsd">

    <!-- bean定义 -->
</beans>
JavaConfig
@Configuration
public class MockConfiguration{
    // bean定义
}
其他Annotation
- 自动扫描
@ComponentScan 对应 XML 配置形式中的 <context:component-scan>
- 自动导入包
@Import对应 <import resource="XXX.xml"/> 整合配置文件,如bean相关配置等等
- 加载properties
@PropertySource 用于指定properties 文件,将属性加载到 IoC
4、@SpringBootApplication
通过@SpringBootApplication注解标注的main()方法启动springboot,源码中重要的只有三个 Annotation
- @EnableAutoConfiguration
@Import 自动导入+@AutoConfigurationPackage自动配置
- @ComponentScan
组件扫描器:扫描组件
- @Configuration
组件配置类:被组件扫描
5、spring-boot-starter
a、spring-boot-starter 自动配置依赖模块
b、都约定以 spring-boot-starter- 作为命名的前缀
c、http://start.spring.io,点击“Switch to the full version”链接,有 SpringBoot1.3.2 默认支持和提供了大约 80 多个自动配置依赖模块。
两个核心
spring-boot-starter-parent和spring-boot-starter-web
- spring-boot-starter-parent
统一各种jar的版本号,引入其他的依赖就可以省略版本号,可以忽略使用默认的版本号
<parent>
    <groupId>org.springframework.boot</groupId>
    <artifactId>spring-boot-starter-parent</artifactId>
    <version>2.0.0.RELEASE</version>
</parent>- spring-boot-starter-web
自动嵌入tomcat容器。从application.properties中读取web应用的配置,如:server.port,不写使用默认配置
<dependency>
    <groupId>org.springframework.boot</groupId>
    <artifactId>spring-boot-starter-web</artifactId>
</dependency>
第二章:核心配置与注解
1、全局配置文件
a、application.properties或application.yaml作为全局配置文件
b、yaml 中的数据是有序的,properties 中的数据是无序的
application.properties配置文件
可以是环境变量、参数等信息
#端口
server.port=8082
#上下文
server.servlet.context-path=/nyfz
# 文件编码
banner.charset= UTF-8
# 文件位置
banner.location= classpath:banner.txt- 注入
@Component将对象作为Bean组件放到ring器中
@PropertySource设置路径
@ConfigurationProperties(prefix = “book”)将book开头的属性设值注入
book.name=三国演义
book.author=罗贯中
book.id=1
@Component
@PropertySource("classpath:book.properties")
@ConfigurationProperties(prefix = "book")
public class Book {
private Long id;
private String name;
private String author;
//省略getter/setter
}application.yaml
- 普通
字面量直接写在后面就可以 , 不需要使用引号
k: v- 对象、Map(键值对)
#对象、Map格式
k:
    v1:
    v2:
缩进写法
student:
    name: qinjiang
    age: 3
行内写法
student: {name: qinjiang,age: 3}- 数组( List、set )
缩进写法
pets:
 - cat
 - dog
 - pig
行内写法

pets: [cat,dog,pig]
- 注入
person:
  name: 纳鲁多
  age: 22
  happy: true
  birth: 2019/09/14
  maps: {k1: v1,k2: v2}
  lists:
    - 哈哈哈
    - 呵呵呵
    - 嘻嘻嘻
  dog:
    name: 旺财
    age: 3
@Component // 注册bean到容器中
@PropertySource("classpath:person.properties")
@ConfigurationProperties(prefix = "person")
public class Person {
private String name;
private Integer age;
private boolean happy;
private Date birth;
private Map<String ,Object> maps;
private List<Object> lists;
private Dog dog;
// 有参无参构造、get、set方法、toString()方法
}
@SpringBootTest
class Springboot002ApplicationTests {

    @Autowired
    private Person person;

    @Test
    void contextLoads() {
        System.out.println(person);
    }
}
注意:
导入配置文件处理器,配置文件进行绑定就会有提示
[ settings -> FileEncodings 中配置;
2、Spring Boot Profile使用
使用@Profile注解可以实现不同环境下配置参数的切换
@Configuration
@Profile("production")
public class ProductionConfiguration {
    // ...
}
@Configuration
@Profile("test")
public class TestConfiguration {
    // ...
}在存在多个profile情况下,你可以使用spring.profiles.active来设置哪些profile被激活
- application.properties
spring.profiles.active=dev,hsqldb
- application.yaml
spring.profiles.active:dev,hsqldb
3、随机数的使用
#随机32位MD5字符串
user.random.secret=${random.value}

#随机int数字
user.random.intNumber=${random.int}

#随机long数字
user.random.longNumber=${random.long}

#随便uuid
user.random.uuid=${random.uuid}

#随机10以内的数字
user.random.lessTen=${random.int(10)}

#随机1024~65536之内的数字
user.random.range=${random.int[1024,65536]}
第三章:spring boot整合mybaties


Dao:
@Mapper
public interface LibrarianMapper {
    Librarian selectLibrarian(int id);
}mapper.xml:

test:
@SpringBootApplication(scanBasePackages={"com.example.*"})
@MapperScan("com.example.dao")
public class SpringBootDemoApplication {

    public static void main(String[] args) {
        SpringApplication.run(SpringBootDemoApplication.class, args);
    }
}
扫包的设置
spring.thymeleaf.cache=false
spring.devtools.restart.enabled=true
spring.devtools.restart.additional-paths=src/main/java

spring.datasource.driver-class-name=com.mysql.jdbc.Driver
spring.datasource.url=jdbc:mysql://localhost:3306/db_library
spring.datasource.username=root
spring.datasource.password=4008

mybatis.type-aliases-package=com.example.entity
mybatis.mapperLocations=classpath:mappers/*.xml
第四章:实现web的常用功能
1、springmvc的整合
默认配置好了web,例如不需要配置视图解析器
- WebMvcConfigurer
核实无参get方式的请求跳转,比较简单
@Configuration
public class WebConfig implements WebMvcConfigurer {

    @Bean
    public ConnectInterceptor connectInterceptor() {
        return new ConnectInterceptor();
    }

    @Override
    public void addInterceptors(InterceptorRegistry registry) {
        registry.addInterceptor(userInterceptor()).addPathPatterns("/**").excludePathPatterns("/admin/**").order(1);
        registry.addInterceptor(connectInterceptor()).addPathPatterns("/provinceExtend/**").order(2);
        registry.addInterceptor(connectInterceptor()).addPathPatterns("/gatewayExtend/**").order(3);
    }
}addInterceptors方法对应的是xml文件中<mvc:interceptors>配置
- 传统的拦截器
a、添加注释@Component
b、继承接口HandlerInterceptor
c、preHandler()判断用户是否登录
2、文件上传和下载


第五章:AOP与trancaction
1、配置aop
controller
@RestController
@RequestMapping("/aopController")
public class AopController {
    @RequestMapping(value = "/Curry")
    public void Curry(){
        System.out.println("库里上场打球了!!");
    }
    @RequestMapping(value = "/Harden")
    public void Harden(){
        System.out.println("哈登上场打球了!!");
    }
    @RequestMapping(value = "/Antetokounmpo")
    public void Antetokounmpo(){
        System.out.println("字母哥上场打球了!!");
    }
    @RequestMapping(value = "/Jokic")
    public void Jokic(){
        System.out.println("约基奇上场打球了!!");
    }
    @RequestMapping(value = "/Durant/{point}")
    public void Durant(@PathVariable("point")  int point){
        System.out.println("杜兰特上场打球了!!");
    }
}
通知类
@Aspect
@Component
public class BrokerAspect {

    /**
     * 定义切入点,切入点为com.example.demo.aop.AopController中的所有函数
     *通过@Pointcut注解声明频繁使用的切点表达式
     */
    @Pointcut("execution(public * com.example.demo.aop.AopController.*(..)))")
    public void BrokerAspect(){

    }

    /**
    * @description  在连接点执行之前执行的通知
    */
    @Before("BrokerAspect()")
    public void doBeforeGame(){
        System.out.println("经纪人正在处理球星赛前事务!");
    }

    /**
     * @description  在连接点执行之后执行的通知(返回通知和异常通知的异常)
     */
    @After("BrokerAspect()")
    public void doAfterGame(){
        System.out.println("经纪人为球星表现疯狂鼓掌!");
    }

    /**
     * @description  在连接点执行之后执行的通知(返回通知)
     */
    @AfterReturning("BrokerAspect()")
    public void doAfterReturningGame(){
        System.out.println("返回通知:经纪人为球星表现疯狂鼓掌!");
    }

    /**
     * @description  在连接点执行之后执行的通知(异常通知)
     */
    @AfterThrowing("BrokerAspect()")
    public void doAfterThrowingGame(){
        System.out.println("异常通知:球迷要求退票!");
    }
}

2、trancaction事务
@Transactional 只能被应用到public方法上, 对于其它非public的方法,如果标记了@Transactional也不会报错,但方法没有事务功能.
第六章:整合Redis
value:缓存名 key:缓存的key
- @Cacheable:查询
@Cacheable(value = "RedisInfo", key = "#root.methodName+'['+#account+']'")- @CachePut:更新
更新数据库和缓存
@CachePut(value="user",key = "#result.id")- @CacheEvict:删除
删除数据库和缓存
@CacheEvict(value = "user",key = "#id")1、理解
a、通过缓存来减少对关系型数据库的查询次数
b、在执行DAO类的select***(), query***()方法时,先从Redis中查询有没有缓存数据,如果没有再查询数据库

2、使用
- @EnableCaching
开启缓存注解支持
- @CacheConfig(cacheNames=" ")
统一设置缓存空间,这样该类所有的方法都可以省略相应的cacheNames属性
@Service
@CacheConfig(cacheNames="userCache") // 本类内方法指定使用缓存时,默认的名称就是userCache
public class UserDAOImpl implements UserDAO{
	//分享
	@CachePut(key = "#P1")
	public void share(String username,String title,String content){
}

	//@Cacheable() // @Cacheable 会先查询缓存,如果缓存中存在,则不执行方法
	public User selectUser(String username){
		User user = null;
		System.out.println(username);
		UserMapper userMapper=sqlSession.getMapper(UserMapper.class);
		user = userMapper.selectUser(username);
		sqlSession.commit();
		return user;
	}
	@Cacheable(key = "getMethodName()") // @Cacheable 会先查询缓存,如果缓存中存在,则不执行方法
    public List<Diary> seeShare() {
		List<Diary> list = new LinkedList<Diary>();
		DiaryMapper diaryMapper = sqlSession.getMapper(DiaryMapper.class);
		list = diaryMapper.selectShare();
		sqlSession.commit();
		return list;
    }
}
第七章:消息服务
a、消息中间件关注于数据的发送和接收,利用异步消息传递机制集成分布式系统。
b、当发送消息以后,将由消息代理接管,消息代理保证消息传递到指定目的地。
- 点对点式消息通信(point-to-point):
消息代理消息放入一个队列中。个消息最终只能被一个接收者所接受。
- 发布(publish)/订阅(subscribe)式消息通信:
发布者发送消息到主题,多个接收者(订阅者)监听(订阅)这个主题
1、RabbitMQ
a、生产者(producer)创建消息
b、然后发布到队列(queue)中
c、消费者(consumer)订阅某个队列
d、最后将消息发送到监听的消费者,可以有多个消费者,消息会被平均分摊给多个消费者进行处理

2、Spring Boot与RabbitMQ整合实现
1).添加引用依赖
<dependency>
	<groupId>org.springframework.boot</groupId>
	<artifactId>spring-boot-starter-amqp</artifactId>
</dependency>
2).添加配置
spring.rabbitmq.host=192.168.68.128
spring.rabbitmq.port=5672
spring.rabbitmq.username=admin
spring.rabbitmq.password=admin
spring.rabbitmq.virtual-host=zy_host
3).队列配置
@Configuration
public class RabbitConfig {
    //定义一个名称为hello的队列
    @Bean
    public Queue HelloQueue(){
        return new Queue("hello");
    }
}
4).生产者
默认实现rabbitTemplate
@Component
public class HelloSender {
    @Autowired
    private AmqpTemplate rabbitTemplate;
    public void send(String queueName, String message){
        rabbitTemplate.convertAndSend(queueName,message);
    }
}
5).消费者,监听队列,处理消息
@Component
@RabbitListener(queues = "hello")
public class HelloReceiver {
    @RabbitHandler
    public void process(String context){
        System.out.println("Receiver : " + context);
    }
}
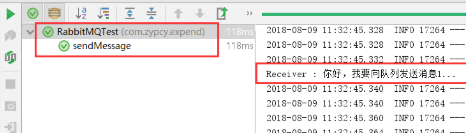
6).测试,生产者与消费者的queue name必须一致
@RunWith(SpringRunner.class)
@SpringBootTest
public class RabbitMQTest {
    @Autowired
    private HelloSender helloSender;
    @Test
    public void sendMessage(){
        helloSender.send("hello","你好,我要向队列发送消息1...");
    }
}

多个生成者
@Test
public void sendManyMessage(){
	for (int i=0;i<5;i++){
		helloSender.send("hello","你好,我要向队列发送消息1..."+i);
		helloSender.send("hello","你好,我要向队列发送消息2..."+i);
	}
}

第八章:springboot任务管理
1、异步任务
@Async标记异步方法
@Service
public class AsyncService {

    @Async
        public  void hello(){
            try {
                Thread.sleep(6000);
            } catch (InterruptedException e) {
                e.printStackTrace();
            }
            System.out.println("处理数据中...");
        }
}
@RequestController=controller+requestBody
@RestController
public class AyncController {

    @Autowired
    AsyncService asyncService;

    @GetMapping("/hello")
    public  String hello(){
     asyncService.hello();
     return "success";
    }
}
EnableAsync即可开启异步任务
@EnableAsync  //开启异步任务
@EnableScheduling  //开启定时任务
@SpringBootApplication
public class DemoApplication {

    public static void main(String[] args) {
        SpringApplication.run(DemoApplication.class, args);
    }

}
二、定时任务
//表达式范例
每隔1分钟执行一次:0 */1 * * * ?
每天23点执行一次:0 0 23 * * ?
每天凌晨1点执行一次:0 0 1 * * ?
每月1号凌晨1点执行一次:0 0 1 1 * ?
每月最后一天23点执行一次:0 0 23 L * ?
每周星期天凌晨1点实行一次:0 0 1 ? * L
在26分、29分、33分执行一次:0 26,29,33 * * * ?
每天的0点、13点、18点、21点都执行一次:0 0 0,13,18,21 * * ?
@Scheduled表达式
@Service

public class Schedule {


   // @Scheduled(cron = "0 * * * * MON-FRI")  //整秒的时候打印
  // @Scheduled(cron = "0-4 * * * * MON-FRI")   //0-4秒的时候会打印
   @Scheduled(cron = "0/4 * * * * MON-FRI")  // 0秒启动 每4秒打印一次
   public  void hello (){
         System.out.println("兽人永不为奴!");
     }
}
@EnableScheduling //开启定时任务


 795
795


 被折叠的 条评论
为什么被折叠?
被折叠的 条评论
为什么被折叠?
 到【灌水乐园】发言


