前言:
最近没什么事做,搭个框架写成博客记录下来,拉通一下之前所学知识.
话不多说,我们直接步入正题。
准备工作:
1/安装并配置java运行环境
2/数据库的安装配置(Mysql)
3/安装并配置服务器(Tomcat)
4/Maven
5/ IntelliJIDEA的安装配置(本人使用的主要软件是IntelliJIDEA,没用eclipse什么的)
6/ 使用IntelliJIDEA创建一个web app项目。
貌似就这些了吧
导包
不同于以往的导包,由于我们创建的是maven的webapp项目,所以现在只需配置下pomxml这个配置文件,系统会自动到maven的中央仓库去下载相应的包.
本人的pom.xml配置文件如下(都写有说明的哈):

<project xmlns="http://maven.apache.org/POM/4.0.0" xmlns:xsi="http://www.w3.org/2001/XMLSchema-instance"
  xsi:schemaLocation="http://maven.apache.org/POM/4.0.0 http://maven.apache.org/maven-v4_0_0.xsd">
  <modelVersion>4.0.0</modelVersion>
  <groupId>XRog</groupId>
  <artifactId>ssh</artifactId>
  <packaging>war</packaging>
  <version>1.0-SNAPSHOT</version>
  <name>ssh Maven Webapp</name>
  <url>http://maven.apache.org</url>

  <!-- 本人将配置包的版本信息都统一放入此处,方便以后管理-->
  <properties>
    <springVersion>4.3.1.RELEASE</springVersion>
    <hibernateVersion>4.3.5.Final</hibernateVersion>
    <jstlVersion>1.2</jstlVersion>
    <taglibVersion>1.1.2</taglibVersion>
    <servletVersion>3.0-alpha-1</servletVersion>
    <jsonVersion>1.9.13</jsonVersion>
    <jacksonVersion>2.5.0</jacksonVersion>
    <mysqlVersion>5.1.38</mysqlVersion>
    <c3p0Version>0.9.1.2</c3p0Version>
    <log4jVersion>1.2.17</log4jVersion>
    <fileuploadVersion>1.3.1</fileuploadVersion>
    <lombokVersion>1.16.10</lombokVersion>
  </properties>

  <dependencies>
    <!-- 单元测试 -->
    <dependency>
      <groupId>junit</groupId>
      <artifactId>junit</artifactId>
      <version>3.8.1</version>
      <scope>test</scope>
    </dependency>

    <!-- spring-->
    <dependency>
      <groupId>org.springframework</groupId>
      <artifactId>spring-beans</artifactId>
      <version>${springVersion}</version>
    </dependency>

    <dependency>
      <groupId>org.springframework</groupId>
      <artifactId>spring-core</artifactId>
      <version>${springVersion}</version>
    </dependency>

    <dependency>
      <groupId>org.springframework</groupId>
      <artifactId>spring-context</artifactId>
      <version>${springVersion}</version>
    </dependency>
    <dependency>
      <groupId>org.springframework</groupId>
      <artifactId>spring-orm</artifactId>
      <version>${springVersion}</version>
    </dependency>

    <!-- spring web + spring MVC-->
    <dependency>
      <groupId>org.springframework</groupId>
      <artifactId>spring-web</artifactId>
      <version>${springVersion}</version>
    </dependency>
    <dependency>
      <groupId>org.springframework</groupId>
      <artifactId>spring-webmvc</artifactId>
      <version>${springVersion}</version>
    </dependency>

    <!-- hibernate配置-->
    <dependency>
      <groupId>org.hibernate</groupId>
      <artifactId>hibernate-core</artifactId>
      <version>${hibernateVersion}</version>
    </dependency>

    <!-- hibernate 缓存, 视情况添加-->
    <dependency>
      <groupId>org.hibernate</groupId>
      <artifactId>hibernate-ehcache</artifactId>
      <version>${hibernateVersion}</version>
    </dependency>

    <!-- jsp页面使用的jstl支持-->
    <dependency>
      <groupId>jstl</groupId>
      <artifactId>jstl</artifactId>
      <version>${jstlVersion}</version>
    </dependency>
    <dependency>
      <groupId>taglibs</groupId>
      <artifactId>standard</artifactId>
      <version>${taglibVersion}</version>
    </dependency>
    <dependency>
      <groupId>javax.servlet</groupId>
      <artifactId>servlet-api</artifactId>
      <version>${servletVersion}</version>
      <scope>provided</scope>
    </dependency>

    <!-- DataBase数据库连接 mysql包-->
    <dependency>
      <groupId>mysql</groupId>
      <artifactId>mysql-connector-java</artifactId>
      <version>${mysqlVersion}</version>
    </dependency>

    <!-- 数据库连接池-->
    <dependency>
      <groupId>c3p0</groupId>
      <artifactId>c3p0</artifactId>
      <version>${c3p0Version}</version>
    </dependency>

    <!-- json数据 使springMVC可以返回json值 ,视情况添加-->
    <dependency>
      <groupId>org.codehaus.jackson</groupId>
      <artifactId>jackson-mapper-asl</artifactId>
      <version>${jsonVersion}</version>
    </dependency>

    <!-- Jackson可以轻松的将Java对象转换成json对象和xml文档,同样也可以将json、xml转换成Java对象-->
    <dependency>
      <groupId>com.fasterxml.jackson.core</groupId>
      <artifactId>jackson-core</artifactId>
      <version>${jacksonVersion}</version>
    </dependency>
    <dependency>
      <groupId>com.fasterxml.jackson.core</groupId>
      <artifactId>jackson-annotations</artifactId>
      <version>${jacksonVersion}</version>
    </dependency>

    <dependency>
      <groupId>com.fasterxml.jackson.core</groupId>
      <artifactId>jackson-databind</artifactId>
      <version>${jacksonVersion}</version>
    </dependency>

    <!-- log4j配置, 视情况添加-->
    <dependency>
      <groupId>log4j</groupId>
      <artifactId>log4j</artifactId>
      <version>${log4jVersion}</version>
    </dependency>

    <!--文件 上传-->
    <dependency>
      <groupId>commons-fileupload</groupId>
      <artifactId>commons-fileupload</artifactId>
      <version>${fileuploadVersion}</version>
    </dependency>

    <!-- lombok插件导包-->
      <dependency>
        <groupId>org.projectlombok</groupId>
        <artifactId>lombok</artifactId>
        <version>${lombokVersion}</version>
        <scope>provided</scope>
      </dependency>


  </dependencies>


  <build>
    <finalName>ssh</finalName>
  </build>
</project>
OK,配置后运行下maven,就会自动向中央仓库下载相应的包啦!(这个就不多说了)。
SpringMVC配置
我现在在这里把我配置后的结构拿出来给你们看下

我们先配置下SpringMVC的配置:resources/META-INF/spring-mvc.xml
<beans xmlns="http://www.springframework.org/schema/beans"
       xmlns:xsi="http://www.w3.org/2001/XMLSchema-instance"
       xmlns:context="http://www.springframework.org/schema/context"
       xmlns:mvc="http://www.springframework.org/schema/mvc"
       xsi:schemaLocation="http://www.springframework.org/schema/beans
        http://www.springframework.org/schema/beans/spring-beans-4.1.xsd
        http://www.springframework.org/schema/context
        http://www.springframework.org/schema/context/spring-context-4.1.xsd
        http://www.springframework.org/schema/mvc
        http://www.springframework.org/schema/mvc/spring-mvc-4.1.xsd">

       <!-- 启动注解驱动的spring MVC功能,注册请求url和注解POJO类方法的映射-->
       <mvc:annotation-driven />
<context:component-scan base-package="com.ssh" />
    <!-- 对模型视图名称的解析,在请求时模型视图名称添加前后缀 -->
    <bean id="viewResolver" class="org.springframework.web.servlet.view.InternalResourceViewResolver">
        <property name="viewClass" value="org.springframework.web.servlet.view.JstlView" />
        <property name="prefix" value="views/" />      <!-- 前缀 -->
        <property name="suffix" value=".jsp" />   <!-- 后缀 -->
    </bean>

    <!--这里是对静态资源的映射-->
    <mvc:resources mapping="/js/**" location="/resources/js/" />
    <mvc:resources mapping="/css/**" location="/resources/css/" />
    <mvc:resources mapping="/img/**" location="/resources/img/" />

</beans>
好了,我们现在修改下web.xml这个配置文件,完善下SpringMVC的配置, web.xml配置如下:
<?xml version="1.0" encoding="UTF-8"?>
<web-app xmlns:xsi="http://www.w3.org/2001/XMLSchema-instance"
         xmlns="http://java.sun.com/xml/ns/javaee"
         xsi:schemaLocation="http://java.sun.com/xml/ns/javaee http://java.sun.com/xml/ns/javaee/web-app_3_0.xsd"
         version="3.0">
        <!-- 地址为http://localhost:8080/  显示的默认网页-->
        <welcome-file-list>
          <welcome-file>/index.jsp</welcome-file>
        </welcome-file-list>

        <!-- spring MVC config start-->
        <servlet>
            <servlet-name>spring</servlet-name>
            <servlet-class>org.springframework.web.servlet.DispatcherServlet</servlet-class>
            <init-param>
              <param-name>contextConfigLocation</param-name>
              <!-- 此处指向的的是SpringMVC的配置文件 -->
              <param-value>classpath:META-INF/spring-mvc.xml</param-value>
            </init-param>
            <!--配置容器在启动的时候就加载这个servlet并实例化-->
            <load-on-startup>1</load-on-startup>
        </servlet>

        <servlet-mapping>
            <servlet-name>spring</servlet-name>
            <url-pattern>/</url-pattern>
        </servlet-mapping>
        <!-- spring MVC config end-->

</web-app>
OK,SpringMVC配置完成,现在我们进行一下测试吧
在controller层新建一个MainController,内容如下
package com.ssh.controller;

import org.springframework.stereotype.Controller;
import org.springframework.web.bind.annotation.RequestMapping;
import org.springframework.web.bind.annotation.RequestMethod;


/**
 * Created by XRog
 * On 2/1/2017.12:36 AM
 */
@Controller
public class MainController {

    @RequestMapping(value = "test", method = RequestMethod.GET)
    public String test(){
//        实际返回的是views/test.jsp ,spring-mvc.xml中配置过前后缀
        return "test";
    }
}
test.jsp网页如下:
<html>
<body>
<center>
<h2 style="color: #ff261a;">this is my test page!</h2>
</center>
</body>
</html>
重启Tomcat服务器, 然后浏览器访问http://localhost/test如下图所示:

PS: Tomcat默认端口是8080,我更改了端口号,如若你们为更改,正确的访问地址是localhost:8080/test
OK,成功访问。
SpringMVC+Spring整合
这个就十分简单了, 配置applicationContext.xml这个Spring的配置文件如下:
<beans xmlns="http://www.springframework.org/schema/beans"
       xmlns:xsi="http://www.w3.org/2001/XMLSchema-instance"
       xmlns:context="http://www.springframework.org/schema/context"
       xmlns:mvc="http://www.springframework.org/schema/mvc"
       xsi:schemaLocation="http://www.springframework.org/schema/beans
        http://www.springframework.org/schema/beans/spring-beans-4.1.xsd
        http://www.springframework.org/schema/context
        http://www.springframework.org/schema/context/spring-context-4.1.xsd
        http://www.springframework.org/schema/mvc
        http://www.springframework.org/schema/mvc/spring-mvc-4.1.xsd">

        <!-- 自动扫描 -->
        <context:component-scan base-package="com.ssh">
            <!-- 扫描时跳过 @Controller 注解的JAVA类(控制器) -->
            <context:exclude-filter type="annotation" expression="org.springframework.stereotype.Controller"/>
        </context:component-scan>

</beans>
完善web.xml配置文件如下:
<?xml version="1.0" encoding="UTF-8"?>
<web-app xmlns:xsi="http://www.w3.org/2001/XMLSchema-instance"
         xmlns="http://java.sun.com/xml/ns/javaee"
         xsi:schemaLocation="http://java.sun.com/xml/ns/javaee http://java.sun.com/xml/ns/javaee/web-app_3_0.xsd"
         version="3.0">
        <!-- 地址为http://localhost:8080/  显示的默认网页-->
        <welcome-file-list>
          <welcome-file>/index.jsp</welcome-file>
        </welcome-file-list>

    <!--加载Spring的配置文件到上下文中去-->
        <context-param>
            <param-name>contextConfigLocation</param-name>
            <param-value>
                classpath:META-INF/applicationContext.xml
            </param-value>
        </context-param>

        <!-- spring MVC config start-->
        <servlet>
            <servlet-name>spring</servlet-name>
            <servlet-class>org.springframework.web.servlet.DispatcherServlet</servlet-class>
            <init-param>
              <param-name>contextConfigLocation</param-name>
              <!-- 此处指向的的是SpringMVC的配置文件 -->
              <param-value>classpath:META-INF/spring-mvc.xml</param-value>
            </init-param>
            <!--配置容器在启动的时候就加载这个servlet并实例化-->
            <load-on-startup>1</load-on-startup>
        </servlet>

        <servlet-mapping>
            <servlet-name>spring</servlet-name>
            <url-pattern>/</url-pattern>
        </servlet-mapping>
        <!-- spring MVC config end-->


        <!-- Spring监听器 -->
        <listener>
            <listener-class>org.springframework.web.context.ContextLoaderListener</listener-class>
        </listener>

        <!--  字符集过滤  -->
        <filter>
            <filter-name>encodingFilter</filter-name>
            <filter-class>org.springframework.web.filter.CharacterEncodingFilter</filter-class>
            <init-param>
                <param-name>encoding</param-name>
                <param-value>UTF-8</param-value>
            </init-param>
            <init-param>
                <param-name>forceEncoding</param-name>
                <param-value>true</param-value>
            </init-param>
        </filter>
        <filter-mapping>
            <filter-name>encodingFilter</filter-name>
            <url-pattern>/*</url-pattern>
        </filter-mapping>

</web-app>
web.xml配置文件中更改了三处:引入Spring配置文件 Spring的监听器 以及 字符集过滤
OK,Spring+SpringMVC配置完成,下面我们开始测试:
在service写一个TestServiceImpl实现TestService接口并实现其test()方法, 代码如下:
package com.ssh.service.impl;

import com.ssh.service.TestService;
import org.springframework.stereotype.Service;

/**
 * Created by XRog
 * On 2/1/2017.12:58 AM
 */
@Service
public class TestServiceImpl implements TestService {
    public String test() {
        return "test";
    }
}
PS:这里注意写@Service注解
MainController控制器更改如下:
package com.ssh.controller;

import com.ssh.service.TestService;
import org.springframework.beans.factory.annotation.Autowired;
import org.springframework.stereotype.Controller;
import org.springframework.web.bind.annotation.RequestMapping;
import org.springframework.web.bind.annotation.RequestMethod;
import org.springframework.web.bind.annotation.ResponseBody;


/**
 * Created by XRog
 * On 2/1/2017.12:36 AM
 */
@Controller
public class MainController {

    @Autowired
    private TestService testService;

    @RequestMapping(value = "test", method = RequestMethod.GET)
    public String test(){
//        实际返回的是views/test.jsp ,spring-mvc.xml中配置过前后缀
        return "test";
    }

    @RequestMapping(value = "springtest", method = RequestMethod.GET)
    public String springTest(){
        return testService.test();
    }
}
控制器这里我们运用了Spring的依赖注入自动装配。
在浏览器中输入地址http://localhost/springtest调用springtest方法

yes,成功返回,说明我们之前的配置没问题
Spring+SpringMVC+hibernate整合
好了,现在就缺hibernate这个框架了。。 我先给大家看些我搭建好之后的结构图吧

我们想来编写config.properties这个配置文件,里面存放的是hibernate的一些配置
#database connection config
jdbc.driver = com.mysql.jdbc.Driver
jdbc.url = jdbc:mysql://?????:3306/ssh?useUnicode=true&characterEncoding=utf-8
jdbc.username = root
jdbc.password = ???

#hibernate config
hibernate.dialect = org.hibernate.dialect.MySQLDialect
hibernate.show_sql = true
hibernate.format_sql = true
hibernate.hbm2ddl.auto = update
这里连接数据库的参数由于我是连接我晚上的数据库,因此我数据库地址和密码打了“???”,你们连接时改成自己本地的就OK了
下面配置hibernate,这里我为了方便,就直接写进applicationContext.xml里面。配置后的applicationContext.xml如下:
<beans xmlns="http://www.springframework.org/schema/beans"
       xmlns:xsi="http://www.w3.org/2001/XMLSchema-instance"
       xmlns:context="http://www.springframework.org/schema/context"
       xmlns:mvc="http://www.springframework.org/schema/mvc"
       xsi:schemaLocation="http://www.springframework.org/schema/beans
        http://www.springframework.org/schema/beans/spring-beans-4.1.xsd
        http://www.springframework.org/schema/context
        http://www.springframework.org/schema/context/spring-context-4.1.xsd
        http://www.springframework.org/schema/mvc
        http://www.springframework.org/schema/mvc/spring-mvc-4.1.xsd">

    <!--********************************************配置Spring***************************************-->
        <!-- 自动扫描 -->
        <context:component-scan base-package="com.ssh">
            <!-- 扫描时跳过 @Controller 注解的JAVA类(控制器) -->
            <context:exclude-filter type="annotation" expression="org.springframework.stereotype.Controller"/>
        </context:component-scan>


    <!--********************************************配置hibernate********************************************-->

    <!--扫描配置文件(这里指向的是之前配置的那个config.properties)-->
    <context:property-placeholder location="classpath:/config.properties" />

    <!--配置数据源-->
    <bean id="dataSource" class="com.mchange.v2.c3p0.ComboPooledDataSource" destroy-method="close">
        <property name="driverClass" value="${jdbc.driver}" />  <!--数据库连接驱动-->
        <property name="jdbcUrl" value="${jdbc.url}" />     <!--数据库地址-->
        <property name="user" value="${jdbc.username}" />   <!--用户名-->
        <property name="password" value="${jdbc.password}" />   <!--密码-->
        <property name="maxPoolSize" value="40" />      <!--最大连接数-->
        <property name="minPoolSize" value="1" />       <!--最小连接数-->
        <property name="initialPoolSize" value="10" />      <!--初始化连接池内的数据库连接-->
        <property name="maxIdleTime" value="20" />  <!--最大空闲时间-->
    </bean>

    <!--配置session工厂-->
    <bean id="sessionFactory" class="org.springframework.orm.hibernate4.LocalSessionFactoryBean">
        <property name="dataSource" ref="dataSource" />
        <property name="packagesToScan" value="com.ssh.entity" />
        <property name="hibernateProperties">
            <props>
                <prop key="hibernate.hbm2ddl.auto">${hibernate.hbm2ddl.auto}</prop> <!--hibernate根据实体自动生成数据库表-->
                <prop key="hibernate.dialect">${hibernate.dialect}</prop>   <!--指定数据库方言-->
                <prop key="hibernate.show_sql">${hibernate.show_sql}</prop>     <!--在控制台显示执行的数据库操作语句-->
                <prop key="hibernate.format_sql">${hibernate.format_sql}</prop>     <!--在控制台显示执行的数据哭操作语句(格式)-->
            </props>
        </property>
    </bean>

    <!-- 事物管理器配置  -->
    <bean id="transactionManager" class="org.springframework.orm.hibernate4.HibernateTransactionManager">
        <property name="sessionFactory" ref="sessionFactory" />
    </bean>

</beans>
OK,到了这里,配置结束。下面进入测试阶段
实体类(entity):
package com.ssh.entity;

import lombok.Data;

import javax.persistence.*;

/**
 * Created by XRog
 * On 2/2/2017.2:03 PM
 */
@Data
@Entity
@Table(name = "Person")
public class Person {

    @Id
    @GeneratedValue
    private Long id;

    @Column(name = "created")
    private Long created = System.currentTimeMillis();

    @Column(name = "username")
    private String username;

    @Column(name = "address")
    private String address;

    @Column(name = "phone")
    private String phone;

    @Column(name = "remark")
    private String remark;
}
PS:我这里用了一个@Data注解,此注解会自动生成get方法,set方法,toString方法等一系列方法,功能十分强大,不过需要安装插件以及导包, 有兴趣的可以百度下
当然,你也可以手动编写get/set/构造方法。
数据库访问层(repository):
package com.ssh.repository;

import java.io.Serializable;
import java.util.List;

/**
 * Created by XRog
 * On 2/2/2017.2:28 PM
 */
public interface DomainRepository<T,PK extends Serializable>{
    T load(PK id);

    T get(PK id);

    List<T> findAll();

    void persist(T entity);

    PK save(T entity);

    void saveOrUpdate(T entity);

    void delete(PK id);

    void flush();
}
package com.ssh.repository;

import com.ssh.entity.Person;

/**
 * Created by XRog
 * On 2/2/2017.2:25 PM
 */
public interface PersonRepository extends DomainRepository<Person,Long> {
}
package com.ssh.repository.impl;

import com.ssh.repository.PersonRepository;
import com.ssh.entity.Person;
import org.hibernate.Session;
import org.hibernate.SessionFactory;
import org.springframework.beans.factory.annotation.Autowired;
import org.springframework.stereotype.Repository;

import java.util.List;

/**
 * Created by XRog
 * On 2/2/2017.2:30 PM
 */
@Repository
public class PersonRepositoryImpl implements PersonRepository {

    @Autowired
    private SessionFactory sessionFactory;

    private Session getCurrentSession() {
        return this.sessionFactory.openSession();
    }

    public Person load(Long id) {
        return (Person)getCurrentSession().load(Person.class,id);
    }

    public Person get(Long id) {
        return (Person)getCurrentSession().get(Person.class,id);
    }

    public List<Person> findAll() {
        return null;
    }

    public void persist(Person entity) {
        getCurrentSession().persist(entity);
    }

    public Long save(Person entity) {
        return (Long)getCurrentSession().save(entity);
    }

    public void saveOrUpdate(Person entity) {
        getCurrentSession().saveOrUpdate(entity);
    }

    public void delete(Long id) {
        Person person = load(id);
        getCurrentSession().delete(person);
    }

    public void flush() {
        getCurrentSession().flush();
    }
}
PS:我这里显示写了一个比较通用的接口,其他所有接口皆继承此接口, 再编写实现类
注意:我这里写的session产生是调用的SessionFactory的openSession()这个方法。之前使用getCurrentSession()一直报错,后来百度了一下才知道,hibernate3版本可以使用getCurrentSession()来创建session,而hibernate4版本则不行。
服务层(service):
package com.ssh.service;

import com.ssh.entity.Person;

/**
 * Created by XRog
 * On 2/2/2017.2:39 PM
 */
public interface PersonService {
    Long savePerson();
}
package com.ssh.service.impl;

import com.ssh.entity.Person;
import com.ssh.repository.PersonRepository;
import com.ssh.service.PersonService;
import org.springframework.beans.factory.annotation.Autowired;
import org.springframework.stereotype.Service;

/**
 * Created by XRog
 * On 2/2/2017.2:40 PM
 */
@Service
public class PersonServiceImpl implements PersonService {

    @Autowired
    private PersonRepository personRepository;

    public Long savePerson() {
        Person person = new Person();
        person.setUsername("XRog");
        person.setPhone("18381005946");
        person.setAddress("chenDu");
        person.setRemark("this is XRog");
        return personRepository.save(person);
    }
}
控制层(controller):
package com.ssh.controller;

import com.ssh.entity.Person;
import com.ssh.service.PersonService;
import com.ssh.service.TestService;
import org.springframework.beans.factory.annotation.Autowired;
import org.springframework.stereotype.Controller;
import org.springframework.web.bind.annotation.RequestMapping;
import org.springframework.web.bind.annotation.RequestMethod;
import org.springframework.web.bind.annotation.ResponseBody;


/**
 * Created by XRog
 * On 2/1/2017.12:36 AM
 */
@Controller
public class MainController {

    @Autowired
    private PersonService personService;

    @RequestMapping(value = "savePerson", method = RequestMethod.GET)
    @ResponseBody
    public String savePerson(){
        personService.savePerson();
        return "success!";
    }
}
OK,编写完毕,我们重启下服务器然后测试:

我们在看下数据库,跟我们插入的数据对比下


有段时间没有更新博客了,跟最近比较忙有关系。无聊搭建个Java web框架,反正好久没有自己搭建框架了,算是练练手了,今天我就来搭建一个框架,技术选型为Spring mvc+Spring+hibernate。若想搭建Spring mvc+Spring+Mybatis请看我上篇日志,好了废话不多说,见代码。
1、开发环境:jdk1.7,tomcat6,eclipse版本过高需要设置jdk
2、项目结构
2、Spring mvc+Spring+Hibernate框架搭建流程跟Spring mvc+Spring+Mybatis搭建类似
首先在web.xml中配置Spring监听器及加载文件,其次配置spring mvc的配置,并在web.xml中配置spring mvc的servlet,最后在配置Spring与Hibernate整合部分即sessionFactory、数据库连接池等
3、先看web.xml配置
- <?xml version="1.0" encoding="UTF-8"?>
- <web-app version="2.5" xmlns="http://java.sun.com/xml/ns/javaee"
- xmlns:xsi="http://www.w3.org/2001/XMLSchema-instance"
- xsi:schemaLocation="http://java.sun.com/xml/ns/javaee
- http://java.sun.com/xml/ns/javaee/web-app_2_5.xsd">
- <welcome-file-list>
- <welcome-file>index.jsp</welcome-file>
- </welcome-file-list>
-
-
- <context-param>
- <param-name>contextConfigLocation</param-name>
- <param-value>
- classpath:config/application-config.xml
- </param-value>
- </context-param>
-
-
- <listener>
- <listener-class>org.springframework.web.context.ContextLoaderListener</listener-class>
- </listener>
-
- <filter>
- <filter-name>CharacterEncodingFilter</filter-name>
- <filter-class>org.springframework.web.filter.CharacterEncodingFilter</filter-class>
- <init-param>
- <param-name>encoding</param-name>
- <param-value>UTF-8</param-value>
- </init-param>
- <init-param>
- <param-name>forceEncoding</param-name>
- <param-value>true</param-value>
- </init-param>
- </filter>
- <filter-mapping>
- <filter-name>CharacterEncodingFilter</filter-name>
- <url-pattern>/*</url-pattern>
- </filter-mapping>
-
-
-
- <servlet>
- <servlet-name>dispatcherServlet</servlet-name>
- <servlet-class>org.springframework.web.servlet.DispatcherServlet</servlet-class>
- <init-param>
- <param-name>contextConfigLocation</param-name>
- <param-value>classpath:config/mvc-config.xml</param-value>
- </init-param>
- <load-on-startup>1</load-on-startup>
- </servlet>
-
- <servlet-mapping>
- <servlet-name>dispatcherServlet</servlet-name>
- <url-pattern>/</url-pattern>
- </servlet-mapping>
-
- <error-page>
- <error-code>403</error-code>
- <location>/WEB-INF/view/error/403.jsp</location>
- </error-page>
- <error-page>
- <error-code>404</error-code>
- <location>/WEB-INF/view/error/404.jsp</location>
- </error-page>
- <error-page>
- <error-code>500</error-code>
- <location>/WEB-INF/view/error/500.jsp</location>
- </error-page>
- </web-app>
4、
我们在来看看spring mvc的配置文件mvc-config.xml
- <?xml version="1.0" encoding="UTF-8"?>
-
- <beans xmlns="http://www.springframework.org/schema/beans"
- xmlns:xsi="http://www.w3.org/2001/XMLSchema-instance" xmlns:mvc="http://www.springframework.org/schema/mvc"
- xmlns:context="http://www.springframework.org/schema/context"
- xmlns:p="http://www.springframework.org/schema/p"
- xsi:schemaLocation="http://www.springframework.org/schema/mvc
- http://www.springframework.org/schema/mvc/spring-mvc-3.2.xsd
- http://www.springframework.org/schema/beans
- http://www.springframework.org/schema/beans/spring-beans.xsd
- http://www.springframework.org/schema/context
- http://www.springframework.org/schema/context/spring-context.xsd" default-autowire="byType">
-
-
- <mvc:annotation-driven />
-
- <context:component-scan base-package="com.demo"></context:component-scan>
-
- <bean
- class="org.springframework.web.servlet.view.InternalResourceViewResolver">
- <property name="prefix" value="/WEB-INF/view/" />
- <property name="suffix" value=".jsp" />
- </bean>
-
- <bean id="propertyConfigurer" class="org.springframework.beans.factory.config.PreferencesPlaceholderConfigurer">
- <property name="location">
- <value>classpath:config/application.properties</value>
- </property>
- </bean>
-
- <mvc:resources mapping="/resources/**" location="/WEB-INF/resources/"></mvc:resources>
- </beans>
5、
常用配置信息如数据库连接池等信息,一般习惯配置在新的文件中application.properties
- #hibernate
- hibernate.max_fetch_depth=3
- hibernate.jdbc.fetch_size=50
- hibernate.jdbc.batch_size=10
- hibernate.show_sql=true
- hibernate.cache.use_second_level_cache=true
- hibernate.cache.use_query_cache=true
- hibernate.cache.region.factory_class=org.hibernate.cache.ehcache.EhCacheRegionFactory
-
- jdbc.driverClassName=com.mysql.jdbc.Driver
- jdbc.url=jdbc:mysql://localhost:3306/demo?useUnicode=true&characterEncoding=UTF-8
- jdbc.username=root
- jdbc.password=root
- jdbc.maxActive=50
-
- c3p0.acquireIncrement=10
- c3p0.minPoolSize=3
- c3p0.maxPoolSize=200
- c3p0.maxIdleTime=6000
6、
spring基本配置,及spring 事物数据库连接池等配置
基本配置application-config.xml
- <?xml version="1.0" encoding="UTF-8"?>
- <beans xmlns="http://www.springframework.org/schema/beans"
- xmlns:xsi="http://www.w3.org/2001/XMLSchema-instance"
- xmlns:context="http://www.springframework.org/schema/context"
- xmlns:task="http://www.springframework.org/schema/task"
- xmlns:cache="http://www.springframework.org/schema/cache"
- xmlns:p="http://www.springframework.org/schema/p"
- xsi:schemaLocation="http://www.springframework.org/schema/beans
- http://www.springframework.org/schema/beans/spring-beans.xsd
- http://www.springframework.org/schema/context
- http://www.springframework.org/schema/context/spring-context.xsd
- http://www.springframework.org/schema/task
- http://www.springframework.org/schema/task/spring-task.xsd
- http://www.springframework.org/schema/cache
- http://www.springframework.org/schema/cache/spring-cache.xsd">
-
-
-
- <context:component-scan base-package="com.demo"/>
-
- <context:annotation-config></context:annotation-config>
-
- <import resource="data-source-tx.xml"></import>
-
- <!-- hibernate ehcache
- <cache:annotation-driven cache-manager="cacheManager"></cache:annotation-driven>
-
- <bean id="cacheManager" class="org.springframework.cache.ehcache.EhCacheCacheManager">
- <property name="cacheManager" ref="ehcache"></property>
- </bean>
- <bean id="ehcache" class="org.springframework.cache.ehcache.EhCacheManagerFactoryBean"
- p:configLocation="classpath:config/ehcache.xml" p:shared="true"/>-->
-
- </beans>
hibernate的sessionFactory及数据库连接池配置datasource-tx.xml
- <?xml version="1.0" encoding="UTF-8"?>
- <beans xmlns="http://www.springframework.org/schema/beans"
- xmlns:xsi="http://www.w3.org/2001/XMLSchema-instance"
- xmlns:context="http://www.springframework.org/schema/context"
- xmlns:jdbc="http://www.springframework.org/schema/jdbc"
- xmlns:tx="http://www.springframework.org/schema/tx"
- xmlns:aop="http://www.springframework.org/schema/aop"
- xmlns:p="http://www.springframework.org/schema/p"
- xsi:schemaLocation="http://www.springframework.org/schema/jdbc
- http://www.springframework.org/schema/jdbc/spring-jdbc.xsd
- http://www.springframework.org/schema/beans
- http://www.springframework.org/schema/beans/spring-beans.xsd
- http://www.springframework.org/schema/tx
- http://www.springframework.org/schema/tx/spring-tx.xsd
- http://www.springframework.org/schema/aop
- http://www.springframework.org/schema/aop/spring-aop-4.0.xsd
- http://www.springframework.org/schema/context
- http://www.springframework.org/schema/context/spring-context.xsd">
-
- <context:property-placeholder location="classpath:config/application.properties"/>
-
-
- <bean id="sessionFactory"
- class="org.springframework.orm.hibernate4.LocalSessionFactoryBean">
- <property name="dataSource" ref="dataSource" />
- <property name="packagesToScan" value="com.demo.model" />
- <property name="hibernateProperties">
- <props>
- <prop key="hibernate.show_sql">${hibernate.show_sql}</prop>
- <prop key="hibernate.current_session_context_class">thread</prop>
- </props>
- </property>
- </bean>
-
-
- <bean id="dataSource" class="com.mchange.v2.c3p0.ComboPooledDataSource"
- destroy-method="close">
- <property name="driverClass" value="${jdbc.driverClassName}" />
- <property name="jdbcUrl" value="${jdbc.url}" />
- <property name="user" value="${jdbc.username}" />
- <property name="password" value="${jdbc.password}" />
-
-
- <property name="acquireIncrement" value="${c3p0.acquireIncrement}" />
- <property name="minPoolSize" value="${c3p0.minPoolSize}" />
- <property name="maxPoolSize" value="${c3p0.maxPoolSize}" />
- <property name="maxIdleTime" value="${c3p0.maxIdleTime}" />
- </bean>
-
-
- <bean id="transactionManager"
- class="org.springframework.orm.hibernate4.HibernateTransactionManager">
- <property name="sessionFactory" ref="sessionFactory" />
- </bean>
-
- <tx:annotation-driven transaction-manager="transactionManager"/>
-
-
- </beans>
以上内容为配置内容,配置讲完了,下面以用户登录为测试案例
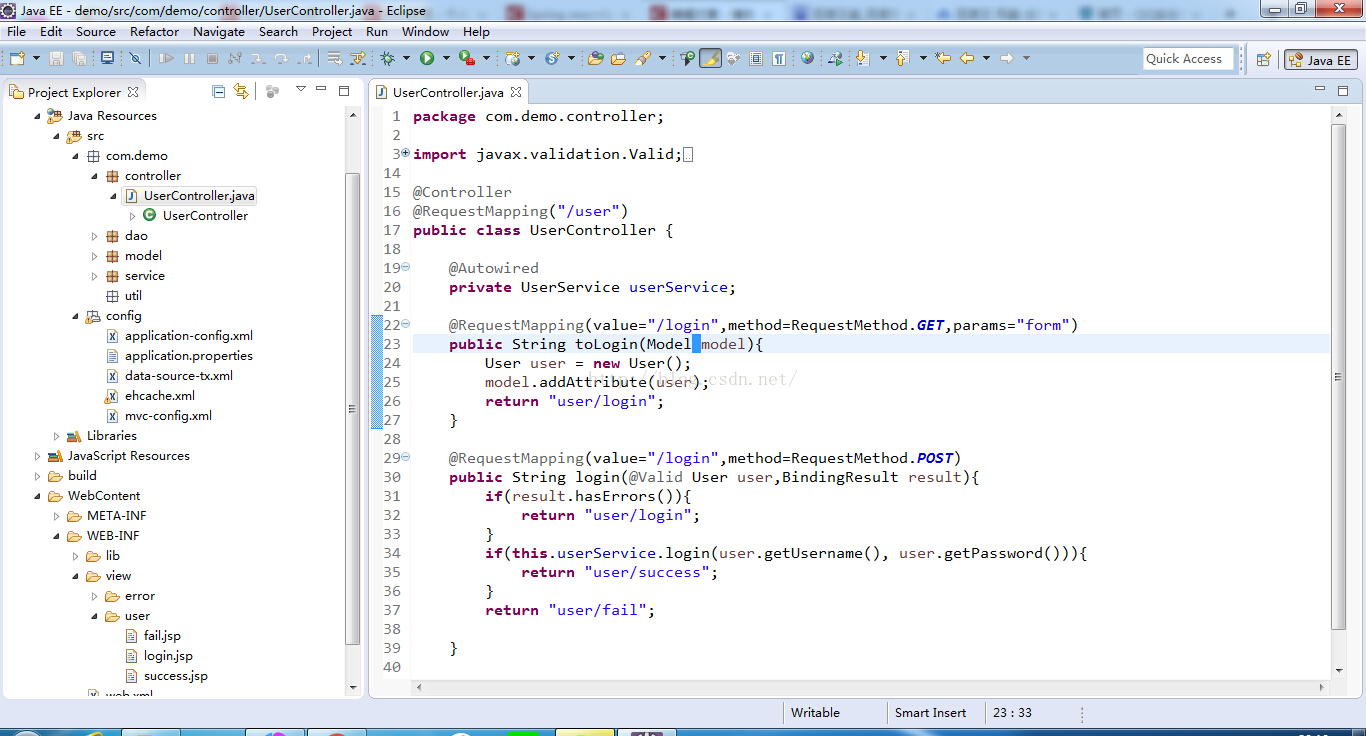
1、控制层controller
- package com.demo.controller;
-
- import javax.validation.Valid;
-
- import org.springframework.beans.factory.annotation.Autowired;
- import org.springframework.stereotype.Controller;
- import org.springframework.ui.Model;
- import org.springframework.validation.BindingResult;
- import org.springframework.web.bind.annotation.RequestMapping;
- import org.springframework.web.bind.annotation.RequestMethod;
-
- import com.demo.model.User;
- import com.demo.service.UserService;
-
- @Controller
- @RequestMapping("/user")
- public class UserController {
-
- @Autowired
- private UserService userService;
-
- @RequestMapping(value="/login",method=RequestMethod.GET,params="form")
- public String toLogin(Model model){
- User user = new User();
- model.addAttribute(user);
- return "user/login";
- }
-
- @RequestMapping(value="/login",method=RequestMethod.POST)
- public String login(@Valid User user,BindingResult result){
- if(result.hasErrors()){
- return "user/login";
- }
- if(this.userService.login(user.getUsername(), user.getPassword())){
- return "user/success";
- }
- return "user/fail";
-
- }
-
- }
2、实体层model
- package com.demo.model;
-
- import java.io.Serializable;
-
- import javax.persistence.Entity;
- import javax.persistence.GeneratedValue;
- import javax.persistence.Id;
- import javax.persistence.Table;
-
- @Entity
- @Table(name="user")
- public class User implements Serializable {
-
-
-
-
- private static final long serialVersionUID = 1482055695347272535L;
-
- @Id
- @GeneratedValue
- private long id;
-
- private String username;
-
- private String password;
-
- public long getId() {
- return id;
- }
-
- public void setId(long id) {
- this.id = id;
- }
-
- public String getUsername() {
- return username;
- }
-
- public void setUsername(String username) {
- this.username = username;
- }
-
- public String getPassword() {
- return password;
- }
-
- public void setPassword(String password) {
- this.password = password;
- }
-
-
-
- }
3、服务层service
服务层接口
- package com.demo.service;
-
- public interface UserService {
-
- public boolean login(String username,String password);
-
- }
服务层实现类
- package com.demo.service.impl;
-
- import javax.transaction.Transactional;
-
- import org.springframework.beans.factory.annotation.Autowired;
- import org.springframework.stereotype.Service;
-
- import com.demo.dao.UserDao;
- import com.demo.model.User;
- import com.demo.service.UserService;
-
- @Service
- @Transactional
- public class UserServiceImpl implements UserService {
-
- @Autowired
- private UserDao userDao;
-
- @Override
- @Transactional
- public boolean login(String username, String password) {
- boolean flag = false;
- User user = this.userDao.findByUsernameAndPassword(username, password);
- if(user != null){
- if(username.equals(user.getUsername()) && password.equals(user.getPassword())){
- flag = true;
- }
- }
- return flag;
- }
-
- }
4、持久层dao
- package com.demo.dao;
-
- import org.hibernate.Query;
- import org.hibernate.Session;
- import org.hibernate.SessionFactory;
- import org.springframework.beans.factory.annotation.Autowired;
- import org.springframework.stereotype.Repository;
-
- import com.demo.model.User;
- @Repository
- public class UserDao{
-
- @Autowired
- private SessionFactory sessionFactory;
-
- public Session getSession(){
- return this.sessionFactory.openSession();
- }
-
- public void close(Session session){
- if(session != null)
- session.close();
- }
-
- public User findByUsernameAndPassword(String username,String password){
- String hsql="from User u where u.username= :username and u.password= :password";
- Session session = getSession();
- Query query = session.createQuery(hsql);
- query.setParameter("username", username).setParameter("password", password);
- User user = (User) query.uniqueResult();
- close(session);
- return user;
- }
-
- }
5、sql脚本
- /*
- Navicat MySQL Data Transfer
-
- Source Server : localhost
- Source Server Version : 50622
- Source Host : localhost:3306
- Source Database : demo
-
- Target Server Type : MYSQL
- Target Server Version : 50622
- File Encoding : 65001
-
- Date: 2016-07-19 20:36:51
- */
-
- SET FOREIGN_KEY_CHECKS=0;
-
-
-
-
- DROP TABLE IF EXISTS `kpi`;
- CREATE TABLE `kpi` (
- `id` int(11) NOT NULL AUTO_INCREMENT,
- `day` varchar(20) DEFAULT NULL,
- `state` varchar(20) DEFAULT NULL,
- `num` int(111) DEFAULT NULL,
- PRIMARY KEY (`id`)
- ) ENGINE=InnoDB AUTO_INCREMENT=21 DEFAULT CHARSET=utf8;
-
-
-
-
- INSERT INTO `kpi` VALUES ('1', '6月28日', 'success', '11');
- INSERT INTO `kpi` VALUES ('2', '6月28日', 'fail', '22');
- INSERT INTO `kpi` VALUES ('3', '6月29日', 'success', '33');
- INSERT INTO `kpi` VALUES ('4', '6月29日', 'fail', '27');
- INSERT INTO `kpi` VALUES ('5', '6月30日', 'success', '232');
- INSERT INTO `kpi` VALUES ('6', '6月30日', 'fail', '123');
- INSERT INTO `kpi` VALUES ('7', '7月1日', 'success', '235');
- INSERT INTO `kpi` VALUES ('8', '7月1日', 'fail', '80');
- INSERT INTO `kpi` VALUES ('9', '7月2日', 'success', '90');
- INSERT INTO `kpi` VALUES ('10', '7月2日', 'fail', '324');
- INSERT INTO `kpi` VALUES ('11', '7月3日', 'success', '325');
- INSERT INTO `kpi` VALUES ('12', '7月3日', 'fail', '134');
- INSERT INTO `kpi` VALUES ('13', '7月4日', 'success', '345');
- INSERT INTO `kpi` VALUES ('14', '7月4日', 'fail', '245');
- INSERT INTO `kpi` VALUES ('15', '7月5日', 'success', '124');
- INSERT INTO `kpi` VALUES ('16', '7月5日', 'fail', '256');
- INSERT INTO `kpi` VALUES ('17', '7月6日', 'success', '193');
- INSERT INTO `kpi` VALUES ('18', '7月6日', 'fail', '274');
- INSERT INTO `kpi` VALUES ('19', '7月7日', 'success', '232');
- INSERT INTO `kpi` VALUES ('20', '7月7日', 'fail', '234');
-
-
-
-
- DROP TABLE IF EXISTS `kpi_detail`;
- CREATE TABLE `kpi_detail` (
- `id` int(11) NOT NULL AUTO_INCREMENT,
- `startTime` timestamp NULL DEFAULT CURRENT_TIMESTAMP ON UPDATE CURRENT_TIMESTAMP,
- `endTime` timestamp NULL DEFAULT CURRENT_TIMESTAMP ON UPDATE CURRENT_TIMESTAMP,
- `state` varchar(20) DEFAULT NULL,
- PRIMARY KEY (`id`)
- ) ENGINE=InnoDB AUTO_INCREMENT=41 DEFAULT CHARSET=utf8;
-
-
-
-
- INSERT INTO `kpi_detail` VALUES ('1', '2016-07-17 16:02:19', '2016-07-17 16:02:19', 'success');
- INSERT INTO `kpi_detail` VALUES ('2', '2016-07-17 16:03:27', '2016-07-17 16:03:27', 'success');
- INSERT INTO `kpi_detail` VALUES ('3', '2016-07-17 16:03:27', '2016-07-17 16:03:27', 'success');
- INSERT INTO `kpi_detail` VALUES ('4', '2016-07-17 16:03:27', '2016-07-17 16:03:27', 'success');
- INSERT INTO `kpi_detail` VALUES ('6', '2016-07-17 16:03:28', '2016-07-17 16:03:28', 'success');
- INSERT INTO `kpi_detail` VALUES ('7', '2016-07-17 16:03:28', '2016-07-17 16:03:28', 'success');
- INSERT INTO `kpi_detail` VALUES ('8', '2016-07-17 16:03:28', '2016-07-17 16:03:28', 'success');
- INSERT INTO `kpi_detail` VALUES ('9', '2016-07-17 16:03:28', '2016-07-17 16:03:28', 'success');
- INSERT INTO `kpi_detail` VALUES ('13', '2016-07-17 16:03:28', '2016-07-17 16:03:28', 'success');
- INSERT INTO `kpi_detail` VALUES ('14', '2016-07-17 16:03:28', '2016-07-17 16:03:28', 'success');
- INSERT INTO `kpi_detail` VALUES ('15', '2016-07-17 16:03:28', '2016-07-17 16:03:28', 'success');
- INSERT INTO `kpi_detail` VALUES ('16', '2016-07-17 16:03:28', '2016-07-17 16:03:28', 'success');
- INSERT INTO `kpi_detail` VALUES ('17', '2016-07-17 16:03:28', '2016-07-17 16:03:28', 'success');
- INSERT INTO `kpi_detail` VALUES ('18', '2016-07-17 16:03:28', '2016-07-17 16:03:28', 'success');
- INSERT INTO `kpi_detail` VALUES ('19', '2016-07-17 16:03:28', '2016-07-17 16:03:28', 'success');
- INSERT INTO `kpi_detail` VALUES ('20', '2016-07-17 16:03:28', '2016-07-17 16:03:28', 'success');
- INSERT INTO `kpi_detail` VALUES ('28', '2016-07-17 16:03:28', '2016-07-17 16:03:28', 'success');
- INSERT INTO `kpi_detail` VALUES ('29', '2016-07-17 16:03:28', '2016-07-17 16:03:28', 'success');
- INSERT INTO `kpi_detail` VALUES ('30', '2016-07-17 16:03:28', '2016-07-17 16:03:28', 'success');
- INSERT INTO `kpi_detail` VALUES ('31', '2016-07-17 16:03:28', '2016-07-17 16:03:28', 'success');
- INSERT INTO `kpi_detail` VALUES ('32', '2016-07-17 16:03:28', '2016-07-17 16:03:28', 'success');
- INSERT INTO `kpi_detail` VALUES ('33', '2016-07-17 16:03:28', '2016-07-17 16:03:28', 'success');
- INSERT INTO `kpi_detail` VALUES ('34', '2016-07-17 16:03:28', '2016-07-17 16:03:28', 'success');
- INSERT INTO `kpi_detail` VALUES ('35', '2016-07-17 16:03:28', '2016-07-17 16:03:28', 'success');
- INSERT INTO `kpi_detail` VALUES ('36', '2016-07-17 16:03:28', '2016-07-17 16:03:28', 'success');
- INSERT INTO `kpi_detail` VALUES ('37', '2016-07-17 16:03:28', '2016-07-17 16:03:28', 'success');
- INSERT INTO `kpi_detail` VALUES ('38', '2016-07-17 16:03:28', '2016-07-17 16:03:28', 'success');
- INSERT INTO `kpi_detail` VALUES ('39', '2016-07-17 16:03:28', '2016-07-17 16:03:28', 'success');
- INSERT INTO `kpi_detail` VALUES ('40', '2016-07-17 16:03:28', '2016-07-17 16:03:28', 'success');
-
-
-
-
- DROP TABLE IF EXISTS `user`;
- CREATE TABLE `user` (
- `id` int(11) NOT NULL AUTO_INCREMENT,
- `username` varchar(255) DEFAULT NULL,
- `password` varchar(255) DEFAULT NULL,
- PRIMARY KEY (`id`)
- ) ENGINE=InnoDB AUTO_INCREMENT=2 DEFAULT CHARSET=utf8;
-
-
-
-
- INSERT INTO `user` VALUES ('1', 'samtest', '123456');
至此,整个项目算是搭建并测试成功
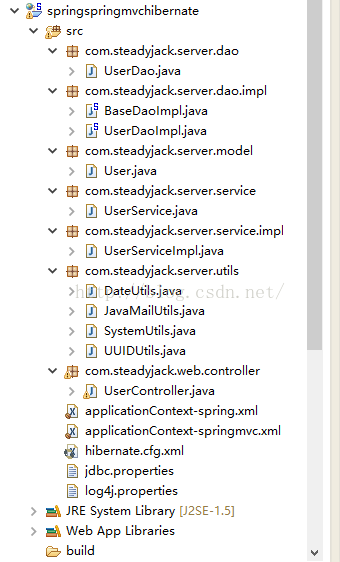
spring springmvc hibernate(ssh)项目整合开发---总体架构搭建
国庆觉得没啥地方想去,于是乎想自己搭建一个长期的用于练手的ssh项目(注意:这里的ssh指的是spring4 springmvc4 hibernate4),在其中融进自己学到的技术,并持续进行更新,与诸位博友共享。目前开发了一个在web项目中比较实用的邮件通信工具类,其中在这个ssh项目中主要用于:“注册成功时采用邮箱验证”与“忘记密码时通过邮件找回密码”。我觉得两个是比较实用的小模块。
好了,废话不多说,在介绍上述的两个小模块之前,毫无疑问的,得先把项目的整体架构搭建起来!项目的后端架构采用spring4 springmvc4 hibernate4,前端采用jsp、jquery、ajax。
首先先预览一下项目的总体架构图:
放入jar包,可以到这里下载:ssm整合jar包
接下来,配置web.xml,如下所示:
- <?xml version="1.0" encoding="UTF-8"?>
- <web-app xmlns:xsi="http://www.w3.org/2001/XMLSchema-instance"
- xmlns="http://java.sun.com/xml/ns/javaee"
- xsi:schemaLocation="http://java.sun.com/xml/ns/javaee http://java.sun.com/xml/ns/javaee/web-app_2_5.xsd"
- id="WebApp_ID" version="2.5">
- <display-name>springspringmvchibernate</display-name>
-
- <welcome-file-list>
- <welcome-file>index.jsp</welcome-file>
- </welcome-file-list>
-
-
- <context-param>
- <param-name>contextConfigLocation</param-name>
- <param-value>classpath:applicationContext-spring.xml</param-value>
- </context-param>
-
- <listener>
- <listener-class>org.springframework.web.context.ContextLoaderListener</listener-class>
- </listener>
-
-
- <servlet>
- <servlet-name>dispatcherServlet</servlet-name>
- <servlet-class>org.springframework.web.servlet.DispatcherServlet</servlet-class>
- <init-param>
- <param-name>contextConfigLocation</param-name>
- <param-value>classpath:applicationContext-springmvc.xml</param-value>
- </init-param>
- <load-on-startup>1</load-on-startup>
- </servlet>
-
- <servlet-mapping>
- <servlet-name>dispatcherServlet</servlet-name>
- <url-pattern>/</url-pattern>
- </servlet-mapping>
-
-
- <filter>
- <filter-name>characterEncodingFilter</filter-name>
- <filter-class>org.springframework.web.filter.CharacterEncodingFilter</filter-class>
- <init-param>
- <param-name>encoding</param-name>
- <param-value>utf-8</param-value>
- </init-param>
- <init-param>
- <param-name>forceEncoding</param-name>
- <param-value>true</param-value>
- </init-param>
- </filter>
- <filter-mapping>
- <filter-name>characterEncodingFilter</filter-name>
- <url-pattern>/*</url-pattern>
- </filter-mapping>
-
- <listener>
- <listener-class>org.springframework.web.util.Log4jConfigListener</listener-class>
- </listener>
-
- </web-app>
spring的配置文件:(已在xml文件中进行详细的注释,不多说明)
- <?xml version="1.0" encoding="UTF-8"?>
- <beans xmlns="http://www.springframework.org/schema/beans"
- xmlns:xsi="http://www.w3.org/2001/XMLSchema-instance"
- xmlns:aop="http://www.springframework.org/schema/aop"
- xmlns:context="http://www.springframework.org/schema/context"
- xmlns:tx="http://www.springframework.org/schema/tx"
- xsi:schemaLocation="http://www.springframework.org/schema/beans http://www.springframework.org/schema/beans/spring-beans-3.2.xsd
- http://www.springframework.org/schema/aop http://www.springframework.org/schema/aop/spring-aop-4.0.xsd
- http://www.springframework.org/schema/context http://www.springframework.org/schema/context/spring-context-4.0.xsd
- http://www.springframework.org/schema/tx http://www.springframework.org/schema/tx/spring-tx-4.0.xsd">
-
-
- <context:annotation-config />
-
-
- <context:component-scan base-package="com.steadyjack.server"></context:component-scan>
-
-
- <context:property-placeholder location="classpath:jdbc.properties" />
-
-
- <bean id="dataSource" class="com.mchange.v2.c3p0.ComboPooledDataSource">
- <property name="driverClass" value="${jdbc.driverClassName}"></property>
- <property name="user" value="${jdbc.user}"></property>
- <property name="password" value="${jdbc.password}"></property>
- <property name="jdbcUrl" value="${jdbc.url}"></property>
-
- <property name="initialPoolSize" value="${jdbc.initialPoolSize}"></property>
- <property name="maxPoolSize" value="${jdbc.maxPoolSize}"></property>
- <property name="acquireIncrement" value="${jdbc.acquireIncrement}"></property>
- <property name="maxStatements" value="${jdbc.maxStatements}"></property>
- <property name="maxStatementsPerConnection" value="${jdbc.maxStatementsPerConnection}"></property>
- <property name="maxIdleTime" value="${jdbc.maxIdleTime}"></property>
- </bean>
-
-
- <bean id="sessionFactory" class="org.springframework.orm.hibernate4.LocalSessionFactoryBean">
-
- <property name="dataSource" ref="dataSource"></property>
-
-
- <property name="configLocation" value="classpath:hibernate.cfg.xml"></property>
-
-
- <property name="packagesToScan" value="com.steadyjack.server.model"></property>
- </bean>
-
-
- <bean id="transactionManager" class="org.springframework.orm.hibernate4.HibernateTransactionManager">
- <property name="sessionFactory" ref="sessionFactory"></property>
- </bean>
-
-
- <tx:advice id="txAdvice" transaction-manager="transactionManager">
- <tx:attributes>
- <tx:method name="add*" propagation="REQUIRED"/>
- <tx:method name="save*" propagation="REQUIRED"/>
- <tx:method name="insert*" propagation="REQUIRED"/>
- <tx:method name="delete*" propagation="REQUIRED"/>
- <tx:method name="update*" propagation="REQUIRED"/>
- <tx:method name="find*" propagation="REQUIRED" read-only="true"/>
- <tx:method name="load*" propagation="REQUIRED" read-only="true"/>
- <tx:method name="query*" propagation="REQUIRED" read-only="true"/>
- <tx:method name="*" propagation="REQUIRED"/>
- </tx:attributes>
- </tx:advice>
-
-
- <aop:config>
-
-
- <aop:pointcut expression="execution(* com.steadyjack.server.service.*.*(..))" id="pointCut"/>
-
-
- <aop:advisor advice-ref="txAdvice" pointcut-ref="pointCut"/>
- </aop:config>
-
- </beans>
数据库配置文件jdbc.properties:
- jdbc.driverClassName=com.mysql.jdbc.Driver
- jdbc.url=jdbc:mysql://localhost:3306/db_springspringmvchibernate?autoReconnect=true&useUnicode=true&characterEncoding=utf-8
- jdbc.user=root
- jdbc.password=123456
-
- jdbc.initialPoolSize=4
- jdbc.minPoolSize=3
- jdbc.maxPoolSize=15
- jdbc.acquireIncrement=3
- jdbc.maxStatements=10
- jdbc.maxStatementsPerConnection=5
- jdbc.maxIdleTime=6000
hibernate配置文件:
- <?xml version="1.0" encoding="UTF-8"?>
- <!DOCTYPE hibernate-configuration PUBLIC
- "-//Hibernate/Hibernate Configuration DTD 3.0//EN"
- "http://hibernate.sourceforge.net/hibernate-configuration-3.0.dtd">
- <hibernate-configuration>
- <session-factory>
-
- <property name="dialect">org.hibernate.dialect.MySQL5Dialect</property>
- <property name="show_sql">true</property>
- <property name="format_sql">true</property>
- <property name="hbm2ddl.auto">update</property>
-
-
-
- </session-factory>
- </hibernate-configuration>
springmvc的配置文件:
- <?xml version="1.0" encoding="UTF-8"?>
- <beans xmlns="http://www.springframework.org/schema/beans"
- xmlns:xsi="http://www.w3.org/2001/XMLSchema-instance" xmlns:aop="http://www.springframework.org/schema/aop"
- xmlns:context="http://www.springframework.org/schema/context" xmlns:tx="http://www.springframework.org/schema/tx"
- xmlns:mvc="http://www.springframework.org/schema/mvc"
- xsi:schemaLocation="http://www.springframework.org/schema/aop http://www.springframework.org/schema/aop/spring-aop-4.0.xsd
- http://www.springframework.org/schema/mvc http://www.springframework.org/schema/mvc/spring-mvc-4.0.xsd
- http://www.springframework.org/schema/beans http://www.springframework.org/schema/beans/spring-beans-3.2.xsd
- http://www.springframework.org/schema/tx http://www.springframework.org/schema/tx/spring-tx-4.0.xsd
- http://www.springframework.org/schema/context http://www.springframework.org/schema/context/spring-context-4.0.xsd">
-
-
- <context:component-scan base-package="com.steadyjack.web.controller" />
-
-
- <mvc:default-servlet-handler/>
-
- <mvc:annotation-driven />
-
-
- <bean id="viewResolver" class="org.springframework.web.servlet.view.InternalResourceViewResolver">
- <property name="prefix" value="/WEB-INF/pages/"></property>
- <property name="suffix" value=".jsp"></property>
- </bean>
-
-
- </beans>
最后是日志配置log4j.properties:
- log4j.rootLogger = INFO, console, R
-
- log4j.appender.console = org.apache.log4j.ConsoleAppender
- log4j.appender.console.layout = org.apache.log4j.PatternLayout
- log4j.appender.console.layout.ConversionPattern = %-d{yyyy-MM-dd HH:mm:ss} [%c]-[%p] %m%n
-
- log4j.appender.R = org.apache.log4j.RollingFileAppender
- log4j.appender.R.File = D:\\logs\\log.log
- log4j.appender.R.MaxFileSize = 500KB
-
- log4j.appender.R.MaxBackupIndex = 1
- log4j.appender.R.layout = org.apache.log4j.PatternLayout
- log4j.appender.R.layout.ConversionPattern=%-d{yyyy-MM-dd HH:mm:ss} [%c]-[%p] - %m%n
然后,建立com.steadyjack.server.dao、com.steadyjack.server.dao.impl这两个package,并在impl包创建BaseDaoImpl.java文件,用于获取hibernate的sessionFactory,以便给各个dao通用。
- package com.steadyjack.server.dao.impl;
-
- import org.hibernate.Session;
- import org.hibernate.SessionFactory;
- import org.springframework.beans.factory.annotation.Autowired;
- import org.springframework.stereotype.Repository;
-
- @Repository
- public class BaseDaoImpl{
-
- @Autowired
- private SessionFactory sessionFactory;
-
- public Session getSession(){
- return sessionFactory.getCurrentSession();
- }
-
- }
在
com.steadyjack.server.model包下建立 User 这个Model
在com.steadyjack.server.dao建立UserDao以及在 com.steadyjack.server.dao.impl建立UserDaoImpl
- package com.steadyjack.server.dao;
-
- import java.util.List;
-
- import com.steadyjack.server.model.User;
-
- public interface UserDao {
-
- public void saveUser(User user);
-
- public User queryUser(User user);
-
- public User findUserById(Integer id);
-
- public User findUserPassword(String userName,String email);
-
- public List<User> findUser(List<Object> params,String hql);
-
- public void updateUser(User user);
-
- public User findUserByUserName(String userName);
- }
- package com.steadyjack.server.dao.impl;
-
- import java.util.List;
-
- import org.hibernate.Query;
- import org.springframework.stereotype.Repository;
-
- import com.steadyjack.server.dao.UserDao;
- import com.steadyjack.server.model.User;
-
- @Repository
- public class UserDaoImpl extends BaseDaoImpl implements UserDao {
-
- @SuppressWarnings("unchecked")
- public User queryUser(User user) {
- String hql="from User where userName=? and password=?";
- Query query=getSession().createQuery(hql);
- query.setParameter(0, user.getUserName());
- query.setParameter(1, user.getPassword());
-
- User currentUser=null;
-
- List<User> userList=query.list();
- if (userList!=null && userList.size()>0) {
- currentUser=userList.get(0);
- }
-
- return currentUser;
- }
-
- public void saveUser(User user) {
- getSession().save(user);
- }
-
- public User findUserById(Integer id) {
- String hql="from User where id=?";
- Query query=getSession().createQuery(hql);
- query.setParameter(0, id);
- User user=(User) query.uniqueResult();
- return user;
- }
-
- public User findUserPassword(String userName, String email) {
- String hql="from User where userName=? and email=?";
- Query query=getSession().createQuery(hql);
- query.setParameter(0, userName);
- query.setParameter(1, email);
- User currentUser=(User) query.uniqueResult();
-
- return currentUser;
- }
-
- public void updateUser(User user) {
- getSession().update(user);
- }
-
- @SuppressWarnings("unchecked")
- public List<User> findUser(List<Object> params,String hql) {
- Query query=getSession().createQuery(hql);
- if (params!=null && params.size()>0) {
- for(int i=0;i<params.size();i++){
- query.setParameter(i, params.get(i));
- }
- }
- return query.list();
- }
-
- public User findUserByUserName(String userName) {
- String hql="from User where userName=?";
- Query query=getSession().createQuery(hql);
- query.setParameter(0, userName);
- return (User) query.uniqueResult();
- }
-
- }
在com.steadyjack.server.service包下建立UserService以及在com.steadyjack.server.service.impl包下建立UserServiceImpl
- package com.steadyjack.server.service;
-
- import java.util.List;
- import java.util.Map;
-
- import com.steadyjack.server.model.User;
-
- public interface UserService {
-
- public void addUser(User user);
-
- public User queryUser(User user);
-
- public User getUserById(Integer id);
-
- public User findUserPassword(String userName,String email);
-
- public List<User> findUsers(Map<String, Object> map);
-
- public void updateUser(User user);
-
- public void saveUser(User user);
-
- public User findUserByUserName(String userName);
-
- }
- package com.steadyjack.server.service.impl;
-
- import java.util.LinkedList;
- import java.util.List;
- import java.util.Map;
-
- import org.springframework.beans.factory.annotation.Autowired;
- import org.springframework.stereotype.Service;
-
- import com.steadyjack.server.dao.UserDao;
- import com.steadyjack.server.model.User;
- import com.steadyjack.server.service.UserService;
-
- @Service
- public class UserServiceImpl implements UserService {
-
- @Autowired
- private UserDao userDao;
-
- public void addUser(User user) {
- userDao.saveUser(user);
- }
-
- public User queryUser(User user) {
- return userDao.queryUser(user);
- }
-
- public User getUserById(Integer id) {
- return userDao.findUserById(id);
- }
-
- public User findUserPassword(String userName, String email) {
- return userDao.findUserPassword(userName, email);
- }
-
- public void updateUser(User user) {
- userDao.updateUser(user);
- }
-
- public List<User> findUsers(Map<String, Object> map) {
- StringBuffer hql=new StringBuffer("from User where 1=1 ");
- List<Object> params=new LinkedList<Object>();
-
- if (map.get("userName")!=null) {
- hql.append(" and userName=? ");
- params.add(map.get("userName"));
- }
- if (map.get("email")!=null) {
- hql.append(" and email=? ");
- params.add(map.get("email"));
- }
- if (map.get("sex")!=null) {
- hql.append(" and sex=? ");
- params.add(map.get("sex"));
- }
- if (map.get("validateOverDate")!=null) {
- hql.append(" and validateOverDate=? ");
- params.add(map.get("validateOverDate"));
- }
- if (map.get("validateSerCode")!=null) {
- hql.append(" and validateSerCode=? ");
- params.add(map.get("validateSerCode"));
- }
- if (map.get("userNameEncodes")!=null) {
- hql.append(" and userNameEncodes=? ");
- params.add(map.get("userNameEncodes"));
- }
-
- System.out.println(hql.toString());
- return userDao.findUser(params, hql.toString());
- }
-
- public User findUserByUserName(String userName) {
- return userDao.findUserByUserName(userName);
- }
-
- public void saveUser(User user) {
- userDao.saveUser(user);
- }
-
- }
最后,我们需要在com.steadyjack.web.controller包建立UserController(先介绍登录这个功能)
- package com.steadyjack.web.controller;
-
- import java.util.Date;
- import java.util.HashMap;
- import java.util.List;
- import java.util.Map;
-
- import javax.servlet.http.HttpServletRequest;
-
- import org.springframework.beans.factory.annotation.Autowired;
- import org.springframework.stereotype.Controller;
- import org.springframework.ui.ModelMap;
- import org.springframework.web.bind.annotation.PathVariable;
- import org.springframework.web.bind.annotation.RequestMapping;
- import org.springframework.web.bind.annotation.ResponseBody;
-
- import com.steadyjack.server.model.User;
- import com.steadyjack.server.service.UserService;
- import com.steadyjack.server.utils.DateUtils;
- import com.steadyjack.server.utils.JavaMailUtils;
- import com.steadyjack.server.utils.SystemUtils;
- import com.steadyjack.server.utils.UUIDUtils;
-
- @RequestMapping("/user")
- @Controller
- public class UserController {
-
- @Autowired
- private UserService userService;
-
-
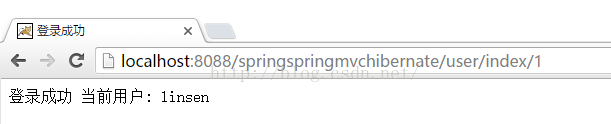
- @RequestMapping("/index/{id}")
- public String index(ModelMap map,@PathVariable Integer id){
- System.out.println(userService.getUserById(id));
- map.put("loginUser", userService.getUserById(id));
- return "user/index";
- }
-
- @ResponseBody
- @RequestMapping("/login")
- public Map<String, Object> userLogin(ModelMap map,HttpServletRequest request) throws Exception{
- Map<String, Object> resultMap=new HashMap<String, Object>();
- User user=new User();
- user.setUserName(request.getParameter("userName"));
- user.setPassword(request.getParameter("password"));
- User currentUser=userService.queryUser(user);
- if (currentUser!=null) {
- resultMap.put("id", currentUser.getId());
- resultMap.put("res", "yes");
- }else{
- resultMap.put("res", "no");
- }
- return resultMap;
- }
-
- }
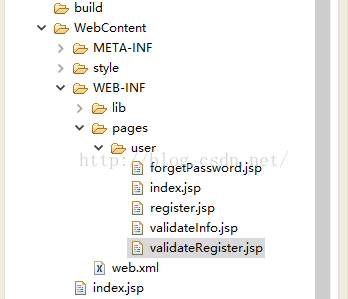
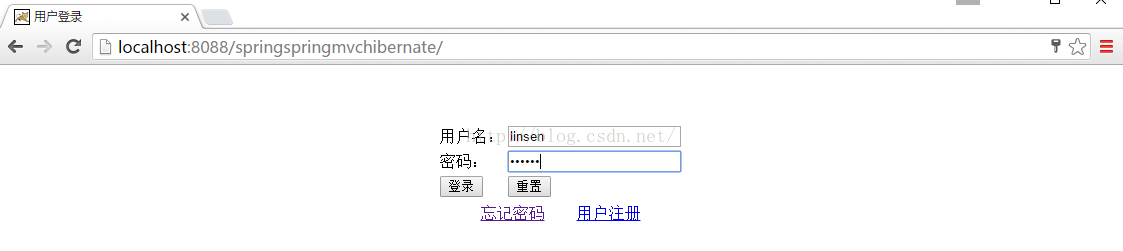
最后是webContent的启动jsp文件index.jsp(这里用到了jquery ajax的交互):
- <%@ page language="java" contentType="text/html; charset=utf-8"
- pageEncoding="utf-8" %>
- <%@ taglib prefix="c" uri="http://java.sun.com/jsp/jstl/core" %>
- <!DOCTYPE html PUBLIC "-//W3C//DTD HTML 4.01 Transitional//EN" "http://www.w3.org/TR/html4/loose.dtd">
- <html>
- <head>
- <meta http-equiv="Content-Type" content="text/html; charset=utf-8">
- <c:set value="${pageContext.request.contextPath }" var="ctx"></c:set>
- <script type="text/javascript" src="${ctx}/style/js/jquery-1.7.2.min.js"></script>
- <title>用户登录</title>
-
- <script type="text/javascript">
-
- $(function(){
- var serverUrl=$('#serverUrl').val();
-
- $('#loginBtn').click(function(){
- var userName = $('#userName').val();
- var password = $('#password').val();
- if (userName == null || password == null || trim(userName) == "" || trim(password) == "") {
- $('#errorTip').html("用户名或密码不能为空!");
- return false;
- }
- $('#errorTip').html("");
-
- $.post(serverUrl+'/user/login',{
- userName:userName,
- password:password
-
- },function(requestData){
- if (requestData.res=='yes') {
- window.location.href=serverUrl+'/user/index/'+parseInt(requestData.id);
- } else {
- $('#errorInfo').html('*用户名或者密码错误!');
- }
-
- });
-
- });
- });
-
- function resetValue() {
- $('#userName').val("");
- $('#password').val("");
- }
-
- //去掉最后的空格
- function trim(str) {
- return str.replace(/(^\s+)|(\s+$)/g, "");
- }
-
- </script>
-
- </head>
- <body>
- <input type="hidden" id="serverUrl" value="${pageContext.request.contextPath}" />
- <div align="center" style="padding-top: 50px;">
- <form>
- <table>
- <tr>
- <td>用户名:</td>
- <td><input type="text" id="userName" name="userName" /></td>
- </tr>
- <tr>
- <td>密码:</td>
- <td><input type="password" id="password" name="password" /></td>
-
- </tr>
- <tr>
- <td><input type="button" value="登录" id="loginBtn"/></td>
- <td><input type="button" value="重置" /></td>
- </tr>
- <tr>
- <td></td>
- <td id="errorInfo" style="color: #ff0000;"></td>
- </tr>
- </table>
- <div id="errorTip"></div>
- </form>
- <a href="${ctx}/user/forgetPassword">忘记密码</a> <a href="${ctx}/user/toRegister">用户注册</a>
- </div>
- </body>
- </html>
右键项目,run 到tomcat,跑起来。如果没有报错,说明启动成功了!然后我们需要在我们的数据库录入用户的信息,测试登录功能。如下图:
最近学习spring框架,学习中总是磕磕绊绊的,出现这样或者那样的问题,于是就像写一篇笔记,将spring,springmvc,hibernate框架整合的过程,以及简单的实现记录下来,一来加深印象,二来一遍以后忘记好找资料(...)当然,初学者也可以借鉴一下。废话不多说,直接上干货!
平台:eclipse
1.首先看看我整个项目的结构
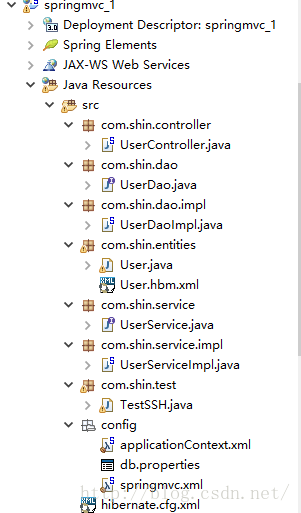
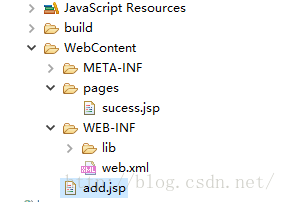
2.项目开始:开始配置配置文件,主要有web.xml, applicationContext.xml, springmvc这三个文件
web.xml文件如下(主要是配置spring IOC容器,springmvc的dispacherServlet, 编码的格式化:防止出现乱码,SessionFilter过滤器:防止session异常。这里主要注意的是路径问题,由于楼主的配置文件是放在src下的config包中的,所以配置的时候用classpath:包名/配置文件名.xml的形式;如果放在WebContext下,直接写文件名就行, WEB-INF下就是/WEB-INF/文件名.xml,以此类推。。)
- <?xml version="1.0" encoding="UTF-8"?>
- <web-app xmlns:xsi="http://www.w3.org/2001/XMLSchema-instance" xmlns="http://java.sun.com/xml/ns/javaee" xsi:schemaLocation="http://java.sun.com/xml/ns/javaee http://java.sun.com/xml/ns/javaee/web-app_3_0.xsd" id="WebApp_ID" version="3.0">
- <display-name>springmvc_1</display-name>
- <welcome-file-list>
- <welcome-file>index.html</welcome-file>
- <welcome-file>index.htm</welcome-file>
- <welcome-file>index.jsp</welcome-file>
- <welcome-file>default.html</welcome-file>
- <welcome-file>default.htm</welcome-file>
- <welcome-file>default.jsp</welcome-file>
- </welcome-file-list>
-
- <!-- 配置spring ioc容器 -->
- <context-param>
- <param-name>contextConfigLocation</param-name>
- <param-value>classpath:config/applicationContext.xml</param-value>
- </context-param>
-
- <!-- Bootstraps the root web application context before servlet initialization -->
- <listener>
- <listener-class>org.springframework.web.context.ContextLoaderListener</listener-class>
- </listener>
-
- <!-- 配置springmvc 的DispatcherServlet -->
- <servlet>
- <servlet-name>dispatcherServlet</servlet-name>
- <servlet-class>org.springframework.web.servlet.DispatcherServlet</servlet-class>
- <init-param>
- <param-name>contextConfigLocation</param-name>
- <param-value>classpath:config/springmvc.xml</param-value>
- </init-param>
- <load-on-startup>1</load-on-startup>
- </servlet>
-
- <!-- Map all requests to the DispatcherServlet for handling -->
- <servlet-mapping>
- <servlet-name>dispatcherServlet</servlet-name>
- <url-pattern>*.do</url-pattern>
- </servlet-mapping>
-
- <filter>
- <filter-name>CharacterEncodingFilter</filter-name>
- <filter-class>org.springframework.web.filter.CharacterEncodingFilter</filter-class>
- <init-param>
- <param-name>encoding</param-name>
- <param-value>UTF-8</param-value>
- </init-param>
- </filter>
- <filter-mapping>
- <filter-name>CharacterEncodingFilter</filter-name>
- <url-pattern>/*</url-pattern>
- </filter-mapping>
-
- <filter>
- <filter-name>SessionFilter</filter-name>
- <filter-class>org.springframework.orm.hibernate4.support.OpenSessionInViewFilter</filter-class>
- </filter>
- <filter-mapping>
- <filter-name>SessionFilter</filter-name>
- <url-pattern>/*</url-pattern>
- </filter-mapping>
- </web-app>
springmvc.xml文件如下(主要是添加一个注解扫描,然后就是视图解析器。其中prefix表示的是跳转后的页面放置的前缀路径,楼主这里纠结了一会儿。。suffix表示的是后缀名,这个好理解。)
- <?xml version="1.0" encoding="UTF-8"?>
- <beans xmlns="http://www.springframework.org/schema/beans"
- xmlns:xsi="http://www.w3.org/2001/XMLSchema-instance"
- xmlns:context="http://www.springframework.org/schema/context"
- xmlns:mvc="http://www.springframework.org/schema/mvc"
- xmlns:tx="http://www.springframework.org/schema/tx"
- xsi:schemaLocation="http:
- http:
- http:
- http:
-
- <!-- 配置自动扫描包 -->
- <context:component-scan base-package="com.shin">
- <!-- <context:include-filter type="annotation" expression="org.springframework.stereotype.Controller"/> -->
- <!-- <context:include-filter type="annotation" expression="org.springframework.web.bind.annotation.ControllerAdvice"/> -->
- </context:component-scan>
-
- <!-- 配置视图解析器 -->
- <bean class="org.springframework.web.servlet.view.InternalResourceViewResolver">
- <property name="prefix" value="/pages/"></property>
- <property name="suffix" value=".jsp"></property>
- </bean>
-
- <mvc:default-servlet-handler/>
-
- <mvc:annotation-driven/>
- </beans>
applicationContext.xml配置如下(1.注解扫描 2.加载db.properties文件:配合数据库连接池配置实用,这里的路径与web.xml中路径同理 3.配置数据源:与dp.properties中的各个属性对应 4.配置sessionFactory:配置hibernate中的一些方言,属性等,这里将这些写在spring配置文件中,去除了hibernate.cfg.xml文件,当然也可以将添加这个文件,只需在sessionFactory中添加映射路径即可 5.配置事务管理器 )
- <?xml version="1.0" encoding="UTF-8"?>
- <beans xmlns="http://www.springframework.org/schema/beans"
- xmlns:xsi="http://www.w3.org/2001/XMLSchema-instance"
- xmlns:context="http://www.springframework.org/schema/context"
- xmlns:tx="http://www.springframework.org/schema/tx"
- xsi:schemaLocation="http:
- http:
- http:
-
-
- <!-- 配置自动扫描的包 -->
- <context:component-scan base-package="com.shin">
- <!-- <context:exclude-filter type="annotation" expression="org.springframework.stereotype.Controller"/> -->
- <!-- <context:exclude-filter type="annotation" expression="org.springframework.web.bind.annotation.ControllerAdvice"/> -->
- </context:component-scan>
-
- <context:property-placeholder location="classpath:config/db.properties"/>
-
- <bean id="dataSource" class="com.mchange.v2.c3p0.ComboPooledDataSource" >
- <property name="user" value="${jdbc.user}"></property>
- <property name="password" value="${jdbc.password}"></property>
- <property name="driverClass" value="${jdbc.driverClass}"></property>
- <property name="jdbcUrl" value="${jdbc.jdbcUrl}"></property>
- </bean>
-
- <bean id="sessionFactory" class="org.springframework.orm.hibernate4.LocalSessionFactoryBean" >
- <property name="dataSource" ref="dataSource"></property>
- <property name="namingStrategy">
- <bean class="org.hibernate.cfg.ImprovedNamingStrategy"></bean>
- </property>
- <property name="packagesToScan" value="com.shin.entities"></property>
-
- <property name="hibernateProperties">
- <props>
- <prop key="hibernate.dialect">org.hibernate.dialect.MySQL5InnoDBDialect </prop>
- <prop key="hibernate.show_sql">true</prop>
- <prop key="hibernate.format_sql">true</prop>
- <prop key="hibernate.hbm2ddl.auto">update</prop>
- <prop key="hibernate.temp.use_jdbc_metadata_defaults">false</prop>
- </props>
- </property>
- <property name="mappingResources" >
- <list>
- <value>com/shin/entities/User.hbm.xml</value>
- </list>
- </property>
- </bean>
-
- <bean id="transactionManager" class="org.springframework.orm.hibernate4.HibernateTransactionManager">
- <property name="sessionFactory" ref="sessionFactory"></property>
- </bean>
-
- </beans>
db.properties文件:
- jdbc.user=root
- jdbc.password=123456
- jdbc.driverClass=com.mysql.jdbc.Driver
- jdbc.jdbcUrl=jdbc:mysql:
然后开始java代码的编写:
楼主只是做了一个简单的用户添加应用,所以代码比较简单,主要是实现这个基本框架,还有很多东西需要去学习;
先来实体类 User.java 然后我用hibernate插件自动生成hbm.xml文件(当然也可以手动配置,挺简单的)
- package com.shin.entities;
-
- public class User {
-
- private Integer id;
- private String name;
- private String password;
-
- public Integer getId() {
- return id;
- }
-
- public void setId(Integer id) {
- this.id = id;
- }
-
- public String getName() {
- return name;
- }
-
- public void setName(String name) {
- this.name = name;
- }
-
- public String getPassword() {
- return password;
- }
-
- public void setPassword(String password) {
- this.password = password;
- }
-
- }
- <?xml version="1.0"?>
- <!DOCTYPE hibernate-mapping PUBLIC "-//Hibernate/Hibernate Mapping DTD 3.0//EN"
- "http://hibernate.sourceforge.net/hibernate-mapping-3.0.dtd">
- <!-- Generated 2016-7-12 10:59:16 by Hibernate Tools 3.5.0.Final -->
- <hibernate-mapping>
- <class name="com.shin.entities.User" table="USER">
- <id name="id" type="java.lang.Integer">
- <column name="ID" />
- <generator class="native" />
- </id>
- <property name="name" type="java.lang.String">
- <column name="NAME" />
- </property>
- <property name="password" type="java.lang.String">
- <column name="PASSWORD" />
- </property>
- </class>
- </hibernate-mapping>
然后是dao层,分别是UserDao.java接口 和 UserDaoImpl.java实现
- package com.shin.dao;
-
- import com.shin.entities.User;
-
- public interface UserDao {
-
- public void addUser(User user);
- }
- package com.shin.dao.impl;
-
- import org.hibernate.SessionFactory;
- import org.springframework.beans.factory.annotation.Autowired;
- import org.springframework.stereotype.Repository;
- import org.springframework.transaction.annotation.Transactional;
-
- import com.shin.dao.UserDao;
- import com.shin.entities.User;
-
- @Repository("userDao")
- public class UserDaoImpl implements UserDao {
-
- @Autowired
- private SessionFactory sessionFactory;
-
- public SessionFactory getSessionFactory() {
- return sessionFactory;
- }
-
- public void addUser(User user) {
-
- sessionFactory.getCurrentSession().save(user);
-
- }
-
- }
再就是service层,分别是UserService.java接口和UserServiceImpl,java实现类
- package com.shin.service;
-
- import com.shin.entities.User;
-
- public interface UserService {
-
- public void addUser(User user);
- }
- package com.shin.service.impl;
-
- import org.springframework.beans.factory.annotation.Autowired;
- import org.springframework.stereotype.Service;
-
- import com.shin.dao.UserDao;
- import com.shin.entities.User;
- import com.shin.service.UserService;
-
- @Service("userService")
- public class UserServiceImpl implements UserService {
-
- @Autowired
- private UserDao userDao;
-
- public void setUserDao(UserDao userDao) {
- this.userDao = userDao;
- }
-
- @Override
- public void addUser(User user) {
-
- userDao.addUser(user);
- }
-
- }
最后是controller: UserController.java(controller是核心,页面的处理跳转都要经过他,requestMapping中的值和.jsp中的action对应,由于web.xml中springmvc拦截的是.do结尾的动作,这里在处理方法上复制以此结尾)
- package com.shin.controller;
-
- import javax.servlet.http.HttpServletRequest;
-
- import org.springframework.beans.factory.annotation.Autowired;
- import org.springframework.stereotype.Controller;
- import org.springframework.web.bind.annotation.RequestMapping;
-
- import com.shin.entities.User;
- import com.shin.service.UserService;
-
- @Controller
- @RequestMapping("/user")
- public class UserController {
-
- @Autowired
- private UserService userService;
-
- @RequestMapping(value="sucess.do")
- public String add(HttpServletRequest request){
- String username = request.getParameter("username");
- String password = request.getParameter("password");
- System.out.println(username+" "+password);
-
- User user = new User();
- user.setName(username);
- user.setPassword(password);
-
- userService.addUser(user);
- return "sucess";
-
- }
- }
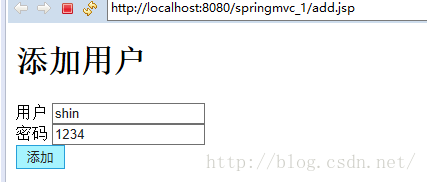
然后是简单的jsp页面,测试用的。
add.jsp
- <%@ page language="java" contentType="text/html; charset=utf-8"
- pageEncoding="utf-8"%>
- <!DOCTYPE html PUBLIC "-//W3C//DTD HTML 4.01 Transitional//EN" "http://www.w3.org/TR/html4/loose.dtd">
- <html>
- <head>
- <meta http-equiv="Content-Type" content="text/html; charset=utf-8">
- <title>Insert title here</title>
- </head>
- <body>
- <h1>添加用户</h1>
- <form action="user/sucess.do" method="post">
- 用户 <input type="text" name="username"/><br/>
- 密码 <input type="text" name="password"/><br/>
- <input type="submit" value="添加">
- </form>
-
- </body>
- </html>
sucess.jsp
- <%@ page language="java" contentType="text/html; charset=utf-8"
- pageEncoding="utf-8"%>
- <!DOCTYPE html PUBLIC "-//W3C//DTD HTML 4.01 Transitional//EN" "http://www.w3.org/TR/html4/loose.dtd">
- <html>
- <head>
- <meta http-equiv="Content-Type" content="text/html; charset=utf-8">
- <title>Insert title here</title>
- </head>
- <body>
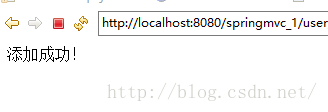
- 添加成功!
- </body>
- </html>
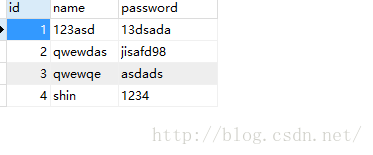
测试:


 1万+
1万+

 被折叠的 条评论
为什么被折叠?
被折叠的 条评论
为什么被折叠?
 到【灌水乐园】发言


