


一、搭建一个简单的项目
1、maven依赖配置
主要添加spring-boot-starter-security和spring-boot-starter-web
<?xml version="1.0" encoding="UTF-8"?>
<project xmlns="http://maven.apache.org/POM/4.0.0" xmlns:xsi="http://www.w3.org/2001/XMLSchema-instance"
	xsi:schemaLocation="http://maven.apache.org/POM/4.0.0 http://maven.apache.org/xsd/maven-4.0.0.xsd">
	<modelVersion>4.0.0</modelVersion>

	<groupId>com.jp</groupId>
	<artifactId>normal_security</artifactId>
	<version>0.0.1-SNAPSHOT</version>
	<packaging>jar</packaging>

	<name>normal_security</name>
	<description>a normal example for Spring Security</description>

	<parent>
		<groupId>org.springframework.boot</groupId>
		<artifactId>spring-boot-starter-parent</artifactId>
		<version>2.0.6.RELEASE</version>
		<relativePath/> <!-- lookup parent from repository -->
	</parent>

	<properties>
		<project.build.sourceEncoding>UTF-8</project.build.sourceEncoding>
		<project.reporting.outputEncoding>UTF-8</project.reporting.outputEncoding>
		<java.version>1.8</java.version>
	</properties>

	<dependencies>
		<dependency>
			<groupId>org.springframework.boot</groupId>
			<artifactId>spring-boot-starter-security</artifactId>
		</dependency>
		<dependency>
			<groupId>org.springframework.boot</groupId>
			<artifactId>spring-boot-starter-thymeleaf</artifactId>
		</dependency>
		<dependency>
			<groupId>org.springframework.boot</groupId>
			<artifactId>spring-boot-starter-web</artifactId>
		</dependency>

		<dependency>
			<groupId>org.springframework.boot</groupId>
			<artifactId>spring-boot-starter-test</artifactId>
			<scope>test</scope>
		</dependency>
		<dependency>
			<groupId>org.springframework.security</groupId>
			<artifactId>spring-security-test</artifactId>
			<scope>test</scope>
		</dependency>
	</dependencies>

	<build>
		<plugins>
			<plugin>
				<groupId>org.springframework.boot</groupId>
				<artifactId>spring-boot-maven-plugin</artifactId>
			</plugin>
		</plugins>
	</build>


</project>
2、创建security配置类
配置类中的方法对用户进行认证和授权,
- 认证 (你是谁) 为用户建立一个他所声明的主体。主体一般是指用户,设备或可以在系统中执行动作的其他系统。
- 授权 (你能干什么)指的是一个用户能否在应用中执行某个操作,在到达授权判断之前,身份的主体已经由身份认证过程建立。

package com.jp.config;

import org.springframework.security.config.annotation.authentication.builders.AuthenticationManagerBuilder;
import org.springframework.security.config.annotation.web.builders.HttpSecurity;
import org.springframework.security.config.annotation.web.configuration.EnableWebSecurity;
import org.springframework.security.config.annotation.web.configuration.WebSecurityConfigurerAdapter;
import org.springframework.security.crypto.bcrypt.BCryptPasswordEncoder;

@EnableWebSecurity
public class SecurityConfiguration extends WebSecurityConfigurerAdapter {
    @Override
    protected void configure(AuthenticationManagerBuilder auth) throws Exception {
        /**
         * 在内存中创建一个名为 "user" 的用户,密码为 "pwd",拥有 "USER" 权限,密码使用BCryptPasswordEncoder加密
         */
        auth.inMemoryAuthentication().passwordEncoder(new BCryptPasswordEncoder())
                .withUser("user").password(new BCryptPasswordEncoder().encode("pwd")).roles("USER");
        /**
         * 在内存中创建一个名为 "admin" 的用户,密码为 "pwd",拥有 "USER" 和"ADMIN"权限
         */
        auth.inMemoryAuthentication().passwordEncoder(new BCryptPasswordEncoder())
                .withUser("admin").password(new BCryptPasswordEncoder().encode("pwd")).roles("USER","ADMIN");
    }

    /**
     * 匹配 "/","/index" 路径,不需要权限即可访问
     * 匹配 "/user" 及其以下所有路径,都需要 "USER" 权限
     * 匹配 "/admin" 及其以下所有路径,都需要 "ADMIN" 权限
     * 登录地址为 "/login",登录成功默认跳转到页面 "/user"
     * 退出登录的地址为 "/logout",退出成功后跳转到页面 "/login"
     */
    @Override
    protected void configure(HttpSecurity http) throws Exception {
        http
                .authorizeRequests()
                .antMatchers("/","/index","/error").permitAll()
                .antMatchers("/user/**").hasRole("USER")
                .antMatchers("/admin/**").hasRole("ADMIN")
                .and()
                .formLogin().loginPage("/login").defaultSuccessUrl("/user")
                .and()
                .logout().logoutUrl("/logout").logoutSuccessUrl("/login");
    }
}
3、定义controller层
package com.jp.controller;

import org.springframework.stereotype.Controller;
import org.springframework.web.bind.annotation.RequestMapping;

/**
 * 主页和登录页面映射
 */
@Controller
public class HomeController {
    @RequestMapping({"/", "/index"})
    public String index(){
        return "index";
    }

    @RequestMapping("/login")
    public String login(){
        return "login";
    }
}
package com.jp.controller;

import org.springframework.security.core.annotation.AuthenticationPrincipal;
import org.springframework.stereotype.Controller;
import org.springframework.ui.Model;
import org.springframework.web.bind.annotation.RequestMapping;

import java.security.Principal;

/**
 * 定义用户相关网址映射的Controller
 */
@Controller
public class UserController {

    @RequestMapping("/user")
    public String user(@AuthenticationPrincipal Principal principal, Model model){
        model.addAttribute("username", principal.getName());
        return "user/user";
    }
    @RequestMapping("/admin")
    public String admin(@AuthenticationPrincipal Principal principal, Model model){
        model.addAttribute("username", principal.getName());
        return "admin/admin";
    }
}
4、视图页面
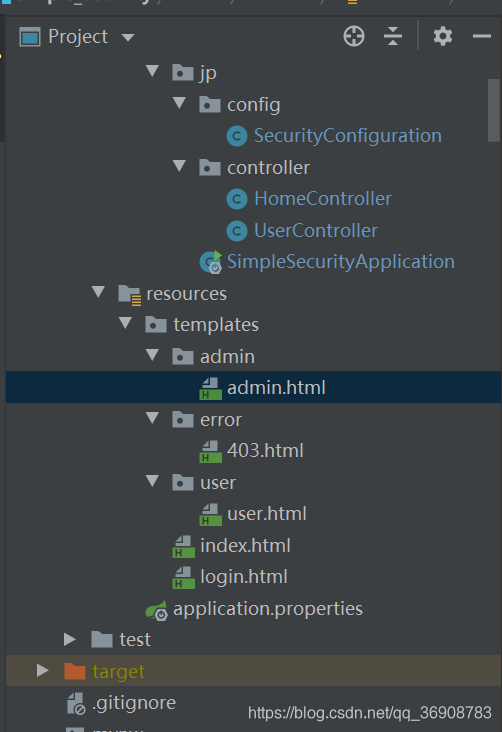
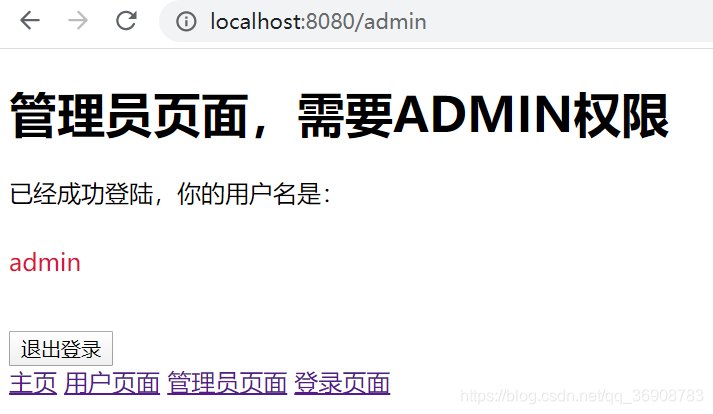
管理员页面
<!DOCTYPE html>
<html xmlns:th="http://www.thymeleaf.org">
<head>
    <meta charset="UTF-8">
    <title>Admin</title>
</head>
<body>
<h1>管理员页面,需要ADMIN权限</h1>
<p>已经成功登陆,你的用户名是:</p>
<p th:text="${username}" style="margin-top: 25px; color: crimson">wxb</p>
<form th:action="@{/logout}" method="post">
    <button class="btn btn-danger" style="margin-top: 20px">退出登录</button>
</form>
<a href="/index">主页</a>
<a href="/user">用户页面</a>
<a href="/admin">管理员页面</a>
<a href="/login">登录页面</a>
</body>
</html>
用户页面
<!DOCTYPE html>
<html xmlns:th="http://www.thymeleaf.org">
<head>
    <meta charset="UTF-8">
    <title>User</title>
</head>
<body>
<h1>用户页面,需要USER权限</h1>
<p>已经成功登陆,你的用户名是:</p>
<p th:text="${username}" style="margin-top: 25px; color: crimson">wxb</p>
<form th:action="@{/logout}" method="post">
    <button class="btn btn-danger" style="margin-top: 20px">退出登录</button>
</form>
<a href="/index">主页</a>
<a href="/user">用户页面</a>
<a href="/admin">管理员页面</a>
<a href="/login">登录页面</a>
</body>
</html>
403页面
<!DOCTYPE html>
<html lang="en">
<head>
    <meta charset="UTF-8">
    <title>403</title>
</head>
<body>
<h1>403错误,权限不足,请使用合适用户登录</h1>
<a href="/index">主页</a>
<a href="/user">用户页面</a>
<a href="/admin">管理员页面</a>
<a href="/login">登录页面</a>
</body>
</html>
主页面
<!DOCTYPE html>
<html xmlns:th="http://www.thymeleaf.org">
<html lang="en">
<head>
    <meta charset="UTF-8">
    <title>Index</title>
</head>
<body>
<h1>主页,不需要任何权限即可访问</h1>
<a href="/index">主页</a>
<a href="/user">用户页面</a>
<a href="/admin">管理员页面</a>
<a href="/login">登录页面</a>
</body>
</html>
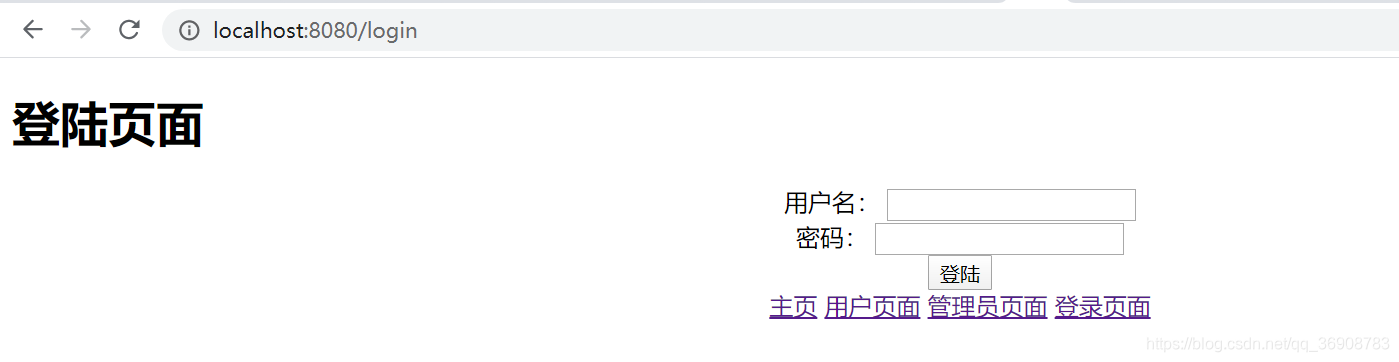
登录页面
<!DOCTYPE html>
<html xmlns:th="http://www.thymeleaf.org">
<head>
    <title>index</title>
    <meta http-equiv="Content-Type" content="text/html; charset=UTF-8" />
</head>
<body>
<h1>登陆页面</h1>
<div style="text-align: center;margin:0 auto;width: 1000px; ">
    <form th:action="@{/login}" method="post">
        <div>
            用户名: <input type="text" name="username"/>
        </div>
        <div>
            密码: <input type="password" name="password"/>
        </div>
        <div th:if="${param.error}">
            <p style="text-align: center" class="text-danger">登录失败,账号或密码错误!</p>
        </div>
        <div th:if="${result}">
            <p style="text-align: center" class="text-success" th:text="${result}"></p>
        </div>
        <div>
            <input type="submit" value="登陆"/>
        </div>
    </form>
    <a href="/index">主页</a>
    <a href="/user">用户页面</a>
    <a href="/admin">管理员页面</a>
    <a href="/login">登录页面</a>
</div>
</body>
</html>
5、运行效果
二、总结
任何一个权限管理系统,主要都分为两个功能:验证和鉴权。验证就是确认用户的身份,一般采用用户名和密码的形式;鉴权就是确认用户拥有的身份(角色、权限)能否访问受保护的资源。这里面其实就涉及到了三个东西,用户、角色、受保护的资源。在上面的例子中,它们三者如下所示:
- 用户:user(角色为USER)、admin(角色为USER、ADMIN)
- 受保护的资源:user/(需要USER角色),admin/(需要ADMIN角色)


 2956
2956


 被折叠的 条评论
为什么被折叠?
被折叠的 条评论
为什么被折叠?
 到【灌水乐园】发言


