


这篇文章是我自己在实现Radio按钮功能的时候,因为自己也是初学者,所以在GitHub上着了相关的案例,并进行了一定的改修,这里做一下学习记录。
import SwiftUI
struct MyTmpView: View {
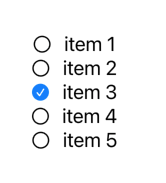
let items: [String] = ["item 1", "item 2", "item 3", "item 4", "item 5"]
//确定被选中的item
@State var selectedID = ""
var body: some View {
VStack{
ForEach(items, id: \.self){item in
RadioButton(id: item, selectedID: self.selectedID, callBack: self.radioButtonCallBack)
}
}
}
//将被选中的item的id赋值
func radioButtonCallBack(id: String) {
self.selectedID = id
}
}
///每一个独立的Radio 组件
struct RadioButton: View {
let id: String
let selectedID: String
let callBack: (String) -> ()
//初始化
init(id: String, selectedID: String, callBack: @escaping (String) -> ()){
self.id = id
self.selectedID = selectedID
self.callBack = callBack
}
var body: some View {
Button(action: {
self.callBack(self.id)
}, label: {
HStack(alignment: .center, spacing: 12, content: {
Image(systemName: self.selectedID == self.id ? "checkmark.circle.fill" : "circle")
.foregroundColor(self.selectedID == self.id ? Color.blue : Color.black)
Text(self.id)
.font(Font.system(size: 20))
.foregroundColor(Color.black)
})
})
}
}
struct MyTmpView_Previews: PreviewProvider {
static var previews: some View {
MyTmpView()
}
}
- 效果图


 856
856

 被折叠的 条评论
为什么被折叠?
被折叠的 条评论
为什么被折叠?
 到【灌水乐园】发言


