


xterm 是一个使用 typescript 编写的前端终端组件,可以在浏览器中实现一个命令行终端应用,通常与 websocket一起使用。
一、安装
pnpm install xterm
or
yarn add xterm
or
pnpm install xterm
二、代码实现: 实现日志展示
<template>
	<a-modal class="task-log-dialog" :title="title" :visible="visible" :footer="false" @cancel="onCancel" width="1200px" :mask-closable="false">
		<div class="main-box">
			<div class="top-box flex-row-start-center">
				<a-input v-model:value="grep" placeholder="Filter(regexp)..." size="small" allow-clear @input="searchLog"></a-input>
				<a-input v-model:value="podName" placeholder="podName" size="small" allow-clear @input="searchLog"></a-input>
			</div>
			<div class="content-box">
				<div ref="terminal" id="terminal" v-loading="loading" element-loading-text="拼命加载中"></div>
			</div>

			<div class="bottom-box">Logs may not appear for pods that are deleted.</div>
		</div>
	</a-modal>
</template>

<script lang="ts" setup>
import { ref, watch } from 'vue'
import useSystemStore from '@/store/modules/system'
import { debounce } from '@/utils/common'
import { Terminal } from 'xterm'
import { FitAddon } from 'xterm-addon-fit'
import 'xterm/css/xterm.css'

type propsType = {
	currentTask: {
		projectUuid: string
		name: string
		podName: string
		grep: string
		follow: boolean
	}
}
const props = defineProps<propsType>()
const title = ref<string>('构建日志')
const visible = ref<boolean>(false)
const grep = ref<string>('')
const podName = ref<string>('')
const showModel = () => {
	visible.value = true
}
defineExpose({
	showModel
})
const emit = defineEmits(['hide'])
const onCancel = () => {
	visible.value = false
	eventSource.value?.close()
	term.value?.reset()
	term.value?.clear()
	if (terminal.value?.innerHTML) {
		terminal.value.innerHTML = ''
		terminal.value = null
	}
	emit('hide')
}

const baseUrl = import.meta.env.VITE_APP_BASE_URL
const eventSource = ref<EventSource | null>(null)
const getLog = async () => {
	if (!props.currentTask.name) return
	initTerm()
	createEventSource()
}
const createEventSource = () => {
	eventSource.value = new EventSource(
		`${baseUrl}/v1/projects/${useSystemStore().projectUuid}/tasks/${props.currentTask.name}/log?podName=${podName.value}&grep=${grep.value}&follow=true`
	)
	eventSource.value.onopen = event => {
		loading.value = false
		term.value?.clear()
		console.log('onopen', event)
	}
	eventSource.value.onmessage = event => {
		term.value?.clear()
		if (eventSource.value?.readyState === 1 && !JSON.parse(event.data).result?.completed) {
			const eventData = JSON.parse(event.data).result
			loading.value = false
			term.value?.write(eventData.PodName + ': ' + eventData.Content + '\r\n')
		}
		if (eventSource.value?.readyState === 1 && JSON.parse(event.data).result?.completed) {
			console.log('complete')
			eventSource.value?.close()
		}
	}

	eventSource.value.onerror = event => {
		console.log('error', event)
		eventSource.value?.close()
	}
}

const terminal = ref<HTMLElement | null>(null)
const fitAddon = new FitAddon()
const loading = ref(true)
const term = ref<null | Terminal>(null)
const initTerm = () => {
	if (!term.value) {
		term.value = new Terminal({
			fontSize: 14,
			scrollback: 999999999999,
			allowTransparency: true,
			fontFamily: 'Monaco, Menlo, Consolas, Courier New, monospace',
			rows: 40,
			disableStdin: true, //是否应禁用输入
			cursorStyle: 'underline',
			cursorBlink: false,
			theme: {
				foreground: '#fff',
				background: '#000',
				cursor: 'help'
			}
		})
	}

	setTimeout(() => {
		term.value?.open(terminal.value as HTMLElement)
		term.value?.clear()
		term.value?.loadAddon(fitAddon)
		fitAddon.fit()
	}, 5)
}

const searchLog = debounce(() => {
	term.value?.clear()
	terminal.value = null
	getLog()
}, 1000)

watch(visible, value => {
	if (value) {
		title.value = '构建日志 - ' + props.currentTask.name
		getLog()
	} else {
		eventSource.value?.close()
		term.value?.reset()
		term.value?.clear()
		if (terminal.value?.innerHTML) {
			terminal.value.innerHTML = ''
			terminal.value = null
		}
	}
})
</script>

<style lang="less">
.task-log-dialog {
	.main-box {
		width: 1152px;
		.top-box {
			margin-bottom: 20px;
			height: 30px;

			.ant-input-affix-wrapper,
			.ant-select-selector {
				width: 280px;
				height: 30px;
				margin-right: 20px;
			}
		}
		.content-box {
			.content {
				width: 100%;
			}
		}

		.bottom-box {
			margin-top: 30px;
		}
	}
}
</style>
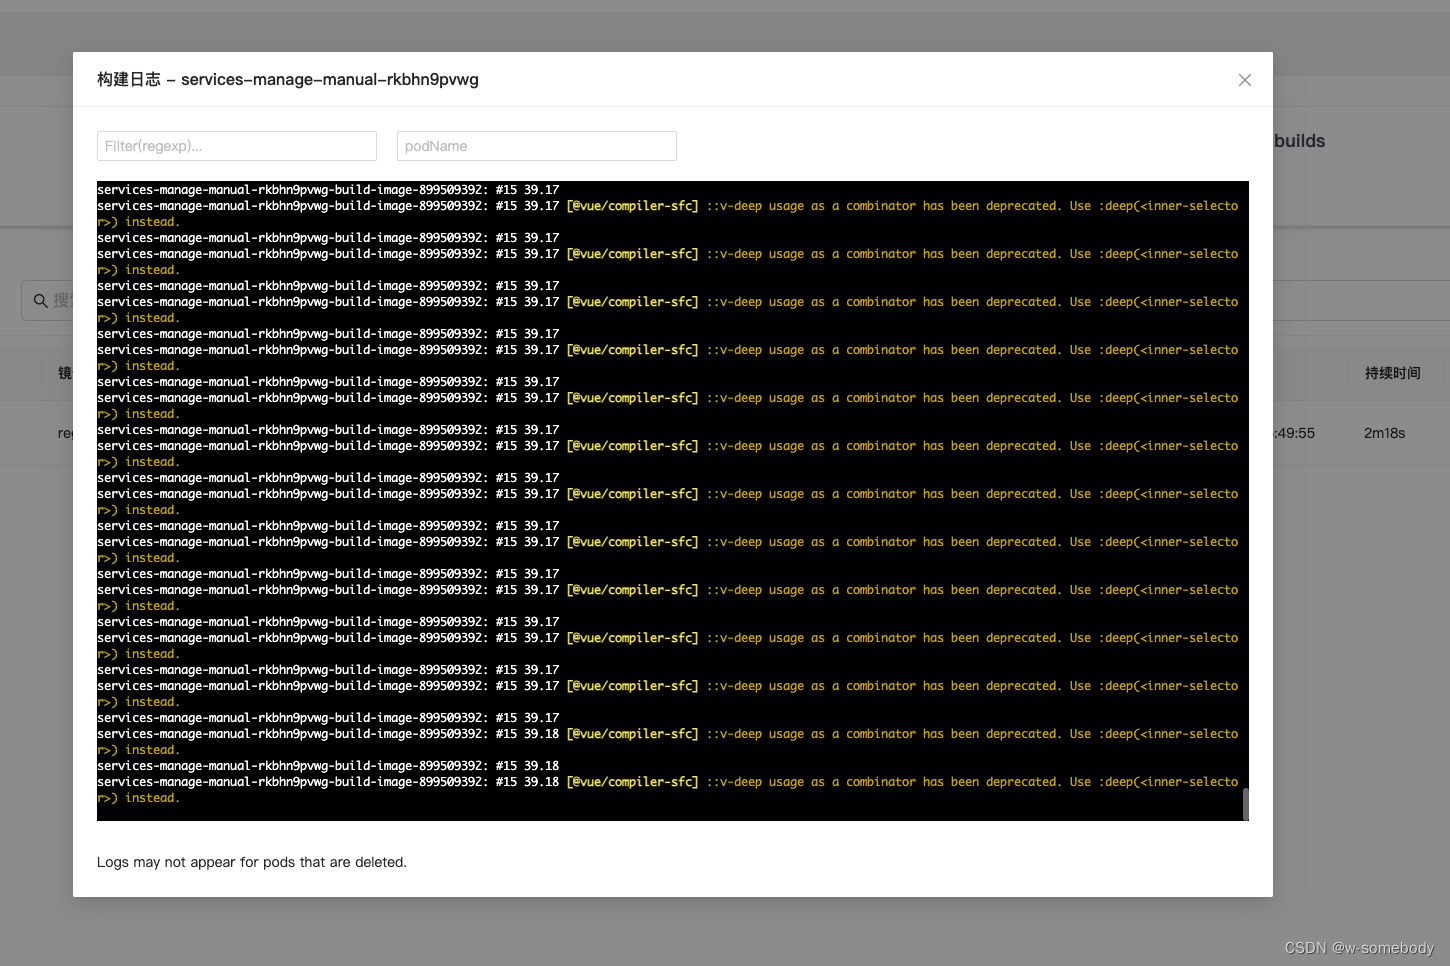
三、效果如下


 3534
3534


 被折叠的 条评论
为什么被折叠?
被折叠的 条评论
为什么被折叠?
 到【灌水乐园】发言


