


此次案例实现的功能
此次案例是实现当用户选中了记住密码复选框,并成功登录一次之后,这个时候如果再重新启动登录界面,之前输入的用户名和密码就会显示在文本框中
主要用到的知识点:
1. SharedPreferences是一个存储类,主要用于存储一些应用程序的配置参数,例如用户名、密码、自定义参数的设置等。SharedPreferences中存储的数据是以键值对的形式保存在XML文件中的。
2. 使用SharedPreferences类存储数据时,首先需要通过Context.getSharedPreferences(String name,int mode)获取SharedPreferences的实例对象。
3. 实现数据的存储和修改需要通过SharedPreferences.Editor()对象实现,要想获取Editor实例对象,需要调用SharedPreferences.Editor.edit()方法。
运行效果图
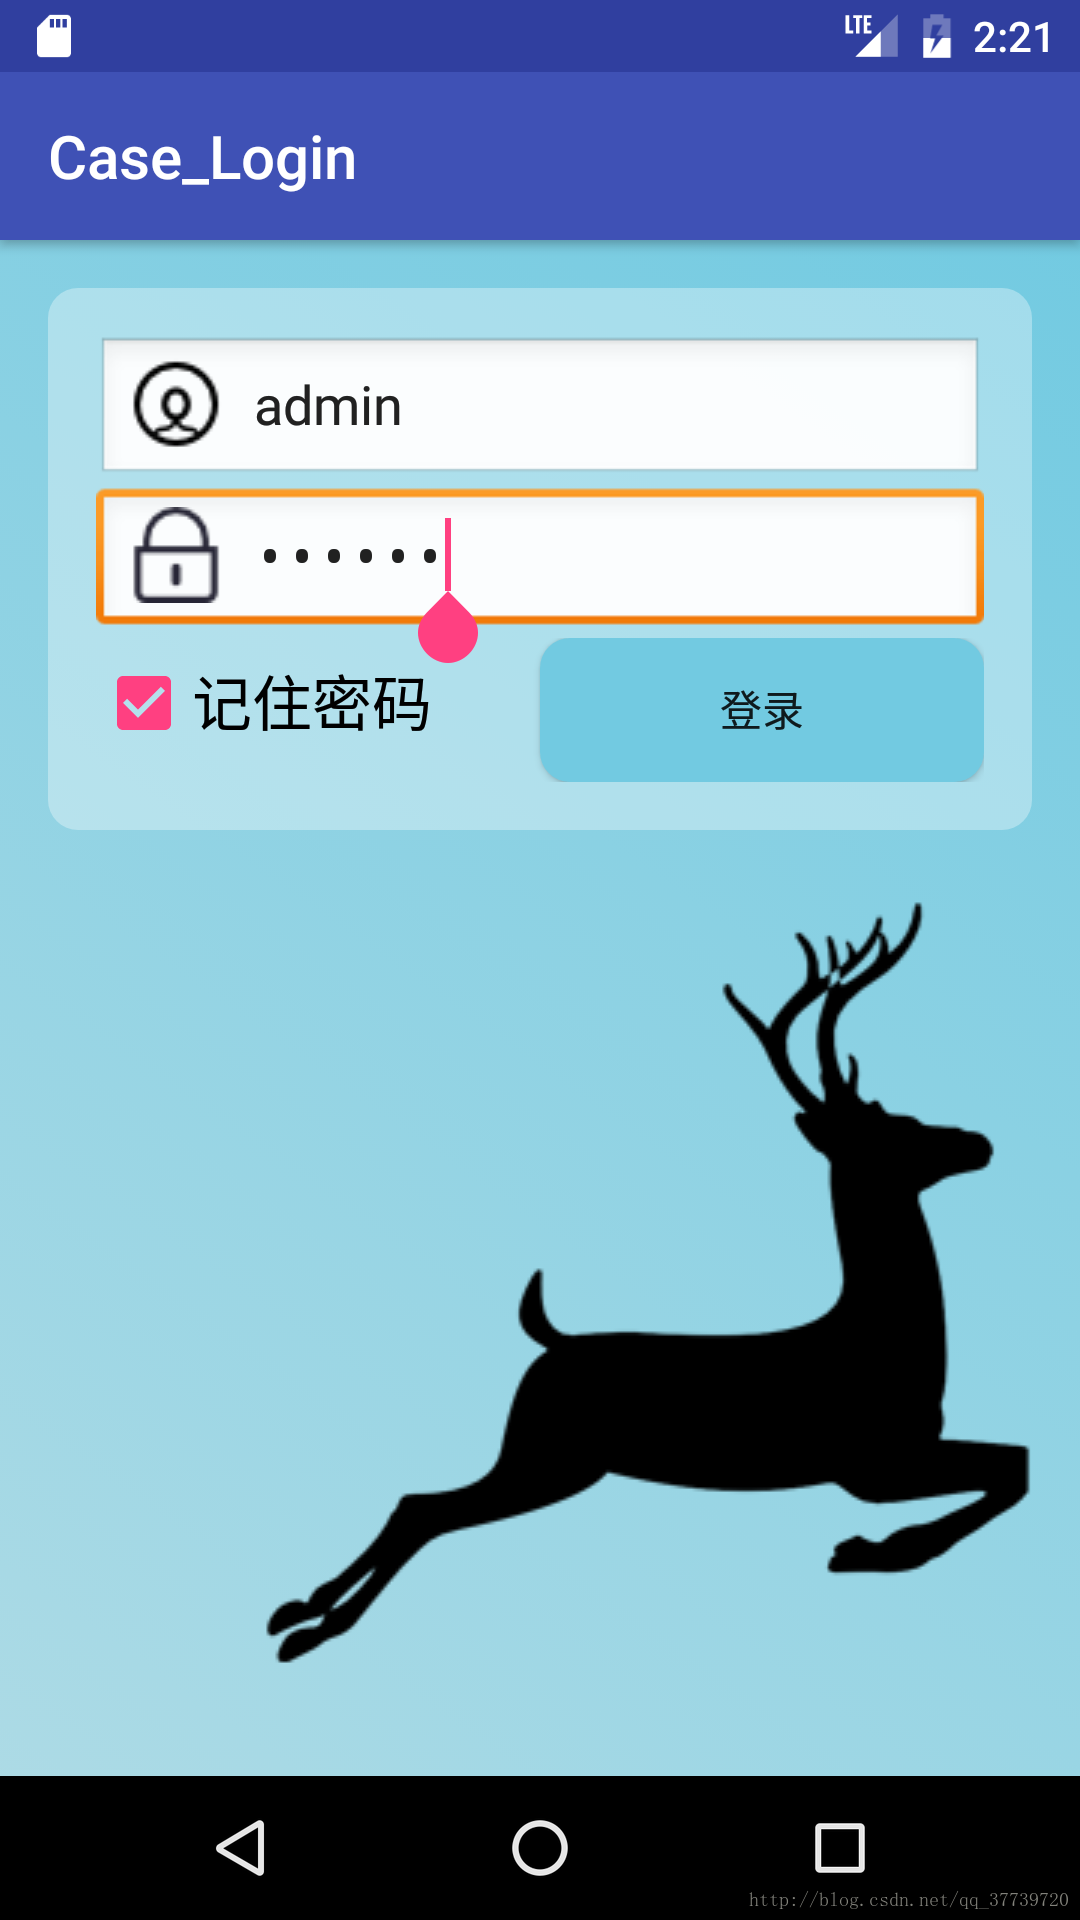
首先是用户第一次登录的界面,输入正确的账户名和密码,并且点击记住密码。
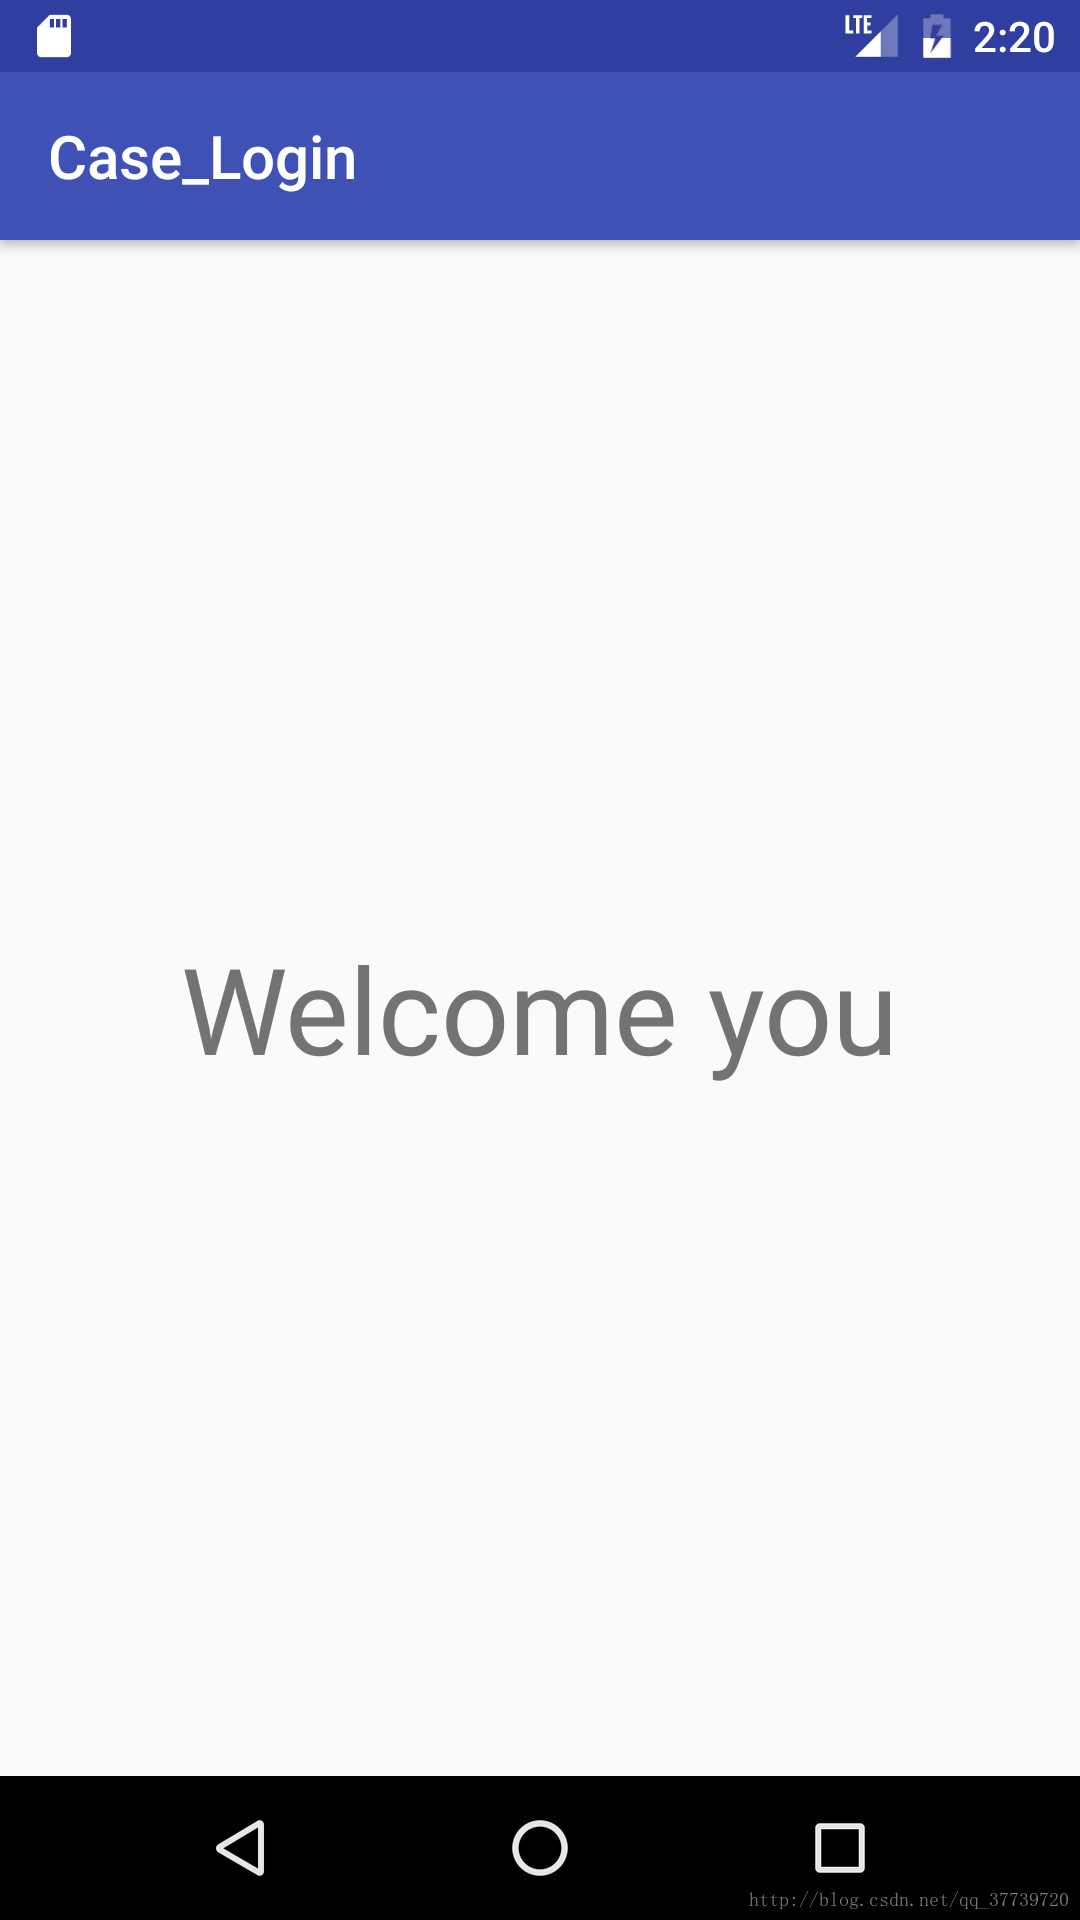
登录成功后会显示一个Welcome you的界面,表明登录成功。当重新打开这个APP时会自动显示上次登录成功的用户信息。
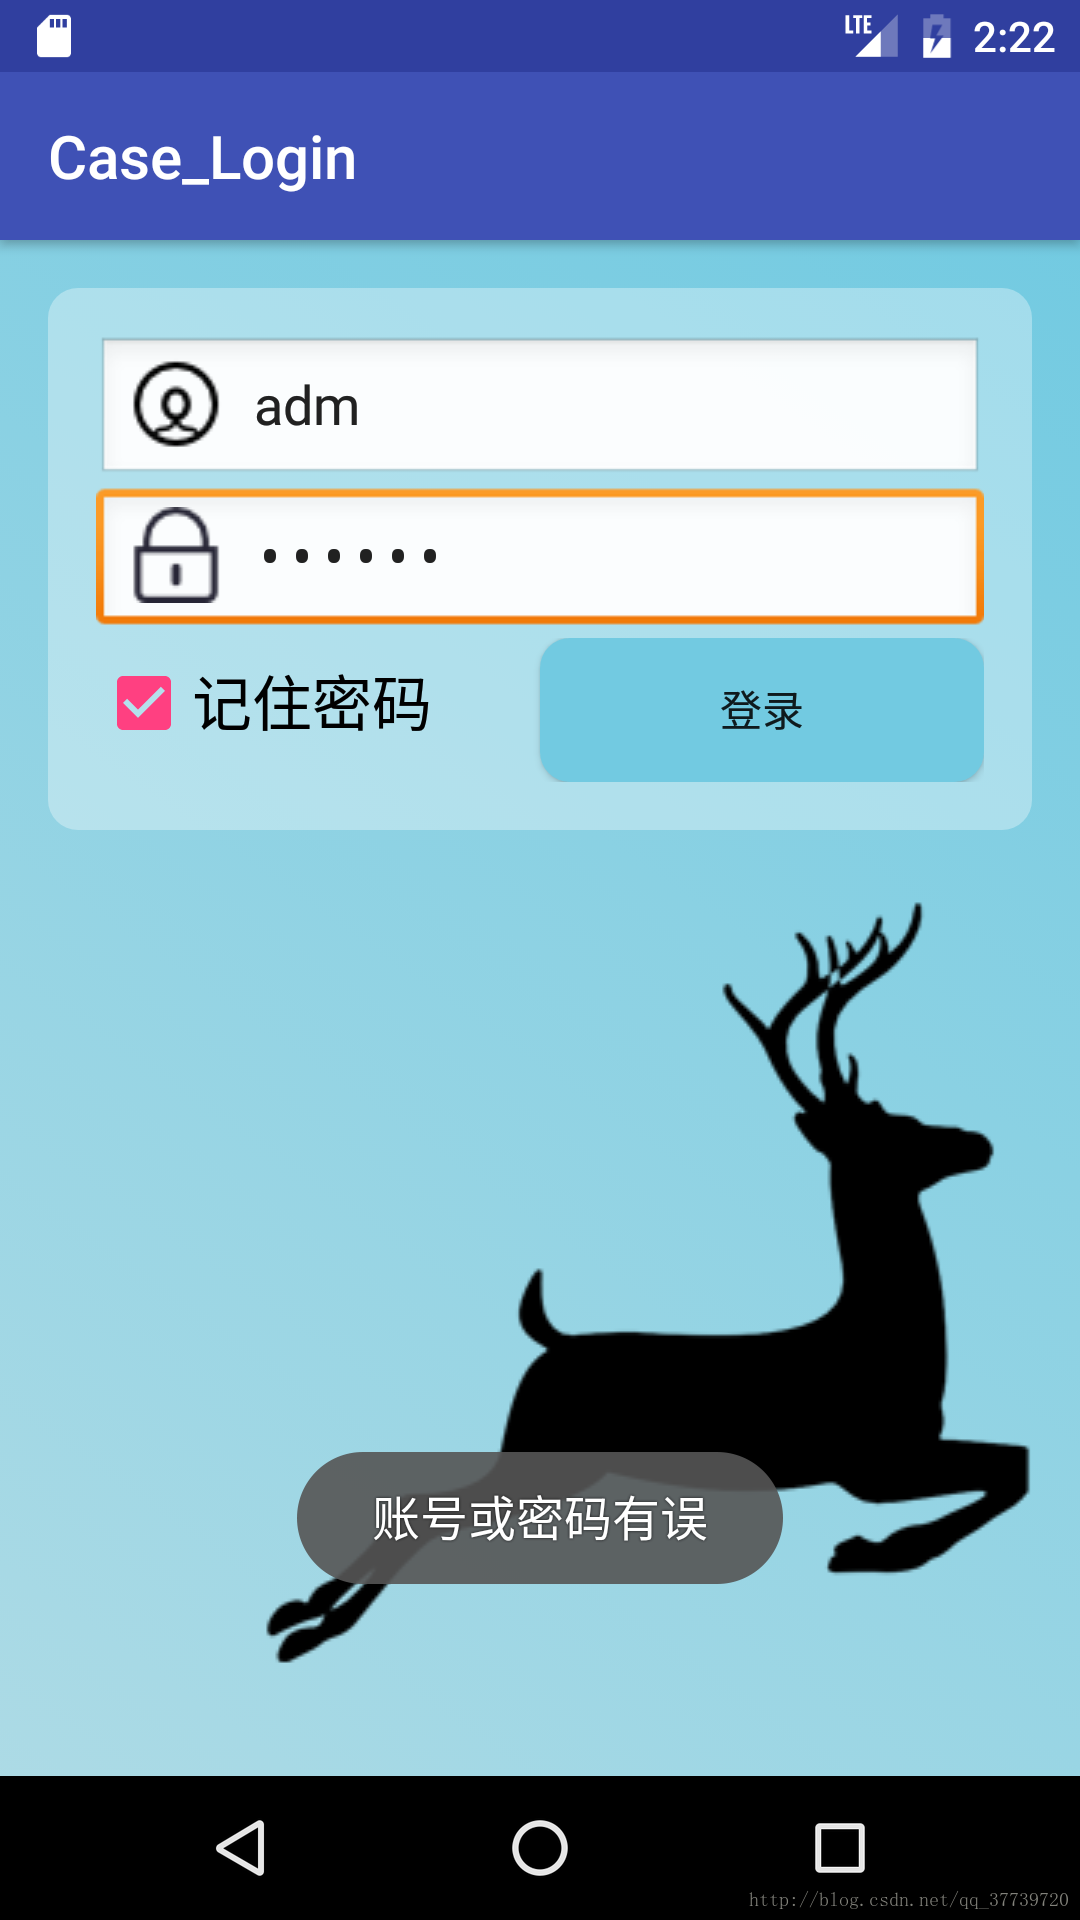
如果输入的密码或用户名错误,系统就会提示用户名或者密码错误的信息,将不能登录成功。
创建login_top.xml页面
向其中放置一个CheckBox用来显示记住密码选择框。
<?xml version="1.0" encoding="utf-8"?>
<RelativeLayout xmlns:android="http://schemas.android.com/apk/res/android"
    android:layout_width="match_parent"
    android:layout_height="wrap_content"
    android:padding="@dimen/activity_horizontal_margin"
    android:background="@drawable/logintop_roundbg">
    <EditText
        android:id="@+id/etName"
        android:layout_width="match_parent"
        android:layout_height="wrap_content"
        android:background="@android:drawable/edit_text"
        android:drawableLeft="@drawable/icon_user"
        android:drawablePadding="10dp"
        android:ems="10"
        android:hint="@string/etName">
        <requestFocus />
    </EditText>
    <EditText
        android:id="@+id/etPassword"
        android:layout_width="match_parent"
        android:layout_height="wrap_content"
        android:layout_below="@id/etName"
        android:background="@android:drawable/edit_text"
        android:drawableLeft="@drawable/icon_pass"
        android:drawablePadding="10dp"
        android:ems="10"
        android:hint="@string/etPass"
        android:inputType="textPassword">
        <requestFocus />
    </EditText>
    <LinearLayout
        android:layout_width="match_parent"
        android:layout_height="wrap_content"
        android:layout_below="@id/etPassword">
        <CheckBox
            android:text="记住密码"
            android:layout_width="0dp"
            android:layout_height="wrap_content"
            android:id="@+id/cbIsRememberPass"
            android:textSize="20sp"
            android:layout_weight="1" />
        <Button
            android:layout_width="0dp"
            android:layout_height="wrap_content"
            android:layout_weight="1"
            android:background="@drawable/btn_select"
            android:onClick="login"
            android:text="@string/btnLogin" />
    </LinearLayout>
</RelativeLayout>
创建activity_login.xml文件
通过插入一个ImageView来放置小鹿的图片
<?xml version="1.0" encoding="utf-8"?>
<RelativeLayout xmlns:android="http://schemas.android.com/apk/res/android"
    xmlns:app="http://schemas.android.com/apk/res-auto"
    xmlns:tools="http://schemas.android.com/tools"
    android:id="@+id/activity_login"
    android:layout_width="match_parent"
    android:layout_height="match_parent"
   android:paddingBottom="@dimen/activity_vertical_margin"
   android:paddingLeft="@dimen/activity_horizontal_margin"
  android:paddingRight="@dimen/activity_horizontal_margin"
    android:paddingTop="@dimen/activity_vertical_margin"
    android:background="@drawable/loginbg"
    tools:context="cn.edu.bzu.case_login.LoginActivity">
    <include layout="@layout/login_top"></include>
    <ImageView
        android:layout_width="wrap_content"
        android:layout_height="wrap_content"
        app:srcCompat="@drawable/deer"
        android:layout_alignParentBottom="true"
        android:layout_alignParentRight="true"
        android:layout_alignParentEnd="true"
        android:layout_marginBottom="20dp"
        android:id="@+id/imageView" />
</RelativeLayout>
创建欢迎界面
activity_main.xml用来显示登录成功,通过一个TextView将text设为Welcome you。
<?xml version="1.0" encoding="utf-8"?>
<RelativeLayout xmlns:android="http://schemas.android.com/apk/res/android"
    xmlns:tools="http://schemas.android.com/tools"
    android:id="@+id/activity_main"
    android:layout_width="match_parent"
    android:layout_height="match_parent"        android:paddingBottom="@dimen/activity_vertical_margin"
   android:paddingLeft="@dimen/activity_horizontal_margin"
  android:paddingRight="@dimen/activity_horizontal_margin"
    android:paddingTop="@dimen/activity_vertical_margin"
    tools:context="cn.edu.bzu.case_login.MainActivity">
    <TextView
        android:text="Welcome you"
        android:layout_width="wrap_content"
        android:layout_height="wrap_content"
        android:layout_centerVertical="true"
        android:layout_centerHorizontal="true"
        android:textSize="40sp"
        android:layout_marginTop="263dp"
        android:id="@+id/textView" />
</RelativeLayout>
实现数据的传输
在Java中新建一个Java文件命名为LoginActivity.java,通过SharedPreferences类存储数据。
package cn.edu.bzu.case_login;
import android.content.Context;
import android.content.Intent;
import android.content.SharedPreferences;
import android.support.v7.app.AppCompatActivity;
import android.os.Bundle;
import android.view.View;
import android.widget.CheckBox;
import android.widget.EditText;
import android.widget.Toast;
public class LoginActivity extends AppCompatActivity {
    private EditText etName;
    private EditText etPassword;
    private CheckBox cbIsRememberPass;
    private SharedPreferences sharedPreferences;
    @Override
    protected void onCreate(Bundle savedInstanceState) {
        super.onCreate(savedInstanceState);
        setContentView(R.layout.activity_login);
        InitViews();
 sharedPreferences=getSharedPreferences("rememberpassword", Context.MODE_PRIVATE);
        boolean isRemember=sharedPreferences.getBoolean("rememberpassword",false);
        if (isRemember){
            String name=sharedPreferences.getString("name","");
            String password=sharedPreferences.getString("password","");
            etName.setText(name);
            etPassword.setText(password);
            cbIsRememberPass.setChecked(true);
        }
   }
    private void InitViews() {
        etName= (EditText) findViewById(R.id.etName);
        etPassword= (EditText) findViewById(R.id.etPassword);
        cbIsRememberPass= (CheckBox) findViewById(R.id.cbIsRememberPass);
    }
    public void login(View view){
        String name=etName.getText().toString();
        String password=etPassword.getText().toString();        if("admin".equals(name)&&"123456".equals(password)){
            SharedPreferences.Editor editor=sharedPreferences.edit();
           if(cbIsRememberPass.isChecked()){
               editor.putBoolean("rememberpassword",true);
                editor.putString("name",name);
                editor.putString("password",password);
            }else{
                editor.clear();
            }
            editor.commit();
            Intent intent=new Intent(this,MainActivity.class);
            startActivity(intent);
            finish();
        }else{
            Toast.makeText(this,"账号或密码有误",Toast.LENGTH_LONG).show();
        }
    }
}
主要代码就是这些了。


 673
673

 被折叠的 条评论
为什么被折叠?
被折叠的 条评论
为什么被折叠?
 到【灌水乐园】发言


