


介绍
在本文中,我们将使用最新技术以一种简单易懂的方式从头开始开发一个 Web 应用程序。
- 后端 = ASP.NET Core Web API
- 数据库 = SQL Server
- 前端 = ANGULAR 12.
首先,我们将创建一个数据库、表并插入一些数据。
其次,我们使用ASP.NET Core Web API开发 API。
第三,我们使用 angular 12 开发前端。
步骤 1 -(数据库相关活动)
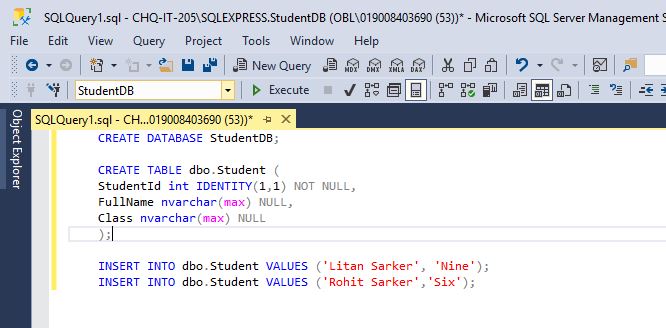
打开 SQL Server Management Studio 并连接到本地数据库后,创建一个名为 StudentDB 的数据库。
CREATE DATABASE StudentDB;
CREATE TABLE dbo.Student (
    StudentId int IDENTITY(1,1) NOT NULL,
    FullName nvarchar(max) NULL,
    Class nvarchar(max) NULL
);

INSERT INTO dbo.Student VALUES ('Litan Sarker', 'Nine');
INSERT INTO dbo.Student VALUES ('Rohit Sarker','Six');
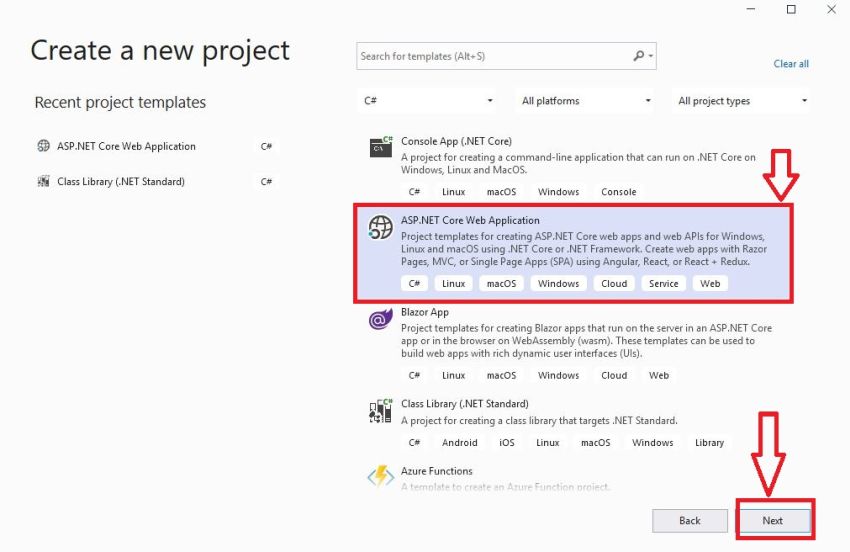
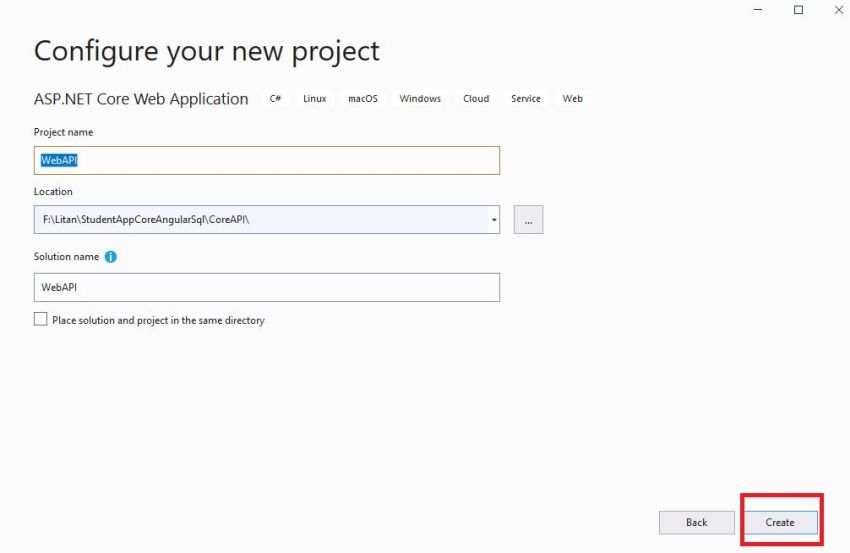
第 2 步 -(Web API 相关活动)
现在,在打开 Visual Studio 2019 后创建一个新项目。


第 3 步 – 现在更改启动类
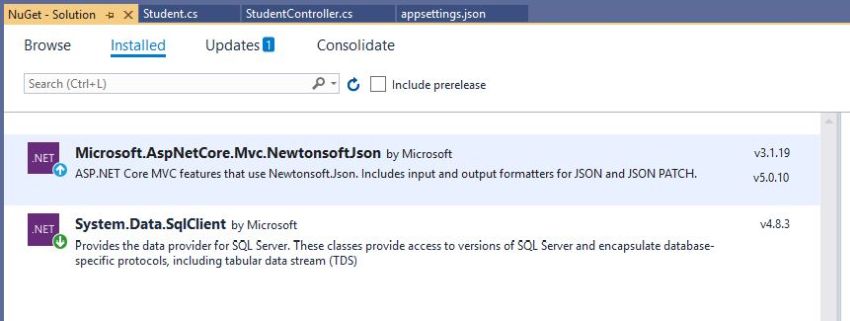
首先,安装这些,
- Microsoft.AspNetCore.Mvc.NewtonsoftJson
- System.Data.SqlClient
来自管理用于 JSON 序列化和数据库的 Nuget 包。
我们启用 CORS 以禁用安全性并允许来自其他域的请求。安装 NewtonSoft.json 后,我们默认使用 JSON 序列化程序。
using Microsoft.AspNetCore.Builder;
using Microsoft.AspNetCore.Hosting;
using Microsoft.AspNetCore.Mvc;
using Microsoft.Extensions.Configuration;
using Microsoft.Extensions.DependencyInjection;
using Microsoft.Extensions.Hosting;
using Microsoft.Extensions.Logging;
using System;
using System.Collections.Generic;
using System.Linq;
using System.Threading.Tasks;
using Newtonsoft.Json.Serialization;

namespace WebAPI
{

    public class Startup
    {

        public Startup(IConfiguration configuration)
        {

            Configuration = configuration;
        }

        public IConfiguration Configuration {
    get; }

        // This method gets called by the runtime. Use this method to add services to the container.
        public void ConfigureServices(IServiceCollection services)
        {

            //Enable Cors
            services.AddCors(c =>
            {

                c.AddPolicy("AllowOrigin", options => options.AllowAnyOrigin().AllowAnyMethod().AllowAnyHeader());
            });

            //Json Serializer
            services.AddControllersWithViews()
                .AddNewtonsoftJson(options =>
                options.SerializerSettings.ReferenceLoopHandling = Newtonsoft.Json.ReferenceLoopHandling.Ignore
                ).AddNewtonsoftJson(options => options.SerializerSettings.ContractResolver
                = new DefaultContractResolver());

            services.AddControllers();
        }

        // This method gets called by the runtime. Use this method to configure the HTTP request pipeline.
        public void Configure(IApplicationBuilder app, IWebHostEnvironment env)
        {

            app.UseCors(options => options.AllowAnyOrigin().AllowAnyMethod().AllowAnyHeader());

            if (env.IsDevelopment())
            {

                app.UseDeveloperExceptionPage();
            }

            app.UseRouting();

            app.UseAuthorization();

            app.UseEndpoints(endpoints =>
            {

                endpoints.MapControllers();
            });
        }
    }
}
第四步
现在,创建一个名为 Models 的文件夹并添加两个名为 Student.cs、department.cs 的类文件
using System;
using System.Collections.Generic;
using System.Linq;
using System.Threading.Tasks;

namespace WebAPI.Models
{

    public class Student
    {

        public int StudentId {
    get; set; }
        public string FullName {
    get; set; }
        public string Class {
    get; set; }
    }
}

using System;
using System.Collections.Generic;
using System.Linq;
using System.Threading.Tasks;

namespace WebAPI.Models
{

    public class Department
    {

        public int DepartmentId {
    get; set; }
        public string DepartmentName {
    get; set; }
    }
}
现在,打开 appsettings.json 文件并将其替换为以下内容,
{

  "ConnectionStrings": {

    "StudentAppCon": "Data Source=.; Initial Catalog=StudentDB; Integrated Security=true"
  },
  "Logging": {

    "LogLevel": {

      "Default": "Information",
      "Microsoft": "Warning",
      "Microsoft.Hosting.Lifetime": "Information"
    }
  },
  "AllowedHosts": "*"
}
第 6 步
现在,添加 StudentController。
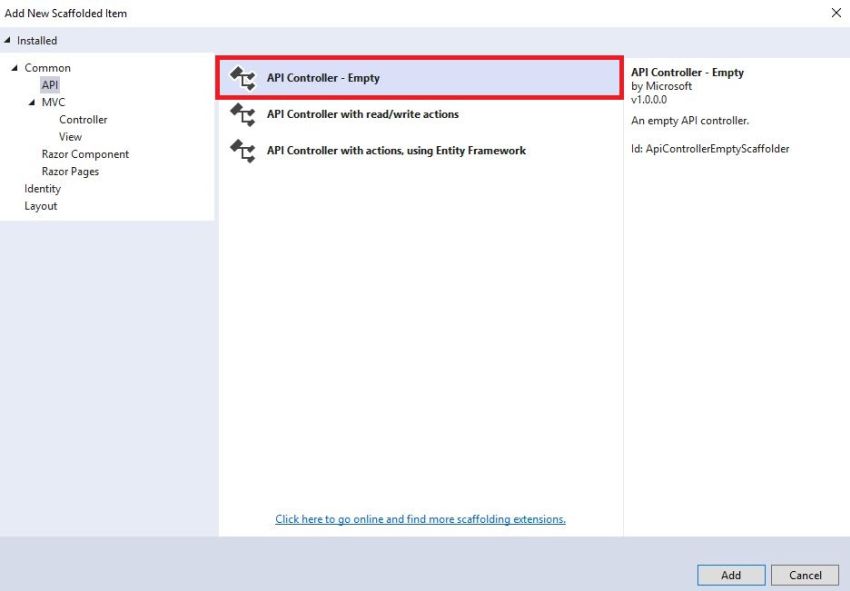
现在,在 StudentController 中进行以下更改,在这里我们实现依赖注入并使用原始 SQL 查询执行 CRUD 操作。
using Microsoft.AspNetCore.Http;
using Microsoft.AspNetCore.Mvc;
using Microsoft.Extensions.Configuration;
using System;
using System.Collections
最低0.47元/天 解锁文章


 2069
2069


 被折叠的 条评论
为什么被折叠?
被折叠的 条评论
为什么被折叠?
 到【灌水乐园】发言


