


 本文深入讲解Android应用中Preference的使用方法,包括Preference控件家族、使用XML和Fragment定义设置界面的步骤,以及如何处理事件。提供了丰富的代码示例和执行效果展示。
Android APP:Preference使用详解和实例
一、Preference 是Android app中重要的控件之一,Settings 模块大部分都是通过Preference 实现的,这里将学习preference 使用方法。
二、Perference 使用方法
一般在XML文件夹中创建xml文件来对Settings进行布局,布局文件中通常使用PreferenceScreen容器,PreferenceScreen包含多个 Preference控件,PreferenceCategory可以设置分类标题。
三、常用Preference控件如下:
Preference 控件家庭 View控件家庭 控件含义
Preference TextView 文本框
CheckPreference CheckBox 单选框
EditTextPreference EditText 输入文本框
ListPreference ListView 列表框
RingtonePreference —— 铃声
PreferenceCategory 类似于LinearLayou、RelativeLayout,用于组合一组Preference,使布局更具备层次感 。
PreferenceScreen 所有Preference元素的根节点
上面控件等同Layout布局中的View,PreferenceScreen 等同Layout布局中的ViewGroup。在Android 3.0之前需要继承PreferenceActivity(此方法不是太推荐使用,已被启用),3.0之后更高版本,则需要继承Activity,使用Fragment控制布局,然后实现不同控件的处理事件。
三、Perference常用使用方法如下两种:
1、使用XML定义Preference
2、使用Fragment 定义Preference
四、使用XML定义Preference
此方法有点过时,不太建议使用,但目前还可以用。让Activity继承PreferenceActivity,然后在重写onCreate方法,添加preferences.xml作为显示界面。
其使用方法如下:
1、在res/xml/目录中新建xml文件 例如:settingsfragment.xml
2、继承PreferenceActivity在onCreate方法中直接调用addPreferencesFromResource(R.xml.settingsfragment);添加布局
3、点击事件处理setOnPreferenceClickListener,内容发生改变事件处理 setOnPreferenceChangeListener
4、执行效果图
五、使用Fragment 定义Preference
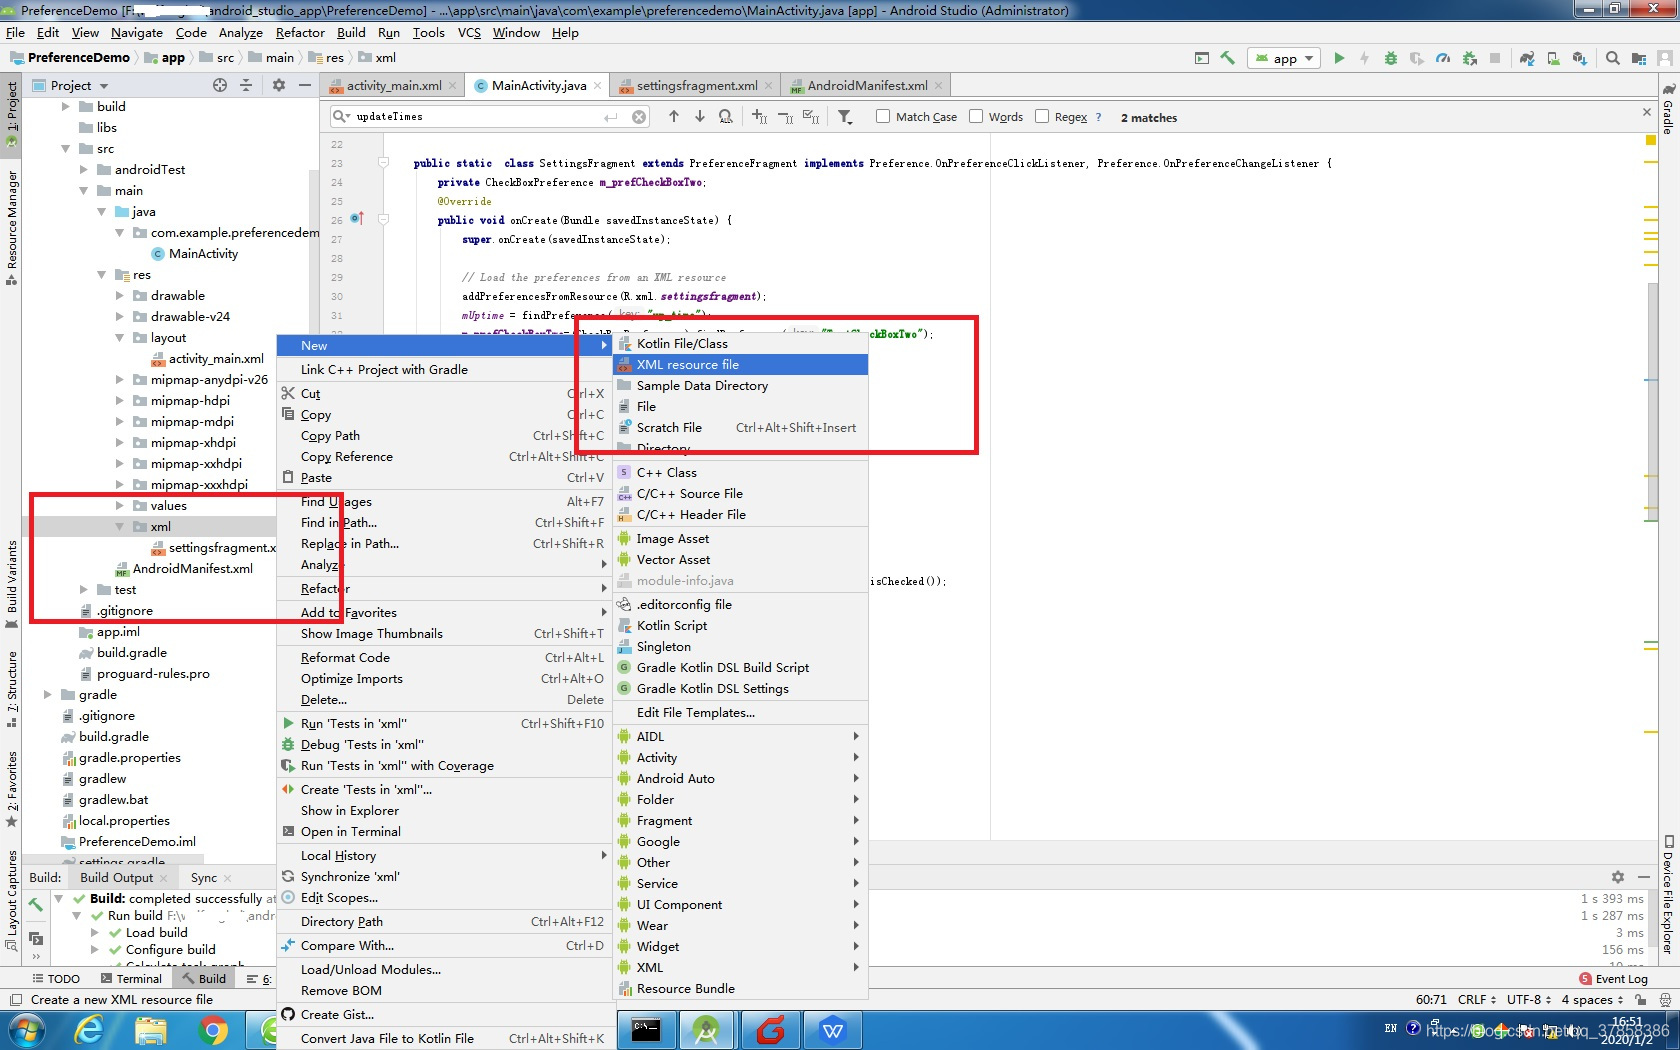
1 、 新建一个资源文件,类型是Preference,为了方便管理我们在res资源文件夹里新建一个名为xml的文件夹,存放我们的资源文件.鼠标右键xml/new/xml resouce file,新建一个settingsfragment.xml文件 。
2、自定义 SettingsFragment。
public class SettingsFragment extends PreferenceFragment {
    @Override
    public void onCreate(Bundle savedInstanceState) {
        super.onCreate(savedInstanceState);

        // Load the preferences from an XML resource
        addPreferencesFromResource(R.xml.preference);
    }
}
3、preference 实现,settingsfragment.xml文件内容如下:
<?xml version="1.0" encoding="utf-8"?>
<PreferenceScreen xmlns:android="http://schemas.android.com/apk/res/android">
    <PreferenceCategory
        android:key="categoryOne"
        android:title="General">
        <Preference
            android:key="prefAndroid"
            android:title="安卓"
            android:summary="点一下更新内容"/>
        <Preference
            android:key="prefIos"
            android:title="IOS"
            android:summary="可以作为一个设置项"/>
        <CheckBoxPreference
            android:key="prefCheckBoxOne"
            android:title="这相当于一个CheckBox"/>
        <CheckBoxPreference
            android:key="prefCheckBoxTwo"
            android:title="还可以设置summary"
            android:summaryOn="选中了"
            android:summaryOff="没选中"/>
        <CheckBoxPreference
            android:key="TestCheckBoxTwo"
            android:title="testsummary" />
        <EditTextPreference
            android:key="prefEditText"
            android:title="这相当于一个EditText"
        android:summary="我是EditText的一个summary"/>
        <ListPreference
            android:key="prefList"
            android:title="这相当于一个List表"/>

        <Preference android:key="up_time"
            android:enabled="false"
            android:shouldDisableView="false"
            android:title="Up time"
            android:summary="hh:min:sec"
            android:persistent="false" />


    </PreferenceCategory>

    <PreferenceCategory
        android:key="prefCategoryTwo"
        android:title="Inactive" >
        <MultiSelectListPreference
            android:key="prefMultiSelect"
            android:title="这相当于一个MultiSelect"/>
    <SwitchPreference
            android:key="prefSwitch"
            android:title="这相当于一个Switch"
            android:switchTextOn="switchTextOn选中了"
            android:switchTextOff="switchTextOff没选中"
            android:summaryOn="summaryOn选中了"
            android:summaryOff="summaryOff没选中"
            android:shadowColor="#0df10d"/>
        <RingtonePreference
            android:key="prefRingtone"
            android:title="这相当于一个"
            android:summary="请选择铃声"
            android:icon="@mipmap/ic_launcher_round"/>
    </PreferenceCategory>
</PreferenceScreen>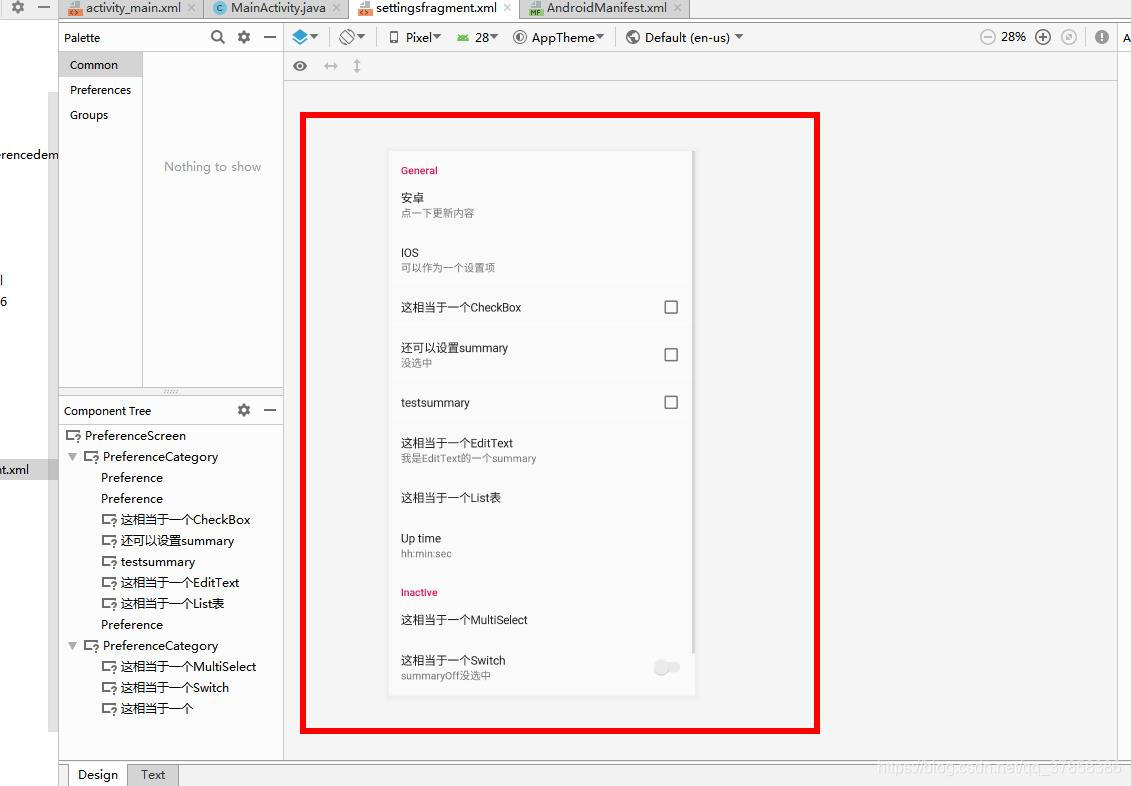
4、Activity 中调用Fragment
public class MainActivity extends AppCompatActivity {

    @Override
    protected void onCreate(Bundle savedInstanceState) {
        // TODO Auto-generated method stub
        super.onCreate(savedInstanceState);
        setContentView(R.layout.activity_preference);

          getFragmentManager().beginTransaction()
                .replace(R.id.settingsFragment, new SettingsFragment()).commit();
    }

}
5、MainActivity.java代码
package com.example.preferencedemo;
import android.net.wifi.WifiConfiguration;
import android.os.Handler;
import android.os.SystemClock;
import android.preference.CheckBoxPreference;
import android.preference.Preference;
import android.preference.PreferenceActivity;
import android.preference.PreferenceFragment;
import android.support.v7.app.AppCompatActivity;
import android.os.Bundle;
import java.lang.ref.WeakReference;
import android.os.Message;
import android.net.wifi.WifiManager;
import android.widget.Toast;
//public class MainActivity extends PreferenceActivity {
public class MainActivity extends AppCompatActivity {
public static Preference mUptime;
private Handler mHandler;
private static final int EVENT_UPDATE_STATS = 500;
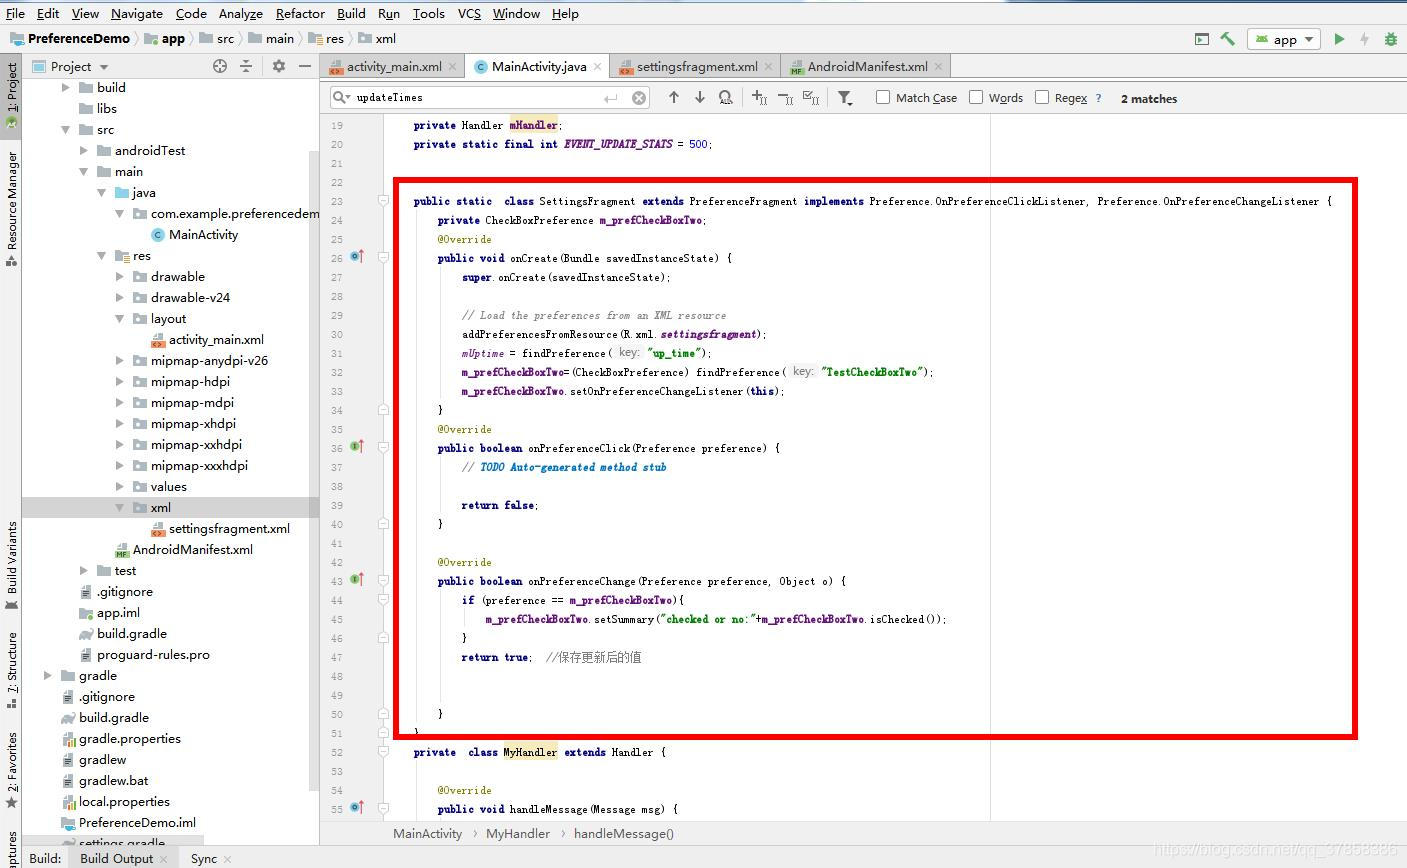
public static class SettingsFragment extends PreferenceFragment implements Preference.OnPreferenceClickListener, Preference.OnPreferenceChangeListener {
private CheckBoxPreference m_prefCheckBoxTwo;
@Override
public void onCreate(Bundle savedInstanceState) {
super.onCreate(savedInstanceState);
// Load the preferences from an XML resource
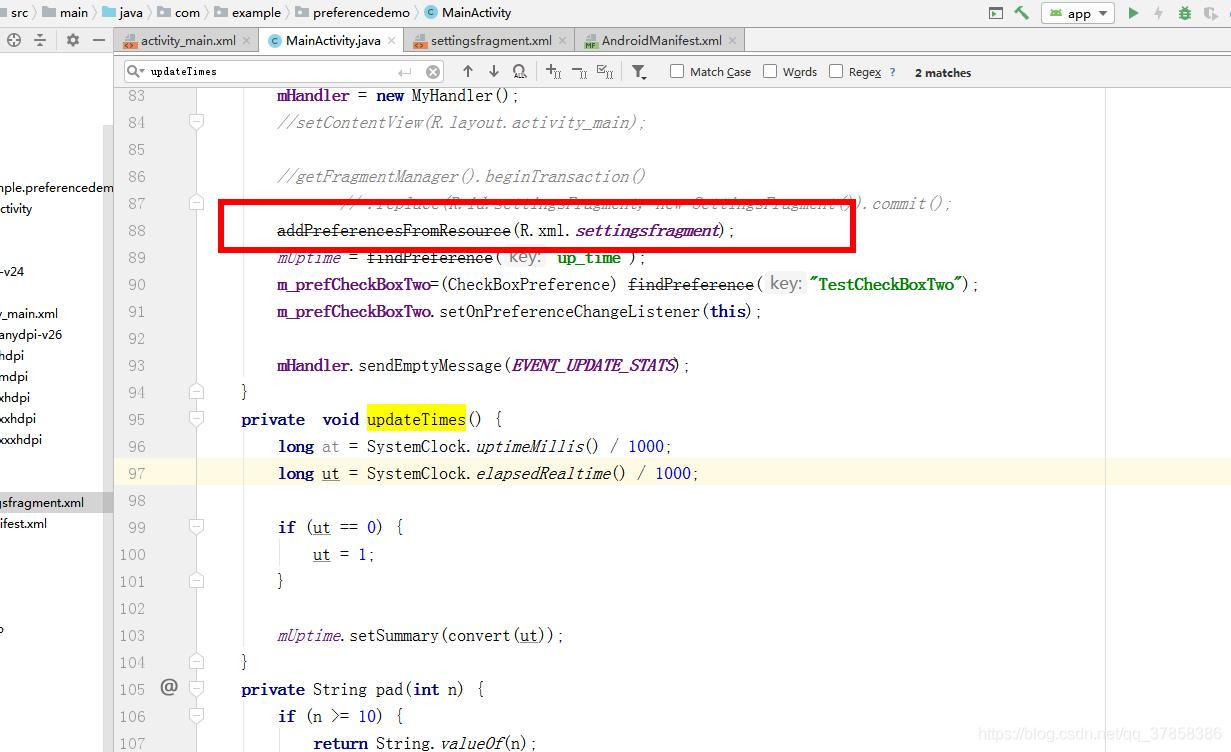
addPreferencesFromResource(R.xml.settingsfragment);
mUptime = findPreference("up_time");
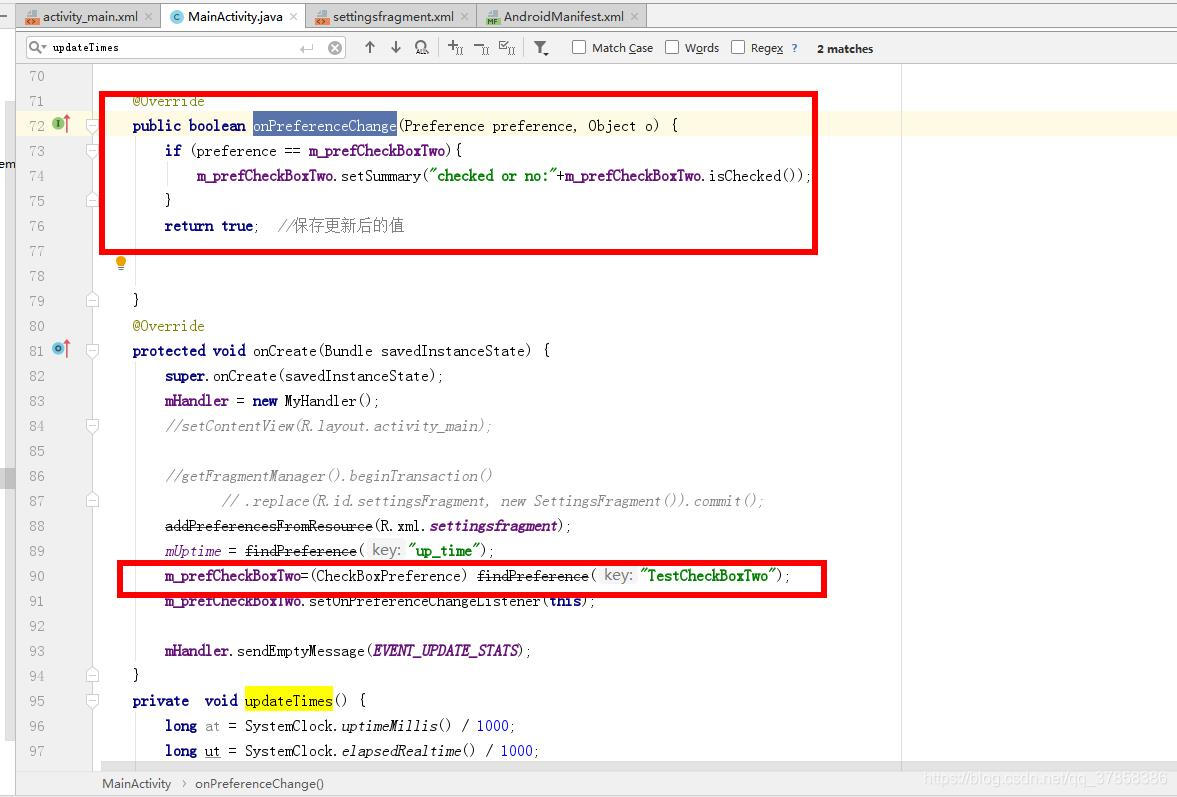
m_prefCheckBoxTwo=(CheckBoxPreference) findPreference("TestCheckBoxTwo");
m_prefCheckBoxTwo.setOnPreferenceChangeListener(this);
}
@Override
public boolean onPreferenceClick(Preference preference) {
// TODO Auto-generated method stub
return false;
}
@Override
public boolean onPreferenceChange(Preference preference, Object o) {
if (preference == m_prefCheckBoxTwo){
m_prefCheckBoxTwo.setSummary("checked or no:"+m_prefCheckBoxTwo.isChecked());
}
return true; //保存更新后的值
}
}
private class MyHandler extends Handler {
@Override
public void handleMessage(Message msg) {
switch (msg.what) {
case EVENT_UPDATE_STATS:
updateTimes();
sendEmptyMessageDelayed(EVENT_UPDATE_STATS, 1000);
break;
}
}
} @Override
protected void onCreate(Bundle savedInstanceState) {
super.onCreate(savedInstanceState);
mHandler = new MyHandler();
setContentView(R.layout.activity_main);
getFragmentManager().beginTransaction()
.replace(R.id.settingsFragment, new SettingsFragment()).commit();
// addPreferencesFromResource(R.xml.settingsfragment);
// mUptime = findPreference("up_time");
mHandler.sendEmptyMessage(EVENT_UPDATE_STATS);
}
private void updateTimes() {
long at = SystemClock.uptimeMillis() / 1000;
long ut = SystemClock.elapsedRealtime() / 1000;
if (ut == 0) {
ut = 1;
}
mUptime.setSummary(convert(ut));
}
private String pad(int n) {
if (n >= 10) {
return String.valueOf(n);
} else {
return "0" + String.valueOf(n);
}
}
private String convert(long t) {
int s = (int)(t % 60);
int m = (int)((t / 60) % 60);
int h = (int)((t / 3600));
return h + ":" + pad(m) + ":" + pad(s);
}
}
6、执行效果图。
六、源码路径
1、使用XML定义Preference源码路径。https://download.csdn.net/download/qq_37858386/12074718
2、使用Fragment 定义Preference源码路径:https://download.csdn.net/download/qq_37858386/12074681


 1164
1164

 被折叠的 条评论
为什么被折叠?
被折叠的 条评论
为什么被折叠?
 到【灌水乐园】发言


