


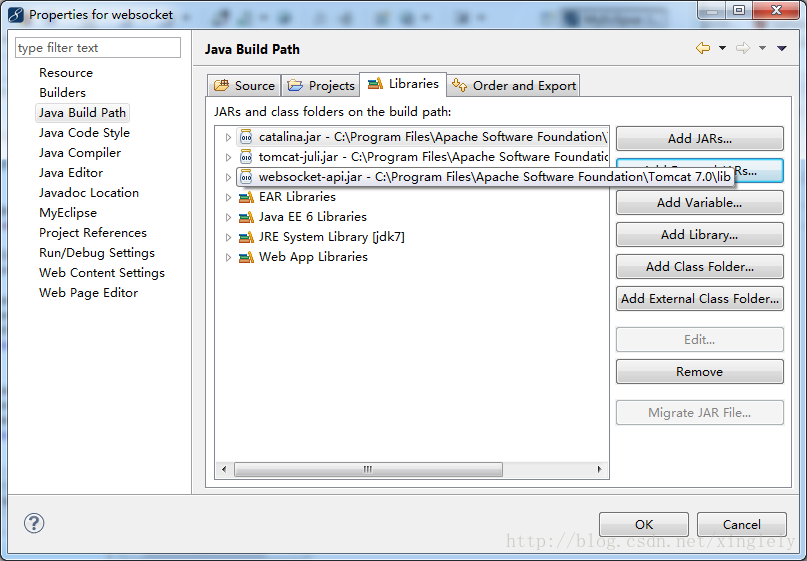
主要是要时在工程中导入catalina.jar,websocket-api.jar,其中前者在java中可以找到,后者如果java中找不到可以试着去下载jetty看看里面的.jar文件。
<------------------------------------------------------------------------分割线-------------------------------------------------------------------------------------------->
在服务器端,也出现了一些实现websocket协议的项目:
<------------------------------------------------------------------------分割线-------------------------------------------------------------------------------------------->
在服务器端,也出现了一些实现websocket协议的项目:
jetty 7.0.1 包含了一个初步的实现
resin 包含有websocket 实现
pywebsocket, apache http server 扩展
apache tomcat 7.0.27 版本
Nginx 1.3.13 版本
websocket api在浏览器端的广泛实现似乎只是一个时间问题了, 值得注意的是服务器端没有标准的api, 各个实现都有自己的一套api, 并且jcp也没有类似的提案, 所以使用websocket开发服务器端有一定的风险.可能会被锁定在某个平台上或者将来被迫升级.
 咳咳,以上这大坨来自百度百科,欲知详细请自行查找
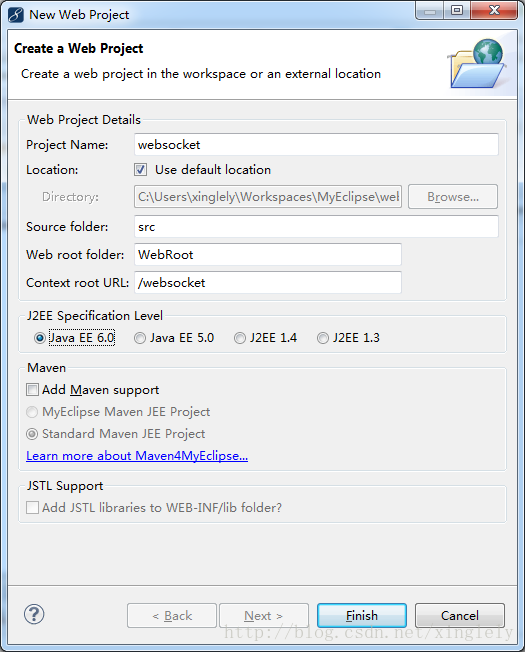
 好了,准备开发环境:java sdk7,Myeclipse10,Tomcat7.47
 下载好了自行安装,我不管了
打开MyEclipse新建一个JSP工程,然后导入catalina.jar,websocket-api.jar
 什么,你觉得不爽,那你就多导几个吧,反正不要钱,也没人强奸你!
什么,你觉得不爽,那你就多导几个吧,反正不要钱,也没人强奸你!
Ok,接下来,新建一个类
WebsocketConfig ,有关抽象类ServerApplicationConfig请查看javaEE7 api
 这个很重要,你知道吗,我不哆嗦,你往下看
这个很重要,你知道吗,我不哆嗦,你往下看
- package com.websocket;
- import java.util.HashSet;
- import java.util.Set;
- import javax.websocket.Endpoint;
- import javax.websocket.server.ServerApplicationConfig;
- import javax.websocket.server.ServerEndpointConfig;
- public class WebsocketConfig implements ServerApplicationConfig{
- @Override
- public Set<Class<?>> getAnnotatedEndpointClasses(Set<Class<?>> scanned) {
- // TODO Auto-generated method stub
- System.out.println("******getAnnotatedEndpointClasses******");
- // Deploy all WebSocket endpoints defined by annotations in the examples
- // web application. Filter out all others to avoid issues when running
- // tests on Gump
- //这主要是扫描类的包,如果前缀为"com.websocket."就抓住她,然后做什么,你懂的
- Set<Class<?>> res=new HashSet<>();
- for(Class<?> cs:scanned){
- if(cs.getPackage().getName().startsWith("com.websocket.")){
- res.add(cs);
- }
- }
- return res;
- }
- @Override
- public Set<ServerEndpointConfig> getEndpointConfigs(
- Set<Class<? extends Endpoint>> scanned) {
- // TODO Auto-generated method stub
- System.out.println("******getEndpointConfigs******");
- Set<ServerEndpointConfig> res=new HashSet<>();
- /*
- //使用<span style="font-family: arial, 宋体, sans-serif; ">Programmatic api的服务器地址</span>
- if (scanned.contains(EchoEndpoint.class)) {
- res.add(ServerEndpointConfig.Builder.create(
- EchoEndpoint.class,
- "/websocket/echoProgrammatic").build());
- }
- */
- return res;
- }
- }
好了,现在我们来建立一个简单chat的ServerEndpoint,据说有两种方式:1、使用@ ServerEndpoint 2、采用继承的方式
我们先来第一种,新建一个类chat1
- package com.websocket.chat;
- import java.io.IOException;
- import java.util.Set;
- import java.util.concurrent.CopyOnWriteArraySet;
- import java.util.concurrent.atomic.AtomicInteger;
- import javax.websocket.OnClose;
- import javax.websocket.OnMessage;
- import javax.websocket.OnOpen;
- import javax.websocket.Session;
- import javax.websocket.server.ServerEndpoint;
- import util.HTMLFilter;
- @ServerEndpoint(value="/chat01")
- //用了这个之后,你的服务地址为ws://localhost:port/projectName/chat01
- public class chat_1 {
- private static final AtomicInteger connectionIds = new AtomicInteger(0);
- private static final Set<chat_1> connections =
- new CopyOnWriteArraySet<chat_1>();
- private final String nickname;
- private Session session;
- public chat_1() {
- nickname = "游客ID:" + connectionIds.getAndIncrement();
- }
- @OnOpen
- public void start(Session session) {
- this.session = session;
- connections.add(this);
- String message = String.format("嗨嗨,姑娘们,来接客了: %s %s", nickname, "has joined.");
- broadcast(message);
- }
- @OnClose
- public void end() {
- connections.remove(this);
- String message = String.format("客官慢走,嘿嘿,还没付钱呢: %s %s",
- nickname, "has disconnected.");
- broadcast(message);
- }
- @OnMessage
- public void receive(String message) {
- // Never trust the client
- String filteredMessage = String.format("您有新消息:%s: %s",
- nickname, HTMLFilter.filter(message.toString()));
- broadcast(filteredMessage);
- }
- private static void broadcast(String msg) {
- for (chat_1 client : connections) {
- try {
- client.session.getBasicRemote().sendText(msg);
- } catch (IOException e) {
- connections.remove(client);
- try {
- client.session.close();
- } catch (IOException e1) {
- // Ignore
- }
- String message = String.format("* %s %s",
- client.nickname, "has been disconnected.");
- broadcast(message);
- }//try
- }//for
- }//void broadcast(String msg)
- }
- /*
- * 你可能已经注意到我们从 javax.websocket包中引入了一些类。
- @ServerEndpoint 注解是一个类层次的注解,它的功能主要是将目
- 前的类定义成一个websocket服务器端。注解的值将被用于监听用户连
- 接的终端访问URL地址。
- onOpen 和 onClose 方法分别被@OnOpen和@OnClose 所注解。
- 这两个注解的作用不言自明:他们定义了当一个新用户连接和断开的时候所调
- 用的方法。
- onMessage 方法被@OnMessage所注解。这个注解定义了当服务器接
- 收到客户端发送的消息时所调用的方法。注意:这个方法可能包含一个
- javax.websocket.Session可选参数(在我们的例子里就是
- session参数)。如果有这个参数,容器将会把当前发送消息客户端的连接
- Session注入进去。
- */
index.jsp
- <%@ page language="java" import="java.util.*" pageEncoding="ISO-8859-1"%>
- <%
- String path = request.getContextPath();
- String basePath = request.getScheme()+"://"+request.getServerName()+":"+request.getServerPort()+path+"/";
- %>
- <!DOCTYPE HTML PUBLIC "-//W3C//DTD HTML 4.01 Transitional//EN">
- <html>
- <head>
- <base href="<%=basePath%>">
- <title>My JSP 'index.jsp' starting page</title>
- <meta http-equiv="pragma" content="no-cache">
- <meta http-equiv="cache-control" content="no-cache">
- <meta http-equiv="expires" content="0">
- <meta http-equiv="keywords" content="keyword1,keyword2,keyword3">
- <meta http-equiv="description" content="This is my page">
- <!--
- <link rel="stylesheet" type="text/css" href="styles.css">
- -->
- </head>
- <body>
- <li><a href="chat01.xhtml">chat01</a></li>
- <pre code_snippet_id="91119" snippet_file_name="blog_20131201_4_6394982" name="code" class="java" style="color: rgb(51, 51, 51); font-size: 14px; line-height: 24px; text-indent: 28px; "><li><a href="chat02.xhtml">chat02</a></li></pre> </body></html>
- <pre></pre>
- <img src="https://img-blog.csdn.net/20131201181020546?watermark/2/text/aHR0cDovL2Jsb2cuY3Nkbi5uZXQveGluZ2xlbHk=/font/5a6L5L2T/fontsize/400/fill/I0JBQkFCMA==/dissolve/70/gravity/SouthEast" alt="">
- <pre></pre>
转自:http://blog.csdn.net/xinglely/article/details/17056723


 1067
1067


 被折叠的 条评论
为什么被折叠?
被折叠的 条评论
为什么被折叠?
 到【灌水乐园】发言


