C# ObjectArx 绘制表格并设置单元格合并

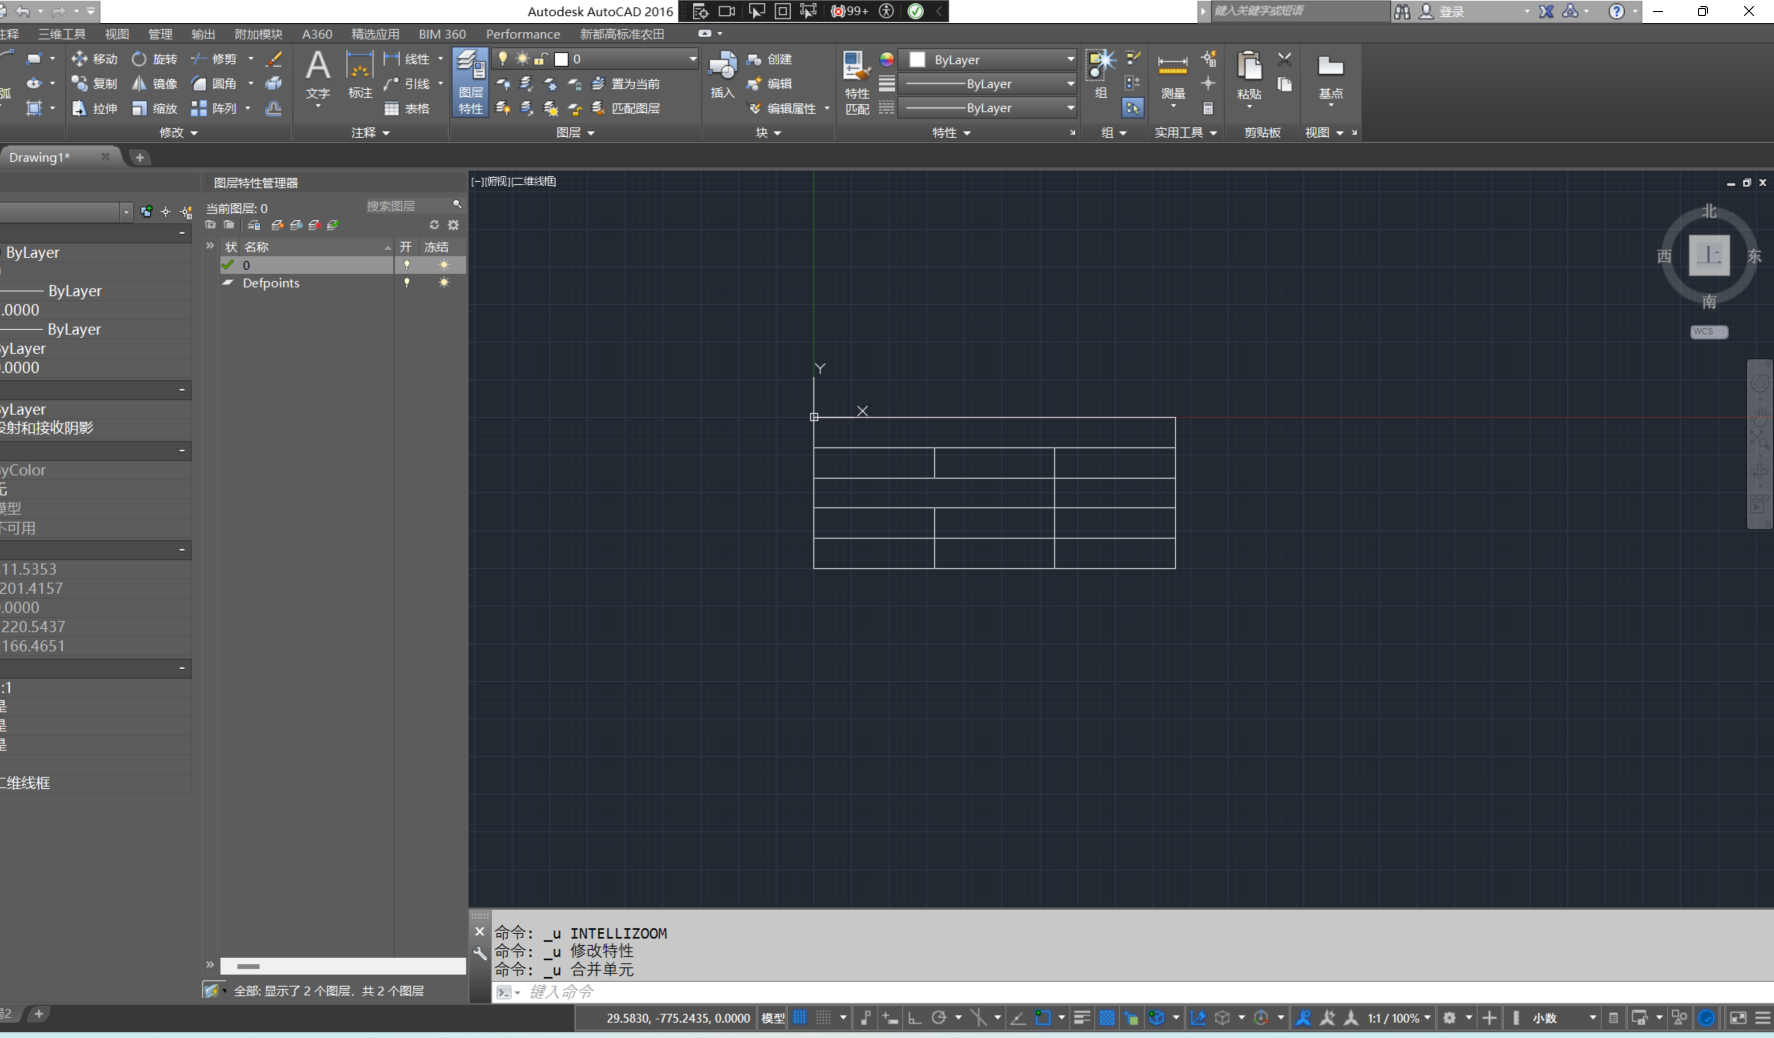
本文介绍了如何在AutoCAD中通过C#代码创建一个新的表格,设置其尺寸、行高、列宽,定位,并将单元格从(2,0)合并到(2,1)的过程。
摘要由CSDN通过智能技术生成

第一行默认是标题,可设置行【RowType】进行设置类型

            Document doc = Application.DocumentManager.MdiActiveDocument;

            using (Transaction tr = doc.TransactionManager.StartOpenCloseTransaction())
            {
                BlockTable bt = tr.GetObject(doc.Database.BlockTableId, OpenMode.ForRead) as BlockTable;
                BlockTableRecord btr = tr.GetObject(bt[BlockTableRecord.ModelSpace], OpenMode.ForWrite) as BlockTableRecord;

                Table table = new Table();
                //设置表格大小(必须先创建表格类型再设置表格属性)
                table.SetSize(5, 3);
                //设置行高
                table.SetRowHeight(50);
                table.SetColumnWidth(200);
                // 设置表格的行数和列数
                
                // 设置表格的位置和大小
                table.Position = new Autodesk.AutoCAD.Geometry.Point3d(0, 0, 0);

                //从(2,0)单元格合并至(2,1)单元格,行列下表从0开始
                var cellRange = CellRange.Create(table, 2, 0, 2, 1);
                table.MergeCells(cellRange);

                btr.AppendEntity(table);
                tr.AddNewlyCreatedDBObject(table,true);

                tr.Commit();
            }

  • 7
    点赞
  • 9
    收藏
    觉得还不错? 一键收藏
  • 0
    评论
C# ObjectARX 是 AutoCAD 的 .NET API,可以通过 C# 代码实现 AutoCAD 的二次开发。下面是按范围打印并设置打印样式表的示例代码: ```csharp using Autodesk.AutoCAD.Runtime; using Autodesk.AutoCAD.ApplicationServices; using Autodesk.AutoCAD.DatabaseServices; using Autodesk.AutoCAD.EditorInput; using Autodesk.AutoCAD.GraphicsInterface; using Autodesk.AutoCAD.PlottingServices; using Autodesk.AutoCAD.Publishing; namespace MyCommands { public class MyCommandsClass { [CommandMethod("MyPrint")] public void MyPrint() { Document doc = Application.DocumentManager.MdiActiveDocument; Database db = doc.Database; Editor ed = doc.Editor; // 获取打印范围 PromptPointResult ppr = ed.GetPoint("\n请指定打印范围的第一个角点:"); if (ppr.Status != PromptStatus.OK) return; Point3d pt1 = ppr.Value; ppr = ed.GetCorner("\n请指定打印范围的第二个角点:", pt1); if (ppr.Status != PromptStatus.OK) return; Point3d pt2 = ppr.Value; // 设置打印样式表 string styleSheetName = "MyStyleSheet"; if (!PlotSettingsValidator.StyleSheetExists(styleSheetName)) { PlotSettingsValidator.AddNewStyleSheet(styleSheetName); } PlotSettingsValidator.SetCurrentStyleSheet(styleSheetName); // 创建打印信息 PlotInfo pi = new PlotInfo(); pi.Layout = "*Model_Space"; pi.OverrideSettings = null; // 创建打印设备 PlotSettings ps = new PlotSettings(doc.Editor); ps.CopyFrom(pi); // 设置打印范围 ps.SetPlotWindowArea(pt1, pt2); // 设置打印样式 ps.PlotStyleName = "monochrome.ctb"; // 创建打印对象 PlotInfoValidator piv = new PlotInfoValidator(); piv.MediaMatchingPolicy = MatchingPolicy.MatchEnabled; piv.Validate(pi); // 打印 PlotEngine pe = PlotFactory.CreatePublishEngine(); pe.BeginPlot(null, null); pe.BeginDocument(pi, doc.Name, null, 1, true, null); pe.BeginPage(new PlotPageInfo(), pi, true, null); pe.SetPlotSettings(ps); pe.BeginGenerateGraphics(null); pe.EndGenerateGraphics(null); pe.EndPage(null); pe.EndDocument(null); pe.EndPlot(null); } } } ``` 以上代码实现了按指定范围打印并设置打印样式表。需要注意的是,代码中的打印范围是使用 `SetPlotWindowArea` 方法设置的,打印样式表是使用 `PlotStyleName` 属性设置的。你可以根据自己的需要修改这些参数。

“相关推荐”对你有帮助么?

  • 非常没帮助
  • 没帮助
  • 一般
  • 有帮助
  • 非常有帮助
提交
评论
添加红包

请填写红包祝福语或标题

红包个数最小为10个

红包金额最低5元

当前余额3.43前往充值 >
需支付:10.00
成就一亿技术人!
领取后你会自动成为博主和红包主的粉丝 规则
hope_wisdom
发出的红包
实付
使用余额支付
点击重新获取
扫码支付
钱包余额 0

抵扣说明:

1.余额是钱包充值的虚拟货币,按照1:1的比例进行支付金额的抵扣。
2.余额无法直接购买下载,可以购买VIP、付费专栏及课程。

余额充值