


背景
电脑和手机连接同一网络,想使用wireshark抓包工具抓取Android手机网络日志,有以下两种连接方法:
- Wi-Fi 网络抓包。
- USB 网络共享抓包。需要USB 数据线将手机连接到电脑,并在开发者模式中启用 USB 网络共享。
查看设备连接信息
设备管理器 - 通用串行总线设备
 可以查看连接的手机
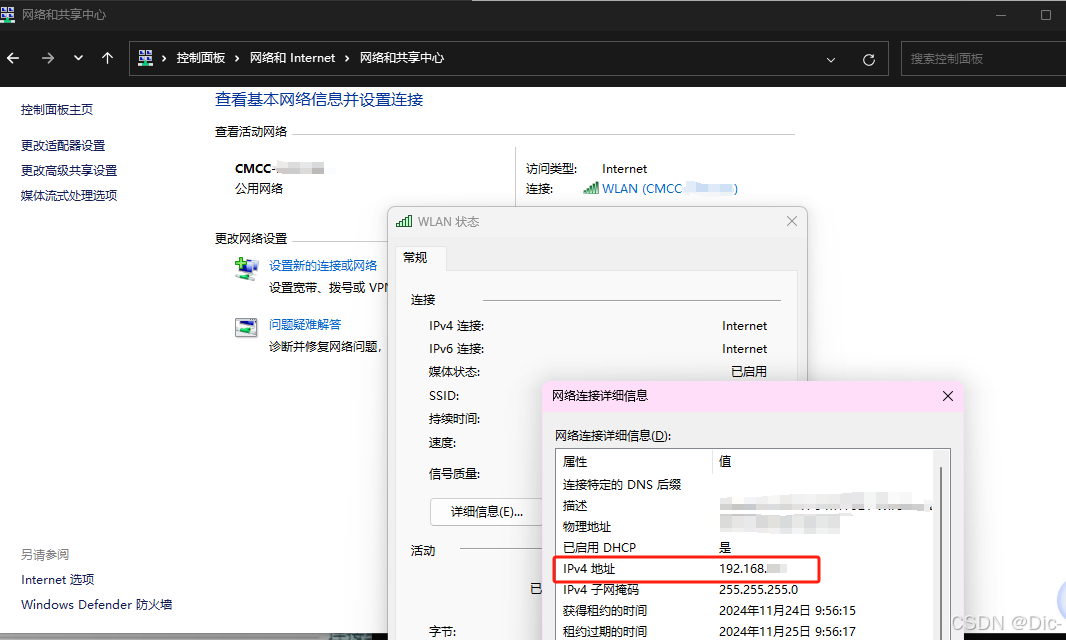
查看电脑IP
(因为cmd ipconfig查到好多IPV4不确定哪一个)
控制面板 - 网络和 Internet - 网络和共享中心,查看活动网络,WLAN连接状态 - 详细信息
问题记录
Steps:
1、按照其他教程介绍的将手机电脑连接到统一WiFi网络,设置手机WiFi的代理和端口。
设置代理参考步骤:
在 Android 设备上将 W-Fi 网络代理设置为运行 Wireshark 的计算机的 IP 地址,
1.打开 Android 设置界面 ->网络与互联网 ->Wi-Fi
2.长按当前连接的 Wi-Fi 网络 ->修改网络
3.设置代理为手动,输入计算机的 IP 地址和端口(通常为 8080)
实际效果是手机连不上网络了。改了IP和port之后。
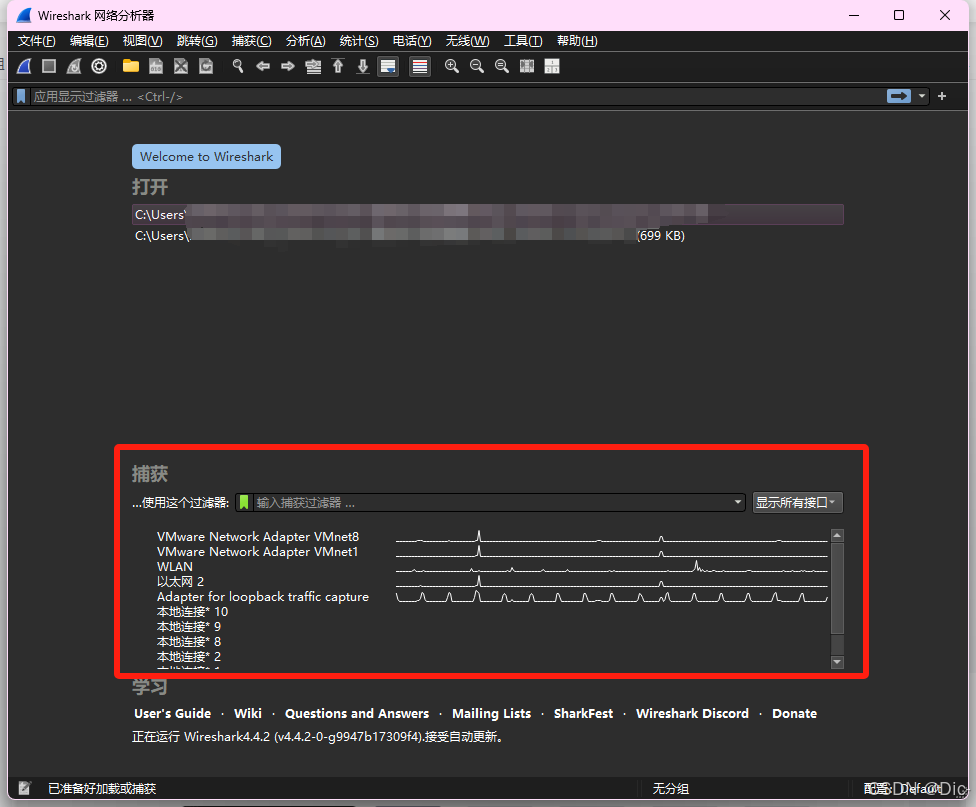
2、打开wireshark,选择WLAN(但是不知道不确认是不是手机的网络啊)。
右边【显示所有接口】可以选通道过滤,有以下五种:
- 有线
- 无线
- 外部捕获
- 虚拟
- 显示隐藏接口
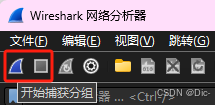
选择WLAN后会自动抓包,左边的按钮开始捕获分组,右边正方形是停止捕获,然后可以保存捕获的netlog。


 3万+
3万+

 被折叠的 条评论
为什么被折叠?
被折叠的 条评论
为什么被折叠?
 到【灌水乐园】发言


