


常看官网
官网 : http://spring.io/
官方下载地址 : https://repo.spring.io/libs-release-local/org/springframework/spring/
GitHub : https://github.com/spring-projects
Spring是一个轻量级的控制反转(IoC)和面向切面(AOP)的容器(框架)
控制反转(IOC)
控制反转IoC(Inversion of Control),是一种设计思想,DI(依赖注入)是实现IoC的一种方法
spring 需要导入commons-logging进行日志记录 . 我们利用maven , 他会自动下载对应的依赖项 .
<dependency>
   <groupId>org.springframework</groupId>
   <artifactId>spring-webmvc</artifactId>
   <version>5.1.10.RELEASE</version>
</dependency>
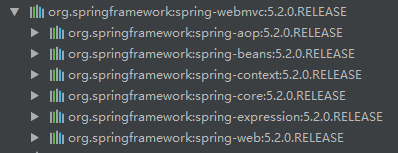
jar包包含:
beans.xml
<?xml version="1.0" encoding="UTF-8"?>
<beans xmlns="http://www.springframework.org/schema/beans"
       xmlns:xsi="http://www.w3.org/2001/XMLSchema-instance"
       xsi:schemaLocation="http://www.springframework.org/schema/beans
        https://www.springframework.org/schema/beans/spring-beans.xsd">
    <bean id="userDaoImpl" class="com.jin.dao.impl.UserDaoImpl"/>
    <bean id="userMysqlDaoImpl" class="com.jin.dao.impl.UserMysqlDaoImpl"/>
    <bean id="userServiceImpl" class="com.jin.service.impl.UserServiceImpl">
        <property name="userDao" ref="userMysqlDaoImpl"/>
    </bean>

</beans>
IOC创建对象方式:
通过无参创建
通过有参创建

spring配置:
1.alias别名
2.bean配置
3.import(用于团队合作):
<import resource="beans.xml"/>
依赖注入
要求被注入的属性 , 必须有set方法 , set方法的方法名由set + 属性首字母大写 , 如果属性是boolean类型 , 没有set方法 , 是 is
p命名和c命名都要导入约束
 导入约束 : xmlns:p="http://www.springframework.org/schema/p"

 <!--P(属性: properties)命名空间 , 属性依然要设置set方法-->
 <bean id="user" class="com.kuang.pojo.User" p:name="狂神" p:age="18"/>
导入约束 : xmlns:c=“http://www.springframework.org/schema/c”
bean的作用域:
singleton:单例
prototype
request
session
bean的自动装配
Spring中bean有三种装配机制,分别是:
在xml中显式配置;
<?xml version="1.0" encoding="UTF-8"?>
<beans xmlns="http://www.springframework.org/schema/beans"
      xmlns:xsi="http://www.w3.org/2001/XMLSchema-instance"
      xsi:schemaLocation="http://www.springframework.org/schema/beans
       http://www.springframework.org/schema/beans/spring-beans.xsd">

   <bean id="dog" class="com.kuang.pojo.Dog"/>
   <bean id="cat" class="com.kuang.pojo.Cat"/>

   <bean id="user" class="com.kuang.pojo.User">
       <property name="cat" ref="cat"/>
       <property name="dog" ref="dog"/>
       <property name="str" value="qinjiang"/>
   </bean>
</beans>
在java中显式配置;
隐式的bean发现机制和自动装配。
Spring的自动装配需要从两个角度来实现,或者说是两个操作:
组件扫描(component scanning):spring会自动发现应用上下文中所创建的bean;
自动装配(autowiring):spring自动满足bean之间的依赖,也就是我们说的IoC/DI;
自动装配
autowire byName (按名称自动装配)
<bean id="user" class="com.kuang.pojo.User" autowire="byName">
   <property name="str" value="qinjiang"/>
</bean>
autowire byType (按类型自动装配)
<bean id="dog" class="com.kuang.pojo.Dog"/>
<bean id="cat" class="com.kuang.pojo.Cat"/>
<bean id="cat2" class="com.kuang.pojo.Cat"/>

<bean id="user" class="com.kuang.pojo.User" autowire="byType">
   <property name="str" value="qinjiang"/>
</bean>
使用注解
导入约束:
xmlns:context="http://www.springframework.org/schema/context"

http://www.springframework.org/schema/context
http://www.springframework.org/schema/context/spring-context.xsd
开启注解:
<context:annotation-config/>
@Autowired:
@Autowired是按类型自动转配的,不支持id匹配。
需要导入 spring-aop的包!
@Qualifier:
@Autowired是根据类型自动装配的,加上@Qualifier则可以根据byName的方式自动装配
@Qualifier不能单独使用。
@Resource:
@Resource如有指定的name属性,先按该属性进行byName方式查找装配;
其次再进行默认的byName方式进行装配;
如果以上都不成功,则按byType的方式自动装配。
都不成功,则报异常。
注解开发
1.配置扫描哪些包下的注解
<!--指定注解扫描包-->
<context:component-scan base-package="com.kuang.pojo"/>
2.在指定包下编写类,增加注解
@Component("user")
// 相当于配置文件中 <bean id="user" class="当前注解的类"/>
public class User {
   public String name = "秦疆";
}
xml与注解整合开发 :推荐最佳实践
xml管理Bean
注解完成属性注入
使用过程中, 可以不用扫描,扫描是为了类上的注解
@Component(“user”):
// 相当于配置文件中
@value(“值”)
 @Value("秦疆")
   // 相当于配置文件中 <property name="name" value="秦疆"/>
如果提供了set方法,在set方法上添加@value(“值”);
@Component三个衍生注解:
@Controller:web层
@Service:service层
@Repository:dao层
@scope(“值”)
singleton:默认的,Spring会采用单例模式创建这个对象。关闭工厂 ,所有的对象都会销毁。
prototype:多例模式。关闭工厂 ,所有的对象不会销毁。内部的垃圾回收机制会回收
@Configuration
代表这是一个配置类
@import
@Import(MyConfig2.class) //导入合并其他配置类,类似于配置文件中的 inculde 标签
@bean
 @Bean //通过方法注册一个bean,这里的返回值就Bean的类型,方法名就是bean的id!
   public Dog dog(){
       return new Dog();
  }
静态/动态代理模式
我们在不改变原来的代码的情况下,实现了对原有功能的增强,这是AOP中最核心的思想
JDK的动态代理需要了解两个类
核心 : InvocationHandler 和 Proxy , 打开JDK帮助文档看看
通用静态代理:
public class ProxyInvocationHandler implements InvocationHandler {
   private Object target;

   public void setTarget(Object target) {
       this.target = target;
  }
   //生成代理类
   public Object getProxy(){
       return Proxy.newProxyInstance(this.getClass().getClassLoader(),
               target.getClass().getInterfaces(),this);
  }
   // proxy : 代理类
   // method : 代理类的调用处理程序的方法对象.
   public Object invoke(Object proxy, Method method, Object[] args) throws Throwable {
       log(method.getName());
       Object result = method.invoke(target, args);
       return result;
  }
   public void log(String methodName){
       System.out.println("执行了"+methodName+"方法");
  }
}
AOP
SpringAOP中,通过Advice定义横切逻辑,Spring中支持5种类型的Advice:

【重点】使用AOP织入,需要导入一个依赖包!
<!-- https://mvnrepository.com/artifact/org.aspectj/aspectjweaver -->
<dependency>
   <groupId>org.aspectj</groupId>
   <artifactId>aspectjweaver</artifactId>
   <version>1.9.4</version>
</dependency>
第一种:
编写增强类
public class Log implements MethodBeforeAdvice {

   //method : 要执行的目标对象的方法
   //objects : 被调用的方法的参数
   //Object : 目标对象
   @Override
   public void before(Method method, Object[] objects, Object o) throws Throwable {
       System.out.println( o.getClass().getName() + "的" + method.getName() + "方法被执行了");
  }
}
去spring的文件中注册 , 并实现aop切入实现 , 注意导入约束 .
<?xml version="1.0" encoding="UTF-8"?>
<beans xmlns="http://www.springframework.org/schema/beans"
      xmlns:xsi="http://www.w3.org/2001/XMLSchema-instance"
      xmlns:aop="http://www.springframework.org/schema/aop"
      xsi:schemaLocation="http://www.springframework.org/schema/beans
       http://www.springframework.org/schema/beans/spring-beans.xsd
       http://www.springframework.org/schema/aop
       http://www.springframework.org/schema/aop/spring-aop.xsd">

   <!--注册bean-->
   <bean id="userService" class="com.kuang.service.UserServiceImpl"/>
   <bean id="log" class="com.kuang.log.Log"/>
   <bean id="afterLog" class="com.kuang.log.AfterLog"/>

   <!--aop的配置-->
   <aop:config>
       <!--切入点 expression:表达式匹配要执行的方法-->
       <aop:pointcut id="pointcut" expression="execution(* com.kuang.service.UserServiceImpl.*(..))"/>
       <!--执行环绕; advice-ref执行方法 . pointcut-ref切入点-->
       <aop:advisor advice-ref="log" pointcut-ref="pointcut"/>
       <aop:advisor advice-ref="afterLog" pointcut-ref="pointcut"/>
   </aop:config>

</beans>
第二种:
写一个切入类
public class DiyPointcut {

   public void before(){
       System.out.println("---------方法执行前---------");
  }
   public void after(){
       System.out.println("---------方法执行后---------");
  }

}
去spring中配置
<!--第二种方式自定义实现-->
<!--注册bean-->
<bean id="diy" class="com.kuang.config.DiyPointcut"/>

<!--aop的配置-->
<aop:config>
   <!--第二种方式:使用AOP的标签实现-->
   <aop:aspect ref="diy">
       <aop:pointcut id="diyPonitcut" expression="execution(* com.kuang.service.UserServiceImpl.*(..))"/>
       <aop:before pointcut-ref="diyPonitcut" method="before"/>
       <aop:after pointcut-ref="diyPonitcut" method="after"/>
   </aop:aspect>
</aop:config>
第三种
只用注解
编写一个注解实现的增强类
@Aspect
public class AnnotationPointcut {
   @Before("execution(* com.kuang.service.UserServiceImpl.*(..))")
   public void before(){
       System.out.println("---------方法执行前---------");
  }

   @After("execution(* com.kuang.service.UserServiceImpl.*(..))")
   public void after(){
       System.out.println("---------方法执行后---------");
  }

   @Around("execution(* com.kuang.service.UserServiceImpl.*(..))")
   public void around(ProceedingJoinPoint jp) throws Throwable {
       System.out.println("环绕前");
       System.out.println("签名:"+jp.getSignature());
       //执行目标方法proceed
       Object proceed = jp.proceed();
       System.out.println("环绕后");
       System.out.println(proceed);
  }
}
在Spring配置文件中,注册bean,并增加支持注解的配置
<!--第三种方式:注解实现-->
<bean id="annotationPointcut" class="com.kuang.config.AnnotationPointcut"/>
<aop:aspectj-autoproxy/>
整合mybatis
除了spring其他jar包,还需导入
mybatis-spring整合包:
<dependency>
            <groupId>org.mybatis</groupId>
            <artifactId>mybatis-spring</artifactId>
            <version>2.0.2</version>
        </dependency>
spring-JDBC:
<dependency>
    <groupId>org.springframework</groupId>
    <artifactId>spring-jdbc</artifactId>
    <version>5.1.10.RELEASE</version>
</dependency>
声明式事物
事务就是把一系列的动作当成一个独立的工作单元,这些动作要么全部完成,要么全部不起作用。
四个属性(ACID):
- 原子性
- 一致性
- 隔离性
- 持久性
使用Spring管理事务,注意头文件的约束导入 : tx
xmlns:tx="http://www.springframework.org/schema/tx"

http://www.springframework.org/schema/tx
http://www.springframework.org/schema/tx/spring-tx.xsd">
配置事物管理器
<bean id="transactionManager" class="org.springframework.jdbc.datasource.DataSourceTransactionManager">
        <property name="dataSource" ref="dataSource"/>
    </bean>
配置事物通知
<tx:advice id="txAdvice" transaction-manager="transactionManager">
        <tx:attributes>
            <tx:method name="addUser" propagation="REQUIRED"/>
            <tx:method name="deleteUser" propagation="REQUIRED"/>
            <tx:method name="getUserList" propagation="REQUIRED"/>
            <tx:method name="select" propagation="REQUIRED"/>
            <tx:method name="*" propagation="REQUIRED"/>
        </tx:attributes>
    </tx:advice>
配置AOP治入事物
<aop:config>
        <aop:pointcut id="pointCut" expression="execution(* com.jin.mapper.UserMapperImpl.*(..))"/>
        <aop:advisor advice-ref="txAdvice" pointcut-ref="pointCut"/>
    </aop:config>


 9929
9929


 被折叠的 条评论
为什么被折叠?
被折叠的 条评论
为什么被折叠?
 到【灌水乐园】发言


