


场景:项目需要对接大华摄像头设备,现场实施人员给了个rtsp:xxx格式的链接,需要在web应用中将画面显示出来。目前我也只是本地测试其他相同格式的链接
说明:本地环境下基本不存在卡顿的情况,如果通过云服务器实现会存在卡顿情况,我自己服务器才1M的,看电视时不时就会卡。
本文在本地虚拟机中linux环境测试,相对windows下测试要麻烦很多,所以记录一下。
前提:要有个rtsp格式的视频流,这里准备了一个网上目前可以用的rtsp://wowzaec2demo.streamlock.net/vod/mp4:BigBuckBunny_115k.mp4,但是我发现有时候也用不了,网上的没找到第二个可以用的,那么如果只是测试这一套技术流程,还准备了一个rtmp格式的:rtmp://ns8.indexforce.com/home/mystream,如果要测试这些视频链接,可以下载flv播放器https://www.videolan.org/,使用方式左上角媒体-打开网络流串-输入url播放就行了,不可用的链接无法播放视频
这里使用的框架为:ffmpeg(将rtsp格式转换成rtmp,推流,推到nginx)+nginx(将ffmpeg转换成http格式,这里使用到了第三方插件,nginx-http-flv)+flvjs(前端显示,拉流,从nginx中拉)。nginx起到了中转的作用,解释仅个人的理解
需要提前安装的内容
- yum -y install gcc gcc-c++
- yum install -y openssl* ncurses-devel pcre-devel
nasm
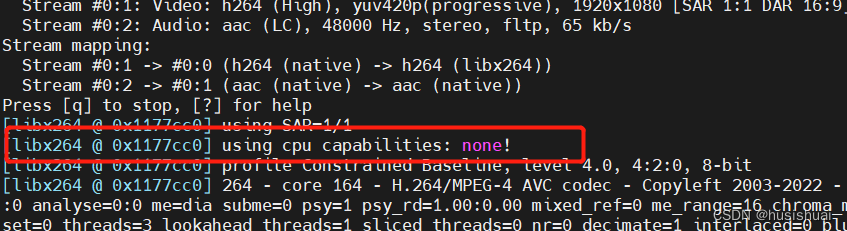
主要解决ffmpeg中引入x264后部分功能失效,导致效率低的问题
如果不引入且使用x264的时候会有using cpu capabilities: none! 问题
- 下载 https://www.nasm.us/pub/nasm/releasebuilds/2.15/nasm-2.15.tar.gz
- 解压
tar -zxf nasm-2.15.tar.gz - cd到nasm目录执行`./configure’
- 编译安装
make && make install
x264
目前主流编码器,ffmpeg中会引入该编码器(下面的测试中我发现不适用到该编码器也没什么问题,这边就安装上防止使用的时候又需要嘛)
- 下载
http:
https://code.videolan.org/videolan/x264/-/archive/master/x264-master.tar.gz
git:
git clone https://code.videolan.org/videolan/x264.git
cd x264到x264目录中设置配置项
./configure --prefix=/usr/local/x264 --enable-shared --enable-static --enable-debug
-
编译并安装
make && make install -
配置环境变量
4.1.vim /etc/profile
4.2. 新增export PATH=$PATH:/usr/local/x264/bin
4.3. 刷新配置source /etc/profile -
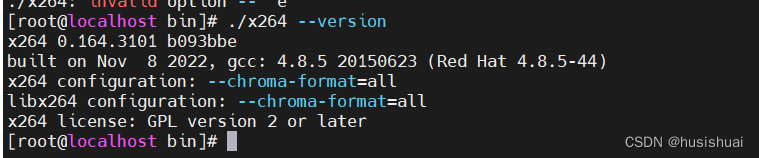
测试,
x264 --version
下面两项配置很重要,会直接影响到ffmpeg的安装、使用
7. 此处为了使ffmpeg设置配置项时能成功配置
1.1. vim /etc/profile
1.2. 末尾加入内容export PKG_CONFIG_PATH=/usr/local/x264/lib/pkgconfig,具体看安装的路径
1.3. source /etc/profile即可
8. 这里保证ffmpeg中能成功使用x264
2.1. vim /etc/ld.so.conf
2.2. 后面加上x264的lib路径,比如我这里安装到了/usr/local/x264/lib,保存退出
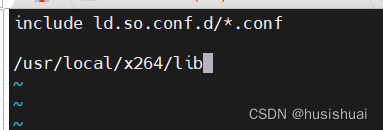
2.3. 刷新配置`ldconfig`
ffmpeg
下面安装有点麻烦,会需要安装很多工具。。
官网下载地址http://ffmpeg.org/download.html
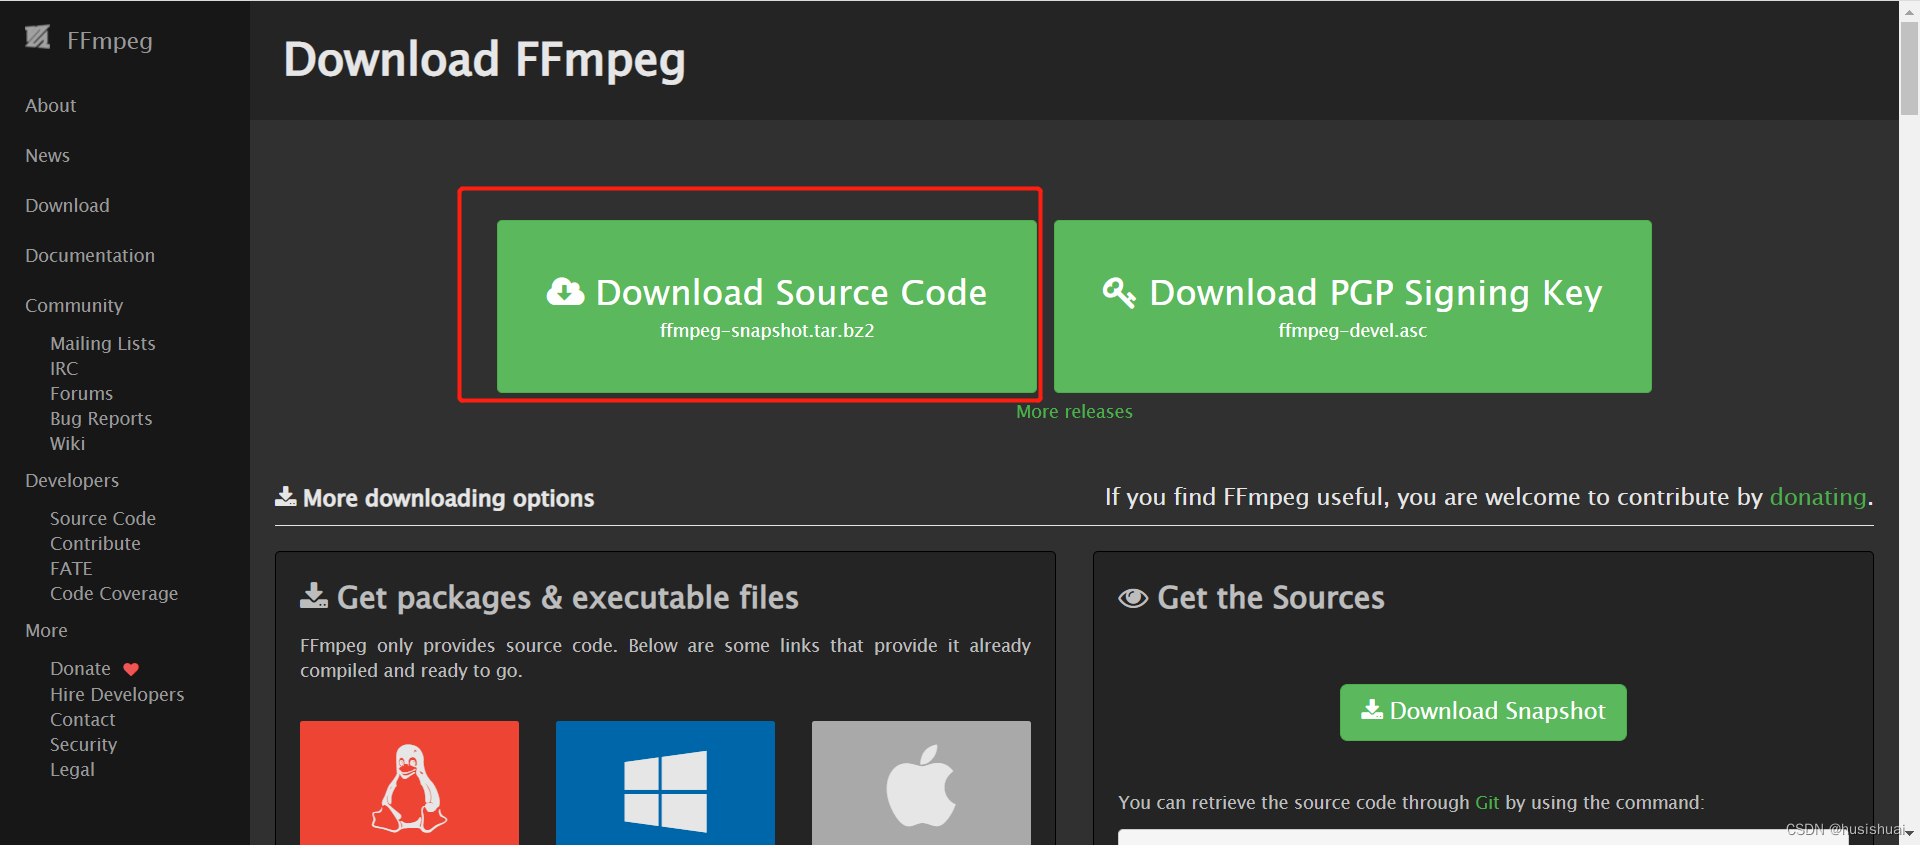
- 下载
- 解压
tar -xvjf ffmpeg-snapshot.tar.bz2
2.1. 如果提示
tar (child): bzip2: Cannot exec: No such file or directory
2.2. 安装yum -y install bzip2
2.3. 再执行tar -xvjf ffmpeg-snapshot.tar.bz2 - cd到ffmpeg目录中,执行命令设置配置项:
./configure --prefix=/usr/local/ffmpeg --enable-shared --enable-libx264 --enable-gpl --enable-pthreads --extra-cflags=-I/usr/local/x264/include --extra-ldflags=-L/usr/local/x264/lib --disable-x86asm,具体安装目录可以自己指定,其中主要引入了x264,编译估计要十多分钟 - 如果出现ERROR: x264 not found using pkg-config,则需要安装
pkg-config
4.1.wget https://pkg-config.freedesktop.org/releases/pkg-config-0.29.tar.gz --no-check-certificate
4.2.tar -zxvf pkg-config-0.29.2.tar.gz
4.3.cd pkg-config-0.29.2/
4.4../configure --with-internal-glib
4.5.make && make install
4.6. 在ffmpeg目录中再执行第3点设置配置项的内容 - 编译安装
make && make install - 配置环境变量,这里的参数根据具体安装目录来
6.1.配置完保证bin目录下的./ffmpeg -version可用:vim /etc/ld.so.conf,新增/usr/local/ffmpeg/lib,执行ldconfig刷新配置
6.2. 配置完保证全局可以使用ffmpeg -version:vim /etc/profile,新增export PATH=$PATH:/usr/local/ffmpeg/bin,执行source /etc/profile刷新配置 - 测试,
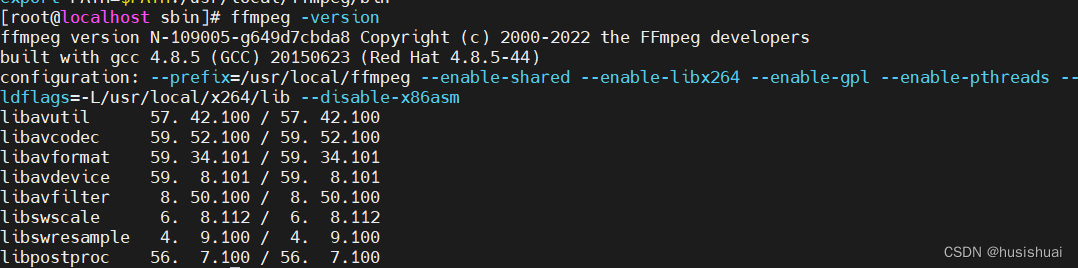
ffmpeg -version
下载nginx-http-flv第三方模块
github第三方下载地址
当前使用的版本下载路径
解压tar -zxvf nginx-http-flv-module-1.2.10.tar.gz
nginx
如果有安装nginx了,要新增模块,直接看第九点
- 官网下载地址
- 解压
tar -zxvf nginx-1.22.1.tar.gz cd nginx-1.22.1- 执行
./configure --prefix=/usr/local/nginx-1.22.1/ --with-http_stub_status_module --with-http_ssl_module --add-module=这里的路径是上面下载解压后的nginx-http-flv-module-1.2.10路径,–prefix指的是安装目录,–with安装ssl模块,用于配置https证书使用,不需要可以去掉,不影响。重要的时最后一个,比如我的是--add-module=/root/nginx-http-flv-module-1.2.10 - 编译
make && make install
可以到指定位置查看cd /usr/local/nginx-1.22.1/sbin,这里我直接到sbin目录,在这里执行启动停止操作 - 启动
./nginx - 停止
./nginx -s stop - 如果需要添加模块,则需要在源代码文件中,也就是上面第3点进入的目录下,执行
./configure --add-module=/第三方模块目录, 再编译make - 然后再打开objs目录,将里面的nginx复制到原有nginx的sbin目录下,替换原有nginx文件即可。复制之前可以备份一下
- 修改nginx的配置文件,看新增的
location /video和rtmp部分即可
worker_processes  1;
events {
    worker_connections  1024;
}

http {
    include       mime.types;
    default_type  application/octet-stream;
    sendfile        on;
    keepalive_timeout  65;

    server {
        listen       88;
        server_name  localhost;
       # 前端拉流时使用
	      location /video {
            flv_live on;
            chunked_transfer_encoding on;
      			add_header 'Access-Control-Allow-Credentials' 'true'; #add additional HTTP header
      			add_header 'Access-Control-Allow-Origin' '*'; #add additional HTTP header
      			add_header Access-Control-Allow-Headers X-Requested-With;
      			add_header Access-Control-Allow-Methods GET,POST,OPTIONS;
      			add_header 'Cache-Control' 'no-cache';
        }

        location / {
            root   html;
            index  index.html index.htm;
        }
        error_page   500 502 503 504  /50x.html;
        location = /50x.html {
            root   html;
        }
    }

}

# 用于接收ffmpeg中推过来的流信息。推流,就是推到了这边。然后前端再通过上面的路径进行拉流。仅个人理解
rtmp_auto_push on;
rtmp_auto_push_reconnect 1s;
rtmp {
    max_streams 128;
    timeout 15s;
    drop_idle_publisher 15s;
    server {
        listen 1935;
        chunk_size 4000;
        application myvideo {
          live on;
		      gop_cache on;
        }
    }
}
- 启动nginx,nginx目录的sbin目录下执行
./nginx
最后ffmpeg的bin目录下执行命令测试
-
测试rtsp
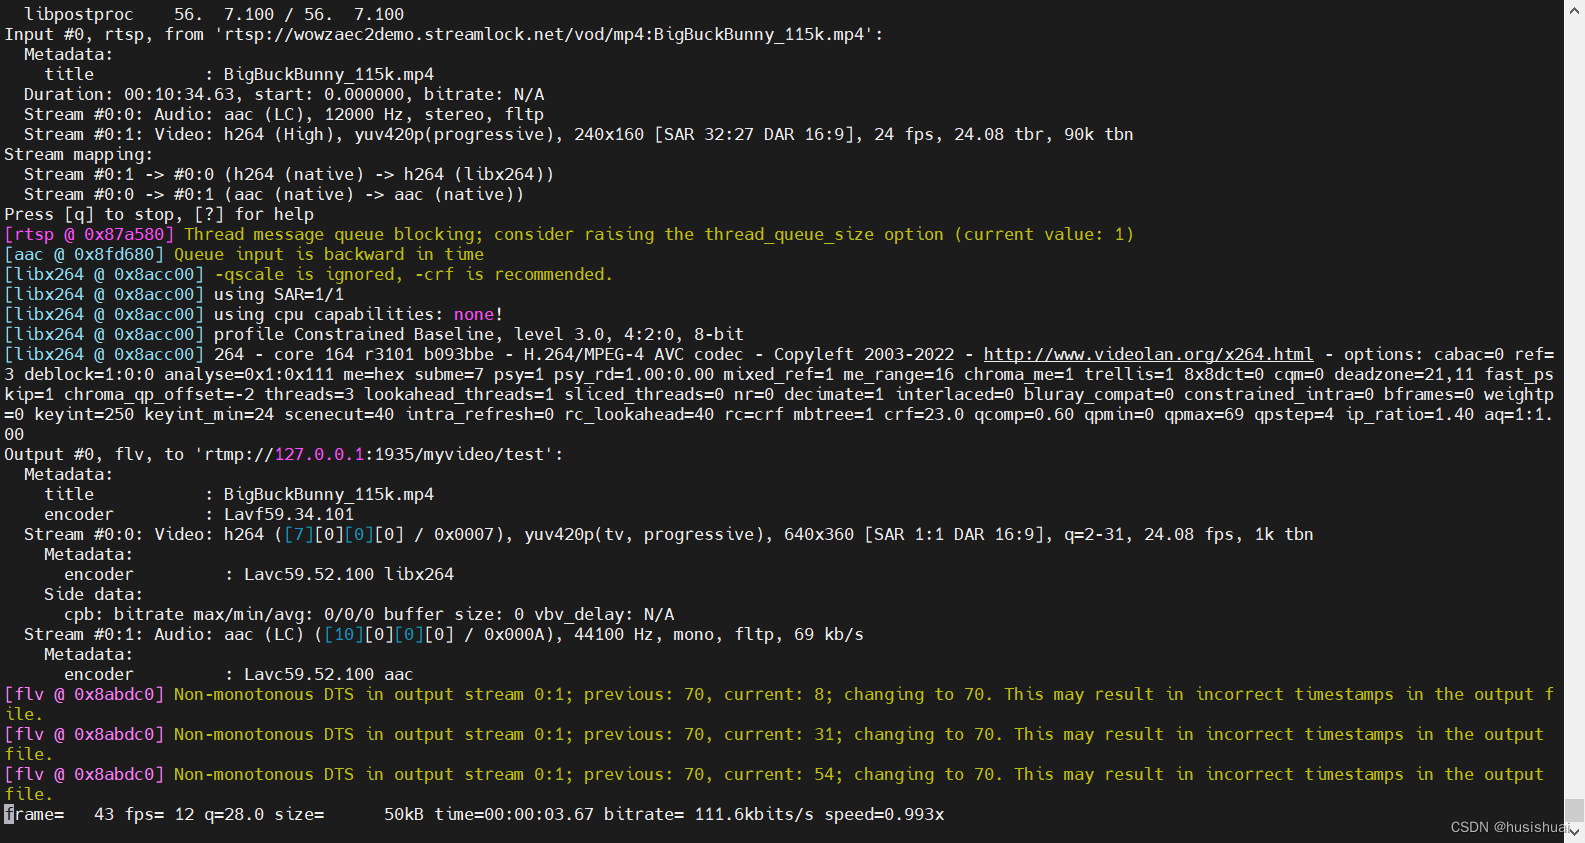
ffmpeg -re -rtsp_transport tcp -i "rtsp://wowzaec2demo.streamlock.net/vod/mp4:BigBuckBunny_115k.mp4" -f flv -vcodec h264 -vprofile baseline -acodec aac -ar 44100 -strict -2 -ac 1 -f flv -q 10 "rtmp://localhost:1935/myvideo/test" -
测试trmp
ffmpeg -i "rtmp://ns8.indexforce.com/home/mystream" -vcodec copy -acodec copy -f flv "rtmp://localhost:1935/myvideo/test"
大概说明:前面的地址为源地址,后面的rtmp:…地址为nginx中配置的地址
效果:
vue
需要引入flv.js,npm install --save flv.js
代码
<template>
  <div>
    <video class="demo-video" ref="player" muted autoplay></video>
  </div>
</template>
<script>
import flvjs from "flv.js";
export default {
  mounted () {
    if (flvjs.isSupported()) {
      let video = this.$refs.player;
      if (video) {
        this.player = flvjs.createPlayer({
          type: "flv",
          isLive: true,
          // 这里为nginx的地址,最后一个参数无所谓
          url: `http://192.168.121.10:88/video?port=1935&app=myvideo&stream=test`
        });
        this.player.attachMediaElement(video);
        try {
          this.player.load();
          this.player.play();
        } catch (error) {
          console.log(error);
        };
      }
    }
  },
}
</script>
<style>
.demo-video {
  max-width: 880px;
  max-height: 660px;
  solid-color: red;
}
</style>
Java
通过java执行ffmpeg命令
依赖
<dependency>
    <groupId>org.bytedeco</groupId>
    <artifactId>javacv-platform</artifactId>
    <version>1.5.7</version>
</dependency>
代码
    public static void main( String[] args ) throws IOException, InterruptedException {
        String name = "test";
        // rtsp地址
//        String inputDir = "rtmp://ns8.indexforce.com/home/mystream";
        String inputDir = "rtsp://wowzaec2demo.streamlock.net/vod/mp4:BigBuckBunny_115k.mp4";
        // rtmp地址,nginx的地址 地址后面拼接的参数随意,唯一就可以了
        String outputDir = "rtmp://192.168.121.10:1935/myvideo/" + name + "?token=1";

        String ffmpeg = Loader.load(org.bytedeco.ffmpeg.ffmpeg.class);
        ProcessBuilder pb = new ProcessBuilder(ffmpeg,
        		// 如果输入是rtmp 则这三个要注释掉
                "-re",
                "-rtsp_transport",
                "tcp",

				// 输入
                "-i",
                inputDir,
                // 转flv格式
                "-f",
                "flv",
                // 输出使用的编码器 这里使用h264 默认可以用copy
                "-vcodec",
                "h264",
                // 调节编码速度和质量的平衡
                // ultrafast(转码速度最快,视频往往也最模糊)、superfast、veryfast、faster、fast、medium、slow、slower、veryslow、placebo这10个选项,从快到慢
                "-preset",
                "ultrafast",
                // 输出音频编码器 这里使用aac 默认可以用copy
                "-acodec",
                "aac",
                //
                "-ar",
                "44100",
                outputDir
        );
        pb.inheritIO().start().waitFor();
    }
}


 734
734


 被折叠的 条评论
为什么被折叠?
被折叠的 条评论
为什么被折叠?
 到【灌水乐园】发言


