


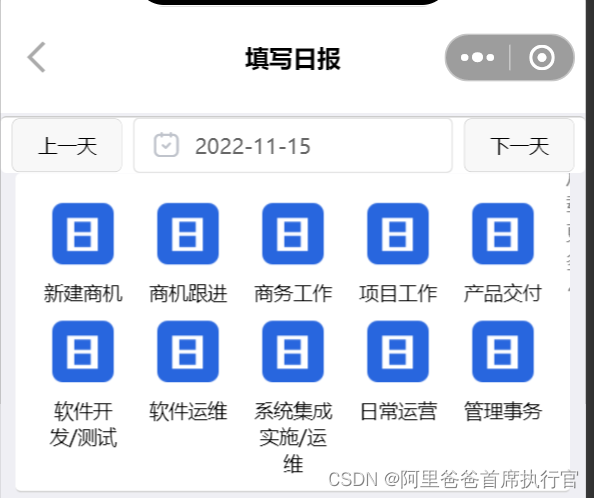
在开发一些填报小程序,一些小型办公小程序的时候,难免会遇到较多的需要填写的表单信息,纯手撸表单耗时耗力。
TIP:类似于这种十种类型的表单,每种类型的表单并不一样
下面将分为三个部分
一、创建对应类型表单的结构体
下面是新建商机的表单结构体
字段详情看注释
//新建商机
export function Oppor() {
	return [{
			label: '客户名称', //表单label文字
			key: 'customer', //表单对应的字段属性名
			name: 'customername', //下拉选项中文名的属性名
			id: 'customerid', //下拉选项的id属性名
			formType: 'select',//表单类型 默认为单行文本
			remoteName: 'getCustomerName',//下拉框远程方法
			required: true,//必填校验
		}, {
			label: '商机名称',
			key: 'opportunityname',
			required: true,
		},
		{
			label: '客户对接人',
			key: 'customerdock',
			required: true,
		},
		{
			label: '预计金额',
			key: 'estimatedamount',
			unitName: '元',
			required: true,
		},
		{
			label: '商机描述',
			key: 'opportunitydescribe',
			formType: 'textarea',
			required: true,
		},
		{
			label: '工时',
			key: 'workhour',
			unitName: '时', //表单内容单位
			required: true,
		}
	]
}
二、对应的表单生成器模板
formProps就是上面的表单结构体
submitForm是保存事件(如有想法可改为插槽)
注意!!! 因为uniapp不支持通过props传子组件Function
所以remoteFun对应表单的远程方法,将通过另一种形式传递,并将修改uni-data-select组件的内部方法,实现远程调用接口。
	<DailyFormTemplate ref="dailyFormTemplate" @submitForm="submitForm"  :formProps="formProp"></DailyFormTemplate>

//js部分
//对应的远程方法
import {getProductLine,getCustomerName,getOpportunityName,getProjectName,getProductByProject,getProductByProductLine} from '@/http/api.js'
export default {
		components:{
			DailyFormTemplate
		},
		data() {
			return {
			//我们需要将remoteFun传进子组件DailyFormTemplate ,表单生成模板中
				remoteFun:{
				//标题一中remoteName绑定的对应的方法名
					getCustomerName,
				}
			}
		},
		mounted(){
		//我们需要将remoteFun传进子组件DailyFormTemplate ,表单生成模板中,初始化方法将remoteFun传入
			this.setRemote();
		},
		methods:{
		setRemote(){
			//将remoteFun传入,通过调用dailyFormTemplate里面定义的setRemote方法
		 	this.$refs.dailyFormTemplate.setRemote(this.remoteFun)
			},
		}
}
三、生成器模板代码
注意!!! 需要注意的是当前并不能直接使用远程方法,因为uni-data-select组件并不支持远程方法渲染,会导致数据无法回显,需要注意第四阶段进入uni-data-select组件修改
<template>
	<view class="continer">
		<uni-forms ref="form" :modelValue="form" :rules="rules">
			<view class="form_element" v-for="(item,index) in formProps" :key="index">

				<view class="form_title">
					<span v-if="item.required" class="is-required">*</span>
					{{item.label}}
				</view>
				<view v-if="!item.formType">
					<uni-forms-item :required="item.required?item.required:false" :name="item.key">
						<view class="input_box">
							<input :ref="item.key" class="uni-input formInput" v-model="form[item.key]"
								:placeholder="'请填写'+item.label" />
							<view class="unit" v-if="item.unitName">{{item.unitName}}</view>
						</view>
					</uni-forms-item>
				</view>
				<view v-if="item.formType==='select'">
					<uni-forms-item :required="item.required?item.required:false" :name="item.key">

						<uni-data-select :ref="item.key" v-model="form[item.key]" :getObjectParam="getObjectParam"
							:placeholder="'请选择'+item.label" @change="onchange($event,item)">
						</uni-data-select>
					</uni-forms-item>
					<!-- <input class="uni-input formInput" v-model="form[item.key]" :placeholder="'请填写'+item.label" /> -->
				</view>
				<view v-if="item.formType==='textarea'">
					<uni-forms-item :required="item.required?item.required:false" :name="item.key">

						<uni-easyinput :ref="item.key" type="textarea" :maxlength="-1" placeholderStyle="fontSize:28upx"
							v-model="form[item.key]" :placeholder="'请填写'+item.label" />
					</uni-forms-item>
					<!-- <input class="uni-input formInput" v-model="form[item.key]" :placeholder="'请填写'+item.label" /> -->
				</view>
			</view>
		</uni-forms>
	</view>
</template>

<script>
	import formTypeMap from '../js/RelationClass.js'
	export default {
		props: {
			formProps: {
				type: Array,
				default: () => []
			},


		},
		computed: {
			reData: {
				get() {
					return function(val) {
						const that = this;
						if (this.remote) {
							return that.remote[val]();
						}
						return []

					}
				},
				set() {}

			},
		},
		data() {
			return {
				getObjectParam: {
					text: 'text',
					value: 'value'
				},
				remoteObj: {
					remoteOption: []
				},
				remote: null,
				form: {},
				// 校验规则
				rules: {},
			}
		},
		mounted() {

			this.setRules();

		},
		options: {
			styleIsolation: 'shared'
		},
		methods: {
			initSelect() {
				this.formProps.forEach(async item => {
					if (item.remoteName) {
						this.$refs[item.key][0].setMixinDatacomResData(this.remote[item.remoteName]())
					}

				})

			},
			setRemote(param) {
				this.remote = param

				this.initSelect();
			},
			async getRemoteFun(val) {
				let arr = await this.remote[val]()
				console.log(arr)
				return arr
			},
			setRules() {
				this.rules = {}
				this.formProps.forEach(item => {
					if (item.required) {
						this.rules[item.key] = {
							rules: [{
								required: true,
								errorMessage: `${item.label}不能为空`
							}]
						}
					}
				})
			},
			onchange(param, item) {
				// console.log(param,item)
				//判断该表单是否有关联操作
				if (item.relationForm) {

					item.relationForm.forEach(temp => {
						// formTypeMap.forEach(ftype=>{
						// 	if(ftype.type ===item.formType){
						// 		ftype.feedbackType(temp.type);
						// 	}
						// })
						if (item.formType === 'select') {
							//如果是下拉框
							if (temp.type === 'reload') {
								//重新加载
								let dataArr = []
								if (temp.searchParam) {
									temp.searchParam.forEach(ele => {

										dataArr.push({
											field: ele.field,
											operator: ele.operator,
											value: ele.fieldParam === 'id' ? param.value : param
												.text
										});
									})
								}
								//清除关联表单的内容
								this.$refs[temp.key][0].clearCurrent()
								this.$refs[temp.key][0].setMixinDatacomResData(this.remote[temp.event](dataArr))
							}

						}

					})
				}


			},
			validateForm() {
				let self = this;
				self.$refs.form.validate().then(res => {
					self.$emit("submitForm", res)

				}).catch(err => {
					console.log(err)
				})
			}
		}
	}
</script>

<style scoped>
	.continer {
		width: 100%;
		height: 100%;
	}

	.form_element {
		width: calc(100% - 40upx);
		padding: 20upx;
		border-bottom: 1px solid #ccc;
	}

	.form_title {
		width: 100%;
		font-weight: 800;
		font-size: 32upx;

	}

	.input_box {
		display: flex;
		align-items: center;
	}

	.unit {
		margin-right: 20upx;
	}

	/* ::v-deep .uni-section .uni-section-header__content {
		font-weight: 800;

	}

	::v-deep .uni-section .uni-section-header {
		padding: 0;
	} */
	::v-deep .uni-input {
		padding: 20upx 0 0 0;

	}

	::v-deep .uni-select {
		border: none;
		padding: 20upx 0 0 0;
	}

	::v-deep .uni-forms-item__label {
		display: none;
	}

	::v-deep .is-input-border {
		border: none;
		padding: 20upx 0 0 0;
	}

	::v-deep .input-padding {
		padding: 0;
	}

	::v-deep .uni-easyinput__content-textarea {}

	::v-deep .uni-textare {}

	.is-required {
		color: #dd524d;
		font-weight: bold;
		margin-right: 10upx;
	}
</style>
四、进入uni-data-select组件,添加一个支持远程接口的方法
//在methods中新增一个自定义方法,通过第三阶段initSelect的方法中调用,将对应的Promise对象传入,来修改组件的数据
	setMixinDatacomResData(param){
				param.then(res=>{
					this.mixinDatacomResData = res;
				})

			}
效果图

五、进阶表单——关联关系
由一个表单影响其他表单的操作-------关联表单关系
我们要回到第一部分,对应类型表单的结构体
例如下图,我们需要在项目名称下拉发生change的时候,改变产品名称表单的数据,需要通过relationForm数组绑定(可绑定多个)
relationForm的
key:代表对应受到影响的表单key,
type:受影响类型,
event:绑定受到影响后需要执行的远程方法,
searchParam:为调用方法需要传递的部分参数
//产品交付
export function BusinessDailyProduct() {
	return [{
			label: '项目名称',
			key: 'project',
			name: 'projectname', //下拉选项中文名的属性名
			id: 'projectid', //下拉选项的id属性名
			remoteName: 'getProjectName',
			formType: 'select',
			relationForm:[{key:'product',type:'reload',event:'getProductByProject',searchParam:[{fieldParam:'id', field:'projectid',operator:'eq',value:''}]}], //关联表单及其触发事件绑定
			required: true,
		}, {
			label: '产品名称',
			formType: 'select',
			key: 'product',
			name: 'productname', //下拉选项中文名的属性名
			id: 'productid', //下拉选项的id属性名
			// remoteName: 'getProductByProject',
			required: true,
		}, {
			label: '工时',
			key: 'workhour',
			unitName: '时',
			required: true,
		},
		{
			label: '工作内容',
			key: 'workcontent',
			formType: 'textarea',
			required: true,
		}, {
			label: '存在问题',
			key: 'existproblem',
			formType: 'textarea',
			required: true,
		},

	]
}


//对应的受影响的远程方法----上面的event
//根据项目获取对应的产品
export async function getProductByProject(searchCondition) {

	let res = await request({
		url: '/business/product/manage/list',
		method: 'post',
		data: new SearchCondition({searchCondition,}),

	})
	let arr = res.data.data.list.map(item => ({
		text: item.productname,
		value: item.id,
		...item
	}))

	return await arr;

}
下班了!,再见!!!!,下回聊


 1752
1752


 被折叠的 条评论
为什么被折叠?
被折叠的 条评论
为什么被折叠?
 到【灌水乐园】发言


