


Vue自定义指令方法介绍
- 页面加载时:bind inserted 注意区别:bind与inserted:bind时父节点为null,inserted时父节点存在。
- 更新组件:update componentUpdated 注意区别:update与componentUpdated:update是数据更新前,componentUpdated是数据更新后。
- 卸载组件:unbind
- 重新安装组件:bind inserted
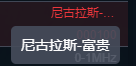
效果图
说明
使用到 onmouseenter(移入)和 onmouseleave(移出)方法。完成dom元素添加和删除。详细说明在代码注释里。复制粘贴就能用,因为框架不同会有一些差距,自行斟酌修改。
dom里使用方法
<span style="width:50px" v-be-poptip>{{item.name}}</span>
指令源码
Vue.directive('bePoptip', {
    inserted: bePoptip,
    componentUpdated: bePoptip,
    //指令与元素解绑时
    unbind: function (el, binding, vnode) {
        el.onmouseenter = undefined;
        el.onmouseleave = undefined;
        // 找到浮层元素并移除
        const vcTooltipDom = document.getElementById('be-tooltips');
        vcTooltipDom && document.body.removeChild(vcTooltipDom);
    }
})

function bePoptip(el, binding, vnode) {
    // 获取当前元素的Style
    const curStyle = window.getComputedStyle(el, '');
    // 创建一个容器来记录文字的width
    const textSpan = document.createElement('span');
    // 设置新容器的字体样式,确保与当前需要隐藏的样式相同
    textSpan.style.fontSize = curStyle.fontSize;
    textSpan.style.fontWeight = curStyle.fontWeight;
    textSpan.style.fontFamily = curStyle.fontFamily;
    // 将容器插入body,如果不插入,offsetWidth为0
    document.body.appendChild(textSpan);
    // 设置新容器的文字
    textSpan.innerHTML = el.innerText;
    // 如果字体元素大于当前元素,则需要隐藏(*...)
    if (textSpan.offsetWidth > el.offsetWidth) {
        // 给当前元素设置超出隐藏
        el.style.overflow = 'hidden';
        el.style.textOverflow = 'ellipsis';
        el.style.whiteSpace = 'nowrap';
        // 鼠标移入
        el.onmouseenter = function (e) {
            // 创建浮层元素并设置样式
            const vcTooltipDom = document.createElement('div');
            vcTooltipDom.style.cssText = `
                  max-width:34rem;
                  max-height: 34rem;
                  overflow: auto;
                  position:absolute;
                  top:${e.clientY + 5}px;
                  left:${e.clientX - 50}px;
                  background: rgba(70, 76, 91, 0.9);
                  color:#fff;
                  border-radius:0.417rem;
                  padding:0.833rem;
                  display:inline-block;
                  font-size:1.167rem;
                  z-index:19999
                `
            // 设置id方便寻找
            vcTooltipDom.setAttribute('id', 'be-tooltips');
            // 将浮层插入到body中
            document.body.appendChild(vcTooltipDom);
            // 浮层中的文字
            document.getElementById('be-tooltips').innerHTML = el.innerText;
        }
        // 鼠标移出
        el.onmouseleave = function () {
            // 找到浮层元素并移出
            const vcTooltipDom = document.getElementById('be-tooltips');
            vcTooltipDom && document.body.removeChild(vcTooltipDom);
        }
    }
    // 记得移除刚刚创建的记录文字的容器
    document.body.removeChild(textSpan)
}
如果样式有特殊的要求,可以在body里添加样式,不能使用scoped。代码如下
<style lang="less">
html,
body {
	#be-tooltips {
		max-width:34rem;
        max-height: 34rem;
        overflow: auto;
        position:absolute;
        background: rgba(70, 76, 91, 0.9);
        color:#fff;
        border-radius:0.417rem;
        padding:0.833rem;
        display:inline-block;
        font-size:1.167rem;
        z-index:19999
}
</style>
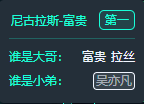
进阶版Poptip
效果图
dom里使用方法
<div v-for="(item ,i) in data" :key="'div'+i" v-be-poptip-policy="item"><div>
指令源码
Vue.directive('bePoptipPolicy', {
    inserted: function (el, binding, vnode) {
        // 鼠标移入
        el.onmouseenter = (e) => {
            // 接受数据,根据业务不同,你们可以调整咯。
            let item = binding.value;
            let strItemY = ``;
            let strItemN = ``;
            for (let index = 0; index < item.list.length; index++) {
                const info = item.list[index];
                if (info.type=== 'Y') {
                    strItemY += `<span style="padding-left: 0.417rem;" :key="${index + '_Y'}" >${info.name}</span>`
                }
                if (info.type=== 'N') {
                    strItemN += `<div class="content-btn" :key="${index + '_N'}">${info.name}</div>`
                }
            }
            let str1 =
                `<div class="move_content_title">
                    <div class="move_content_title_inner">${item.name}</div>
                    <span class="move_content_title-btn">${ item.name1}</span>
                </div>`;
            let str2 =
                `<div class="move_content_poptip">
                    <div class="item">
                        <div class="name">谁是大哥:</div>
                        <div class="content">
                        ` + strItemY + `
                        </div>
                    </div>
                    <div class="item">
                        <div class="name">谁是小弟:</div>
                        <div class="content">
                        ` + strItemN + `
                        </div>
                    </div>
                </div>`;
            // 创建浮层元素并设置样式  top:${e.clientY}px; left:${e.clientX}px;
            const vcTooltipDom = document.createElement('div');
            // 设置id方便寻找
            vcTooltipDom.setAttribute('id', 'node_poptip');
            vcTooltipDom.style.cssText = `top:${getTop(el) / 12 + 1.5}rem; left:${getLeft(el) / 12 + 7.5}rem;`
            // 将浮层插入到body中
            document.body.appendChild(vcTooltipDom);
            // 浮层中的文字
            document.getElementById('node_poptip').innerHTML = str1 + str2;
        }
        // 鼠标移出
        el.onmouseleave = () => {
            // 找到浮层元素并移出
            const vcTooltipDom = document.getElementById('node_poptip');
            vcTooltipDom && document.body.removeChild(vcTooltipDom);
        }
    },
    // 指令与元素解绑时
    unbind: function (el, binding, vnode) {
        el.onmouseenter = undefined;
        el.onmouseleave = undefined;
        // 找到浮层元素并移除
        const vcTooltipDom = document.getElementById('node_poptip');
        vcTooltipDom && document.body.removeChild(vcTooltipDom);
    }
})
//获取元素的纵坐标(相对于窗口)
function getTop(e) {
    var offset = e.offsetTop - e.scrollTop;
    if (e.offsetParent != null) offset += getTop(e.offsetParent);
    return offset;
};
//获取元素的横坐标(相对于窗口)
function getLeft(e) {
    var offset = e.offsetLeft - e.scrollLeft;
    if (e.offsetParent != null) offset += getLeft(e.offsetParent);
    return offset;
};
css样式。绑定在body。
<style lang="less">
html,
body {
	#node_poptip {
		max-width: 34rem;
		max-height: 34rem;
		overflow: auto;
		position: absolute;
		background: #242f39;
		color: #fff;
		border-radius: 0.417rem;
		padding: 0.833rem;
		display: inline-block;
		font-size: 1.167rem;
		z-index: 19999;

		.move_content_title {
			position: relative;
			display: flex;
			flex-direction: row;
			margin: 0;
			border-bottom: 0.083rem solid  #ffffff;
			margin-bottom: 0.5rem;
			padding-bottom: 0.5rem;
			.move_content_title_inner {
				display: flex;
				color: #ffffff;
				font-size: 12px;
				font-weight: 500;
				padding: 2px 2px;
			}

			.move_content_title-btn {
				color: #ffffff;
				font-size: 12px;
				border-radius: 5px;
				border: 1px solid #ffffff;
				background-color: rgba(25, 255, 216, 0.1);
				margin-left: 10px;
				padding: 0px 5px;
				height: 20px;
			}
		}
		.move_content_poptip {
			.item {
				display: flex;
				flex-direction: row;
				justify-content: space-between;
				font-size: 12px;
				height: 24px;

				.name {
					display: flex;
					align-items: center;
					color: #ffffff;
				}

				.content {
					display: flex;
					align-items: center;
					color: #f0f5ff;

					.content-btn {
						color: rgba(240, 245, 255, 0.6);
						font-size: 12px;
						line-height: 12px;
						border-radius: 4px;
						border: 1px solid #f0f5ff;
						background-color: rgba(240, 245, 255, 0.1);
						align-items: center !important;
						text-align: center !important;
						margin-left: 5px !important;
						padding: 2px 2px !important;
					}
				}
			}
		}
	}
}
</style>


 1746
1746


 被折叠的 条评论
为什么被折叠?
被折叠的 条评论
为什么被折叠?
 到【灌水乐园】发言


