


最近工作中项目需要用到fastDFS,在网上也找了好多篇文章,但是大多都不能安装成功,也是废了九牛二虎之力安装成功了,给大家总结一下,希望用到的能有所帮助。
一、资源准备
1、下载fastDFS相关依赖
wget https://github.com/happyfish100/libfastcommon/archive/V1.0.7.tar.gz上边的命令下载到是文件名为V1.0.7.tar.gz的一个包,这里修改一下名称:
mv V1.0.7.tar.gz libfastcommonV1.0.7.tar.gz2、下载fastDFS关于nginx扩展插件
wget http://jaist.dl.sourceforge.net/project/fastdfs/FastDFS%20Nginx%20Module%20Source%20Code/fastdfs-nginx-module_v1.16.tar.gz3、下载fastDFS安装包,这里是V5.05.tar.gz版本
wget https://github.com/happyfish100/fastdfs/archive/V5.05.tar.gz这里也做一下名称的修改如下:
mv V5.05.tar.gz FastDFS_V5.05.tar.gz4、下载nginx安装包(已经有的可以不用下载,请忽略;这里用的是nginx-1.8.0.tar.gz这个版本)
wget http://mirrors.sohu.com/nginx/nginx-1.8.0.tar.gz二、安装
FastDFS是c语言开发的,安装的时候需要先将官网下载的源码进行编译,需要依赖gcc环境,如果还没有gcc环境,需要安装一下。
1、安装gcc环境(已经有的忽略)
yum install -y gcc gcc-c++2、安装libevent(FastDFS运行的时候依赖libevent库)
yum -y install libevent3、安装libfastcommon
#先解压
tar -zxvf libfastcommonV1.0.7.tar.gz -C /usr/local/

#切换到libfastcommonV1.0.7目录
cd /usr/local/libfastcommon-1.0.7/

#编译安装
./make.sh && ./make.sh install

#libfastcommon安装好后会在/usr/lib64 目录下生成  libfastcommon.so 库文件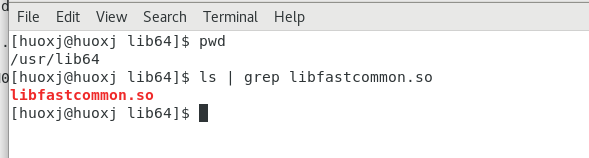
注意:由于FastDFS程序引用usr/lib目录所以需要将/usr/lib64下的库文件拷贝至/usr/lib下
cp libfastcommon.so /usr/lib4、安装tracker
将下载的FastDFS_v5.05.tar.gz 解压至/usr/local/下
tar -zxvf FastDFS_v5.05.tar.gz -C /usr/local切换目录到: /usr/local/FastDFS/ 下,编译和安装(解压后的是fastdfs_v5.05,修改一下目录名称)
#切换目录
cd /usr/local/FastDFS/

#编译之后接着进行安装
./make.sh && ./make.sh install

#安装成功将安装目录下的conf下的文件拷贝到/etc/fdfs/下
cp /usr/local/FastDFS/conf/* /etc/fdfs/
5、配置和启动tracker
#切换目录到: /etc/fdfs/ 目录下
#拷贝一份新的tracker配置文件
cp tracker.conf.sample tracker.conf

#修改tracker.conf ;   vim tracker.conf
base_path=/home/yuqing/fastdfs  改为:  base_path=/home/fastdfs
#配置http端口
http.server_port  改为: 80

#创建 /home/fastdfs 目录
mkdir /home/fastdfs

#启动tracker,运行如下命令:
/usr/bin/fdfs_trackerd /etc/fdfs/tracker.conf restart
注意:在/home/fastdfs/ 目录下生成两个目录, 一个是数据,一个是日志
6、配置和启动storage
#切换目录到: /etc/fdfs/ 目录下
cd /etc/fdfs/

#拷贝一份新的storage配置文件
cp storage.conf.sample storage.conf

#修改storage.conf; vim storage.conf
group_name=group1 #配置组名
base_path=/home/yuqing/fastdfs    改为:  base_path=/home/fastdfs

#store存放文件的位置(store_path)
store_path0=/home/yuqing/fastdfs  改为: store_path0=/home/fdfs_storage
#如果有多个挂载磁盘则定义多个store_path,如下
#store_path1=.....
#store_path2=......

#配置tracker服务器:IP
tracker_server=192.168.2.2:22122
#如果有多个则配置多个tracker
#tracker_server=192.168.2.3:22122

#配置http端口
http.server_port=88

#创建 /home/fdfs_storage 目录
mkdir /home/fdfs_storage

#启动storage,运行命令如下:
/usr/bin/fdfs_storaged /etc/fdfs/storage.conf restart
启动完成后进入 /home/fdfs_storage/data 目录下,显示目录如下:

7、测试
这里用FastDFS自带工具测试
#切换目录到 /etc/fdfs/ 目录下:
cd  /etc/fdfs/

#拷贝一份新的client配置文件
cp client.conf.sample client.conf

#修改client.conf; vim client.conf,修改如下:
#修改基本路径
base_path=/home/fastdfs
#tracker_server
tracker_server=192.168.2.2:22122
注意:若tracker配置了多个,这可以配置多个,如下:
#tracker_server=......
#tracker_server=......
找一个文件进行测试:我是在网上下载了一张图片,找到存储位置,运行如下:
/usr/bin/fdfs_test /etc/fdfs/client.conf upload /文件路径/xxx.jpg如下图表示搭建成功:

8、FastDFS 和nginx整合
在tracker上安装 nginx
在每个tracker上安装nginx,的主要目的是做负载均衡及实现高可用。如果只有一台tracker可以不配置nginx。
一个tracker对应多个storage,通过nginx对storage负载均衡;
在storage 上安装nginx
#解压 fastdfs-nginx-module_v1.16.tar.gz 到 /usr/local目录下
tar -zxvf fastdfs-nginx-module_v1.16.tar.gz -C /usr/local

#切换目录到: /usr/local/fastdfs-nginx-module/src/ 目录下
cd /usr/local/fastdfs-nginx-module/src/

#修改config文件,将文件中的所有 /usr/local/ 路径改为 /usr/
#将fastdfs-nginx-module/src下的mod_fastdfs.conf拷贝至/etc/fdfs/下
cp mod_fastdfs.conf /etc/fdfs/

#修改 /etc/fdfs/mod_fastdfs.conf 的内容;vi /etc/fdfs/mod_fastdfs.conf

base_path=/tmp 修改为 base_path=/home/fastdfs
tracker_server=192.168.2.2:22122#(多个tracker配置多行)
url_have_group_name=true #url中包含group名称
store_path0=/home/fdfs_storage  #指定文件存储路径(上面配置的store路径)

#将libfdfsclient.so拷贝至/usr/lib下
cp /usr/lib64/libfdfsclient.so /usr/lib/

#创建nginx/client目录
mkdir -p /var/temp/nginx/client
Nginx的安装
#解压 nginx-1.8.0.tar.gz 到 /usr/local目录下
tar -zxvf nginx-1.8.0.tar.gz -C /usr/local/

#安装nginx的依赖库
yum install pcre
yum install pcre-devel
yum install zlib
yum install zlib-devel
yum install openssl
yum install openssl-devel

#进入nginx解压的目录下:cd /usr/local/nginx-1.8.0/
#加入模块命令配置
./configure \
--prefix=/usr/local/nginx \
--pid-path=/var/run/nginx/nginx.pid \
--lock-path=/var/lock/nginx.lock \
--error-log-path=/var/log/nginx/error.log \
--http-log-path=/var/log/nginx/access.log \
--with-http_gzip_static_module \
--http-client-body-temp-path=/var/temp/nginx/client \
--http-proxy-temp-path=/var/temp/nginx/proxy \
--http-fastcgi-temp-path=/var/temp/nginx/fastcgi \
--http-uwsgi-temp-path=/var/temp/nginx/uwsgi \
--http-scgi-temp-path=/var/temp/nginx/scgi \
--add-module=/usr/local/fastdfs-nginx-module/src

#编译并安装
make && make install

#拷贝配置文件到 /etc/fdfs 下
cd /usr/local/FastDFS/conf
cp http.conf mime.types /etc/fdfs/

#修改nginx配置文件-nginx.conf
mkdir /usr/local/nginx/logs # 创建logs目录
cd /usr/local/nginx/conf/
vim nginx.conf
做如下修改
pid   /usr/local/nginx/logs/nginx.pid;


server_name 192.168.2.2;


location /group1/M00/{
    root /home/fdfs_storage/data;
    ngx_fastdfs_module;
}


#nginx的启动
cd /usr/local/nginx/sbin/
./nginx


 1554
1554


 被折叠的 条评论
为什么被折叠?
被折叠的 条评论
为什么被折叠?
 到【灌水乐园】发言


