


前言导读
这一个节课我们讲一下PlatformView的是使用 我们在实战中有可能出现了在鸿蒙next只加载一部分Flutter的情况
我们今天就讲一下这种情况具体实现要使用到我们的PlatformView
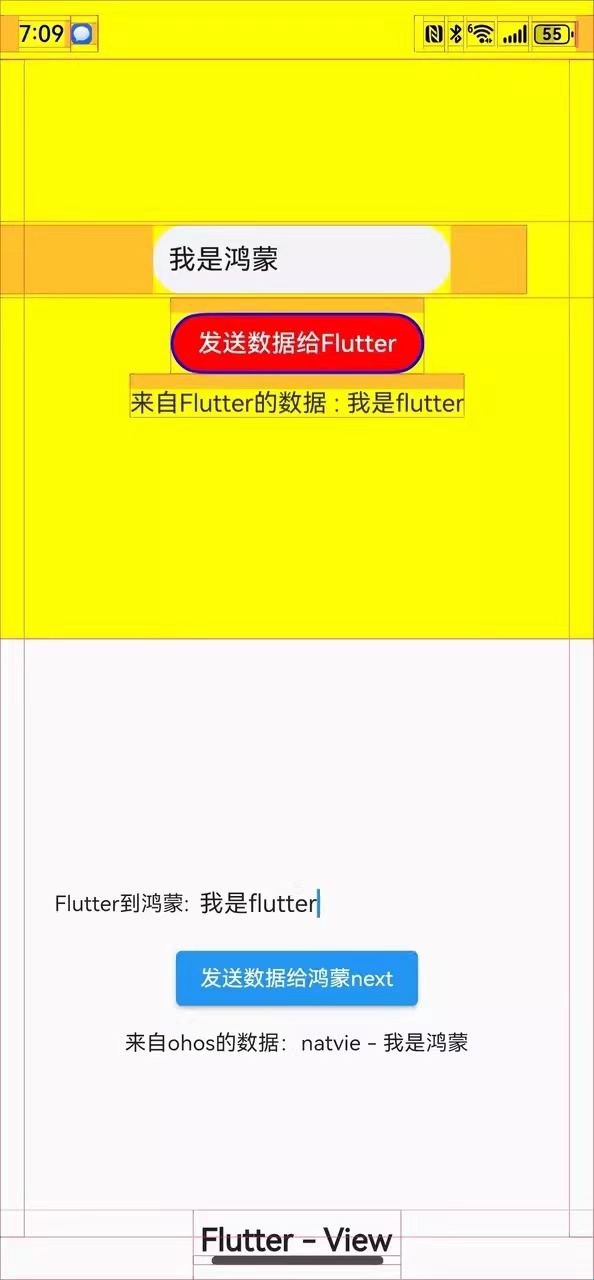
效果图
Native侧实现
- 使用
DevEco Studio工具打开platform_view_example\ohos项目 - 在
platform_view_example\ohos\entry\src\main\ets\entryability目录下实现代码 - 新建
CustomView.ets文件,CustomView用于在Flutter Widget里显示
定义一个Component,代表ohos的PlatformView的定义
@Extend(TextInput) function  inputStyle(){
  .placeholderColor($r('app.color.placeholder_color'))
  .height(45)
  .fontSize(18)
  .backgroundColor($r('app.color.background'))
  .width('50%')
  .padding({left:10})
  .margin({left:100,top:0,right:50,bottom:0})
}

@Component
struct ButtonComponent {
  @Prop params: Params
  customView: CustomView = this.params.platformView as CustomView
  @StorageLink('numValue') storageLink: string = "first"
  @State bkColor: Color = Color.Red
  @State inputstr:string="";


  build() {
    Column() {
      Row(){
        TextInput({placeholder:'请输入你传递的参数'})
          .maxLength(10)
          .inputStyle()
          .onChange((value:string)=>{
            this.inputstr=value;
          }).margin({left:100,top:0,right:50,bottom:0})
      }.width('100%')
       .height(50)

      Button("发送数据给Flutter")
        .border({ width: 2, color: Color.Blue})
        .backgroundColor(this.bkColor)
        .onTouch((event: TouchEvent) => {
          console.log("nodeController button on touched")
        })
        .onClick((event: ClickEvent) => {
          this.customView.sendMessage(this.inputstr);
          console.log("nodeController button on click")
        }).margin({left:0,top:10,right:0,bottom:0})

      Text(`来自Flutter的数据 : ${this.storageLink}`).margin({left:0,top:10,right:0,bottom:0})
        .onTouch((event: TouchEvent) => {
         console.log("nodeController text on touched")
        })

    }.alignItems(HorizontalAlign.Center)
    .justifyContent(FlexAlign.Center)
    .direction(Direction.Ltr)
    .width('100%')
    .height('100%')
  }
}
3.2 定义一个builder方法,放入3.1的自定义Component组件
@Builder
function ButtonBuilder(params: Params) {
  ButtonComponent({ params: params })
    .backgroundColor(Color.Yellow)
}
3.3 继承PlatformView实现一个自定义的Customview,实现getView接口,返回WrappedBuilder(ButtonBuilder),放入3.2的builder方法
AppStorage.setOrCreate('numValue', 'test')

@Observed
export class CustomView extends PlatformView implements MethodCallHandler {
  numValue: string = "test";

  methodChannel: MethodChannel;
  index: number = 1;

  constructor(context: common.Context, viewId: number, args: ESObject, message: BinaryMessenger) {
    super();
    // 注册消息通道
    this.methodChannel = new MethodChannel(message, `com.rex.custom.ohos/customView${viewId}`, StandardMethodCodec.INSTANCE);
    this.methodChannel.setMethodCallHandler(this);
  }

  onMethodCall(call: MethodCall, result: MethodResult): void {
    // 接受Dart侧发来的消息
    let method: string = call.method;
    let link1: SubscribedAbstractProperty<number> = AppStorage.link('numValue');
    switch (method) {
      case 'getMessageFromFlutterView':
        let value: ESObject = call.args;
         this.numValue = value;
        link1.set(value)
        console.log("nodeController receive message from dart: " + this.numValue);
        result.success(true);
        break;
    }
  }

  public  sendMessage = (getinputstr:string) => {
    console.log("nodeController sendMessage")
    //向Dart侧发送消息
    this.methodChannel.invokeMethod('getMessageFromOhosView', 'natvie - ' + getinputstr);
  }

  getView(): WrappedBuilder<[Params]> {
    return new WrappedBuilder(ButtonBuilder);
  }

  dispose(): void {
  }
}
4 实现一个自定义的PlatformViewFactory,在其create方法中创建自定义的PlatformView的实例
import { BinaryMessenger } from '@ohos/flutter_ohos/src/main/ets/plugin/common/BinaryMessenger';
import MessageCodec from '@ohos/flutter_ohos/src/main/ets/plugin/common/MessageCodec';
import PlatformViewFactory from '@ohos/flutter_ohos/src/main/ets/plugin/platform/PlatformViewFactory';
import { CustomView } from './CustomView';
import common from '@ohos.app.ability.common';
import PlatformView from '@ohos/flutter_ohos/src/main/ets/plugin/platform/PlatformView';


export class CustomFactory extends PlatformViewFactory {
  message: BinaryMessenger;

  constructor(message: BinaryMessenger, createArgsCodes: MessageCodec<Object>) {
    super(createArgsCodes);
    this.message = message;
  }

  public create(context: common.Context, viewId: number, args: Object): PlatformView {
    return new CustomView(context, viewId, args, this.message);
  }
}
5 实现一个FlutterPlugin插件,在onAttachedToEngine中,注册自定义的PlatformViewFactory
import  { FlutterPlugin,
  FlutterPluginBinding } from '@ohos/flutter_ohos/src/main/ets/embedding/engine/plugins/FlutterPlugin';
import StandardMessageCodec from '@ohos/flutter_ohos/src/main/ets/plugin/common/StandardMessageCodec';
import { CustomFactory } from './CustomFactory';


export class CustomPlugin implements FlutterPlugin {
  getUniqueClassName(): string {
    return 'CustomPlugin';
  }

  onAttachedToEngine(binding: FlutterPluginBinding): void {
    binding.getPlatformViewRegistry()?.
    registerViewFactory('com.rex.custom.ohos/customView', new CustomFactory(binding.getBinaryMessenger(), StandardMessageCodec.INSTANCE));
  }

  onDetachedFromEngine(binding: FlutterPluginBinding): void {}
}
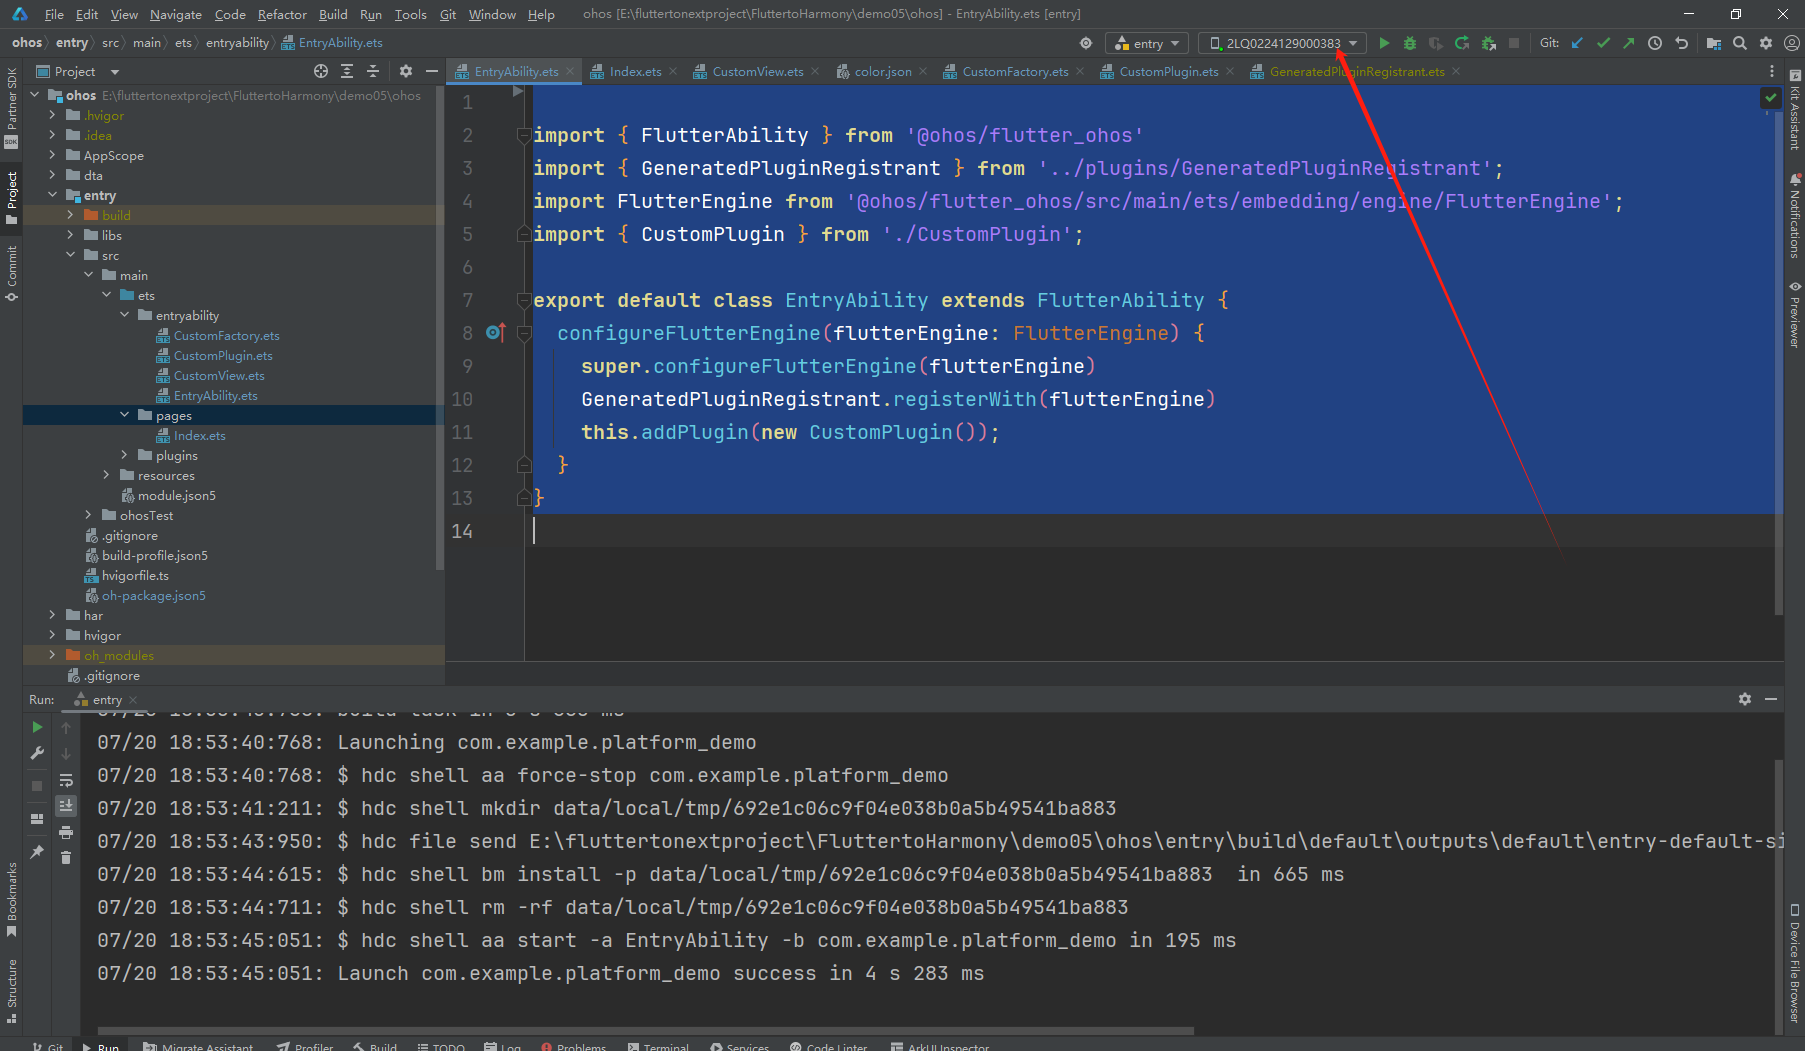
6 打开EntryAbility.ets文件,添加Plugin(也可以把自定义PlatformView写在一个鸿蒙插件中,在应用中沿用,就不用在此显式添加插件)
import { FlutterAbility } from '@ohos/flutter_ohos'
import { GeneratedPluginRegistrant } from '../plugins/GeneratedPluginRegistrant';
import FlutterEngine from '@ohos/flutter_ohos/src/main/ets/embedding/engine/FlutterEngine';
import { CustomPlugin } from './CustomPlugin';

export default class EntryAbility extends FlutterAbility {
  configureFlutterEngine(flutterEngine: FlutterEngine) {
    super.configureFlutterEngine(flutterEngine)
    GeneratedPluginRegistrant.registerWith(flutterEngine)
    this.addPlugin(new CustomPlugin());
  }
}
Flutter 端代码实现
1,使用 Android Studio工具打开 platform_view_example项目
2,在platform_view_example\lib目录下实现代码
3,新建CustomPage,用于显示Native侧的CustomView的Widget
import 'dart:math';
import 'package:flutter/material.dart';
import 'custom_ohos_view.dart';

void main() {
  runApp(const MaterialApp(home: MyHome()));
}

class MyHome extends StatelessWidget {
  const MyHome({Key? key}) : super(key: key);

  @override
  Widget build(BuildContext context) {
    return const Scaffold(
      body: CustomExample(),
    );
  }
}
class CustomExample extends StatefulWidget {
  const CustomExample({Key? key}) : super(key: key);

  @override
  State<CustomExample> createState() => _CustomExampleState();
}
4,实现_CustomPageState
class _CustomExampleState extends State<CustomExample> {
  String receivedData = '';
  CustomViewController? _controller;

  String  toflutterStr='';

  void _onCustomOhosViewCreated(CustomViewController controller) {
    _controller = controller;
    _controller?.customDataStream.listen((data) {
      //接收到来自OHOS端的数据
      setState(() {
        receivedData = '来自ohos的数据:$data';
      });
    });
  }

  Widget _buildOhosView() {
    return Expanded(
      child: Container(
        color: Colors.blueAccent.withAlpha(60),
        child: CustomOhosView(_onCustomOhosViewCreated),
      ),
      flex: 1,
    );
  }

  Widget _buildFlutterView() {
    return Expanded(
      child: Stack(
        alignment: AlignmentDirectional.bottomCenter,
        children: [
          Column(
            mainAxisAlignment: MainAxisAlignment.center,
            mainAxisSize: MainAxisSize.max,
            children: [


              Row(
                children: <Widget>[
                  new Padding(padding: EdgeInsets.only(top: 0,left: 30.0,right: 0,bottom: 0)),
                  Container(
                    alignment: Alignment.center,
                    width: 100,
                    height: 50,
                    child: Text("Flutter到鸿蒙:"),
                  ),
                  Expanded(
                    child: TextField(
                      obscureText: false,
                      decoration: InputDecoration(
                        hintText: "请输入要传递的参数",
                        border: InputBorder.none,
                      ),
                      onChanged: (value){
                        setState(() {
                          this.toflutterStr=value;
                        });
                      },
                    ),
                  )
                ],
              ),

              ElevatedButton(
                onPressed: () {
                  final randomNum = Random().nextInt(10);
                  _controller
                      ?.sendMessageToOhosView(this.toflutterStr);
                },
                child: const Text('发送数据给鸿蒙next'),
              ),
              const SizedBox(height: 10),
              Text(receivedData),
            ],
          ),
          const Padding(
            padding: EdgeInsets.only(bottom: 15),
            child: Text(
              'Flutter - View',
              style: TextStyle(
                fontSize: 20,
                fontWeight: FontWeight.bold,
              ),
            ),
          ),
        ],
      ),
      flex: 1,
    );
  }

  @override
  Widget build(BuildContext context) {
    return Column(
      children: [
        _buildOhosView(),
        _buildFlutterView(),
      ],
    );
  }
}
OhosView组件就是桥接PlatformView的关键。
- viewType:传递给鸿蒙next Native 端,告知插件需要创建那个PlatformView,这个PlatformView需要在插件初始化时注册。
- onPlatformViewCreated:PlatformView创建成功时的回调。
- creationParams:传递给PlatformView的初始化参数。
5、实现CustomOhosView,使用OhosView组件,viewType需要和ets侧FlutterPlugin做registerViewFactory操作时指定的viewType一致
import 'dart:async';

import 'package:flutter/material.dart';
import 'package:flutter/services.dart';

typedef OnViewCreated = Function(CustomViewController);

//自定义OhosView
class CustomOhosView extends StatefulWidget {
  final OnViewCreated onViewCreated;

  const CustomOhosView(this.onViewCreated, {Key? key}) : super(key: key);

  @override
  State<CustomOhosView> createState() => _CustomOhosViewState();
}

class _CustomOhosViewState extends State<CustomOhosView> {
  late MethodChannel _channel;

  @override
  Widget build(BuildContext context) {
    return _getPlatformFaceView();
  }

  Widget _getPlatformFaceView() {
    return OhosView(
      viewType: 'com.rex.custom.ohos/customView',
      onPlatformViewCreated: _onPlatformViewCreated,
      creationParams: const <String, dynamic>{'initParams': 'hello world'},
      creationParamsCodec: const StandardMessageCodec(),
    );
  }

  void _onPlatformViewCreated(int id) {
    _channel = MethodChannel('com.rex.custom.ohos/customView$id');
    final controller = CustomViewController._(
      _channel,
    );
    widget.onViewCreated(controller);
  }
}
6、新建CustomViewController,用于实现flutter端与鸿蒙next端的交互
class CustomViewController {
  final MethodChannel _channel;
  final StreamController<String> _controller = StreamController<String>();

  CustomViewController._(
    this._channel,
  ) {
    _channel.setMethodCallHandler(
      (call) async {
        switch (call.method) {
          case 'getMessageFromOhosView':
            // 从native端获取数据
            final result = call.arguments as String;
            _controller.sink.add(result);
            break;
        }
      },
    );
  }

  Stream<String> get customDataStream => _controller.stream;

  // 发送数据给native
  Future<void> sendMessageToOhosView(String message) async {
    await _channel.invokeMethod(
      'getMessageFromFlutterView',
      message,
    );
  }
}
编译运行
一、签名
1,使用 DevEco Studio工具打开 platform_view_example\ohos目录
2,单击 File > Project Structure > Project > Signing Configs界面勾选 Automatically generate signature,等待自动签名完成,点击OK
二、编译运行
1,cd 到 platform_view_example 目录下
2,打开 终端,执行下面指令进行编译运行:
flutter run -d <device-id>
第二种运行方式直接直接输入
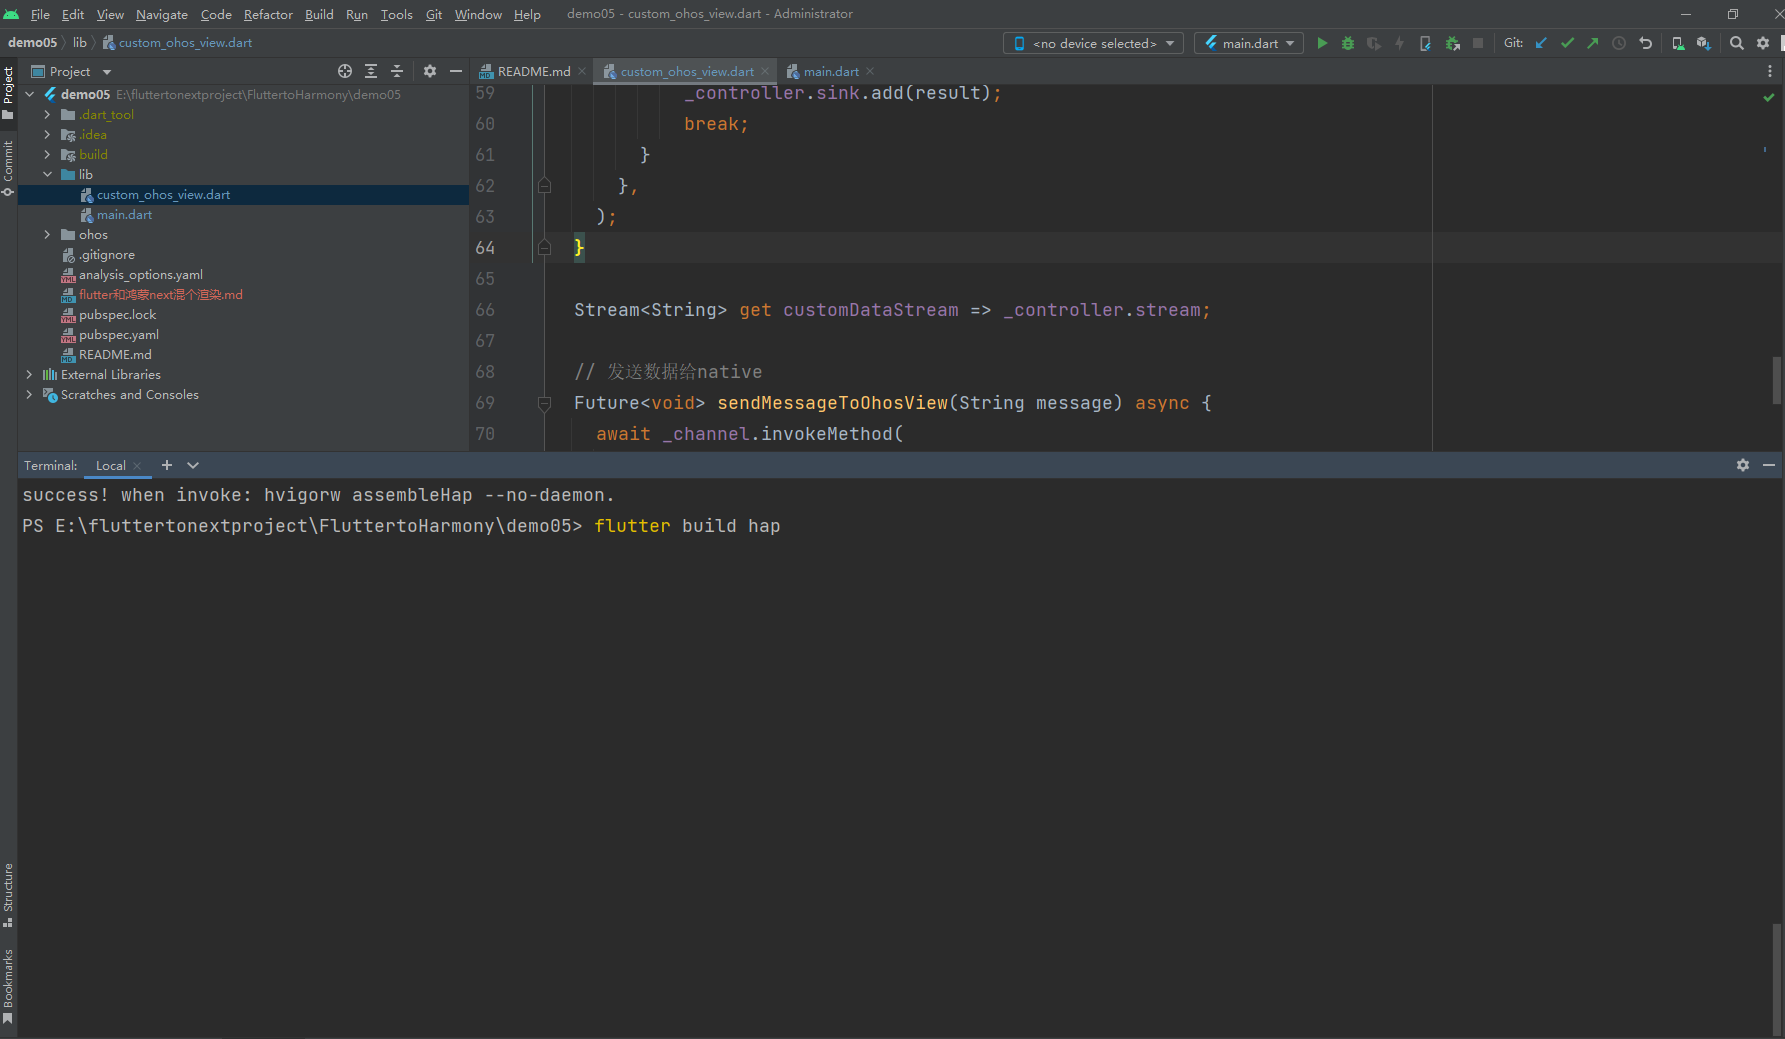
flutter build hap
然后直接使用 DevEco Studio工具打开 platform_view_example\ohos目录 然后使用 DevEco Studio 运行项目也可以
需要注意的点
这里最好使用真机运行 如果是windows 电脑的x86架构的模拟器运行会报错
最后总结
我们使用 PlatformView 就可以实现在我们鸿蒙native 项目中只需要加载部分的Flutter项目比较类似安卓的里面只加载一个view或者是fragment。
也可以配合我们之前讲的章节能够在实战中很好使用Flutter在我们的鸿蒙next上面跨端的开发。也可以很好使用上面原本Flutter项目上已有的一些功能
减少开发适配鸿蒙的一个成本。


 903
903

 被折叠的 条评论
为什么被折叠?
被折叠的 条评论
为什么被折叠?
 到【灌水乐园】发言


