


前言
在上篇文章中,我们分析了invokeBeanFactoryPostProcessors的执行的流程,其中一个重要的后置处理器类ConfigurationClassPostProcessor,也就是这个类,完成了spring对各种注解的扫描注册,丢到容器中。后续的文章中将会接着来分析Spring是完成如何扫描Bean的。
我们都知道spring是创建和管理bean的工厂,它提供了多种定义bean的方式,能够满足我们日常工作中的多种业务场景。
那么问题来了,你知道spring中有哪些方式可以定义bean?
1.常见的bean创建的方式
1.1 xml文件配置
无参构造器创建bean
<bean id="abfpp" class="com.ysj.beanfactory.ABfpp"/>
带参数的构造创建bean
<bean id="abfpp" class="com.ysj.beanfactory.ABfpp">
	<constructor-arg index="0" value="susan"></constructor-arg>
  <constructor-arg index="1" ref="xxx"></constructor-arg>
</bean>
set方法
<bean id="abfpp" class="com.ysj.beanfactory.ABfpp">
   <property name="name" value="susan"></constructor-arg>
   <property name="age" value="18"></constructor-arg>
</bean>
静态工厂
<bean id="tvFactory" class="org.example.beans.TVFactory"></bean>
实例工厂
<bean id="xiaomi" factory-bean="tvFactory" factory-method="createMi">
1.2 注解
@Component系列注解,配合@ComponentScan或者<context:component-scan base-package="com.sue.cache" />
-
Controller
-
Service
-
Repository
-
Component
等等…
@Configuration 、@Bean、@Import、@importResource
1.3 接口
配合@import注解
-
ImportSelector
-
ImportBeanDefinitionRegistrar
2.了解ConfigurationClassPostProcessor
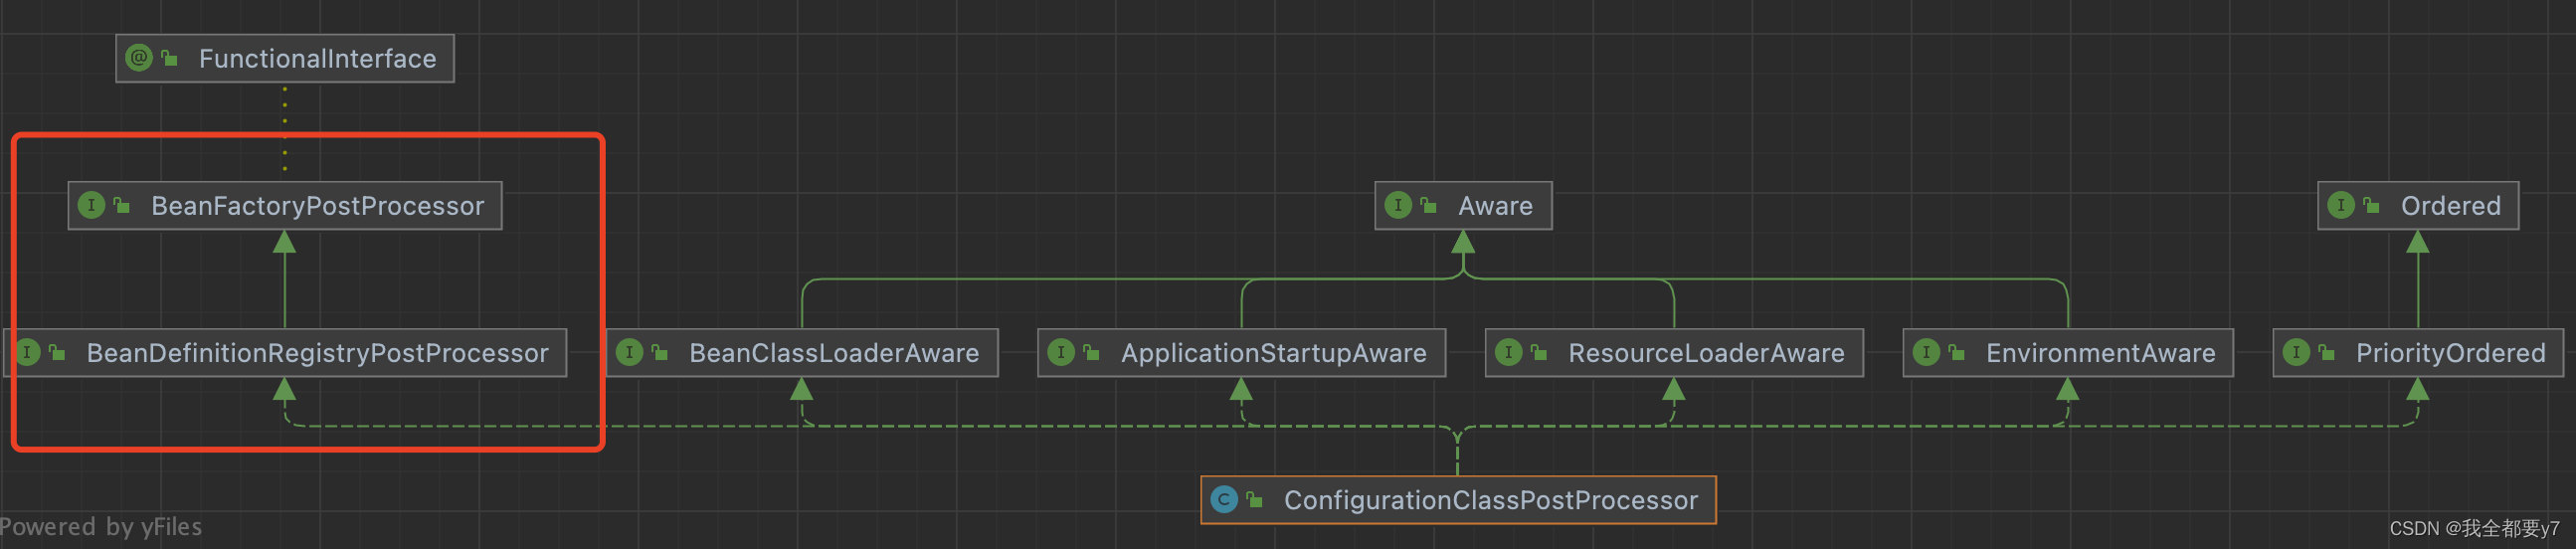
ConfigurationClassPostProcessor是spring中实现Bean扫描的类
在容器启动时候,调动this方法,最终在registerAnnotationConfigProcessors方法中,创建出一个该类的BeanDefinition,放入beanDefinitionMap中。最终会在invokeBeanFactoryPostProcessors方法中回调postProcessBeanDefinitionRegistry方法,完成Bean的扫描
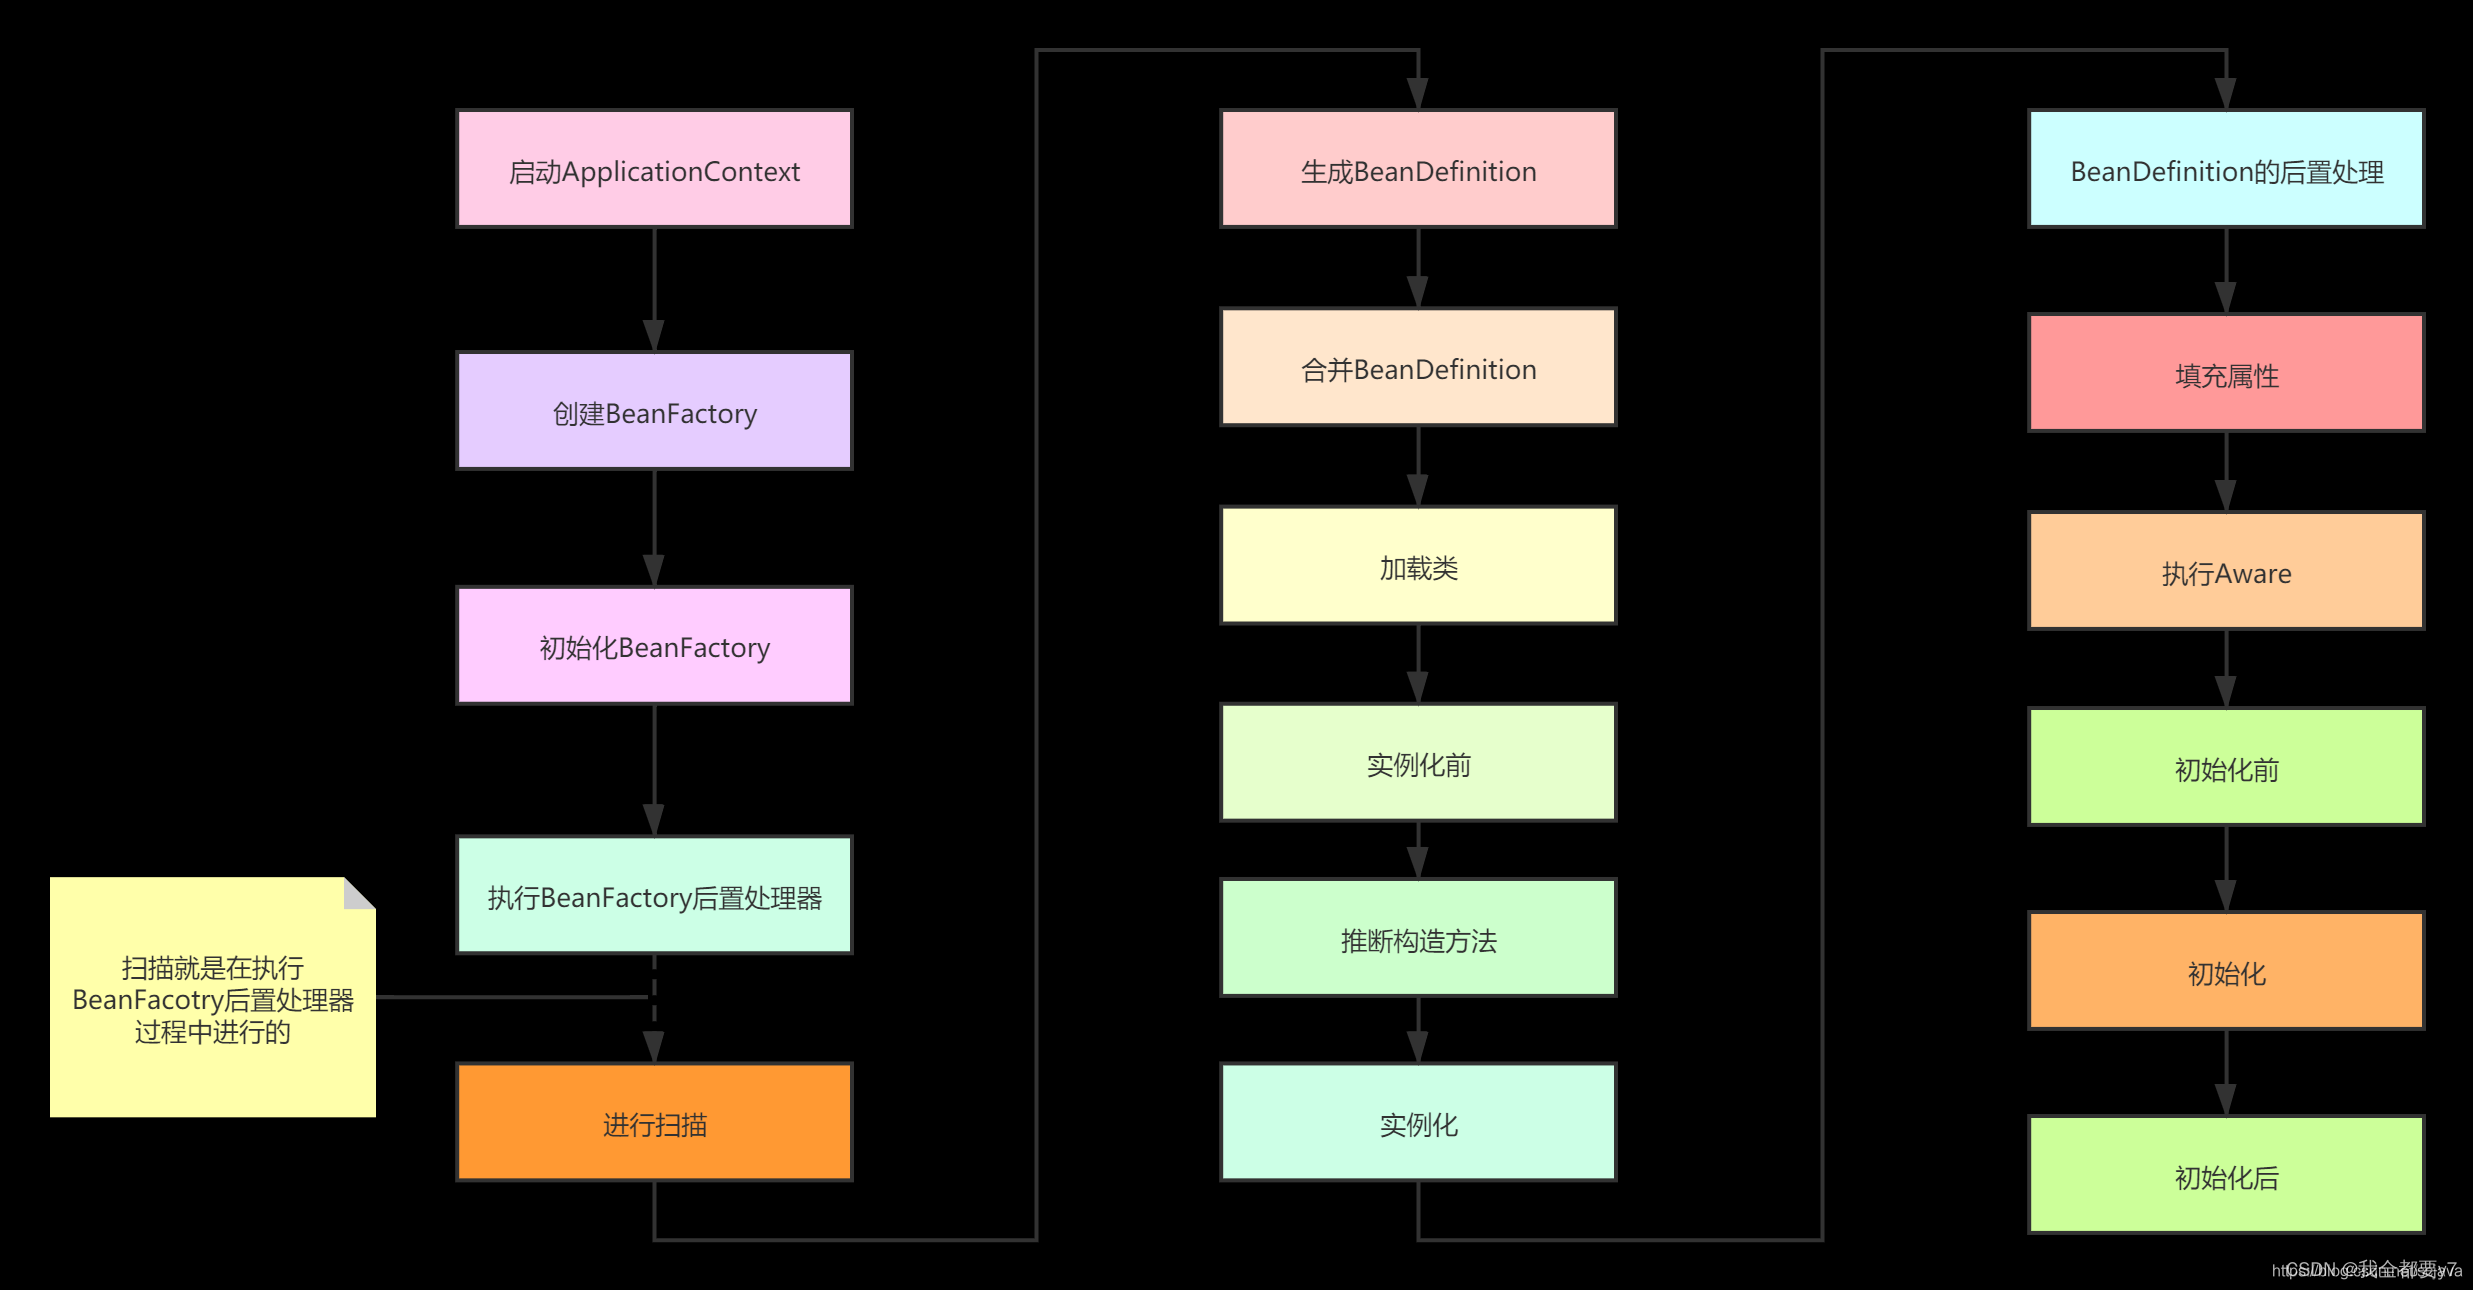
3.Bean扫描的源码分析
![[外链图片转存失败,源站可能有防盗链机制,建议将图片保存下来直接上传(img-1MlsoUzt-1681378831039)(/Users/ys7/Desktop/流程一.png)]](https://img-blog.csdnimg.cn/9afc0c4334f14a9085988bf86fb7b14f.png)
![[外链图片转存失败,源站可能有防盗链机制,建议将图片保存下来直接上传(img-BvgoMl8s-1681378831039)(/Users/ys7/Desktop/流程二.png)]](https://img-blog.csdnimg.cn/635c88338e07456984be6edf46b6b0eb.png)
概述
在我看来,这个扫描的Bean的过程就是一个循环+递归的,简单的说,就是套娃。
第一阶段
- 代码在<1>~<3>只是做了幂等性校验,避免配置类后置处理器重复处理同一个BeanDefinitionRegistry对象,重点在于
processConfigBeanDefinitions(registry)方法
@Override
public void postProcessBeanDefinitionRegistry(BeanDefinitionRegistry registry) {
   int registryId = System.identityHashCode(registry);   //《1》
   if (this.registriesPostProcessed.contains(registryId)) {
      throw new IllegalStateException(
            "postProcessBeanDefinitionRegistry already called on this post-processor against " + registry);
   }
   if (this.factoriesPostProcessed.contains(registryId)) {
      throw new IllegalStateException(
            "postProcessBeanFactory already called on this post-processor against " + registry);
   }
   this.registriesPostProcessed.add(registryId);  //《3》

   processConfigBeanDefinitions(registry);
}
- 判断是否为配置类,并且打上full和lite的标记
//configCandidates  配置候选类集合
List<BeanDefinitionHolder> configCandidates = new ArrayList<>();
//获取到当前容器内所以的BeanDefinitionName
String[] candidateNames = registry.getBeanDefinitionNames();
//遍历
for (String beanName : candidateNames) {
	//获取到当前的bd
	BeanDefinition beanDef = registry.getBeanDefinition(beanName);
	//BeanDefinition继承自AttributeAccessor  获取属性configurationClass
	//如果不为null 说明已经标记过full和lite了
	if (beanDef.getAttribute(ConfigurationClassUtils.CONFIGURATION_CLASS_ATTRIBUTE) != null) {
		if (logger.isDebugEnabled()) {
			logger.debug("Bean definition has already been processed as a configuration class: " + beanDef);
		}
	}
	//ConfigurationClassUtils 工具方法用来判断某类的bean定义是否为配置类,并且标记 full  lite
	else if (ConfigurationClassUtils.checkConfigurationClassCandidate(beanDef, this.metadataReaderFactory)) {
		//如果是   则将该bd封装成一个holder 放入配置候选集合
		configCandidates.add(new BeanDefinitionHolder(beanDef, beanName));
	}
}
其中,BeanDefinition继承自AttributeAccessor ,getAttribute实际获取map中key为全限定类名+configurationClass,则value值是full或者lite。BeanDefinition是对Bean的描述,那么这个attributes的Map可以认为是对BeanDefinition的描述,就好比full/lite。
(KEY是这么一大串org.springframework.context.annotation.ConfigurationClassPostProcessor.configurationClass)
/** Map with String keys and Object values. */
private final Map<String, Object> attributes = new LinkedHashMap<>();
接着进入到checkConfigurationClassCandidate方法,首先会判断BeanClassName为null或者FactoryMethodName不为null,这里为什么要这么判断呢?这里总结下:
- 如果该
BeanDefinition是一个父类BeanDefinition,作为其他BeanDefinition的父类或者模板,此时abstract属性为true,表示该BeanDefinition是抽象的,不能被实例化,在这种情况下,BeanDefinition的beanClass属性可以不指定 - 如果
FactoryMethodName不为null,说明是一个FactoryBean
根据以上情况,spirng会认为该BeanDefinition不是一个配置类
public static boolean checkConfigurationClassCandidate(
			BeanDefinition beanDef, MetadataReaderFactory metadataReaderFactory) {

		String className = beanDef.getBeanClassName();
		if (className == null || beanDef.getFactoryMethodName() != null) {
			return false;
		}
		// 下面这一段都是为了获取一个AnnotationMetadata
		// AnnotationMetadata包含了对应class上的注解元信息以及class元信息
		AnnotationMetadata metadata;
		//e.g. 自己配置的注解类(真实类型为AnnotatedGenericBeanDefinition) 是AnnotatedBeanDefinition类型 走这个分支
		//先判断是是否AnnotatedBeanDefinition类型(可能同时也是AbstractBeanDefinition类型)
		if (beanDef instanceof AnnotatedBeanDefinition &&
				className.equals(((AnnotatedBeanDefinition) beanDef).getMetadata().getClassName())) {
			// Can reuse the pre-parsed metadata from the given BeanDefinition...
			metadata = ((AnnotatedBeanDefinition) beanDef).getMetadata();
		}
		//Spring在创建AnnotatedBeanDefinitionReader对象的时候
		// Spring已经往容器中注册了5个内置的BeanDefinition(见registerAnnotationConfigProcessors方法)
		// 真实类型为RootBeanDefinition
		else if (beanDef instanceof AbstractBeanDefinition && ((AbstractBeanDefinition) beanDef).hasBeanClass()) {
			// Check already loaded Class if present...
			// since we possibly can't even load the class file for this Class.
			// spring内置的几个工厂后置处理器,不认为是配置类,直接返回false
			Class<?> beanClass = ((AbstractBeanDefinition) beanDef).getBeanClass();
			if (BeanFactoryPostProcessor.class.isAssignableFrom(beanClass) ||
					BeanPostProcessor.class.isAssignableFrom(beanClass) ||
					AopInfrastructureBean.class.isAssignableFrom(beanClass) ||
					EventListenerFactory.class.isAssignableFrom(beanClass)) {
				return false;
			}
			//转换为StandardAnnotationMetadata
			metadata = AnnotationMetadata.introspect(beanClass);
		}
		else {
			//尝试获取元数据对象,这里可能获取失败,如果失败的话则会抛出异常,告诉外部这个BeanDefinition不是配置类的BeanDefinition。
			try {
				MetadataReader metadataReader = metadataReaderFactory.getMetadataReader(className);
				metadata = metadataReader.getAnnotationMetadata();
			}
			catch (IOException ex) {
				if (logger.isDebugEnabled()) {
					logger.debug("Could not find class file for introspecting configuration annotations: " +
							className, ex);
				}
				return false;
			}
		}
		//获取@Configuration注解的属性  如果该map为空则说明没有该注解
		Map<String, Object> config = metadata.getAnnotationAttributes(Configuration.class.getName());
		/**
		 * 如果 config 不为null  并且proxyBeanMethods 不为false (默认为true)
		 * 则给该bd的attribute的map中 添加 key为一大长串上面说的  value为full
		 */
		if (config != null && !Boolean.FALSE.equals(config.get("proxyBeanMethods"))) {
			beanDef.setAttribute(CONFIGURATION_CLASS_ATTRIBUTE, CONFIGURATION_CLASS_FULL);
		}
		/**
		 * 存在@Configuration注解,但proxyBeanMethods属性为false   或者  isConfigurationCandidate(metadata)进入该分支
		 * 该bd的attribute的map中 添加 key为一大长串上面说的  value为lite
		 */
		else if (config != null || isConfigurationCandidate(metadata)) {
			beanDef.setAttribute(CONFIGURATION_CLASS_ATTRIBUTE, CONFIGURATION_CLASS_LITE);
		}
		else {
			return false;
		}

		// It's a full or lite configuration candidate... Let's determine the order value, if any.
		//获取是否有@Order  为该bd的ttribute的map中设置order相关的值
		Integer order = getOrder(metadata);
		if (order != null) {
			beanDef.setAttribute(ORDER_ATTRIBUTE, order);
		}

		return true;
	}
其中isConfigurationCandidate方法主要判断了:
-
若为接口 返回false
-
如果是这其中四种注解,则返回true
static { candidateIndicators.add(Component.class.getName()); candidateIndicators.add(ComponentScan.class.getName()); candidateIndicators.add(Import.class.getName()); candidateIndicators.add(ImportResource.class.getName()); } -
如果有@Bean,也返回true
至此,配置类都加入到configCandidates集合中,并且都标记了full和lite
第二阶段
在ConfigurationClassParser.parse(...)方法中是完成配置类的解析,在这里做了一个do-while循环一直持续到spring确定不会再有新的配置类引入时退出。
那么什么情况下会出现扫描类的时候引入新的配置类呢?spring提供了@Import注解允许我们用三种不同的方式在解析配置类的时候引入新的配置类。@Import通常和@Configuration搭配使用,但也可以独立存在。我们可以用@Import直接引入一个配置类,也可以实现ImportSelector或ImportBeanDefinitionRegistrar其中一个接口,在接口里面返回或注册配置类,同样用@Import引入这两个接口的实现类。这里不懂没有关系,我们可以接着往下看,看完就能明白这段话的意思
Set<BeanDefinitionHolder> candidates = new LinkedHashSet<>(configCandidates);
Set<ConfigurationClass> alreadyParsed = new HashSet<>(configCandidates.size());
do {
	//解析 spring中的所有的bean 生成bean definition
	parser.parse(candidates);
	parser.validate();
}
while (!candidates.isEmpty());
首先,进入到parser.parse(candidates)方法会发现,根据不同类型的BeanDefinition,调用重载的parse方法,不过最终都是调用processConfigurationClass方法
public void parse(Set<BeanDefinitionHolder> configCandidates) {
		for (BeanDefinitionHolder holder : configCandidates) {
			BeanDefinition bd = holder.getBeanDefinition();
			try {
				//根据不同的BeanDefinition 重载的parse方法
				if (bd instanceof AnnotatedBeanDefinition) {
					parse(((AnnotatedBeanDefinition) bd).getMetadata(), holder.getBeanName());
				}
				else if (bd instanceof AbstractBeanDefinition && ((AbstractBeanDefinition) bd).hasBeanClass()) {
					parse(((AbstractBeanDefinition) bd).getBeanClass(), holder.getBeanName());
				}
				else {
					parse(bd.getBeanClassName(), holder.getBeanName());
				}
			}
			catch (BeanDefinitionStoreException ex) {
				throw ex;
			}
			catch (Throwable ex) {
				throw new BeanDefinitionStoreException(
						"Failed to parse configuration class [" + bd.getBeanClassName() + "]", ex);
			}
		}
		this.deferredImportSelectorHandler.process();
	}
![[外链图片转存失败,源站可能有防盗链机制,建议将图片保存下来直接上传(img-qt0AmWzx-1681378831039)(/Users/ys7/Library/Application Support/typora-user-images/image-20230322200737910.png)]](https://img-blog.csdnimg.cn/4f83c5ec29e34560a728bdaa3055f55a.png)
接着,重点看一下processConfigurationClass方法。
protected void processConfigurationClass(ConfigurationClass configClass, Predicate<String> filter) throws IOException {
	if (this.conditionEvaluator.shouldSkip(configClass.getMetadata(), ConfigurationPhase.PARSE_CONFIGURATION)) {
		return;
	}
	ConfigurationClass existingClass = this.configurationClasses.get(configClass);
	if (existingClass != null) {
		if (configClass.isImported()) {
			if (existingClass.isImported()) {
				existingClass.mergeImportedBy(configClass);
			}
			return;
		}
		else {
			this.configurationClasses.remove(configClass);
			this.knownSuperclasses.values().removeIf(configClass::equals);
		}
	}
	SourceClass sourceClass = asSourceClass(configClass, filter);
	do {
		sourceClass = doProcessConfigurationClass(configClass, sourceClass, filter);
	}
	while (sourceClass != null);
	this.configurationClasses.put(configClass, configClass);
}
在此处的shouldSkip,是根据Condition接口的实现类来判定是否需要加载指定的配置类到容器之中
@Condition注解可以接受一个实现了Condition接口的类作为参数,该接口只有一个方法:matches(ConditionContext context, AnnotatedTypeMetadata metadata)。当这个方法返回true时,表示需要解析这个bd,否则不解析。
if (this.conditionEvaluator.shouldSkip(configClass.getMetadata(), ConfigurationPhase.PARSE_CONFIGURATION)) {
   return;
}
这里拿到existingClass,这个是用来存放已经已经解析好的ConfigurationClass,主要是用来反正注册的情况。后续会讲到
ConfigurationClass existingClass = this.configurationClasses.get(configClass);
	if (existingClass != null) {
		if (configClass.isImported()) {
			if (existingClass.isImported()) {
				existingClass.mergeImportedBy(configClass);
			}
			return;
		}
		else {
			this.configurationClasses.remove(configClass);
			this.knownSuperclasses.values().removeIf(configClass::equals);
		}
	}
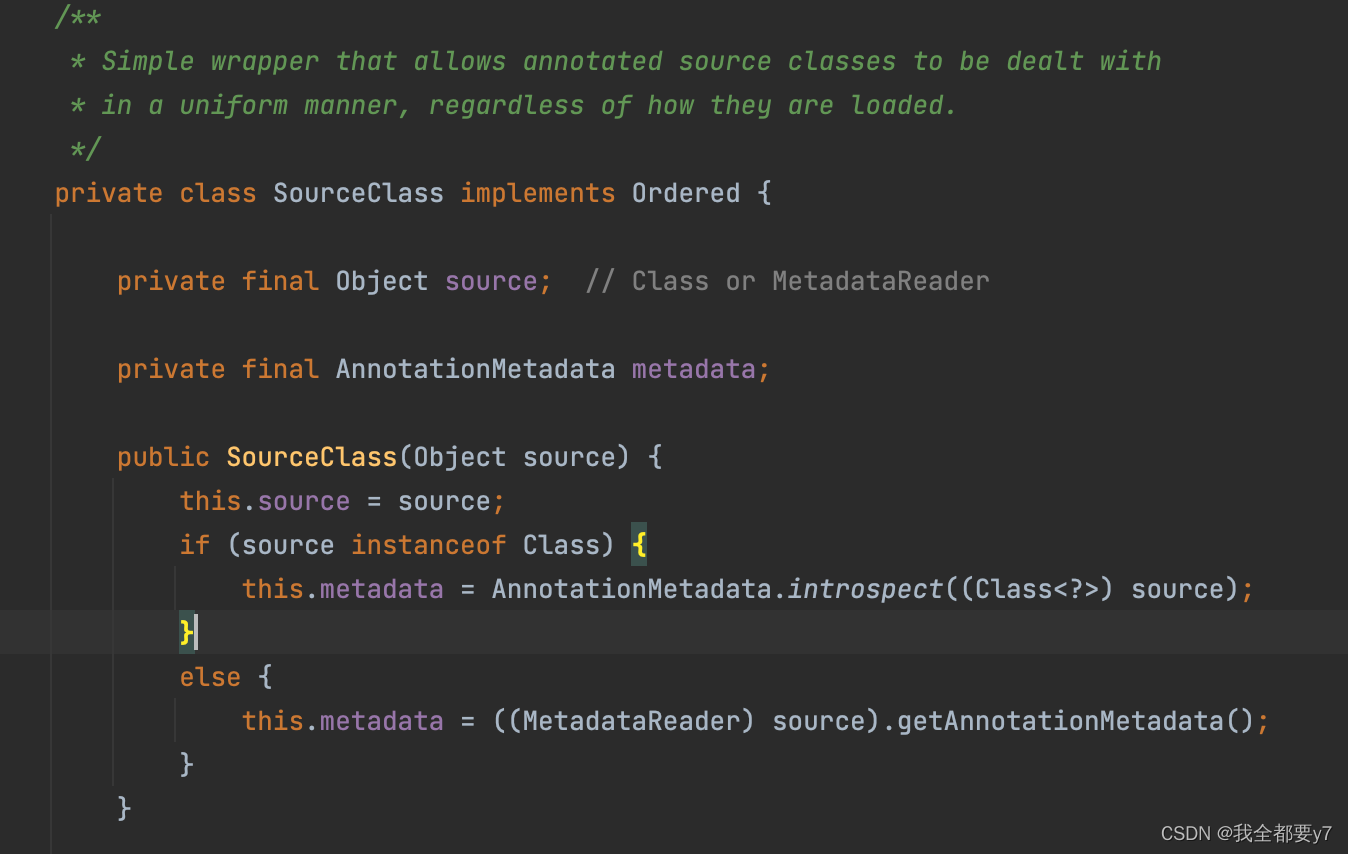
这块具体来说,它将配置类的所有属性和方法做一个拆解,然后封装在一个Java类中。这样,我们可以像使用普通Java类一样使用配置类。SoureceClass里面有source属性,以及注解信息AnnotationMetadata,以及一些方法
//简单的包装器,允许以统一的方式处理带注释的源类,而不管它们是如何加载的
SourceClass sourceClass = asSourceClass(configClass, filter);
在这里我们又看到一个do-while循环,之所以存在这个循环,是因为可能存在配置类继承配置类的情况,会判断其父类是否有被处理的需要,如果有的话会进行第二次循环,在处理完配置类后,会在将配置类放进configurationClasses这个集合。
do {
	sourceClass = doProcessConfigurationClass(configClass, sourceClass, filter);
}
while (sourceClass != null);
this.configurationClasses.put(configClass, configClass);
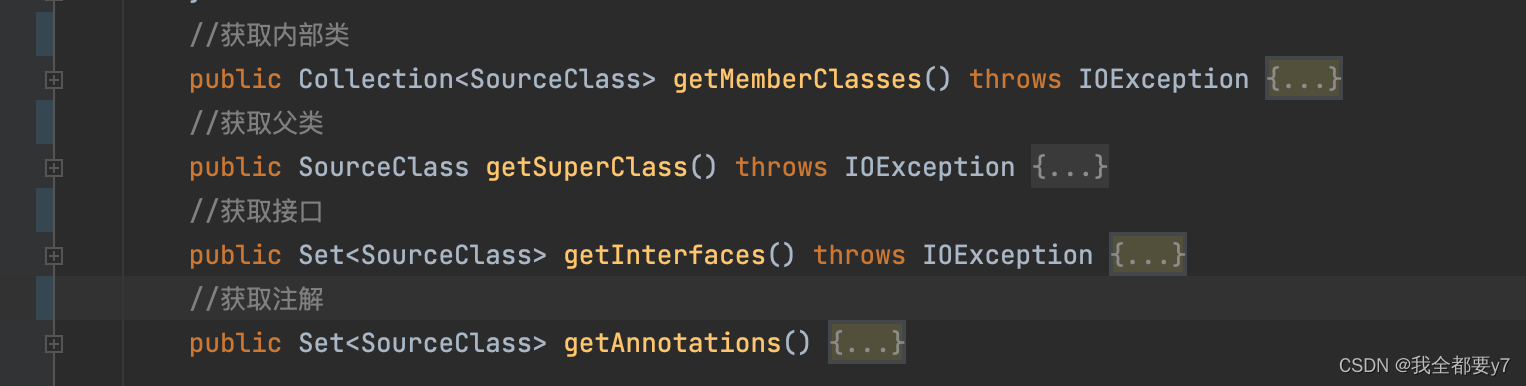
进入到doProcessConfigurationClass方法,会首先判断该配置类是否含有@Component注解,如果有进入到processMemberClasses这个处理内部类的方法。
之前我们说过SourceClass是一个简单的包装器,里面有个getMemberClasses的方法,通过反射的方法,获取到所有的内部类。拿到后,会去循环遍历内部类,也就是调用我们上面讲的ConfigurationClassUtils.isConfigurationCandidate方法,如果是配置类,则加入到candidates集合。
(同时还判断了!memberClass.getMetadata().getClassName().equals(configClass.getMetadata().getClassName())这个是否相等,也就是当前内部类memberClass的className和当前configClass的className不相同,这里应该是某些特殊情况下会相同,待后续继续研究,这里不影响主流程。)
当所有的内部类遍历完后,会去遍历candidates集合,会继续递归调用processConfigurationClass方法。因为这个内部类,也是一个配置类,同样需要spring去解析,所以需要递归。
这里大家会注意到,有个this.importStack.contains的判断,这是做什么用呢?
if (configClass.getMetadata().isAnnotated(Component.class.getName())) {
   processMemberClasses(configClass, sourceClass, filter);
}

private void processMemberClasses(ConfigurationClass configClass, SourceClass sourceClass,
			Predicate<String> filter) throws IOException {
		//获取指定类的成员类(Member Classes)数组 内部类
		Collection<SourceClass> memberClasses = sourceClass.getMemberClasses();
		//这里再判断它的内部类是否为配置类
		if (!memberClasses.isEmpty()) {
			List<SourceClass> candidates = new ArrayList<>(memberClasses.size());
			for (SourceClass memberClass : memberClasses) {
				//内部类是否为配置  是的话 加入配置候选集合
				if (ConfigurationClassUtils.isConfigurationCandidate(memberClass.getMetadata()) &&
						!memberClass.getMetadata().getClassName().equals(configClass.getMetadata().getClassName())) {
					candidates.add(memberClass);
				}
			}
			//排序
			OrderComparator.sort(candidates);
			for (SourceClass candidate : candidates) {
				if (this.importStack.contains(configClass)) {
					this.problemReporter.error(new CircularImportProblem(configClass, this.importStack));
				}
				else {
					this.importStack.push(configClass);
					try {
						//递归
						processConfigurationClass(candidate.asConfigClass(configClass), filter);
					}
					finally {
						this.importStack.pop();
					}
				}
			}
		}
	}
在上面的内部类处理完后,接着会解析@PropertySource注解,·AnnotationConfigUtils.attributesForRepeatable 用于获取@PropertySource和@PropertySources注解,存在的话,会去遍历处理该注解的内容。
// Process any @PropertySource annotations
//处理@PropertySource注释 @PropertySources是个可重复注解
//attributesForRepeatable 工具方法
for (AnnotationAttributes propertySource : AnnotationConfigUtils.attributesForRepeatable(
      sourceClass.getMetadata(), PropertySources.class,
      org.springframework.context.annotation.PropertySource.class)) {
   if (this.environment instanceof ConfigurableEnvironment) {
      processPropertySource(propertySource);
   }
   else {
      logger.info("Ignoring @PropertySource annotation on [" + sourceClass.getMetadata().getClassName() +
            "]. Reason: Environment must implement ConfigurableEnvironment");
   }
}
主要看processPropertySource方法,可以看到,无非就是获取@propertySource的一些属性,name,encoding,value,ignoreResourceNotFound,factory这几个值。
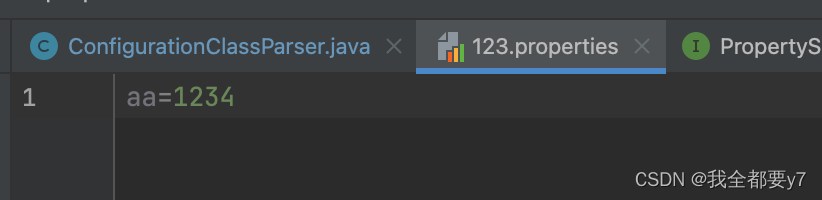
其中value就是我们配置的资源路径,可以配置多个,所以此处代码是getStringArray获取到它的值,如下图所示


接着获取了ignoreResourceNotFound值,在下面的try{...}catch(){...}中可以看到,如果这个资源路径在解析时被捕获了异常,会判断ignoreResourceNotFound值是否为true,是的话不做其他处理,否则抛出异常。
最后我们看到,又获取了一个factory值,如果这个factory是PropertySourceFactory,则会new一个默认实现,也就是DefaultPropertySourceFactory,否则会去实例化我们自定义的factory。那什么时候我们会去自定义这个解析工厂实现呢?DefaultPropertySourceFactory只支持解析xml或者properties文件,不支持yml文件,所以如果想要解析yml,就需要自定义一个解析的工厂类。
private void processPropertySource(AnnotationAttributes propertySource) throws IOException {
// 获取@PropertySource的name属性
String name = propertySource.getString("name");
if (!StringUtils.hasLength(name)) {
name = null;
}
// 获取@PropertySource的encoding属性
String encoding = propertySource.getString("encoding");
if (!StringUtils.hasLength(encoding)) {
encoding = null;
}
// 获取@PropertySource的value属性(即properties文件的路径)
String[] locations = propertySource.getStringArray("value");
Assert.isTrue(locations.length > 0, "At least one @PropertySource(value) location is required");
boolean ignoreResourceNotFound = propertySource.getBoolean("ignoreResourceNotFound");
// 获取@PropertySource的factory属性
Class<? extends PropertySourceFactory> factoryClass = propertySource.getClass("factory");
PropertySourceFactory factory = (factoryClass == PropertySourceFactory.class ?
DEFAULT_PROPERTY_SOURCE_FACTORY : BeanUtils.instantiateClass(factoryClass));
for (String location : locations) {
try {
//解析占位符
String resolvedLocation = this.environment.resolveRequiredPlaceholders(location);
// 将路径解析为资源
Resource resource = this.resourceLoader.getResource(resolvedLocation);
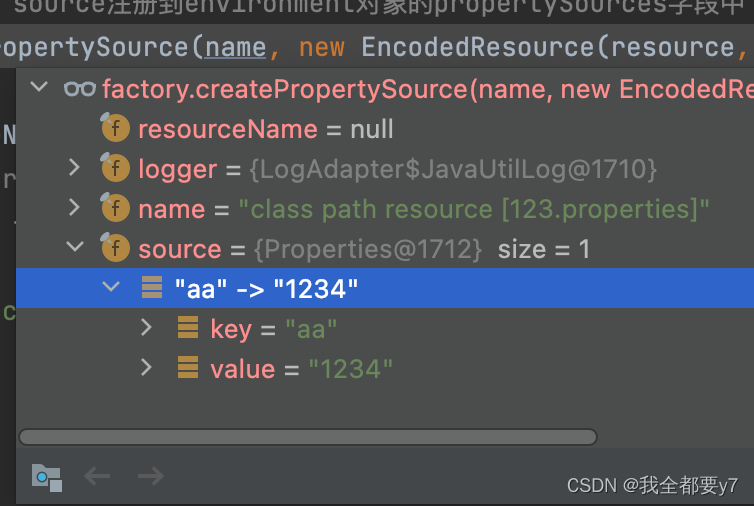
// (1) factory.createPropertySource: 解析资源(properties文件)中的键/值对,封装到PropertySource对象中并返回
// PropertySource是对某一资源对应键值对的封装,键值对存储在其source字段中
// (2) addPropertySource将property source注册到environment对象的propertySources字段中
addPropertySource(factory.createPropertySource(name, new EncodedResource(resource, encoding)));
}
catch (IllegalArgumentException | FileNotFoundException | UnknownHostException | SocketException ex) {
// Placeholders not resolvable or resource not found when trying to open it
if (ignoreResourceNotFound) {
if (logger.isInfoEnabled()) {
logger.info("Properties location [" + location + "] not resolvable: " + ex.getMessage());
}
}
else {
throw ex;
}
}
}
}
当所有的值都获取到了,接下来就是循环遍历这个locations,解析占位符,将路径解析为资源。然后主要的就是这一行代码
addPropertySource(factory.createPropertySource(name, new EncodedResource(resource, encoding)));
首先看factory.createPropertySource这个方法,这个方法里面,会调用PropertiesLoaderUtils.loadProperties再到fillProperties(),读取properties文件中的key-value,封装成一个PropertySource对象
接着看addPropertySource方法,
private void addPropertySource(PropertySource<?> propertySource) {
   String name = propertySource.getName();
   MutablePropertySources propertySources = ((ConfigurableEnvironment) this.environment).getPropertySources();
   //查看有没有相同的配置文件
   if (this.propertySourceNames.contains(name)) {
      // We've already added a version, we need to extend it
      PropertySource<?> existing = propertySources.get(name);
     //如果已经存在了该配置文件的PropertySource 会进行合并
      if (existing != null) {
         PropertySource<?> newSource = (propertySource instanceof ResourcePropertySource ?
               ((ResourcePropertySource) propertySource).withResourceName() : propertySource);
         if (existing instanceof CompositePropertySource) {
            ((CompositePropertySource) existing).addFirstPropertySource(newSource);
         }
         else {
            if (existing instanceof ResourcePropertySource) {
               existing = ((ResourcePropertySource) existing).withResourceName();
            }
            CompositePropertySource composite = new CompositePropertySource(name);
            composite.addPropertySource(newSource);
            composite.addPropertySource(existing);
            propertySources.replace(name, composite);
         }
         return;
      }
   }
//如果是自己第一个 引起了的propertySource,那就放在最末尾
//否则,就放在引入过的最后一个的前一个里
   if (this.propertySourceNames.isEmpty()) {
      propertySources.addLast(propertySource);
   }
   else {
      String firstProcessed = this.propertySourceNames.get(this.propertySourceNames.size() - 1);
      propertySources.addBefore(firstProcessed, propertySource);
   }
   this.propertySourceNames.add(name);
}
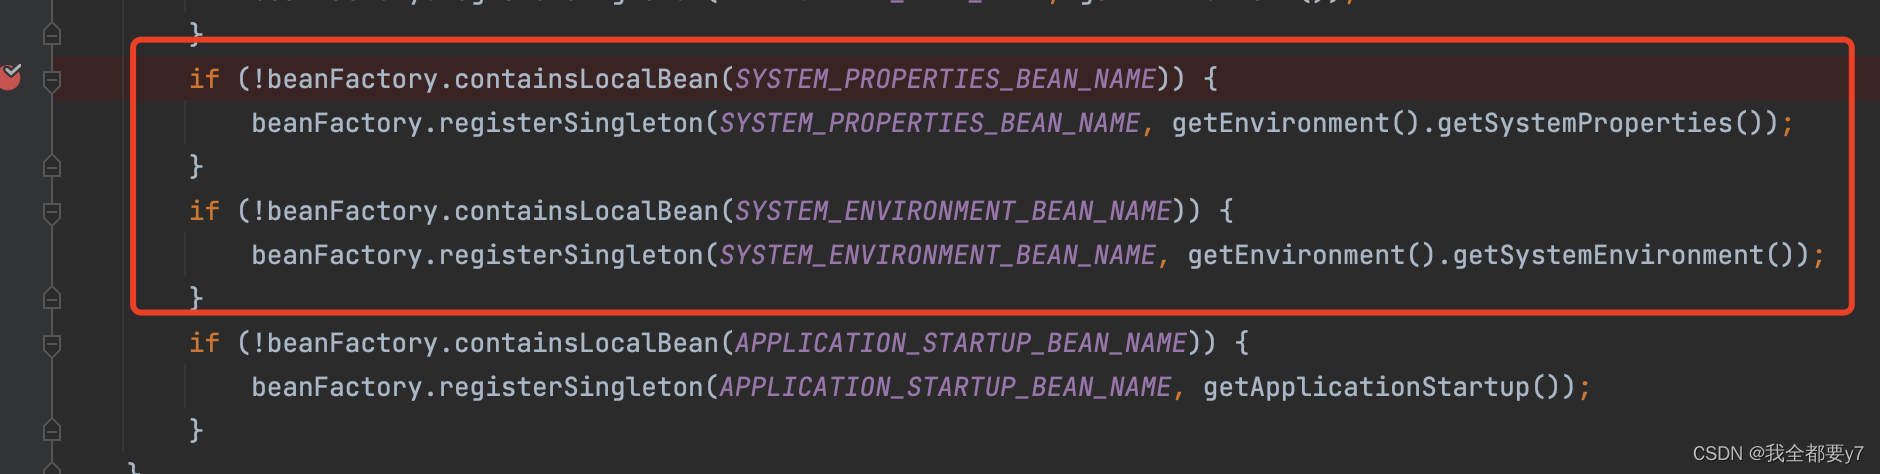
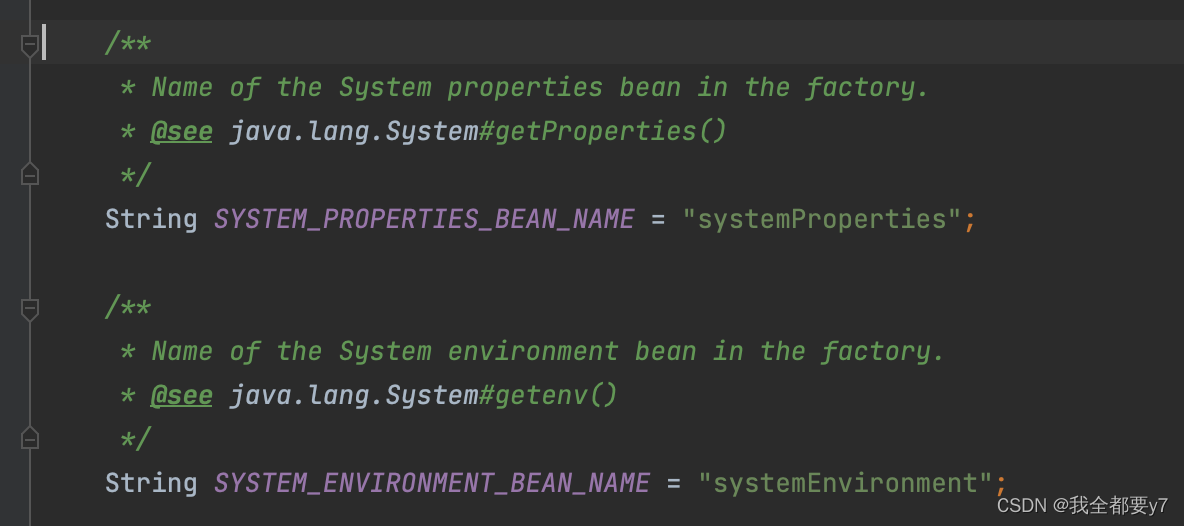
首先会调用getPropertySources方法,取到当前环境中的propertySources,内置会有两个,分别是systemProperties和systemEnvironment,这两个其实也是在spring启动的时候注入的,在prepareBeanFactory方法中,会注册这两个。
接着判断,若出现同名的配置文件,它会两个都保存着,最后组合形成一个CompositePropertySource 这样两个都会生效。最后就是做一个顺序的调整。
到这里我们分析完了内部类的解析和@PropertySources的解析。也遗留了几个问题,后面会继续分析@ComponentScans``@import等。。。


 3251
3251

 被折叠的 条评论
为什么被折叠?
被折叠的 条评论
为什么被折叠?
 到【灌水乐园】发言


