


纯vue3的语法
一.创建(基于vite)
1.在指定目录下运行
npm create vue@latest

- 项目名称:英文小写+下划线+数字
- 回车表示确定
- 是、否 左右切换
- 路由、pina、单元测试、端到端的测试、开启eslint控制代码质量 先选择no,学的时候自己手动配置
2.目录的介绍
1).vscode文件下的extensions.json文件用于 插件安装推荐,也可以删掉

又这个文件,vscode的右下角就会出现插件提示
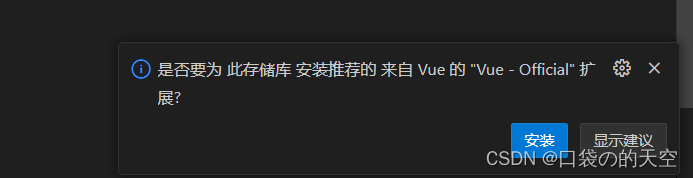
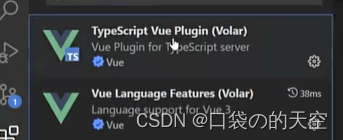
需要安装这两插件


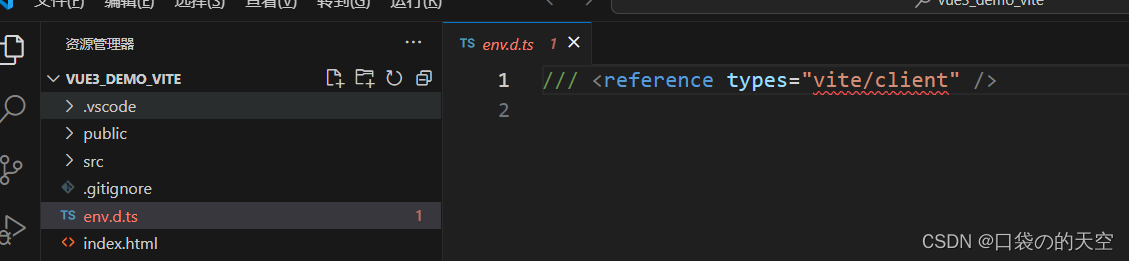
2)env.d.ts文件
由于ts不认识.ts、.jpg、.vue等文件,所以引入的时候会飘红。有了这个文件就不会红了
3)index.html入口文件
4)package.json 包的管理文件
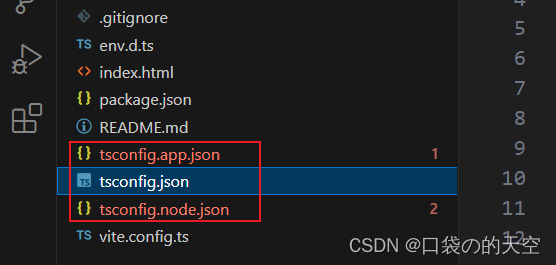
5)tsconfig.json ts的配置文件
6)vite.config.ts等的配置文件
二.安装
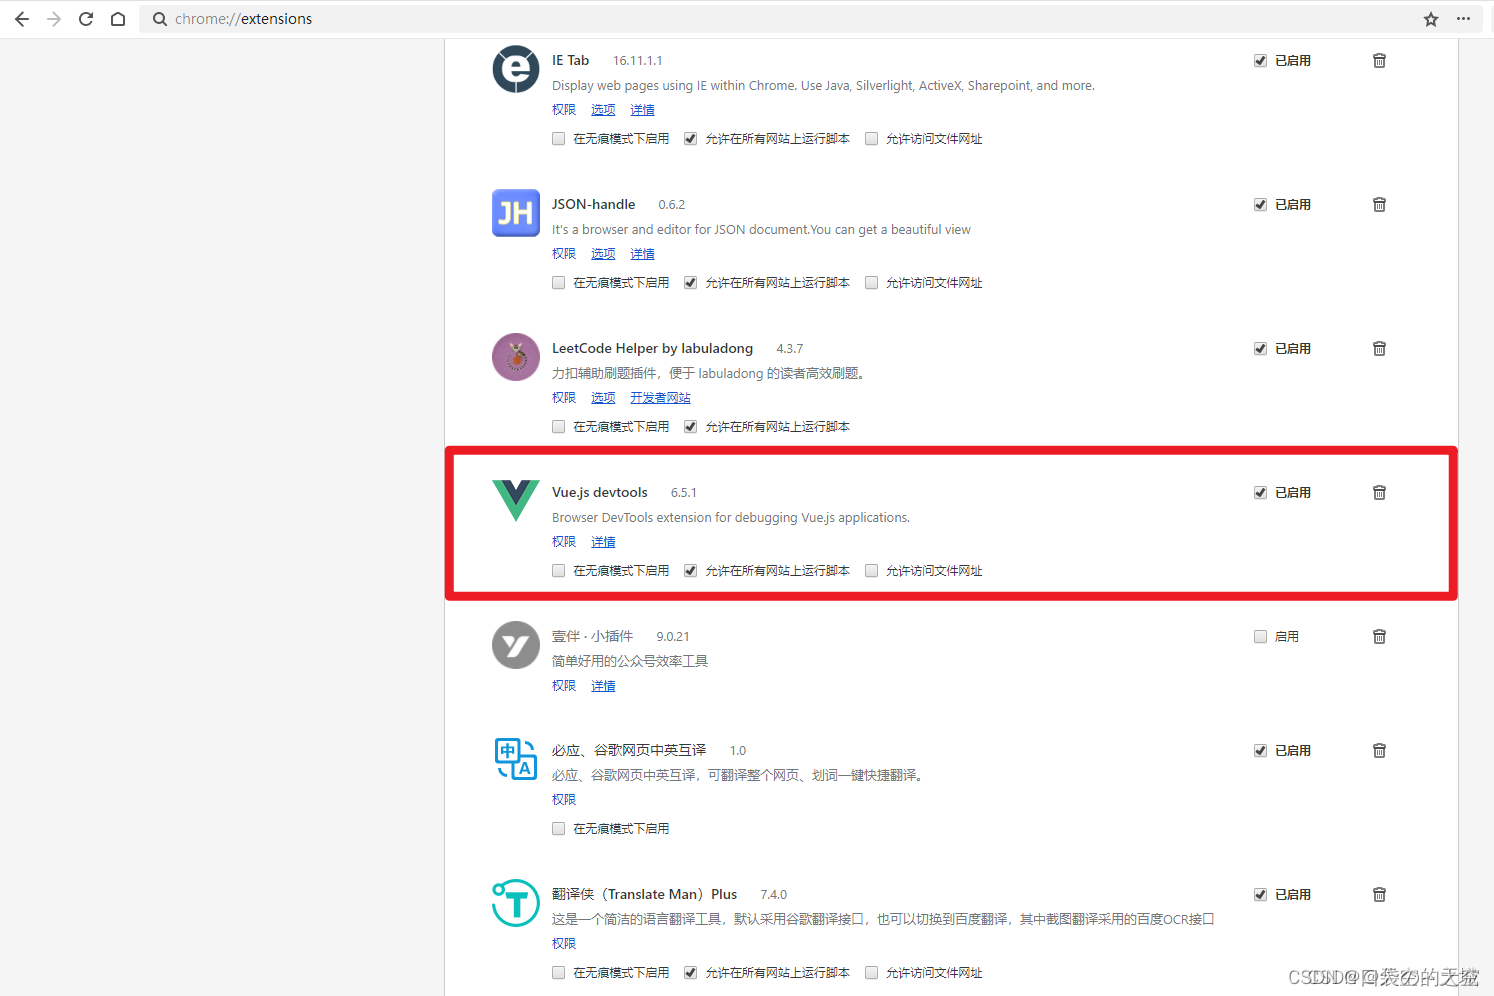
1.vue devtool
安装地址:https://chrome.zzzmh.cn/index
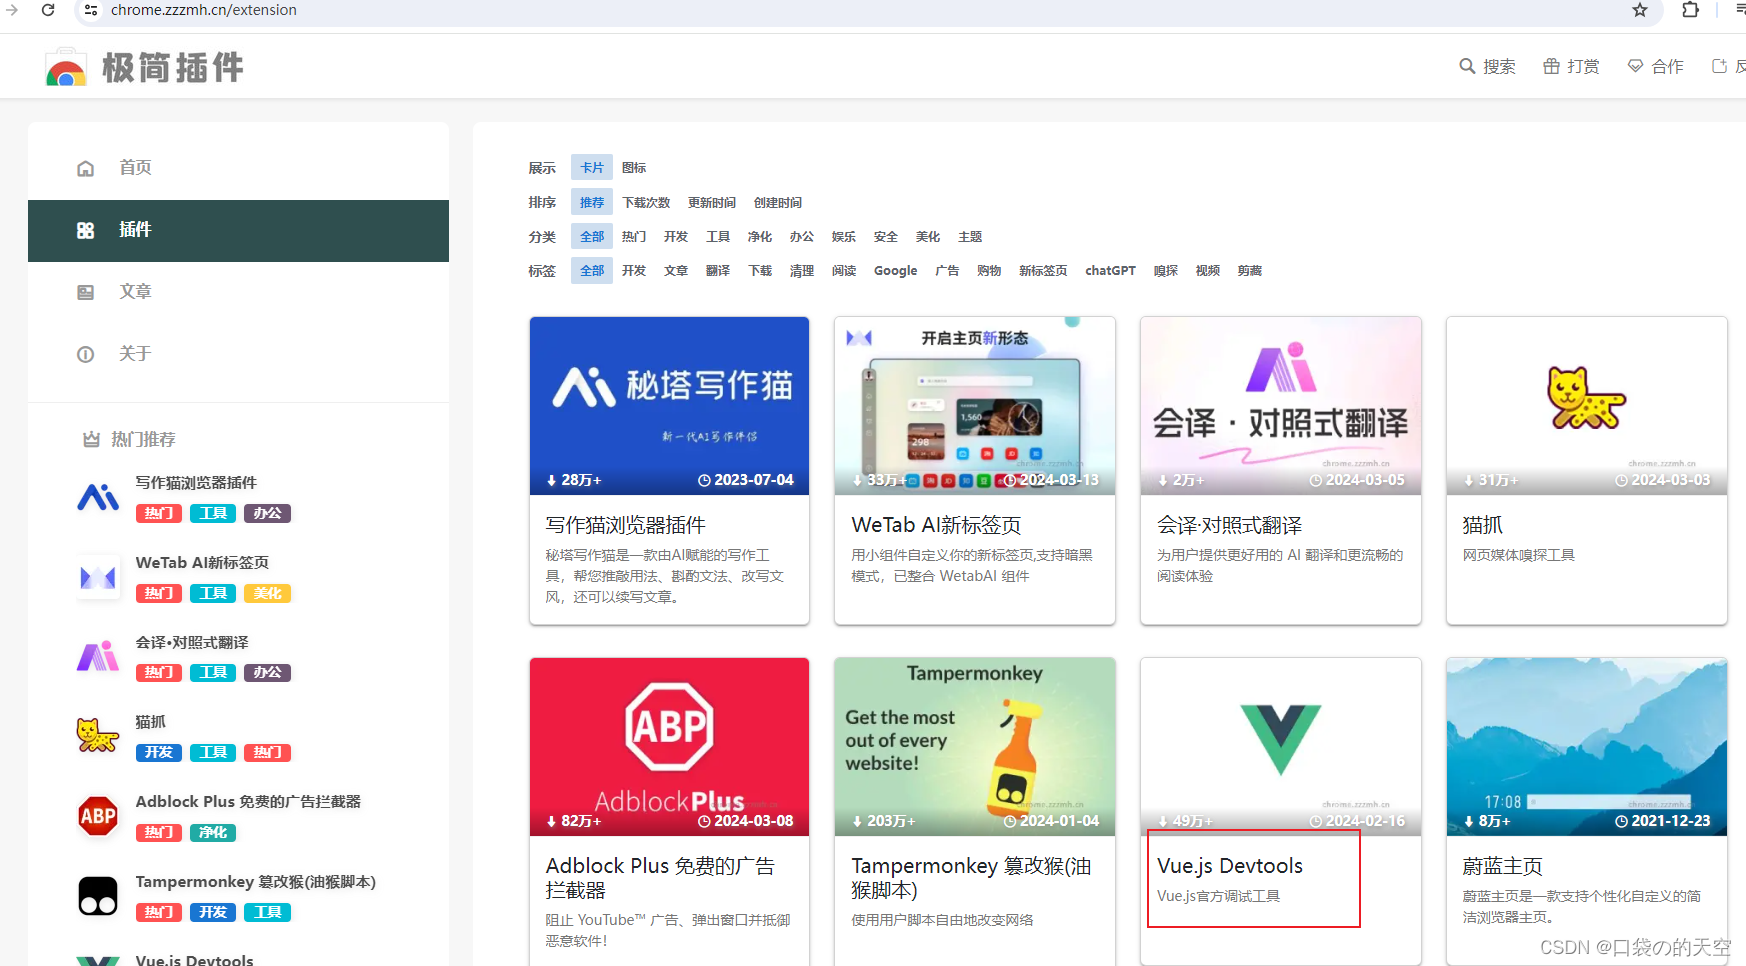
把解压包里面的crx 文件直接拖拽到浏览器中的扩展工具
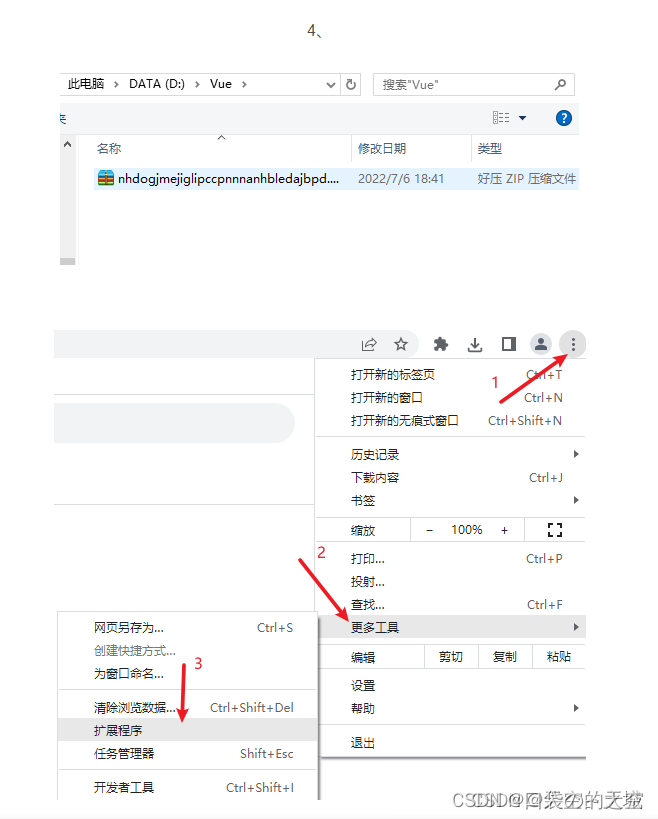
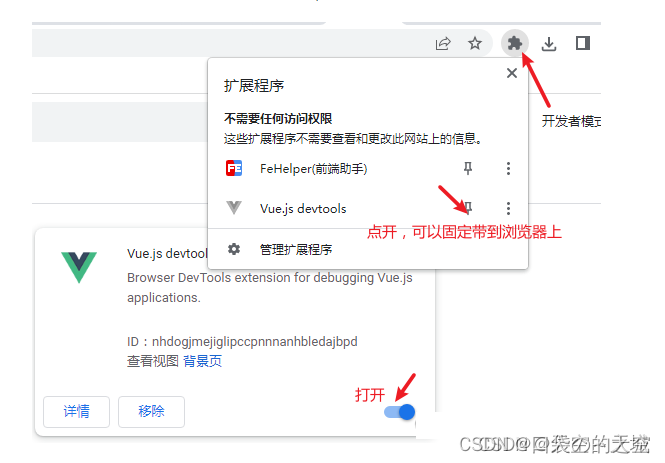
如果没有显示 添加扩展工具的话 请把左侧的开发者模式打开
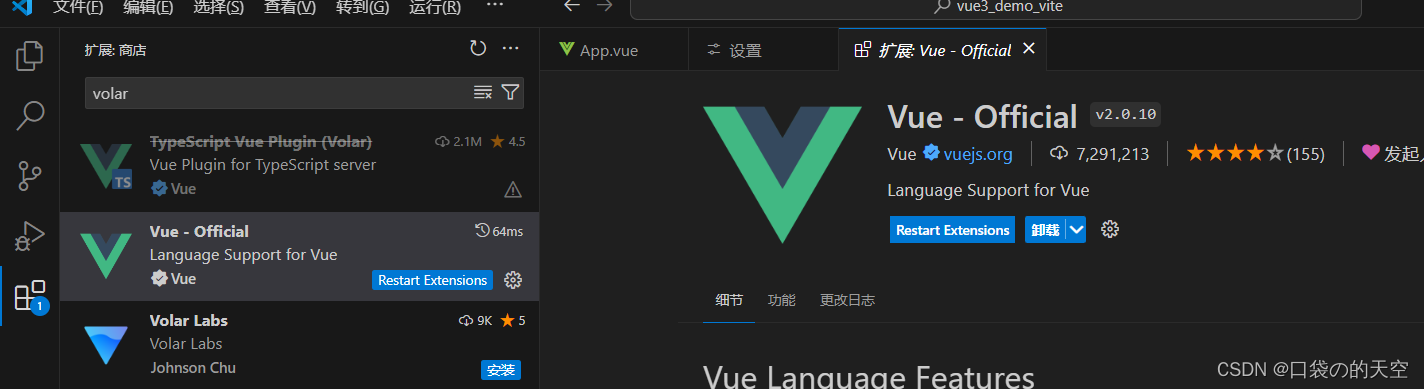
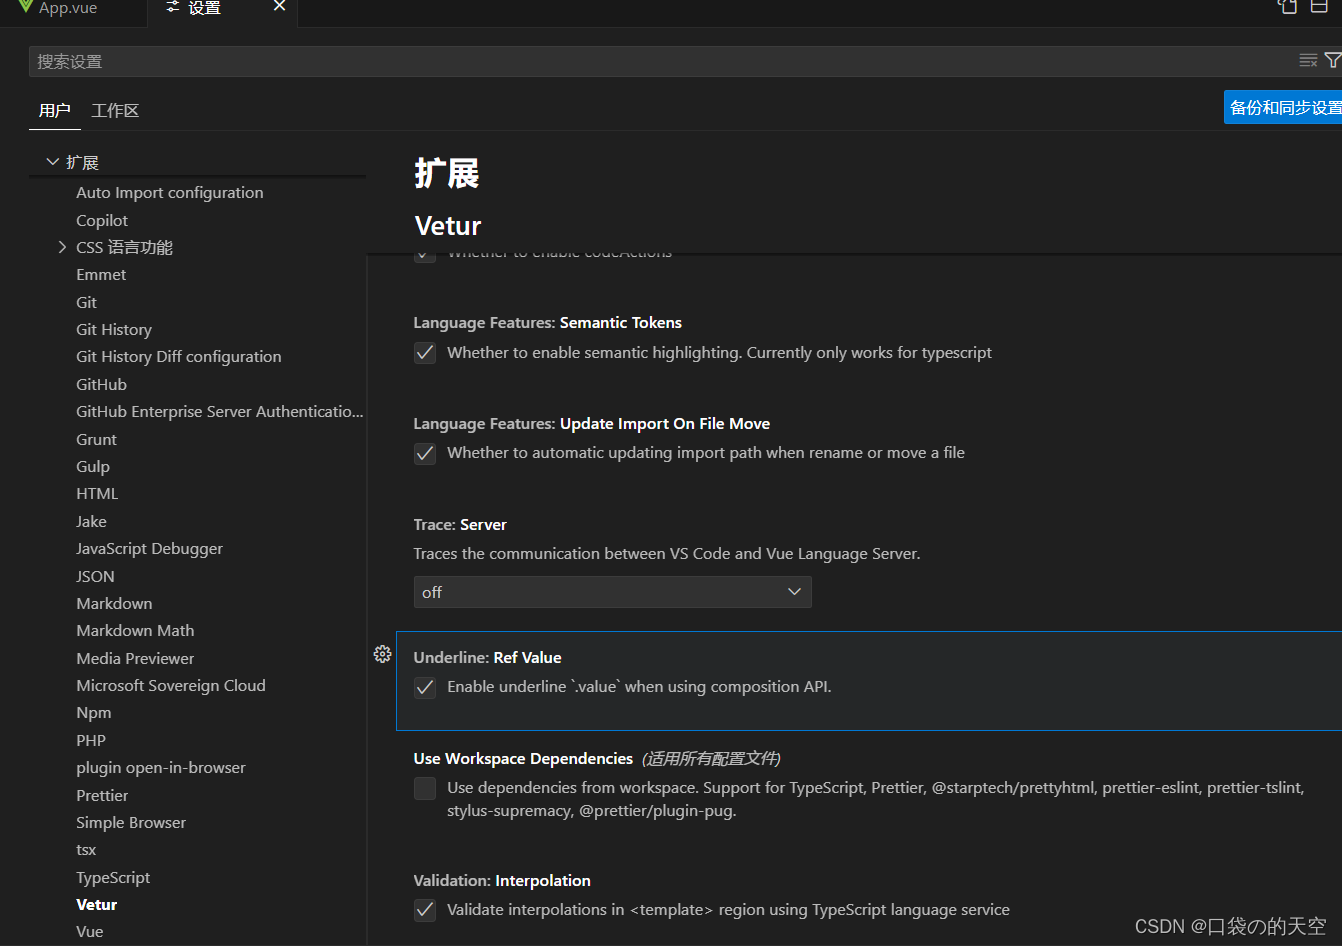
2.vue-offical
安装以后,ref的value自动补充完整
三.vue3的核心语法
1.OptionsAPI 与CompositionAPI
Vue2 是选项式API(OptionsAPI,选项式风格),data、methods、name都是选项
vue3 组合式API(CompositionAPI,配置式风格)
1.1 OptionsAPI的弊端
Options类型的API数据、方法、计算属性等,是分散在:data、methods、computed中的,若想新增或者修改一个需求,就需要分别修改:data、methods、computed,不便于维护和复用。
1.2 CompositionAPI 的优势
可以用函数式的方式,更加优雅的组织代码,让相关功能的代码更加有序的组织在一起。
2.setup
setup中的this是undefiend,Vue3中已经弱化this了- 直接在
setup中打印数据比beforeCreate和data还靠前。data里面通过this.可以获取到steup中定义的数据;但steup里面无法获取data里面的数据 setup的返回值也可以是个渲染函数
2.1 setup语法糖
1)如何使用语法糖
在script后面加上一个setup
2)这个语法糖有什么用呢
- 引入组件的时候自动注册子组件
- 属性和方法不需要return出去,顶层的绑定会暴露给模板,模板中可以直接使用
<script lang="ts" setup>
  import {ref} from "vue"
  // 只需要引入需要的组件,不需要注册组件
  import Test from "./components/Test.vue"
  // 定义变量不需要return出去
  const count = ref(0)
  const Add = () =>{
    count.value++
  }
</script>
- 支持props、emit
//Child.vue
<template>
  <span @click="handleClick">我是子组件! -- msg: {{ props.msg }}</span>
</template>

<script>
import { defineComponent, ref } from 'vue'
export default defineComponent({
  emits: [
    'child-click'
  ],
  props: {
    msg: String
  },
  setup(props, context) {
    const handleClick = () => {
      context.emit('child-click', context)
    }

    return {
      props,
      handleClick
    }
  },
})
</script>

//语法糖写法
//Child.vue
<template>
  <span @click="handleClick">我是子组件! -- msg: {{ props.msg }}</span>
</template>

<script setup>
import { defineProps, defineEmit } from 'vue'
const emit = defineEmit(['child-click'])
const props = defineProps({
  msg: String
})

const handleClick = () => {
  emit('child-click', "点击了")
}
</script>
- 父子组件访问方法及属性
子组件里面暴露
<script setup>
import {defineExpose, ref } from 'vue'
//子组件暴露出去 用于父组件调用
defineExpose({
  handleMenu(value: boolean) {
    handleMenu(value);
  },
});
</script>
- useSlots 和 useAttrs
在
<script setup>
import { useSlots, useAttrs } from 'vue'

const slots = useSlots()
const attrs = useAttrs()
</script>
- setup中没法直接定义或修改组件的name。组件的name默认是文件的名字,但如果要求跟文件名字不一样,就要修改。
如果需要重新定义的话,有两种办法:
- 在单独写个script,专门写name的,但这样就会有两个script标签
- 引入
vite-plugin-vue-setup-extend插件
安装命令:npm install vite-plugin-vue-setup-extend -D 然后在vite.config.js`添加如下代码:
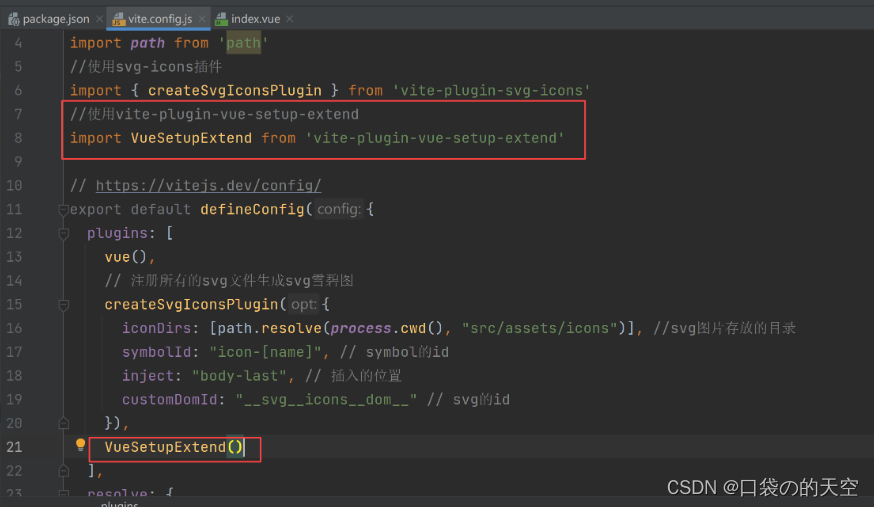
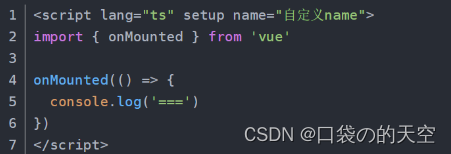
在页面就可以直接在script标签里面加name属性了:
2.2 ref和reactive
- 宏观角度看:
- ref 用来定义:基本类型教据、对象类型数据;
- reactive 只能定义:对象类型数据。
- 区别:
- ref 创建的变量必须使用.value(可以使用volar播件自动添加.value)。
- reactive 重新分配一个对象,会失去响应式(可以使用 0bject.assign去整体替换)
- 使用原则:
- 若需要一个基本类型的响应式数据,必须使用ref。
- 若需要一个响应式对象,展级不深,ref、reactive 都可以
- 若需要一个响应式对象,且层圾较深,推荐使用reactive。
<template>
  <div>
    食物:{{ food.type }}---{{ food.price }}

    汽车:{{ car.type }}----{{ car.price }}
    <br />
    <button @click="changeFood">修改</button>
  </div>
</template>
<script setup lang="ts">
import { ref, reactive } from "vue";
let food = reactive({
  type: "apple",
  price: 15,
});
let car = ref({ type: "宝马", price: 33000 });

const changeFood = () => {
  //直接这样写不更新
  // food = reactive({
  //   type: "orange",
  //   price: 21,
  // });
  // food = {
  //   type: "orange",
  //   price: 21,
  // };

  // //以下写法可以更新
  Object.assign(food, { type: "orange", price: 21 });
  // //或者
  car.value = { type: "奥拓", price: 666000 };
};
</script>
2.3 toRefs和toRef
- toRefs 解构赋值,给新的变量转为ref
- toRef 用于将一个响应式对象的属性转换为一个独立的ref对象,保持对源对象属性的响应式交互
<template>
  <div class="person">
    <h2>姓名:{{ person.name }}---{{ name }}</h2>
    <h2>年龄:{{ person.age }}----{{age}}---{{ nl }}</h2>
    <button @click="changeName">修改姓名</button>
    <button @click="changeAge">修改年龄</button>
  </div>
</template>
<script setup lang="ts">
import { ref, reactive, toRefs, toRef } from "vue";
let person = reactive({
  name: "张三",
  age: 15,
});
//解构赋值,给新的变量转为ref
let { name, age } = toRefs(person);
//给新的变量取值
let nl = toRef(person, "age");

const changeName = () => {
  name.value += "~";
};
const changeAge = () => {
  age.value += 1;
  nl.value += 2;
};
</script>

<style scoped>
</style>
2.4 computed
1)只读的写法——get
<template>
  <div class="person">
    <h2>姓:{{ firstName }}</h2>
    <br  />
    <h2>名:{{ lastName }}</h2>
    <br  />
    <h2>全名:{{ fullName }}</h2>

  </div>
</template>
<script setup lang="ts">
import { ref, computed } from "vue";
let firstName = ref('zhang')
let lastName = ref('san')

let fullName = computed(()=>{
  return firstName.value +lastName.value
})

</script>
2)可读可写的写法_get和set
<template>
  <div class="person">
    <h2>姓:{{ firstName }}</h2>
    <br />
    <h2>名:{{ lastName }}</h2>
    <br />
    <h2>全名:{{ fullName }}</h2>
    <br />
    <button @click="changeFullName">改全名</button>
  </div>
</template>
<script setup lang="ts">
import { ref, computed } from "vue";
let firstName = ref("zhang");
let lastName = ref("san");

let fullName = computed({
  get() {
    return firstName.value + "-" + lastName.value;
  },
  set(val) {
    let arr = val.split("-");
    firstName.value = arr[0];
    lastName.value = arr[1];
  },
});

const changeFullName = () => {
  fullName.value = "li-si";
};
</script>

<style scoped>
</style>
2.5 watch
vue3中的watch只能监听以下四种数据
- ref 定义的数据
- reactive 定义的数据
- 函数返回的一个值(getter函数)
- 一个包含上述内容的数组
我们在vue3中使用watch的时候,通常会遇到以下几种情况:
情况一
监听ref定义的【基本类型】的数据,直接写数据名即可,监听的是其value 值的改变。
监听的ref值不用写.value
<template>
  <div class="person">
    <h2>当前求和为:{{ sum }}</h2>
    <br />
    <button @click="changeNum">点我sum+1</button>
  </div>
</template>
<script setup lang="ts">
import { ref, computed, watch } from "vue";
let sum = ref(0);
const changeNum = () => {
  sum.value += 1;
};
const stopWatch = watch(sum, (newVal, oldVal) => {
  console.log("sum变化了", newVal, oldVal);
  //停止监听
  if (newVal >= 10) {
    stopWatch();
  }
});
</script>

<style scoped>
</style>
情况二
监视 ref 定义的【对象类型】数据,直接写数据名,监视的是对象的【地址值】,若想监视对象内部的数据,要手动{deep:true}开启深度监视。
注意:
- 若修改的是ref 定义的对象中的属性,newValue 和 oldValue 都是新值,因为它们是同一个对象,。
- 若修改整个 ref 定义的对象, newValue 是新值, oldvalue 是旧值,因为不是同一个对象了。
<template>
  <div class="person">
    <h2>person:{{ person.name }}-------{{ person.age }}</h2>
    <br />
    <button @click="changeName">修改名字</button>
  </div>
</template>
<script setup lang="ts">
import { ref, watch } from "vue";
let person = ref({
  name: "张三",
  age: 15,
});
const changeName = () => {
  person.value.name = '李四';
};
watch(
  person,
  (newVal, oldVal) => {
    console.log(newVal, oldVal);
  },
  //深度监听
  {
    deep: true,
  }
);
</script>

<style scoped>
</style>
情况三
监视 reactive 定义的【对象类型】数据,且默认开启了深度监视。而且这个深度监视关不掉。
不需要手动加{deep:true}
<template>
  <div class="person">
    <h2>person:{{ person.name }}-------{{ person.age }}</h2>
    <br />
    <button @click="changeName">修改名字</button>
  </div>
</template>
<script setup lang="ts">
import { reactive, ref, watch } from "vue";
let person = reactive({
  name: "张三",
  age: 15,
});
const changeName = () => {
  person.name += '~';
  person.age += 1;
};
watch(
  person,
  (newVal, oldVal) => {
    console.log(newVal, oldVal);
  }
);
</script>

<style scoped>
</style>
情况四
监视 ref 或reactive 定义的【对象类型】数据中的某个属性,注意点如下:
- 若该属性值不是【对象类型】,需要写成函数形式。
- 若该属性值是依然是【对象类型】,可直接编,也可写成函数,不过建议写成函数。
总结:修改对象下的某个属性,都写成函数
<template>
  <div class="person">
    <h2>person:{{ person.name }}-------{{ person.age }}</h2>
    <br />
    车:{{ person.car.c1 }},{{ person.car.c2 }}
    <button @click="changeName">修改名字</button>
    <button @click="changeC1">修改第一台车</button>
    <button @click="changeC2">修改第二台车</button>
    <button @click="changeCar">修改所有车</button>
  </div>
</template>
<script setup lang="ts">
import { reactive, ref, watch } from "vue";
let person = reactive({
  name: "张三",
  age: 15,
  car: {
    c1: "奥迪",
    c2: "宝马",
  },
});
const changeName = () => {
  person.name += "~";
  person.age += 1;
};

const changeC1 = () => {
  person.car.c1 = "特斯拉";
};

const changeC2 = () => {
  person.car.c2 = "比亚迪";
};
const changeCar = () => {
  person.car = {
    c1: "摩托罗拉",
    c2: "大众",
  };
};
watch(
  () => person.name,
  (newVal, oldVal) => {
    console.log(newVal, oldVal);
  }
);

watch(
  () => person.car,
  (newVal, oldVal) => {
    console.log(newVal, oldVal);
  },
  {
    deep: true,
  }
);
</script>

<style scoped>
</style>
情况五
监听上述多个数据
<template>
  <div class="person">
    <h2>person:{{ person.name }}-------{{ person.age }}</h2>
    <br />
    车:{{ person.car.c1 }},{{ person.car.c2 }}
    <button @click="changeName">修改名字</button>
    <button @click="changeC1">修改第一台车</button>
    <button @click="changeC2">修改第二台车</button>
    <button @click="changeCar">修改所有车</button>
  </div>
</template>
<script setup lang="ts">
import { reactive, ref, watch } from "vue";
let person = reactive({
  name: "张三",
  age: 15,
  car: {
    c1: "奥迪",
    c2: "宝马",
  },
});
const changeName = () => {
  person.name += "~";
  person.age += 1;
};

const changeC1 = () => {
  person.car.c1 = "特斯拉";
};

const changeC2 = () => {
  person.car.c2 = "比亚迪";
};
const changeCar = () => {
  person.car = {
    c1: "摩托罗拉",
    c2: "大众",
  };
};

watch([() => person.name, () => person.car.c1], (newVal, oldVal) => {
  console.log(newVal, oldVal);
});

</script>

<style scoped>
</style>
2.6 watchEffect
-
官网:立即远行一个函数,同时响应式地追踪其依稳,并在依较更改时重新执行该的数
-
watch 对比watchEffect
- 都能监听前应式敷冢的变化。不同的是监听数报变化的方式不同
- watch 要明确指出监视的数据watch
- watcheffect:不用明确指出监视的数据(函数中用到哪些属性,那就监视哪些属性)。
<template>
  <div class="person">
    <h1>需求:水温达到50℃,或水位达到80cm,则联系服务器</h1>
    <h2>水温:{{ temp }}</h2>
    <h2>水位:{{ height }}</h2>
    <button @click="changeTemp">水温+10</button>
    <button @click="changeHeight">水位+10</button>
  </div>
</template>
<script setup lang="ts">
import { reactive, ref, watch, watchEffect } from "vue";
let temp = ref(0);
let height = ref(0);

const changeTemp = () => {
  temp.value += 10;
};

const changeHeight = () => {
  height.value += 10;
};

//watch 实现需求
// watch([temp, height], (val) => {
//   let [temp, height] = val;
//   if (temp >= 50 || height >= 80) {
//     console.log("联系服务器");
//   }
// });

//watchEffect 实现需求
watchEffect(() => {
  if (temp.value >= 50 || height.value >= 80) {
    console.log("联系服务器");
  }
});
</script>

<style scoped>
</style>
2.7 【标签的 ref 属性】
作用:用于注册模板引用。
- 用在普通 DOM 标签上,获取的是 DOM 节点.
- 用在组件标签上,获取的是组件实例对象。
父组件:
<template>
  <div class="person">
    <h1 ref="title2">您好</h1>
    <button @click="showlog1">点我输出h2【您好】 这个元素</button>
    <button @click="showlog2">点我输出子组件【人】 这个元素</button>

    <hr>
    <Person ref="ren"></Person>
  </div>
</template>
<script setup lang="ts">
import Person from "./components/Person.vue";
import { ref } from "vue";
let title2 = ref()
let ren = ref()

const showlog1 = ()=>{
  console.log(title2.value)
}
const showlog2 = ()=>{
  console.log(ren.value.a)
  console.log(ren.value.b)
  console.log(ren.value.c)
}
</script>
子组件Person:
<template>
  <div class="person">
    <h1>我是--人组件</h1>
    <h3 ref="title2">人</h3>
    <button @click="showlog">点我输出h3【人】这个元素</button>

  </div>
</template>
<script setup lang="ts">
import { ref, defineExpose } from "vue";

//创建一个title2,用于存储ref标记的内容
let title2 = ref()
let a = ref(1)
let b = ref(2)
let c = ref(3)

const showlog = ()=>{
  console.log(title2.value)
}
//子组件向父组件暴露数据,让父组件能访问
defineExpose({a,b,c})
</script>
3.ts的接口、泛型、自定义类型
1. 定义.ts的文件
//定义一个接口,用于限制person对象的具体属性
export interface PersonInter {
    id: string,
    name: string,
    age: number
}

//一个自定义类型(一类人,数组)
//第一种写法
export type Persons = Array<PersonInter>
//第二种写法
// export type Persons = PersonInter[]
2. 使用
属性名不对,或者类型不对,就可以校验提示
<template>
  <div class="person">???</div>
</template>
<script setup lang="ts">
import { type PersonInter, type Persons } from "@/types/index.ts";
//固定一个人
let person: PersonInter = { id: "sgdiuahsdiahi1", name: "张三", age: 19 };

//固定一类人
let personList: Array<PersonInter> = [
  { id: "sgdiuahsdiahi1", name: "张三", age: 19 },
  { id: "sgdiuahsdiahi2", name: "李四", age: 22 },
  { id: "sgdiuahsdiahi3", name: "王五", age: 21 },
];
// 或者这样写
// let personList: Persons = [
//   { id: "sgdiuahsdiahi1", name: "张三", age: 19 },
//   { id: "sgdiuahsdiahi2", name: "李四", age: 22 },
//   { id: "sgdiuahsdiahi3", name: "王五", age: 21 },
// ];

</script>

<style scoped>
</style>
4.props的使用
注意:
withDefaults,和 defineExpose 不用引入,可以直接使用。
defineXXX属于宏函数,Vue3中不用引入,直接使用
.ts文件
//定义一个接口,用于限制person对象的具体属性
export interface PersonInter {
    id: string,
    name: string,
    age: number
}

//一个自定义类型(一类人,数组)
export type Persons = Array<PersonInter>
父组件:
<template>
  <Person :list="personList" />
</template>
<script setup lang="ts">
import { reactive } from "vue";
import { type Persons } from "@/types/index.ts";
import Person from "@/components/Person.vue";

//对reactive进行类型限制
let personList = reactive<Persons>([
  { id: "sgdiuahsdiahi1", name: "张三", age: 19 },
  { id: "sgdiuahsdiahi2", name: "李四", age: 22 },
  { id: "sgdiuahsdiahi3", name: "王五", age: 21 },
]);
</script>

<style scoped>
</style>
子组件:
<template>
  <div class="person">
    <ul>
      <li v-for="item in list" :key="item.id">{{ item.name }}</li>
    </ul>
  </div>
</template>
<script setup lang="ts">
import { ref, defineProps, withDefaults } from "vue";
import { type Persons } from "@/types/index.ts";

//限定类型+限定必要性+指定默认值
let props = withDefaults(defineProps<{ list: Persons }>(), {
  list: () => [{ id: "1", name: "小妖", age: 22 }],
});
console.log(props);
</script>

<style scoped>
</style>
5.生命周期
生命周期分为四个阶段:创建,挂载,更新,销毁 每个阶段两个钩子,一前一后。
vue2的生命周期:
创建阶段:
beforeCreate、created
挂载阶段:beforemount、mounted
更新阶段:beforeUpdate、updated
销毁阶段:beforeDestroy、destroyed
vue3的生命周期:
创建阶段:setup
挂载阶段:onBeforemount、onMounted
更新阶段:onBeforeUpdate、onUpdated
销毁阶段:onBeforeUnmount、onUnmounted
常用的钩子:onMounted(挂载完毕)、onUpdated(更新完毕)、onBeforeUnmount(卸载之前)
需要注意的是:在销毁的时候有变化
beforeDestroy --> beforeUnmount
destroyed --> unmounted
6.hooks
为什么产生了hooks?
- 跨组件代码难以复用
- 大组件,维护困难,颗粒度不好控制,细粒度划分时,组件嵌套存层次太深影响性能
- 类组件,this不可控,逻辑分散,不容易理解
- mixins具有副作用,逻辑互相嵌套,数据来源不明,且不能互相消费
当一个模版依赖了很多mixin的时候,很容易出现数据来源不清或者命名冲突的问题,而且开发mixins的时候,逻辑及逻辑依赖的属性互相分散且mixin之间不可互相消费。这些都是开发中令人非常痛苦的点。
hooks存在以下优势:
- 允许hooks间相互传递值
- 组件之间重用状态逻辑
- 明确指出逻辑来自哪里
用于提取js或ts
主页面:
<template>
  <h2>当前求和为:{{ sum }}</h2>
  <el-button type="primary" @click="add">点我sum+1</el-button>
  <hr>
  其他内容
</template>
<script setup lang="ts">
import { reactive,ref,computed, watch } from "vue";
import useSum from '@/hooks/useSum'
let {sum, add} = useSum()
</script>

<style scoped>
</style>
hooks页面:
import { reactive, ref } from "vue";
export default function () {
  let sum = ref(0);

  const add = () => {
    sum.value += 1;
  };

  return {sum, add}
}
7.路由
7.1 路由模式
1)history模式
优点:URL更加美观,不带有#,更接近传统的网站 URL缺点:后期项目上线,需要服务端配合处理路径问题,否则刷新会有 404 错误。
const router = VueRouter.createRouter({
  history: VueRouter.createWebHistory(),
  routes, // `routes: routes` 的缩写
})
2)hash模式
优点:兼容性更好,因为不需要服务器端处理路径,缺点: URL 带有#不太美观,且在 SE0 优化方面相对较差。
const router = VueRouter.createRouter({
  history: VueRouter.createWebHashHistory(),
  routes, // `routes: routes` 的缩写
})
7.2 路由传参
7.2.1 query
1)传参
第一种方式:
在路由路径后直接拼接?参数名:参数值 ,多组参数间使用&分隔
<RouterLink to="/path/path1?name=小红&age=23"></RouterLink>
第二种方式:
to不再传递字符,而是传一个对象,由于参数为对象,所以to前需要加上
<RouterLink :to="{
	path: "/path/path1",
	query: {
		name: "小红",
		age: 23
	}
}"/>
2)参数接收:
// 接收
import { useRoute } from "vue-router"
const route = useRoute()

// 使用
<div>{{ route.query.name }}</div>
<div>{{ route.query.age }}</div>
1.2.2 params
1)传参
第一种写法:
在路由路径后直接拼接/参数值
<RouterLink to="/path/path1/小红/23"></RouterLink>
在路由规则中提前声明参数名,参数名前不要丢失冒号
这里给 路由/path/path1 添加了name和age参数,由于age后添加了问号,所以age为可传参数,否则未传age会报错。
{
	path:"/path",
	component: Comp1
	children:[
		{ path:'path1/:name/:age?',component: Comp2 }
	]
}
第二种写法:
to传对象写法
路径使用name,注意name需保持与路由规则中的一致
<RouterLink :to="{
	name: "path1Name",
	params: {
		name: "田本初",
		age: 23
	}
}"/>
2)参数接收
// 接收
import { useRoute } from "vue-router"
const route = useRoute()

// 使用
<div>{{ route.params.name }}</div>
<div>{{ route.params.age }}</div>
备注1:传递 parans 参数时,若使用 to的对象写法,必须使用 na=e 配置项,不能用 path。
备注2:params拼接字符串在路径后直接 /参数值即可,但需要在路由规则中提前声明参数名
备注3:对象写法中,query参数既可以使用path又可以使用name,但是params参数只能使用name
7.3 将 props 传递给路由组件
如何简化参数使用
方法一: 解构 配合 toRefs
如果解构使用query/params对象,由于是直接从响应式数据中解构,变量会丢失响应式,需要使用toRefs
// 接收
import { useRoute } from "vue-router"
import { toRefs } from "vue"
const route = useRoute()
const { query } = toRefs(route)

// 使用
<div>{{ query.name }}</div>
方法二:路由的props配置
下面就会讲到props配置的三种方法
7.3.1 第一种写法
将路由收到的所有params参数作为props传给路由组件(只用于params传参)
- 路由规则中添加 props:true
// 路由规则配置
{ path:'/path/path1/:name/:age', component: Comp2, props: true }
- 使用参数时,defineProps([‘name’,‘age’])
defineProps(['name','age'])

<div>{{ name }}</div>
<div>{{ age }}</div>
7.3.2 第二种写法:函数写法
params和query传参都可以使用,一般用于处理query参数,需要写成函数形式
- 路由规则中添加props函数
// 路由规则配置
{
	path:'/path/path1/:name/:age',
	component: Comp2,
	props(route){
		return route.query
	}
}
使用参数时,defineProps([‘name’,‘age’])
defineProps(['name','age'])

<div>{{ name }}</div>
<div>{{ age }}</div>
7.3.3 第三种写法
很少使用,就是写死的
props:{
	a:100
	b:200
	c:380
}
8.pina
来个对象解构赋值
let obj = {
  country: {
    province: {
      city: {
        qu: "瑶海区",
      },
    },
  },
};
//下面写法是连续解构+重命名
let {
  country: {
    province: {
      city: { qu: qulala },
    },
  },
} = obj;
console.log(qulala);
8.1 搭建环境
- 安装
npm install pinia
- 引入
import { createApp } from 'vue'
//第一步:引入pinia
import { createPinia } from 'pinia'
import App from './App.vue'
//第二步:创建pinia
const pinia = createPinia()
const app = createApp(App)
//第三步:安装pinia
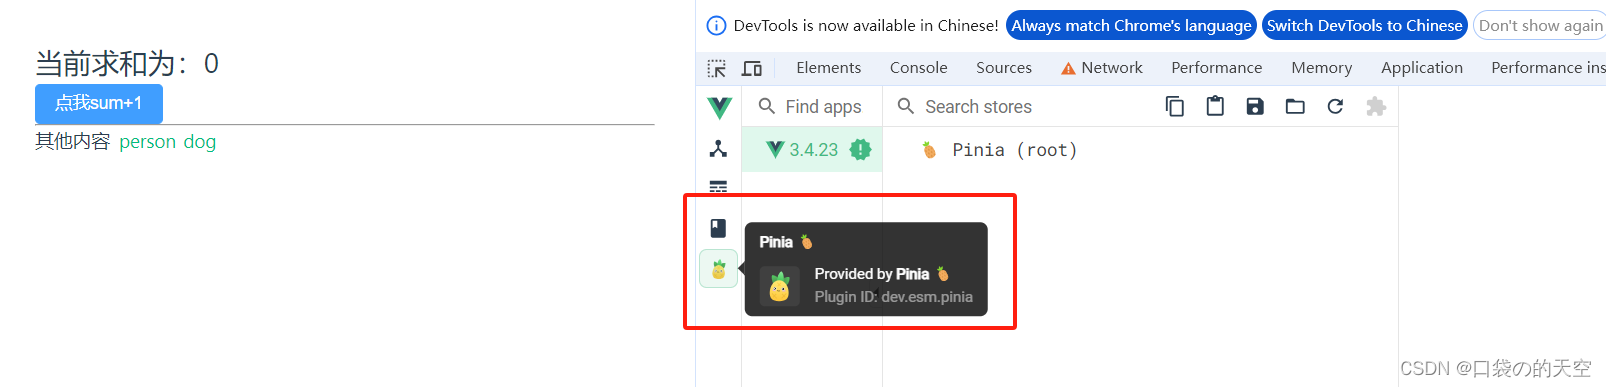
app.use(pinia).mount('#app')
注意:第三步不能错,不然vue调试工具没有Pinia模块
8.2 存储+读取数据
定义
// stores/counter.js
import { createPinia, defineStore } from "pinia";
export const usePersonStore = defineStore("person", {
  state: () => {
    return {
      count: 0,
    };
  },
});
使用:
<template>
  <div class="person">
    {{ personStore.count }}
  </div>
</template>
<script setup lang="ts">
import { usePersonStore } from "@/store/person";
const personStore = usePersonStore();

//如果打印count有两种取值的方法:
// 第一种:
console.log(personStore.count);
// 第二种:
console.log(personStore.$state.count);
</script>

<style scoped>
</style>
需要注意的是取值的时候,如果是对象里面有ref,直接去值就行,不用加.value;
但如果是外层为ref,才需要加.value
8.3 修改数据的三种方式
person.vue
<template>
  <div class="person">
    姓名:{{ personStore.name }}
    <br />
    年龄:{{ personStore.count }}
    <br />
    <el-button type="primary" @click="addBtn">按钮</el-button>
  </div>
</template>
<script setup lang="ts">
import { usePersonStore } from "@/store/person";
const personStore = usePersonStore();
const addBtn = () => {
  //第一种修改方式,直接修改
  // personStore.count += 1;

  // 第二种修改方式,多次修改只会触发一次commit
  // personStore.$patch({
  //   name: "李四",
  //   count: 18,
  // });

  // 第三次修改方式,调用actions里的方法
  personStore.increament(1);
};
</script>

<style scoped>
</style>
person.ts
import { createPinia, defineStore } from "pinia";
export const usePersonStore = defineStore("person", {
  // actions 里面放置的是一个个方法,用于响应组件的“动作”
  actions: {
    increament(value: number) {
      // 修改数据,this是当前的store
      this.count += value;
    },
  },
  // 存储数据的地方
  state: () => {
    return {
      name: "张三",
      count: 0,
    };
  },
});
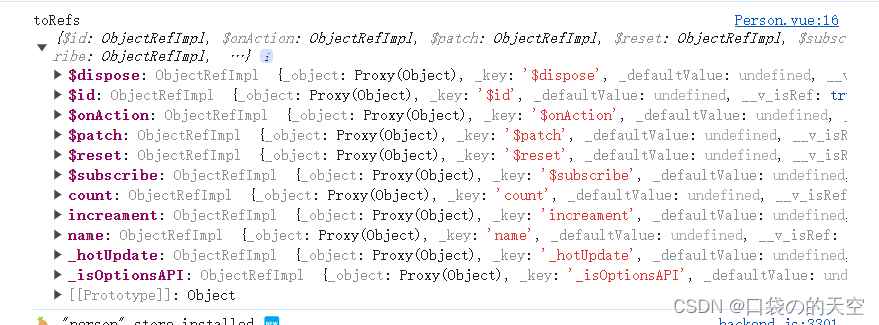
8.4 store的解构赋值 - storeToRefs
storeToRefs 只会关注store中数据,不会对方法进行ref包裹。
<template>
  <div class="person">
    姓名:{{ name }}
    <br />
    年龄:{{ count }}
    <br />
    <el-button type="primary" @click="addBtn">按钮</el-button>
  </div>
</template>
<script setup lang="ts">
import { usePersonStore } from "@/store/person";
import { toRefs } from "vue";
import { storeToRefs } from "pinia";

const personStore = usePersonStore();
const { name, count } = toRefs(personStore);
console.log("storeToRefs", storeToRefs(personStore));

const addBtn = () => {
  personStore.increament(1);
};
</script>

<style scoped>
</style>
其实toRefs也能实现响应式,但性能相对比较差,他会把所有的vue属性都通过ref包裹了

8.5 getters的使用
- 可以返回一个函数或箭头函数,但箭头函数中不能通过this去取state的值
- 箭头函数可以通过state取上面state的值
person.ts
import { createPinia, defineStore } from "pinia";
export const usePersonStore = defineStore("person", {
  // actions 里面放置的是一个个方法,用于响应组件的“动作”
  actions: {
    increament(value: number) {
      // 修改数据,this是当前的store
      this.count += value;
    },
  },
  // 存储数据的地方
  state: () => {
    return {
      name: "zhangsan",
      count: 1,
    };
  },
  getters: {
    upperName(): string {
      return this.name.toUpperCase() + "~~";
    },
    bigCount: (state) => state.count * 20,
  },
});
8.6 $subscribe的使用——监听
类似于watch用于监听,共两参数,只要关注的是第二个参数
<template>
  <div class="person">
    姓名:{{ name }},大名:{{ upperName }}
    <br />
    年龄:{{ count }},长大了:{{ bigCount }}
    <br />
    <el-button type="primary" @click="addBtn">按钮</el-button>
  </div>
</template>
<script setup lang="ts">
import { usePersonStore } from "@/store/person";
import { toRefs } from "vue";
import { storeToRefs } from "pinia";
const personStore = usePersonStore();
const { name, count, upperName, bigCount } = toRefs(personStore);
const addBtn = () => {
  personStore.increament(1);
};
//监听count值的变化,共两参数,只要关注的是第二个参数
personStore.$subscribe((mutate, state) => {
  console.log(mutate, state);
  console.log("count", count.value);
});
</script>

<style scoped>
</style>
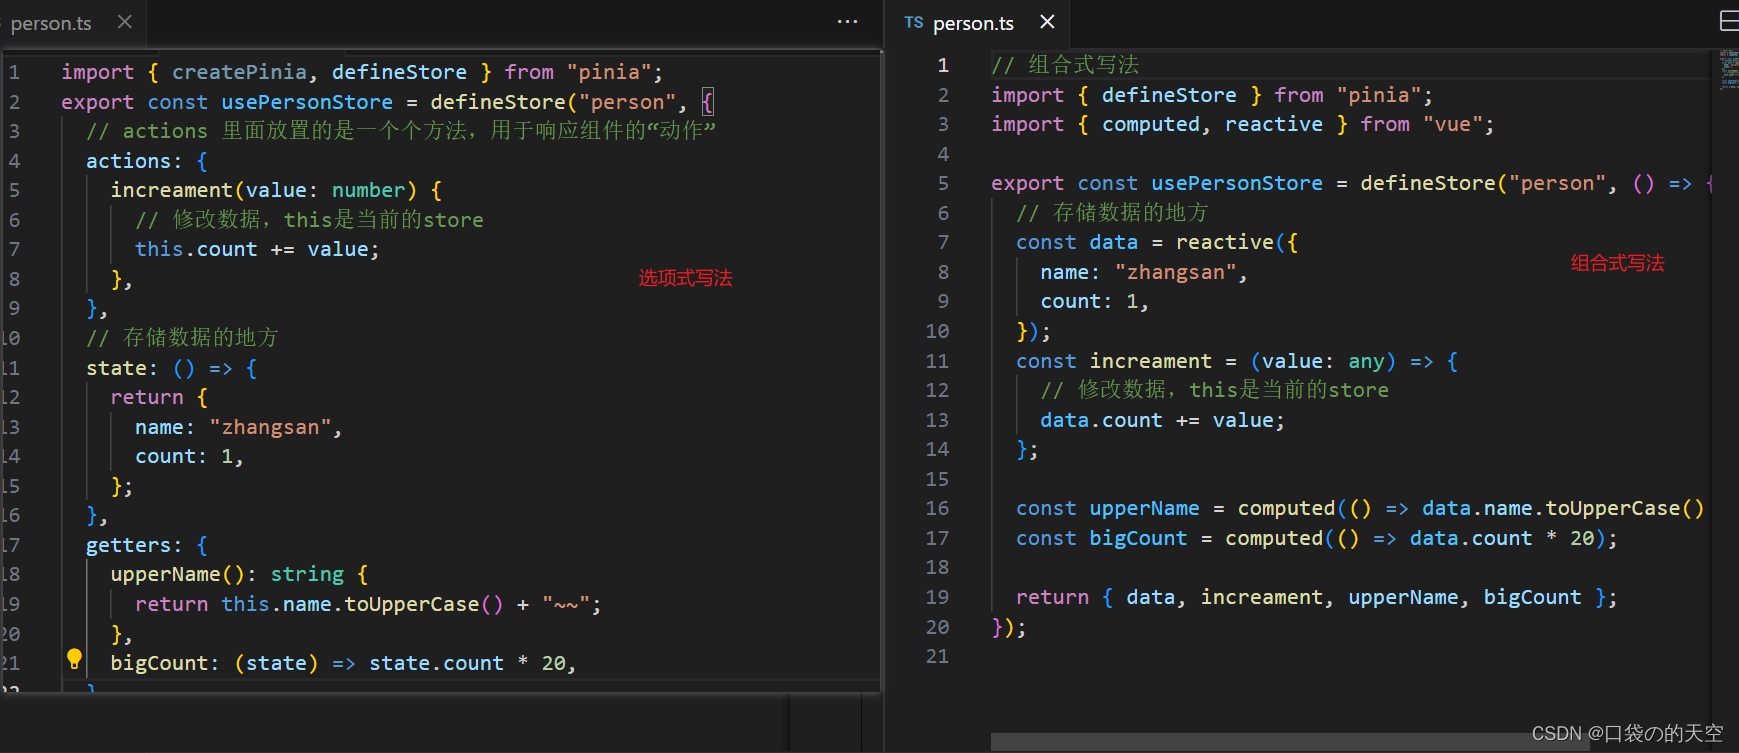
8.7 store组合式写法
上面person.ts都是选项式的写法,下面没问来接下组合式的写法。两种写法都可以
8.8 什么是 Pinia
Pinia 是 Vue 的存储库,它允许跨组件/页面共享状态。实际上,pinia就是Vuex的升级版,官网也说过,为了尊重原作者,所以取名pinia,而没有取名Vuex,所以大家可以直接将pinia比作为Vue3的Vuex。
8.9 pinia和vuex的区别
- pinia它没有mutation,他只有state,getters,action【同步、异步】使用他来修改state数据;而Vuex 有 mutations、getters 和 actions
- pinia没有modules配置,没一个独立的仓库都是definStore生成出来的;而vuex有modules配置
- pinia一些调试功能,如时间旅行和编辑不被支持;而Vuex 支持调试功能的
- pinea 是轻量级的,体积很小,它适合于中小型应用;而Vuex 适用于大规模、高复杂度的 Vue.js 项目
- 与 Pinia 相比,Vuex 的社区支持很大
9.Vue3组件间通信
props、自定义事件、mitt、v-model、 r e f s 、 refs、 refs、parent、pinia、slot

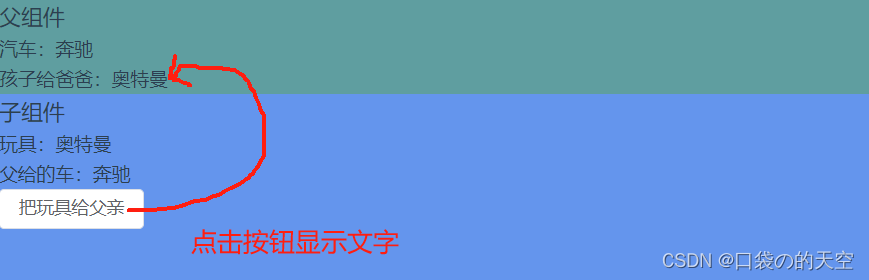
9.1 props
概述: props是使用频率最高的一种通信方式,常用与:父<—>子。
- 若 父传子:属性值是非函数。
- 若 子传父:属性值是函数。
son.vue
<template>
  <div class="son">
    <h3>子组件</h3>
    <h4>玩具:{{ toy }}</h4>
    <h4>父给的车:{{ car }}</h4>
    <el-button @click="sendToy(toy)">把玩具给父亲</el-button>
  </div>
</template>
<script setup lang="ts">
import { ref } from "vue";
let toy = ref("奥特曼");
defineProps(["car", "sendToy"]);
</script>

<style scoped>
.son {
  height: 200px;
  background: cornflowerblue;
}
</style>
father.vue
<template>
  <div class="father">
    <h3>父组件</h3>
    <h4>汽车:{{ car }}</h4>
    <h4 v-if="toy">孩子给爸爸:{{ toy }}</h4>
    <Son :car="car" :sendToy="getToy" />
  </div>
</template>
<script setup lang="ts">
import { ref } from "vue";
import Son from "./son.vue";

let car = ref("奔驰");
let toy = ref("");

const getToy = (val: string) => {
  console.log("孩子给爸爸", val);
  toy.value = val;
};
</script>

<style scoped>
.father {
  height: 200px;
  background: cadetblue;
}
</style>
9.2 自定义事件
- 父组件调用子组件的自定义事件
- 子组件 通过
defineEmits声明自定义事件后,父组件才能调用
father.vue
<template>
  <div class="father">
    <h3>父组件</h3>
    <h4>子给的玩具:{{ toy }}</h4>
    <Son @send-toy="getToy" />
  </div>
</template>
<script setup lang="ts">
import { ref } from "vue";
import Son from "./son.vue";
let toy = ref("");
const getToy = (val: string) => {
  toy.value = val;
};
</script>

<style scoped>
.father {
  height: 200px;
  background: cadetblue;
}
</style>
son.vue
<template>
  <div class="son">
    <h3>子组件</h3>
    <el-button type="primary" @click="emit('send-toy', toy)">按钮</el-button>
  </div>
</template>
<script setup lang="ts">
import { ref } from "vue";
let toy = ref("奥特曼");
const emit = defineEmits(["send-toy"]);
</script>

<style scoped>
.son {
  height: 200px;
  background: cornflowerblue;
}
</style>
9.3 mitt
- 安装
npm i mitt
- 四个属性:
mitt.on(事件名,回调)绑定事件mitt.emit(事件名,回调)触发事件mitt.off(事件名)解绑事件mitt.all.clear()全部清除
utils/emitter.ts
//引入mitt
import mitt from "mitt";

// 调用mitt得到emitter,可以绑定事件,触发事件
const emitter = mitt();

//绑定事件
emitter.on("test1", () => {
  console.log("test1被调用");
});
emitter.on("test2", () => {
  console.log("test2被调用");
});

//触发事件
setInterval(() => {
  emitter.emit("test1");
  emitter.emit("test2");
}, 2000);

setTimeout(() => {
  //解除绑定
  emitter.off("test1");
  //清除所有绑定
  emitter.all.clear();
}, 8000);

export default emitter;
main.ts
import emitter from "./utils/emitter";
-
注意:
组件中使用完以后,在onmounted钩子里面解除绑定 -
示例
son1.vue哥哥组件:
<template>
  <div class="son">
    <h3>子组件1-哥哥</h3>
    <el-button type="primary" @click="emitter.emit('send-toy', toy)"
      >按钮</el-button
    >
  </div>
</template>
<script setup lang="ts">
import { ref } from "vue";
import emitter from "@/utils/emitter";

let toy = ref<string>("奥特曼");
</script>
son2.vue弟弟组件:
<template>
  <div class="son">
    <h3>子组件2-弟弟</h3>
    <h4>哥哥给的玩具:{{ toy }}</h4>
  </div>
</template>
<script setup lang="ts">
import { ref, onUnmounted } from "vue";
import emitter from "@/utils/emitter";

let toy = ref<any>("");
//给emitter绑定send-toy事件
emitter.on("send-toy", (val: string) => {
  toy.value = val;
});
//在卸载的时候,解绑send-toy事件
onUnmounted(() => {
  emitter.off("send-toy");
});
</script>
9.4 v-model
- v-model用在html标签上
<template>
  <div class="father">
    <h3>父组件</h3>
    <!-- v-model用在html标签上 -->
    <input type="text" v-model="username" />
    <!-- 相当于下面的写法(input原生的属性就是绑定value值,触发input事件) -->
    <input
      type="text"
      :value="username"
      @input="username = (<HTMLInputElement>$event.target).value"
    />
  </div>
</template>
<script setup lang="ts">
import { ref } from "vue";

let username = ref("你好");
</script>
- v-model用在组件标签上(vue3的写法)
father.vue
<template>
  <div class="father">
    <h3>父组件</h3>
    <!-- v-model用在组件标签上 -->
    <ASYGInput v-model="username" />
    <!-- 相当于下面的写法(modelValue和@update:modelValue事vue3约定的标准写法) -->
    <!-- <ASYGInput :modelValue="username" @update:modelValue="username = $event" /> -->
  </div>
</template>
<script setup lang="ts">
import ASYGInput from "./ASYGInput.vue";
import { ref } from "vue";

let username = ref("555");
</script>

<style scoped>
.father {
  height: 200px;
  background: cadetblue;
}
</style>
ASYGInput.vue
<template>
  <input
    type="text"
    :value="modelValue"
    @input="emit('update:modelValue', (<HTMLInputElement>$event.target).value)"
  />
</template>
  <script setup lang="ts">
defineProps(["modelValue"]);
const emit = defineEmits(["update:modelValue"]);
</script>

<style scoped>
input {
  background-image: radial-gradient(red, green, blue, yellow);
  color: #fff;
}
</style>
$event到底是啥?啥时候能.target
- 对于原生事件,$event就是事件对象====>能.target
- 对于自定义事件,$event就是触发事件时,所传递的数据====>不能.target
- 修改自定义属性modelValue
father.vue
<template>
  <div class="father">
    <h3>父组件</h3>
    <h4>{{ username }}</h4>
    <!-- v-model用在组件标签上 -->
    <!-- <ASYGInput v-model="username" /> -->

    <!-- 修改自定义属性modelValue -->
    <ASYGInput v-model:mingzi="username" />
  </div>
</template>
<script setup lang="ts">
import ASYGInput from "./ASYGInput.vue";
import { ref } from "vue";

let username = ref("22");
</script>

<style scoped>
.father {
  height: 200px;
  background: cadetblue;
}
</style>
ASYGInput.vue
<template>
  <input
    type="text"
    :value="mingzi"
    @input="emit('update:mingzi', (<HTMLInputElement>$event.target).value)"
  />
</template>
  <script setup lang="ts">
defineProps(["mingzi"]);
const emit = defineEmits(["update:mingzi"]);
</script>

<style scoped>
input {
  background-image: radial-gradient(red, green, blue, yellow);
  color: #fff;
}
</style>
9.5 $attrs
- 概述:
$attrs用于实现当前组件的父组件,向当前组件的子组件通信(祖一>孙)。 - 具体说明:
$attrs是一个对象,包含所有父组件传入的标签属性。
注意:
$attrs会自动排除props中声明的属性(可以认为声明过的props被子组件自己“消费”了)
- 示例
- 通过
v-bind传递对象相当于一个一个传值过去 - 子级可以通过
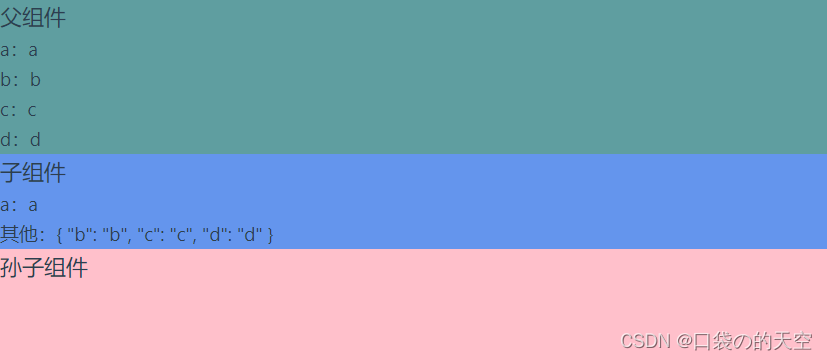
defineProps接收父级传过来的数据,但没有接收的都在都在$attrs上,可以直接取值使用
father.vue
<template>
  <div class="father">
    <h3>父组件</h3>
    <h4>a:{{ a }}</h4>
    <h4>b:{{ b }}</h4>
    <h4>c:{{ c }}</h4>
    <h4>d:{{ d }}</h4>

    <Child :a="a" v-bind="{ b: b, c: c, d: d }" />
    <!-- 相当于下面的写法 -->
    <!-- <Child :a="a" :b="b" :c="c" :d="d" /> -->
  </div>
</template>
<script setup lang="ts">
import Child from "./child.vue";
import { ref } from "vue";

let a = ref("a");
let b = ref("b");
let c = ref("c");
let d = ref("d");
</script>

<style scoped>
.father {
  height: 200px;
  background: cadetblue;
}
</style>
child.vue
<template>
  <div class="son">
    <h3>子组件</h3>
    <h4>a:{{ a }}</h4>
    <!-- 父级给传了,但子级没有通过defineProps接收的,都在$attrs -->
    <h4>其他:{{ $attrs }}</h4>
    <GrandChild />
  </div>
</template>
<script setup lang="ts">
import GrandChild from "./grandChild.vue";
import { ref } from "vue";
defineProps(["a"]);
</script>

<style scoped>
.son {
  height: 200px;
  background: cornflowerblue;
}
</style>
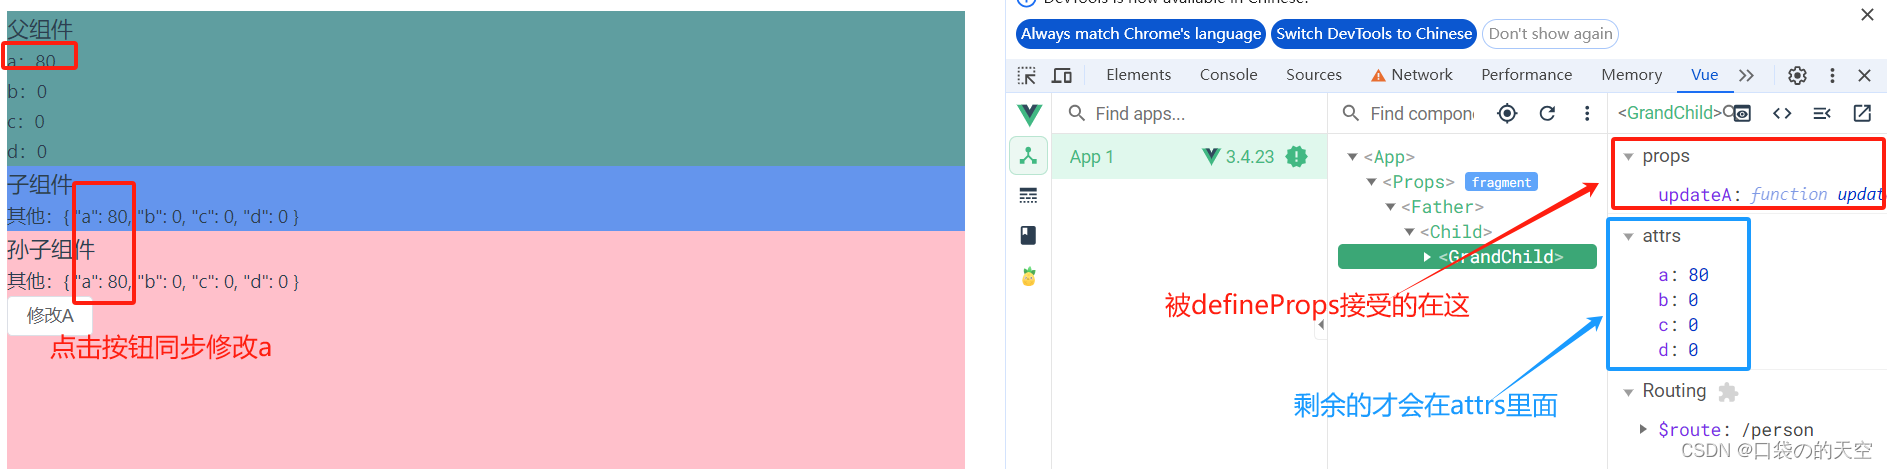
4. 示例:
父->子->孙,都可以通过$attrs传递变量或者方法
father.vue
<template>
  <div class="father">
    <h3>父组件</h3>
    <h4>a:{{ a }}</h4>
    <h4>b:{{ b }}</h4>
    <h4>c:{{ c }}</h4>
    <h4>d:{{ d }}</h4>

    <!-- 传属性值和方法 -->
    <Child v-bind="{ a: a, b: b, c: c, d: d }" :updateA="updateA" />
  </div>
</template>
<script setup lang="ts">
import Child from "./child.vue";
import { ref } from "vue";

let a = ref(0);
let b = ref(0);
let c = ref(0);
let d = ref(0);

const updateA = (val: number) => {
  a.value += val;
};
</script>

<style scoped>
.father {
  height: 200px;
  background: cadetblue;
}
</style>
child.vue
<template>
  <div class="son">
    <h3>子组件</h3>
    <h4>其他:{{ $attrs }}</h4>
    <GrandChild v-bind="$attrs" />
  </div>
</template>
<script setup lang="ts">
import GrandChild from "./grandChild.vue";
</script>

<style scoped>
.son {
  height: 200px;
  background: cornflowerblue;
}
</style>
grandChild.vue
<template>
  <div class="grandChild">
    <h3>孙子组件</h3>
    <h4>其他:{{ $attrs }}</h4>
    <el-button @click="updateA(10)">修改A</el-button>
  </div>
</template>
<script setup lang="ts">
defineProps(["updateA"]);
</script>

<style scoped>
.grandChild {
  height: 200px;
  background: pink;
}
</style>
9.6 $refs、$parent
1.概述:
$refs用于:父->子$parent用于:子->父
都需要通过defineExpose暴露值才能使用
2.原理如下:
| 属性 | 说明 |
|---|---|
$refs | 值为对象,包含所有被 ref 属性标识的 DOM 元素或组件实例。 |
$parent | 值为对象,当前组件的父组件实例对象 |
3.示例
通过ref修改子级的数据,通过parent修改父级的数据。但都需要defineExpose的帮助
parent.vue
<template>
  <div class="father">
    <h3>父组件</h3>
    <h4>房产:{{ house }}</h4>
    <el-button type="primary" @click="changeToy">修改child的玩具</el-button>
    <Son1 ref="son1" />
    <Son2 ref="son2" />
  </div>
</template>
<script setup lang="ts">
import Son1 from "./son1.vue";
import Son2 from "./son2.vue";
import { ref } from "vue";
let house = ref(4);
const son1 = ref();

const changeToy = () => {
  son1.value.toy = "小猪佩奇";
};

defineExpose({ house });
</script>

<style scoped>
.father {
  height: 200px;
  background: cadetblue;
}
</style>
son1.vue
小注意点:响应式对象,他里面的ref不需要.value,底层会自动读取响应式数据
<template>
  <div class="son">
    <h3>子组件1</h3>
    <h4>玩具:{{ toy }}</h4>
    <h4>书籍:{{ book }}本</h4>
    <el-button type="primary" @click="minusHouse($parent)"
      >干掉父亲一套房产</el-button
    >
  </div>
</template>
<script setup lang="ts">
import { ref } from "vue";

let toy = ref("奥特曼");
let book = ref(3);

const minusHouse = (parent: any) => {
//parent是个响应式对象,他里面的ref不需要.value
  parent.house -= 1;
};

defineExpose({ toy, book });
</script>

<style scoped>
.son {
  height: 200px;
  background: cornflowerblue;
}
</style>
- 如何修改多个子级的数据?
通过$refs可以获取所有儿子
father.vue
<template>
  <div class="father">
    <h3>父组件</h3>
    <h4>房产:{{ house }}</h4>
    <el-button type="primary" @click="changeBook($refs)"
      >修改所有子级的书数量</el-button
    >
    <Son1 ref="son1" />
    <Son2 ref="son2" />
  </div>
</template>
<script setup lang="ts">
import Son1 from "./son1.vue";
import Son2 from "./son2.vue";
import { ref } from "vue";
let house = ref(4);
const son1 = ref();

const changeBook = (refs: any) => {
  for (let key in refs) {
    refs[key].book += 3;
  }
};

defineExpose({ house });
</script>

<style scoped>
.father {
  height: 200px;
  background: cadetblue;
}
</style>
son1.vue
<template>
  <div class="son">
    <h3>子组件1</h3>
    <h4>书籍:{{ book }}本</h4>
  </div>
</template>
<script setup lang="ts">
import { ref } from "vue";
let book = ref(3);

defineExpose({ book });
</script>

<style scoped>
.son {
  height: 200px;
  background: cornflowerblue;
}
</style>
son2.vue
<template>
  <div class="son">
    <h3>子组件2</h3>
    <h4>书籍:{{ book }}本</h4>
  </div>
</template>
<script setup lang="ts">
import { ref } from "vue";
let book = ref(6);

defineExpose({ book });
</script>

<style scoped>
.son {
  height: 200px;
  background: skyblue;
}
</style>
9.7 provide和inject
祖孙之间传值,前面也说到了一个祖孙之间传值的$attrs,但是会影响中间人。而这个provide和inject会对中间人0影响。

示例1:祖传子
注意:
- 祖组件传递的
ref数据 provide的时候不能.value,否则就不会响应式,传递的只是单纯的数据 - ts的报红可以通过默认值解决
father.vue
<template>
  <div class="father">
    <h3>父组件</h3>
    <h4>银子:{{ money }}万元</h4>
    <h4>车子:一辆{{ car.brand }}车,价值{{ car.price }}万元</h4>
    <Child />
  </div>
</template>
<script setup lang="ts">
import Child from "./child.vue";
import { ref, reactive, provide } from "vue";

let money = ref(100);
let car = reactive({
  brand: "奔驰",
  price: 100,
});
//向后代提供数据
//注意:这里不能.value,不然就不会响应式,传递的只是单纯的数据
provide("money", money);
provide("car", car);
</script>

<style scoped>
.father {
  height: 200px;
  background: cadetblue;
}
</style>
grandChild.vue
<template>
  <div class="grandChild">
    <h3>孙子组件</h3>
    <h4>银子:{{ money }}万元</h4>
    <h4>车子:一辆{{ car.brand }}车,价值{{ car.price }}万元</h4>
  </div>
</template>
<script setup lang="ts">
import { inject } from "vue";

//第二个参数的默认值,解决ts的报红问题
let money = inject("money", "我是默认值");
let car = inject("car", { brand: "未知", price: 0 });
</script>

<style scoped>
.grandChild {
  height: 200px;
  background: pink;
}
</style>
示例2:子修改祖
子触发 祖传递的方法(修改祖自己)
father.vue
<template>
  <div class="father">
    <h3>父组件</h3>
    <h4>银子:{{ money }}万元</h4>
    <Child />
  </div>
</template>
<script setup lang="ts">
import Child from "./child.vue";
import { ref, reactive, provide } from "vue";

let money = ref(100);
const updateMoney = (val: number) => {
  money.value -= val;
};

//向后代提供数据
provide("moneyContext", { money, updateMoney });
</script>

<style scoped>
.father {
  height: 200px;
  background: cadetblue;
}
</style>
grandChild.vue
<template>
  <div class="grandChild">
    <h3>孙子组件</h3>
    <h4>银子:{{ money }}万元</h4>
    <el-button @click="updateMoney(2)" type="parmary">花爷爷的钱</el-button>
  </div>
</template>
<script setup lang="ts">
import { inject } from "vue";

//第二个参数的默认值,解决ts的报红问题
let { money, updateMoney } = inject("moneyContext", {
  money: 0,
  updateMoney: (params: number) => {},
});
</script>

<style scoped>
.grandChild {
  height: 200px;
  background: pink;
}
</style>
9.9 slot
9.9.1 默认插槽和具名插槽
- 插槽需要写在
template或者组件上 - 具名插槽
v-slot:插槽名,还有语法糖,直接#插槽名也可以
father.vue
<template>
  <div class="father">
    <h4>父组件</h4>

    <Child>
      <!-- 默认插槽 -->
      啦啦啦

      <!-- 具名插槽 -->
      <template v-slot:name>
        <h4>我是小花</h4>
      </template>
      <!-- 具名插槽另一种写法,语法糖 -->
      <template #age>
        <h4>今年30咯</h4>
      </template>
    </Child>
  </div>
</template>
<script setup lang="ts">
import Child from "./child.vue";
</script>

<style scoped>
.father {
  height: 200px;
  background: cadetblue;
}
</style>
children.vue
<template>
  <div class="son">
    <h4>子组件</h4>
    <!-- 默认插槽 -->
    <slot></slot>

    <!-- 具名插槽 -->
    <slot name="name"></slot>
    <slot name="age"></slot>
  </div>
</template>
<script setup lang="ts">
</script>

<style scoped>
.son {
  height: 200px;
  background: cornflowerblue;
}
</style>
9.9.2 作用域插槽
值在自定义组件那儿,传给使用的组件,但样式的展示由需要使用的组件决定
children.vue
<template>
  <div class="son">
    <h4>子组件</h4>

    <slot name="person" hello="你好" happy="啦啦啦"></slot>
  </div>
</template>
<script setup lang="ts">
</script>

<style scoped>
.son {
  height: 200px;
  background: cornflowerblue;
}
</style>
father.vue
<template>
  <div class="father">
    <h4>父组件</h4>

    <Child>
      <!-- 具名插槽 -->
      <template v-slot:person="params">
        <h4 style="background: pink">{{ params.happy }}</h4>
        <h4 style="background: blue">{{ params.hello }}</h4>
      </template>
    </Child>
  </div>
</template>
<script setup lang="ts">
import Child from "./child.vue";
</script>

<style scoped>
.father {
  height: 200px;
  background: cadetblue;
}
</style>
10.异步组件
10.1 为什么要使用异步组件
异步组件可以将我们的组件分开打包,按需要加载,这样可以减轻初始页面加载时间和减少资源浪费;有助于提高应用程序的性能和响应速度。
10.2 定义异步组件
Vue3中使用defineAsyncComponent() 来定义异步组件,该API的入参是一个返回组件选项的函数,需要使用() => import()函数来导入组件。
示例代码:
import { defineAsyncComponent } from 'vue'
const AsyncComponent = defineAsyncComponent(() => import('./MyComponent.vue'))
export default {
  components: {
    AsyncComponent
  }
}
上面代码得到的 AsyncComponent 是一个外层包装过的组件,仅在页面需要它渲染时才会调用加载内部实际组件的函数。
10.3 异步组件的加载与错误状态
提供了两个配置项即:加载异步组件时使用的组件loadingComponent和加载失败后展示的组件errorComponent
const AsyncComp = defineAsyncComponent({
  // 加载函数
  loader: () => import('./MyComponent.vue'),
  // 加载异步组件时使用的组件
  loadingComponent: LoadingComponent,
  // 展示加载组件前的延迟时间,默认为 200ms
  delay: 200,

  // 加载失败后展示的组件
  errorComponent: ErrorComponent,
  // 如果提供了一个 timeout 时间限制,并超时了
  // 也会显示这里配置的报错组件,默认值是:Infinity
  timeout: 3000
})
10.4 搭配 Suspense 使用
<template>
  <Suspense>
    <template #default>
      <AsyncComponent />
    </template>
    <template #fallback>
      <p>loading...</p>
    </template>
  </Suspense>
</template>
11.其他API
11.1 shallowRef与shallowReactive
1)shallowRef
- 作用:创建一个响应式数据,但只对
顶层属性进行响应式处理 - 用法:
let myVar = shallowRef(initialvalue): - 特点:只跟踪引用值的变化,不关心值内部的属性变化
2)shallowReactive
- 作用:创建一个浅层响应式对象,只会使对象的最顶层属性变成应式的,对象内部的嵌套属性则不会变成响应式的
- 用法:
const my0b = shallowReactive({ ... }); - 特点:对象的顶层属性是响应式的,但嵌套对象的属性不是。
- 总结
通过使用
shallowRef()和shallowReactive()来绕开深度响应。浅展式 API 创建的状态只在其顶层是响应式的,对所有深层的对象不会做任何处理,避免了对每一个内部属性做响应式所带来的性能成本,这使得属性的访问交得更快,可提升性能。如对象嵌套对象,则内部的对象就无法监听该属性的响应式,也就是说修改后不变化。
11.2 readonly 与shallowReadOnly
1)readonly
- 作用:用于创建一个对象的
深只读副本 - 用法:
const original=reactive({...});
const readOnlyCopy=readonly(original);
- 特点:
- 对象的所有嵌套属性都将变为只读。
- 嵌套的内容必须是个响应式对象,这样ref的值就不需要
.value。嵌套的属性可以是ref也可以是reactive - 任何尝试修改这个对象的操作都会被阻止(在开发模式下,还会在控制台中发出警告)。
- 应用场景:
- 创建不可变的状态快照给别人,自己可以改数据,别人不能改数据
- 保护全局状态或配置不被修改。
<template>
  <h2>当前sum1为:{{ sum1 }}</h2>
  <h2>当前sum2为:{{ sum2 }}</h2>
  <el-button @click="changeSum1">修改sum1</el-button>
  <el-button @click="changeSum2">修改sum2</el-button>
</template>
<script setup lang="ts">
import { ref, reactive, readonly } from "vue";

let sum1 = ref(0);
//注意这里不是sum1.value,readonly里面必须传值是个响应式对象
let sum2 = readonly(sum1);

//修改sum1的时候,sum2也会响应式变化
const changeSum1 = () => {
  sum1.value += 1;
};

const changeSum2 = () => {
  sum2.value += 1; //这一行代码会直接爆红,不允许修改(无法为“value”赋值,因为它是只读属性)
};
</script>

<style scoped>
</style>
2)shallowReadonly
- 作用:与
readonly类似,但只作用于对象的顶展属性, - 用法:
const original = reactive((...));
const shalloaReadOnlyCopy =  shallowReadonly(original):
- 特点:
- 只将对象的顶展属性设置为只读,对象内部的嵌套属性仍然是可变的
- 透用于只需保护对象顶展属性的场景,
11.3 toRaw与markRaw
1)toRaw
- 作用:用于获取一个响应式对象的原始对象,
toRaw返回的对象不再是响应式的,不会触发视图更新。
官网描述:这是一个可以用于临时读取而不引起代理访问/跟踪开销,或是写入而不触发更改的特殊方法。不建议保存对原始对象的持久引用,请谨慎使用。
何时使用?–在需要将响应式对象传递给非vue的库或外部系统时,使用toRaw可以确保它们收到的是普通对象
- 示例
<template>
  <h2>姓名:{{ person.name }}</h2>
  <h2>年龄:{{ person.age }}</h2>

  <el-button @click="person.age += 1">修改年龄(响应式数据)</el-button>
  <el-button @click="person2.age += 1">修改年龄(原始数据)</el-button>
</template>
<script setup lang="ts">
import { ref, reactive, readonly, toRaw } from "vue";

let person = reactive({
  name: "tony",
  age: 19,
});
let person2 = toRaw(person);
console.log("响应式数据", person);
console.log("原始数据", person2);
</script>

<style scoped>
</style>

2)markRaw
-
作用:标记一个对象,使其
永远不会变成响应式的。
例如使用mockjs时,为了防止误把mockjs变为响应式对象,可以使用markRaw去标记mockis -
示例
<template></template>
<script setup lang="ts">
import { ref, reactive, readonly, toRaw, markRaw } from "vue";

let person = {
  name: "tony",
  age: 19,
};
let person2 = markRaw(person);
console.log("person", person);
console.log("person2", person2);
</script>

<style scoped>
</style>
打印都是普通对象

11.4 自定义 ref
场景:input输入框输入,2秒以后才响应式到其他地方
原本的ref是会实时响应式,所以我们需要自定义一个ref
useMsgRefs.ts
import { customRef } from "vue";

export default function (initValue: string, delay: number) {
  // 使用vue提供的customRef定义响应式数据
  let timer: number;
  // track(跟踪) 、triggerAsyncId(触发)
  let msg = customRef((track, trigger) => {
    return {
      // get何时调用?——msg被读取时
      get() {
        track(); //告诉Vue数据msg很重要,你要对msg进行跟踪
        return initValue;
      },
      // set何时调用?- msg被修改时
      set(value) {
        clearTimeout(timer);
        timer = setTimeout(() => {
          initValue = value;
          trigger(); //通知Vue一下数据msg变化了
        }, delay);
      },
    };
  });
  return { msg };
}
调用
<template>
  <h1>{{ msg }}</h1>
  <input type="text" v-model="msg" />
</template>
<script setup lang="ts">
import { ref, reactive, readonly, toRaw, markRaw } from "vue";
import useMsgRefs from "./components/useMsgRefs";
let { msg } = useMsgRefs("你好", 2000);
</script>

<style scoped>
</style>
11.5 Teleport
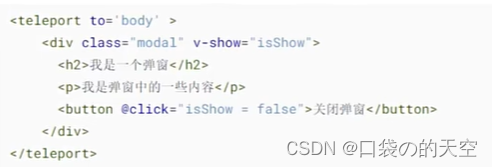
什么是Teleport?-- Teleport 是一种能够将我们的组件html结构移动到指定位置的技术(传送门)
如下示例:原本这个模态框在元素里面,但现在通过to属性,给他写到body里面了。
to属性里面可以写类名.class,#app,body都可以
11.6 Suspense
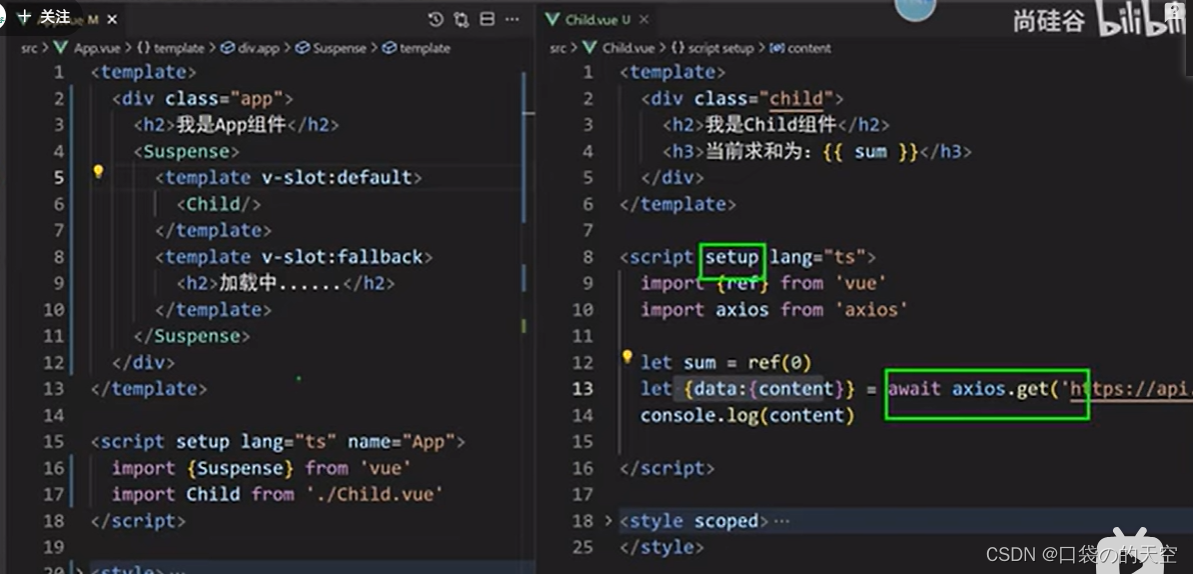
- 等待异步组件时渲染一些额外内容,让应用有更好的用户体验——>子组件里面有异步任务,需求希望网速慢的时候,子组件有东西
- 但这是一个试验性api,后期可能会改变
- 使用步骤:
- 异步引入组件
- 使用
Suspense包裹组件,并配置好default与fallback
如下:
如果异步请求,像下面这样使用await,setup顶层直接有async,不需要加async。但引用子组件的时候,需要Suspense包裹,而且可以写入加载中的插槽
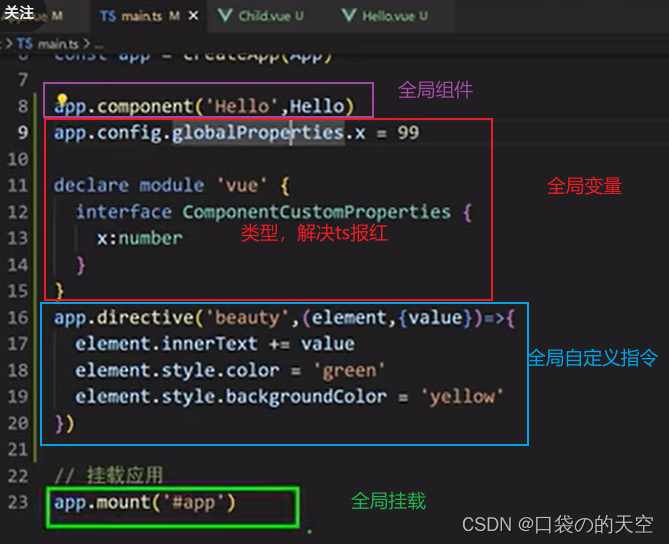
11.7 全局API转移到应用对象
app.componentapp.configapp.directiveapp.mountapp.unmountapp.use
11.8 其他
- 过渡类名
v-enter修改为v-enter-from、过渡类名v-leave修改为v-leave-from, keyCode作为v-on修饰符的支持。v-model指令在组件上的使用已经被重新设计,替换掉了v-bind.sync。v-if和v-for在同一个元素身上使用时的优先级发生了变化。- 移除了
son、$off和$once实例方法。 - 移除了过滤器
filter,官方建议建议用方法调用或计算属性来替换它们 - 移除了
$children。如果你需要访问子组件实例,建议使用 $refs - 移除修饰符
.native
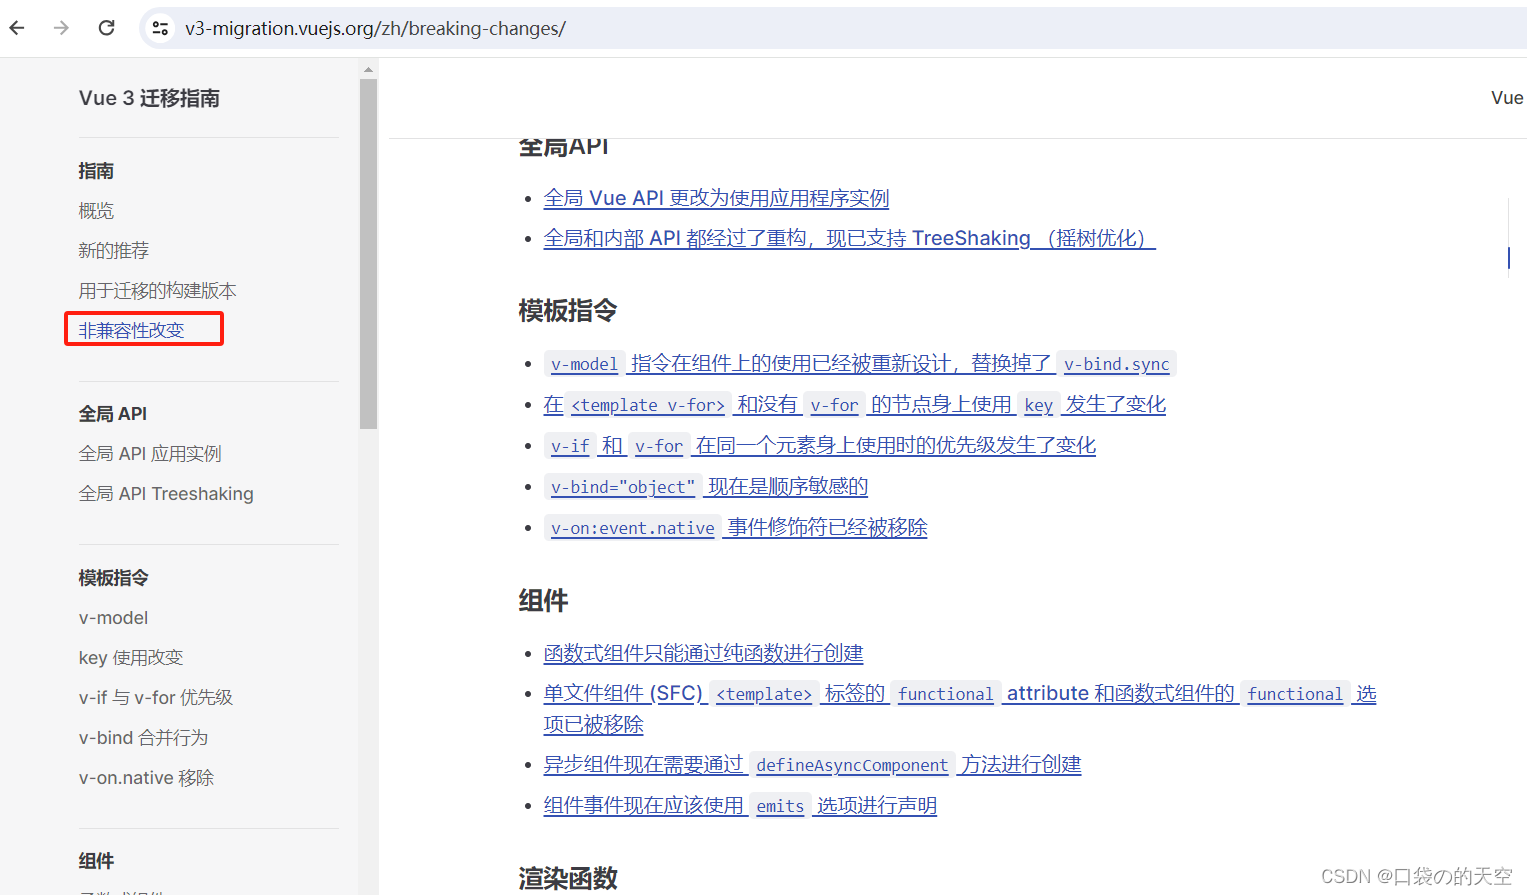
建议去看下vue官网的飞兼容性改变,了解的更全面,这里都是vue2可以用,但vue3不能这样写的语法
12.定义全局变量的方法变化
// 之前(Vue 2.x)
Vue.prototype.$http = () => {}
Vue.prototype.url= 'http://123'
// 之后(Vue 3.x)
const app = createApp({})
app.config.globalProperties.$http = () => {}
app.config.globalProperties.url= 'http://123'
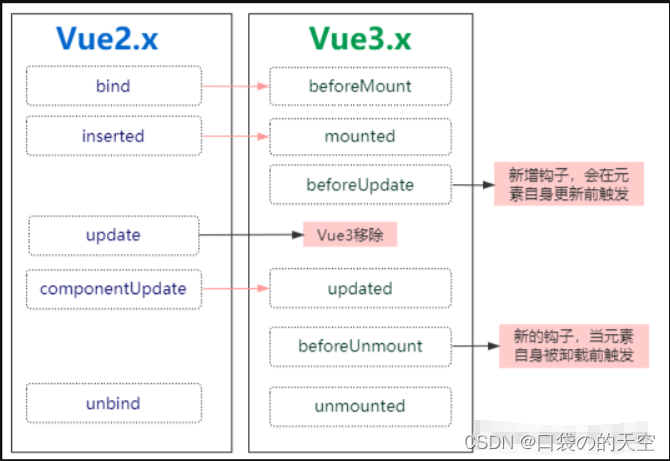
13.自定义指令
在 Vue 2 中, 自定义指令通过以下几个可选钩子创建:
bind:进行一次性的初始化设置
inserted:被绑定元素插入父节点时调用
update
componentUpdated
在 Vue 3 中对自定义指令的 API 进行了更加语义化的修改, 就如组件生命周期变更一样, 都是为了更好的语义化
14.v-model 升级
Vue 3 中 v-model 发生了很大的变化:
变更:
- 在自定义组件上使用v-model时, 属性以及事件的默认名称变了
- v-bind的.sync修饰符在 Vue 3 中又被去掉了, 合并到了v-model里
新增:
- 同一组件可以同时设置多个 v-model
- 开发者可以自定义 v-model修饰符
<el-dialog v-model:visible="isVisible" v-model:content="content"></el-dialog>

<!-- 相当于 -->
<el-dialog
    :visible="isVisible"
    :content="content"
    @update:visible="isVisible"
    @update:content="content"
></el-dialog>
15.watchEffect
- watchEffect 不需要手动传入依赖
- watchEffect 会先执行一次用来自动收集依赖
- watchEffect无法获取到变化前的值, 只能获取变化后的值
16.vue2.x 与vue3.x的响应式数据对比
在vue2.x中,实现数据监听使用的是Object.defineProperty。而vue3.x使用的是Proxy
- Object.defineProperty只能劫持对象的属性,需要遍历对象的每一个属性,如果属性值也是对象,就需要递归进行深度遍历。 而 Proxy 是直接代理对象
- Object.defineProperty对新增属性需要手动进行Observe
- Proxy有多种拦截方法,如apply,deleteProperty等等,是Object.defineProperty()不具备的。
- Proxy是返回值是一个对象,可以直接进行操作,而defineProperty()要先遍历所有对象属性值才能进行操作。
但是相对来说,Object.defineProperty()兼容性高一些。


 7万+
7万+

 被折叠的 条评论
为什么被折叠?
被折叠的 条评论
为什么被折叠?
 到【灌水乐园】发言


