


一、实验目的
通过简单的实验,掌握IOT-PLC运行的基本条件和开发环境的使用。
二、实验内容
1、IOT-PLC的硬件工作环境准备
2、基本的输入和输出功能设计
3、下载运行以及在线调试
4、继电器输出和晶体管输出的区分
三、实验过程
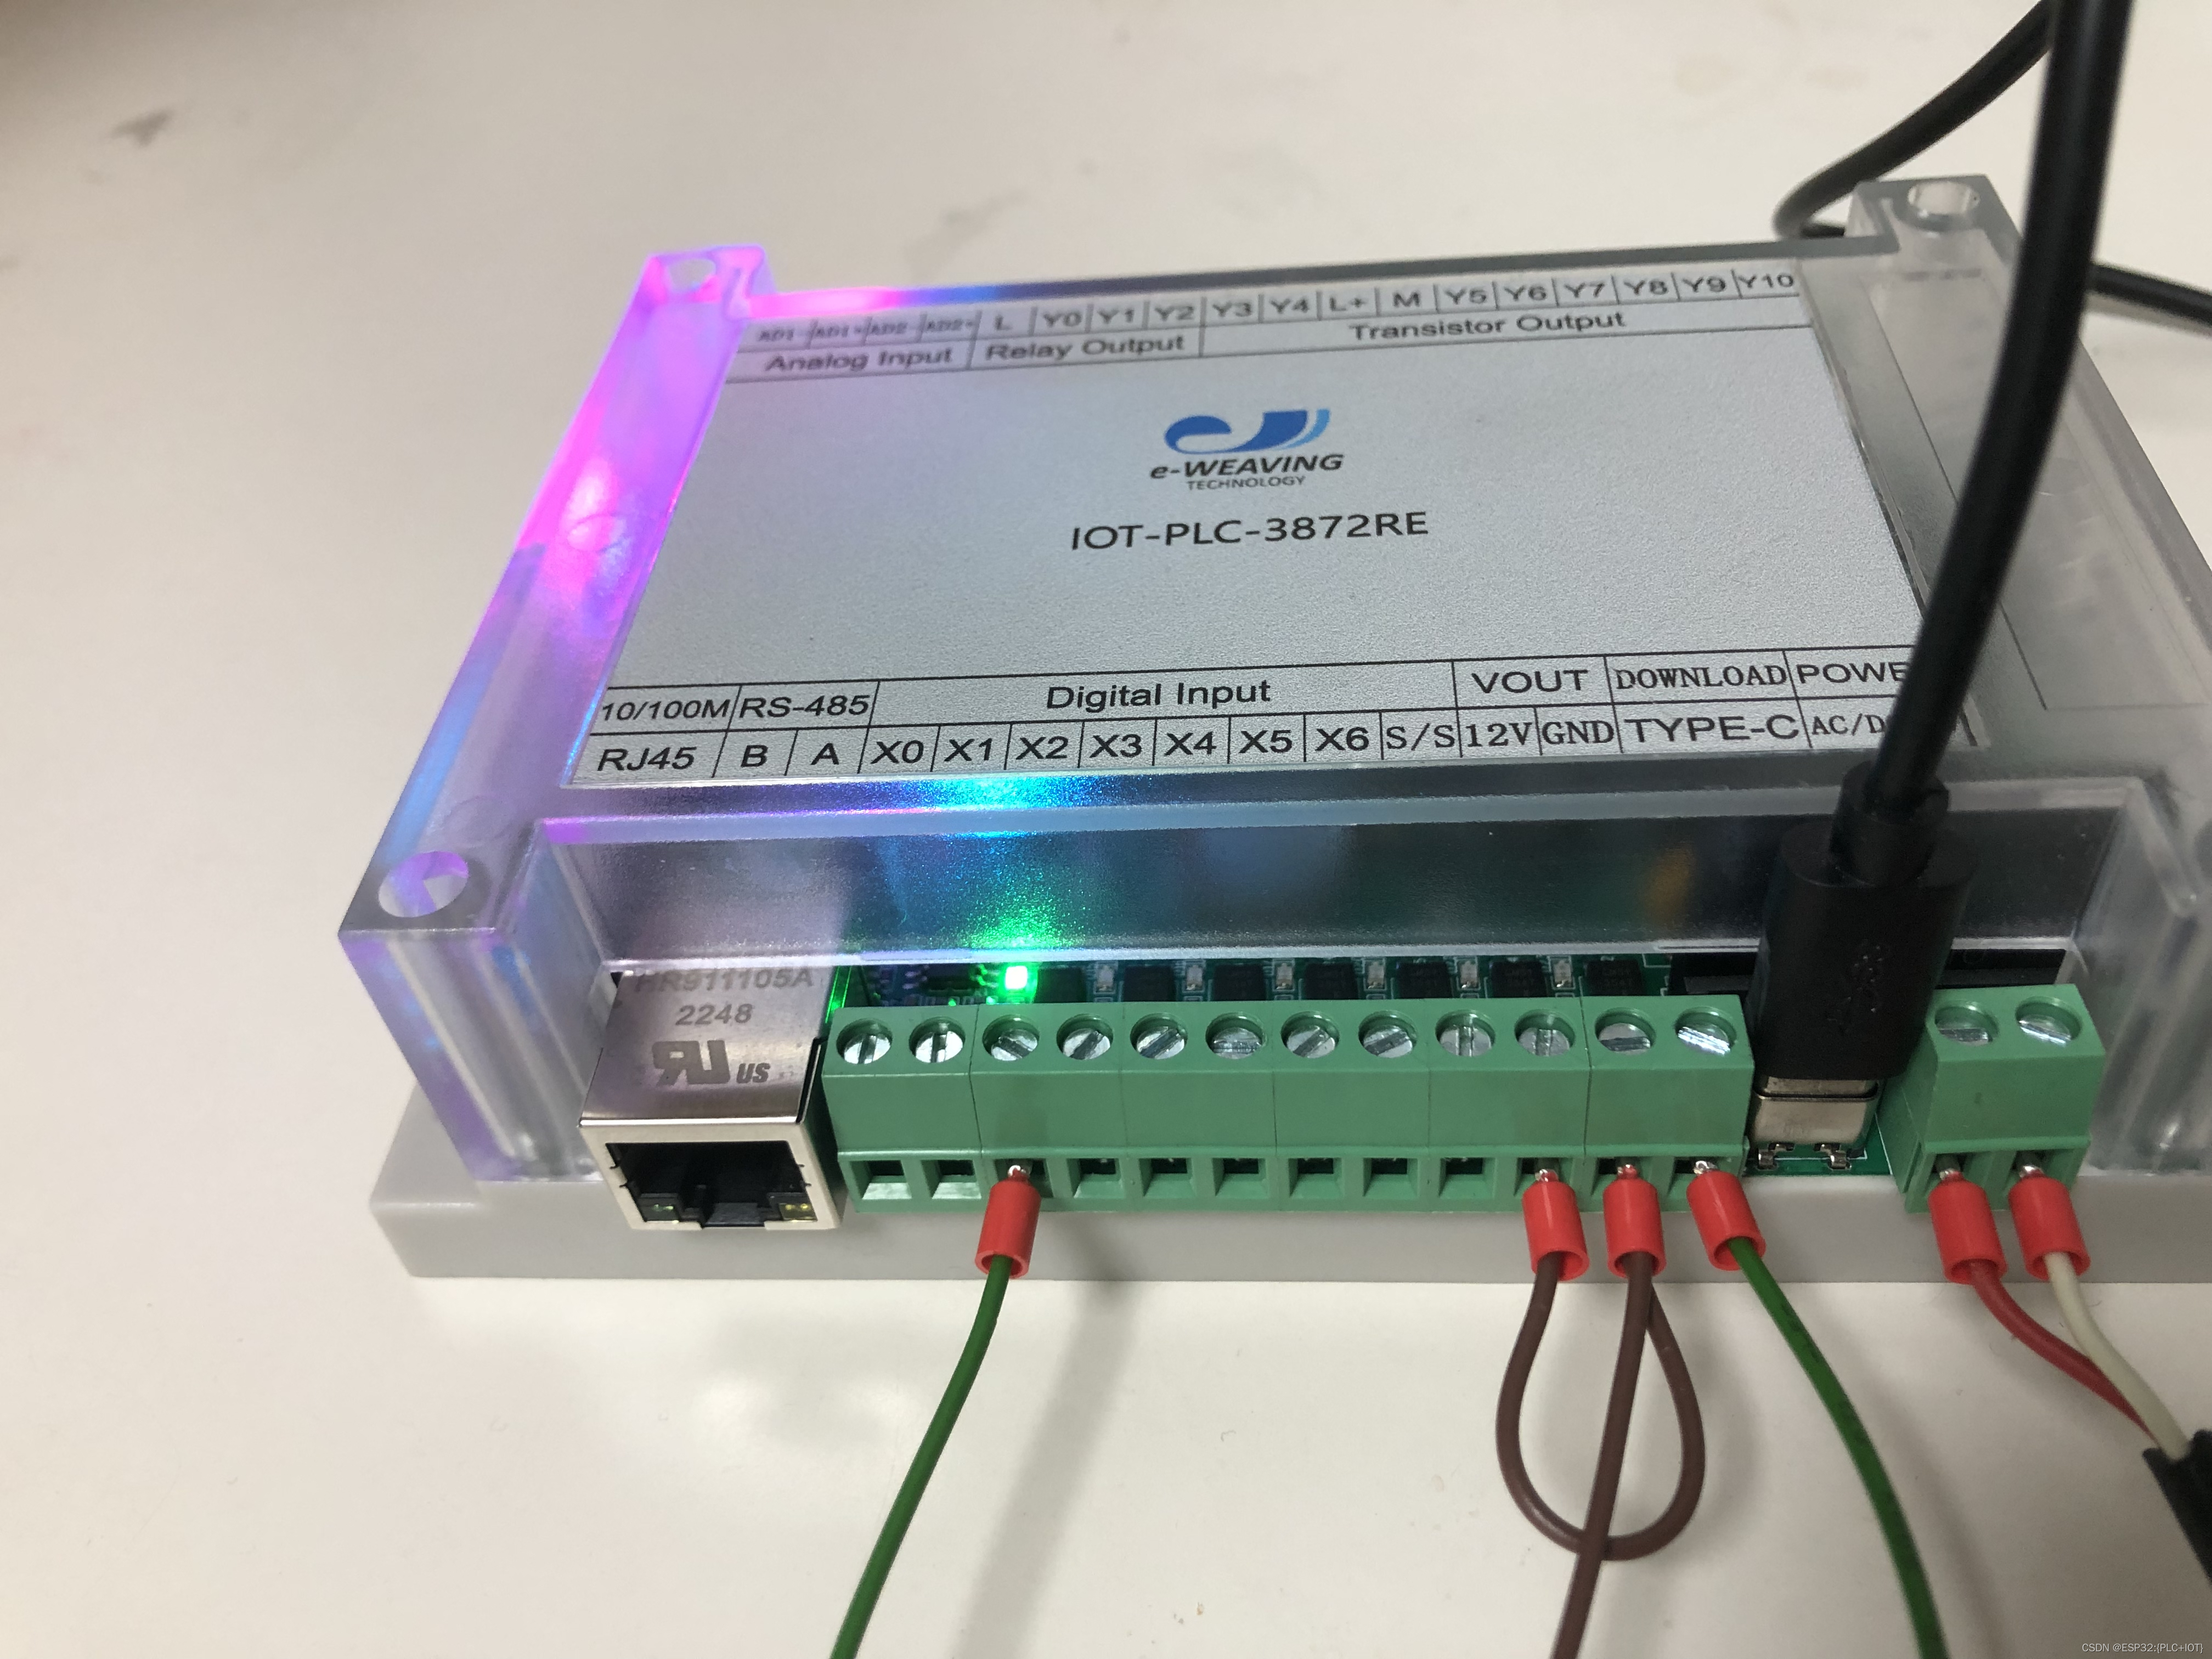
3.1 IOT-PLC硬件工作环境准备
3.1.1 材料和工具
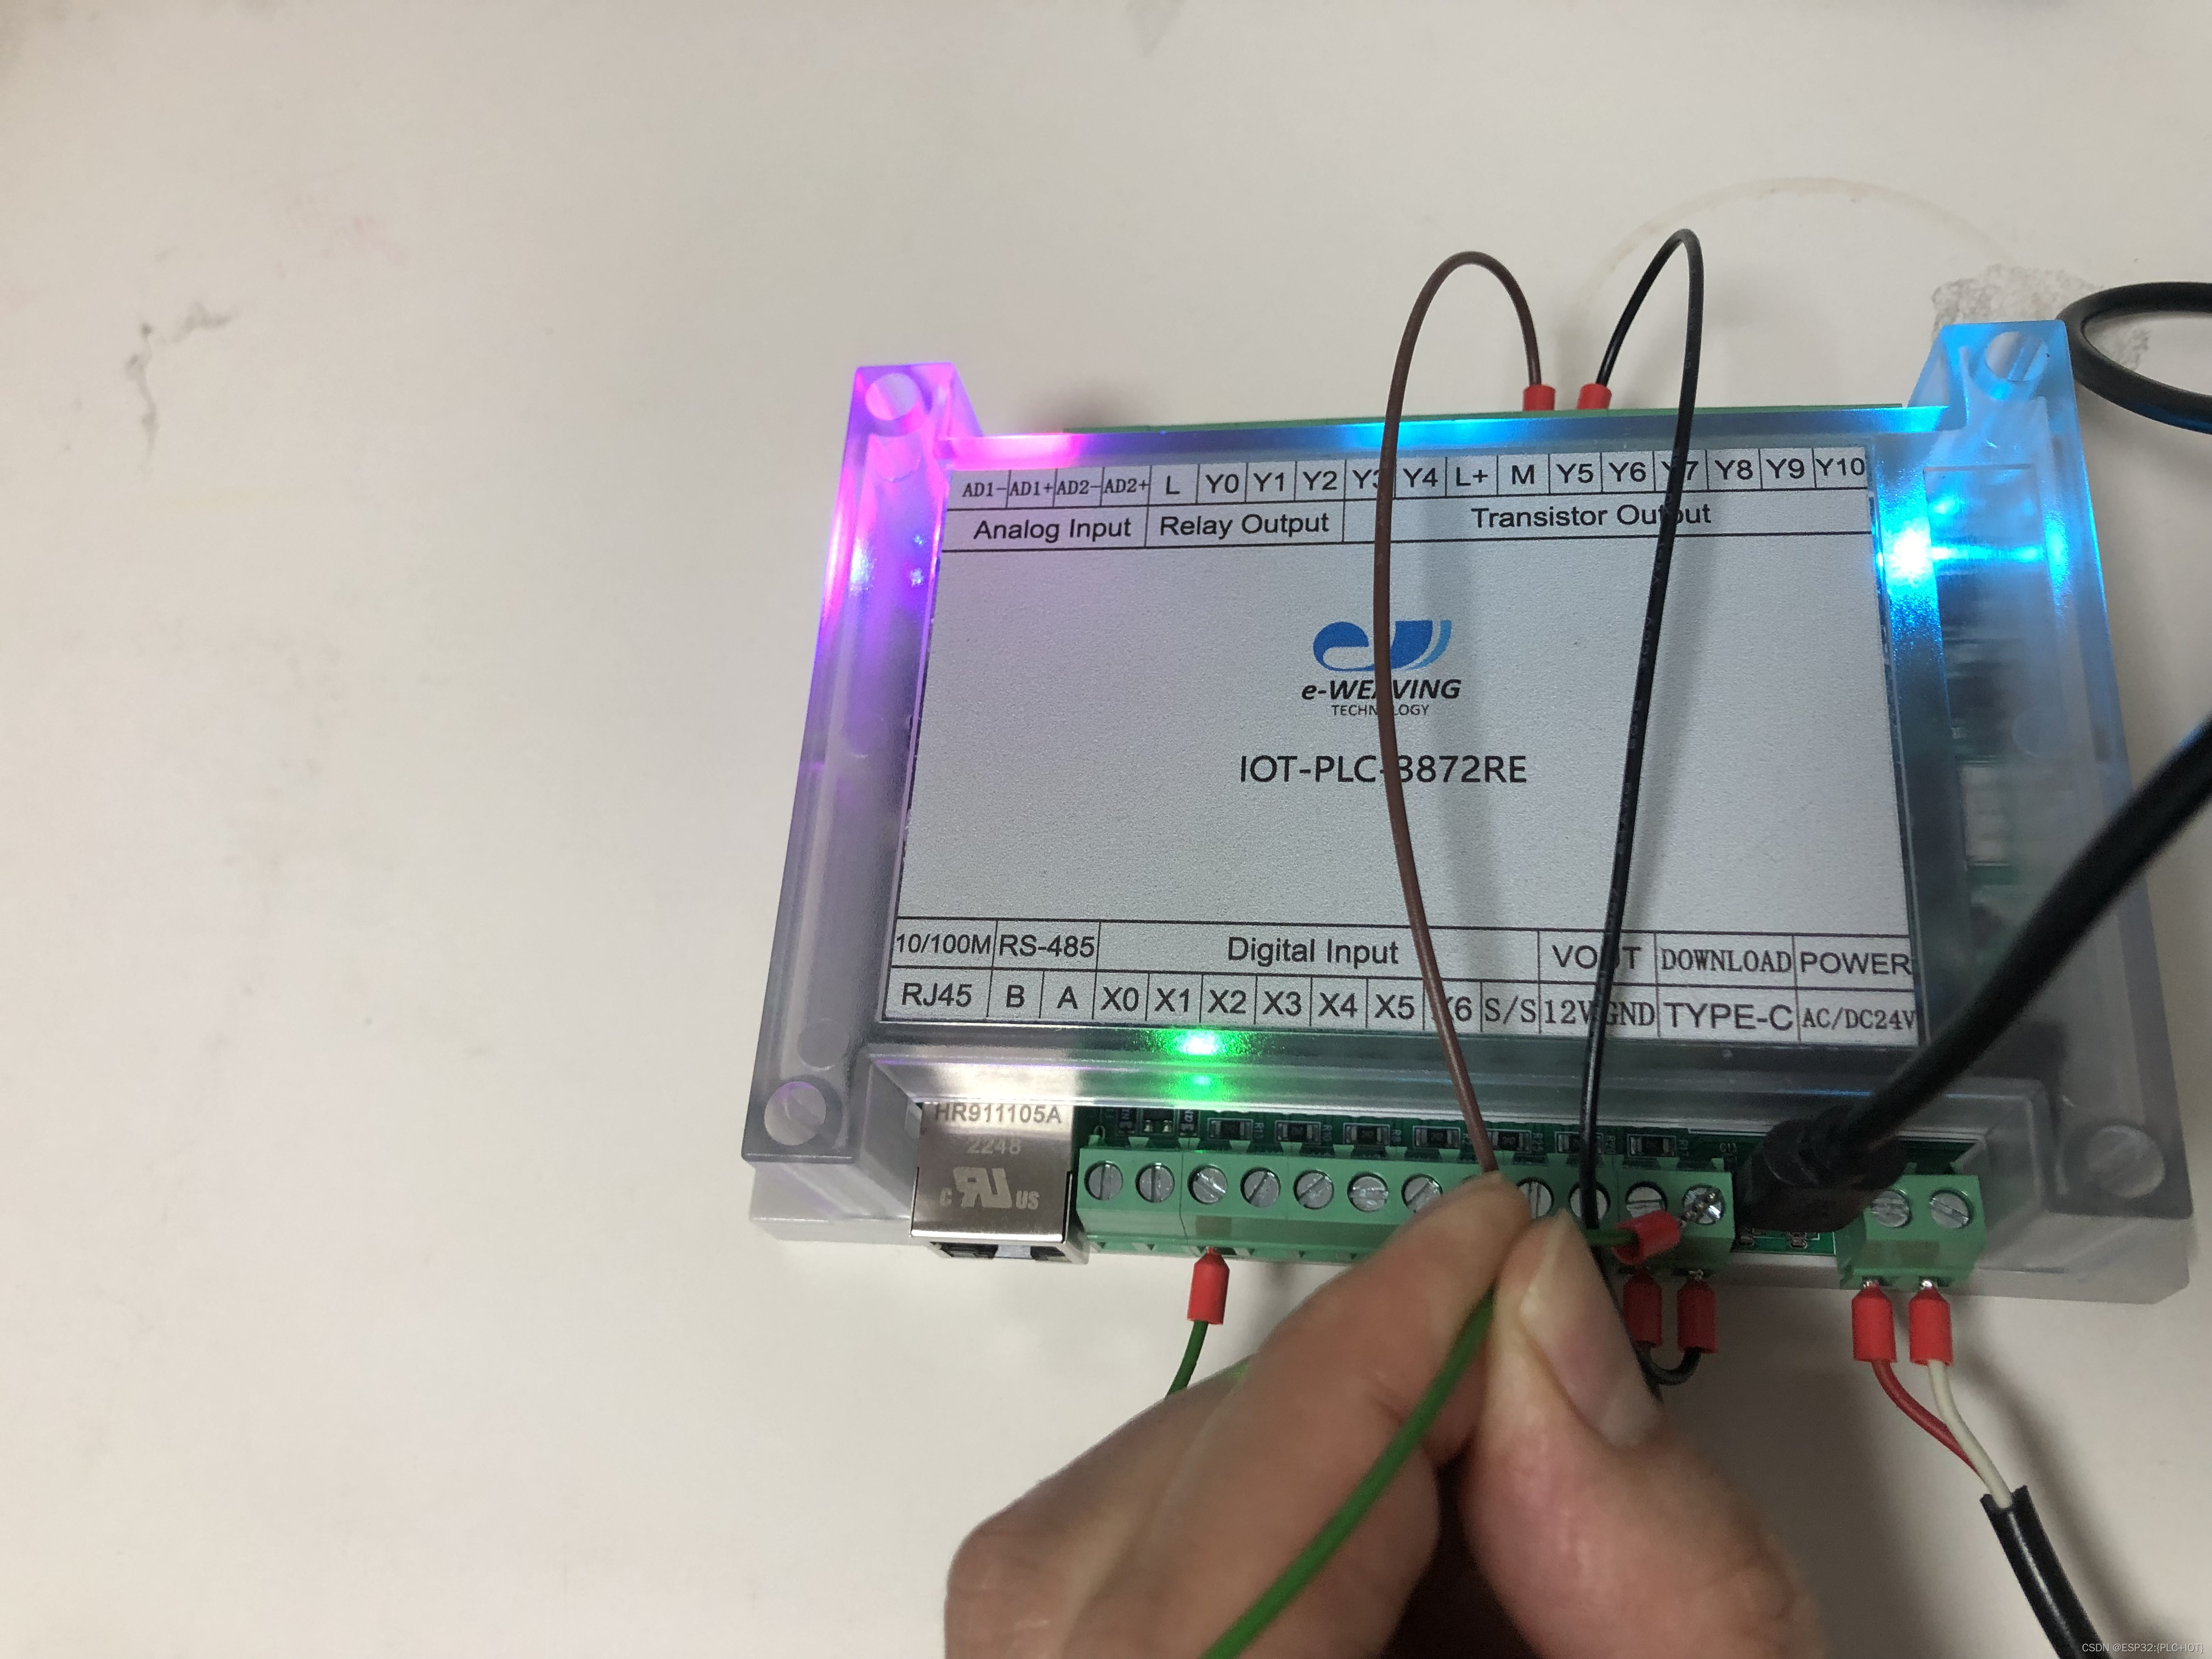
小一字螺丝刀、连接线、IOT-PLC-3872RE、USB Type-C 数据线、12V电源适配器
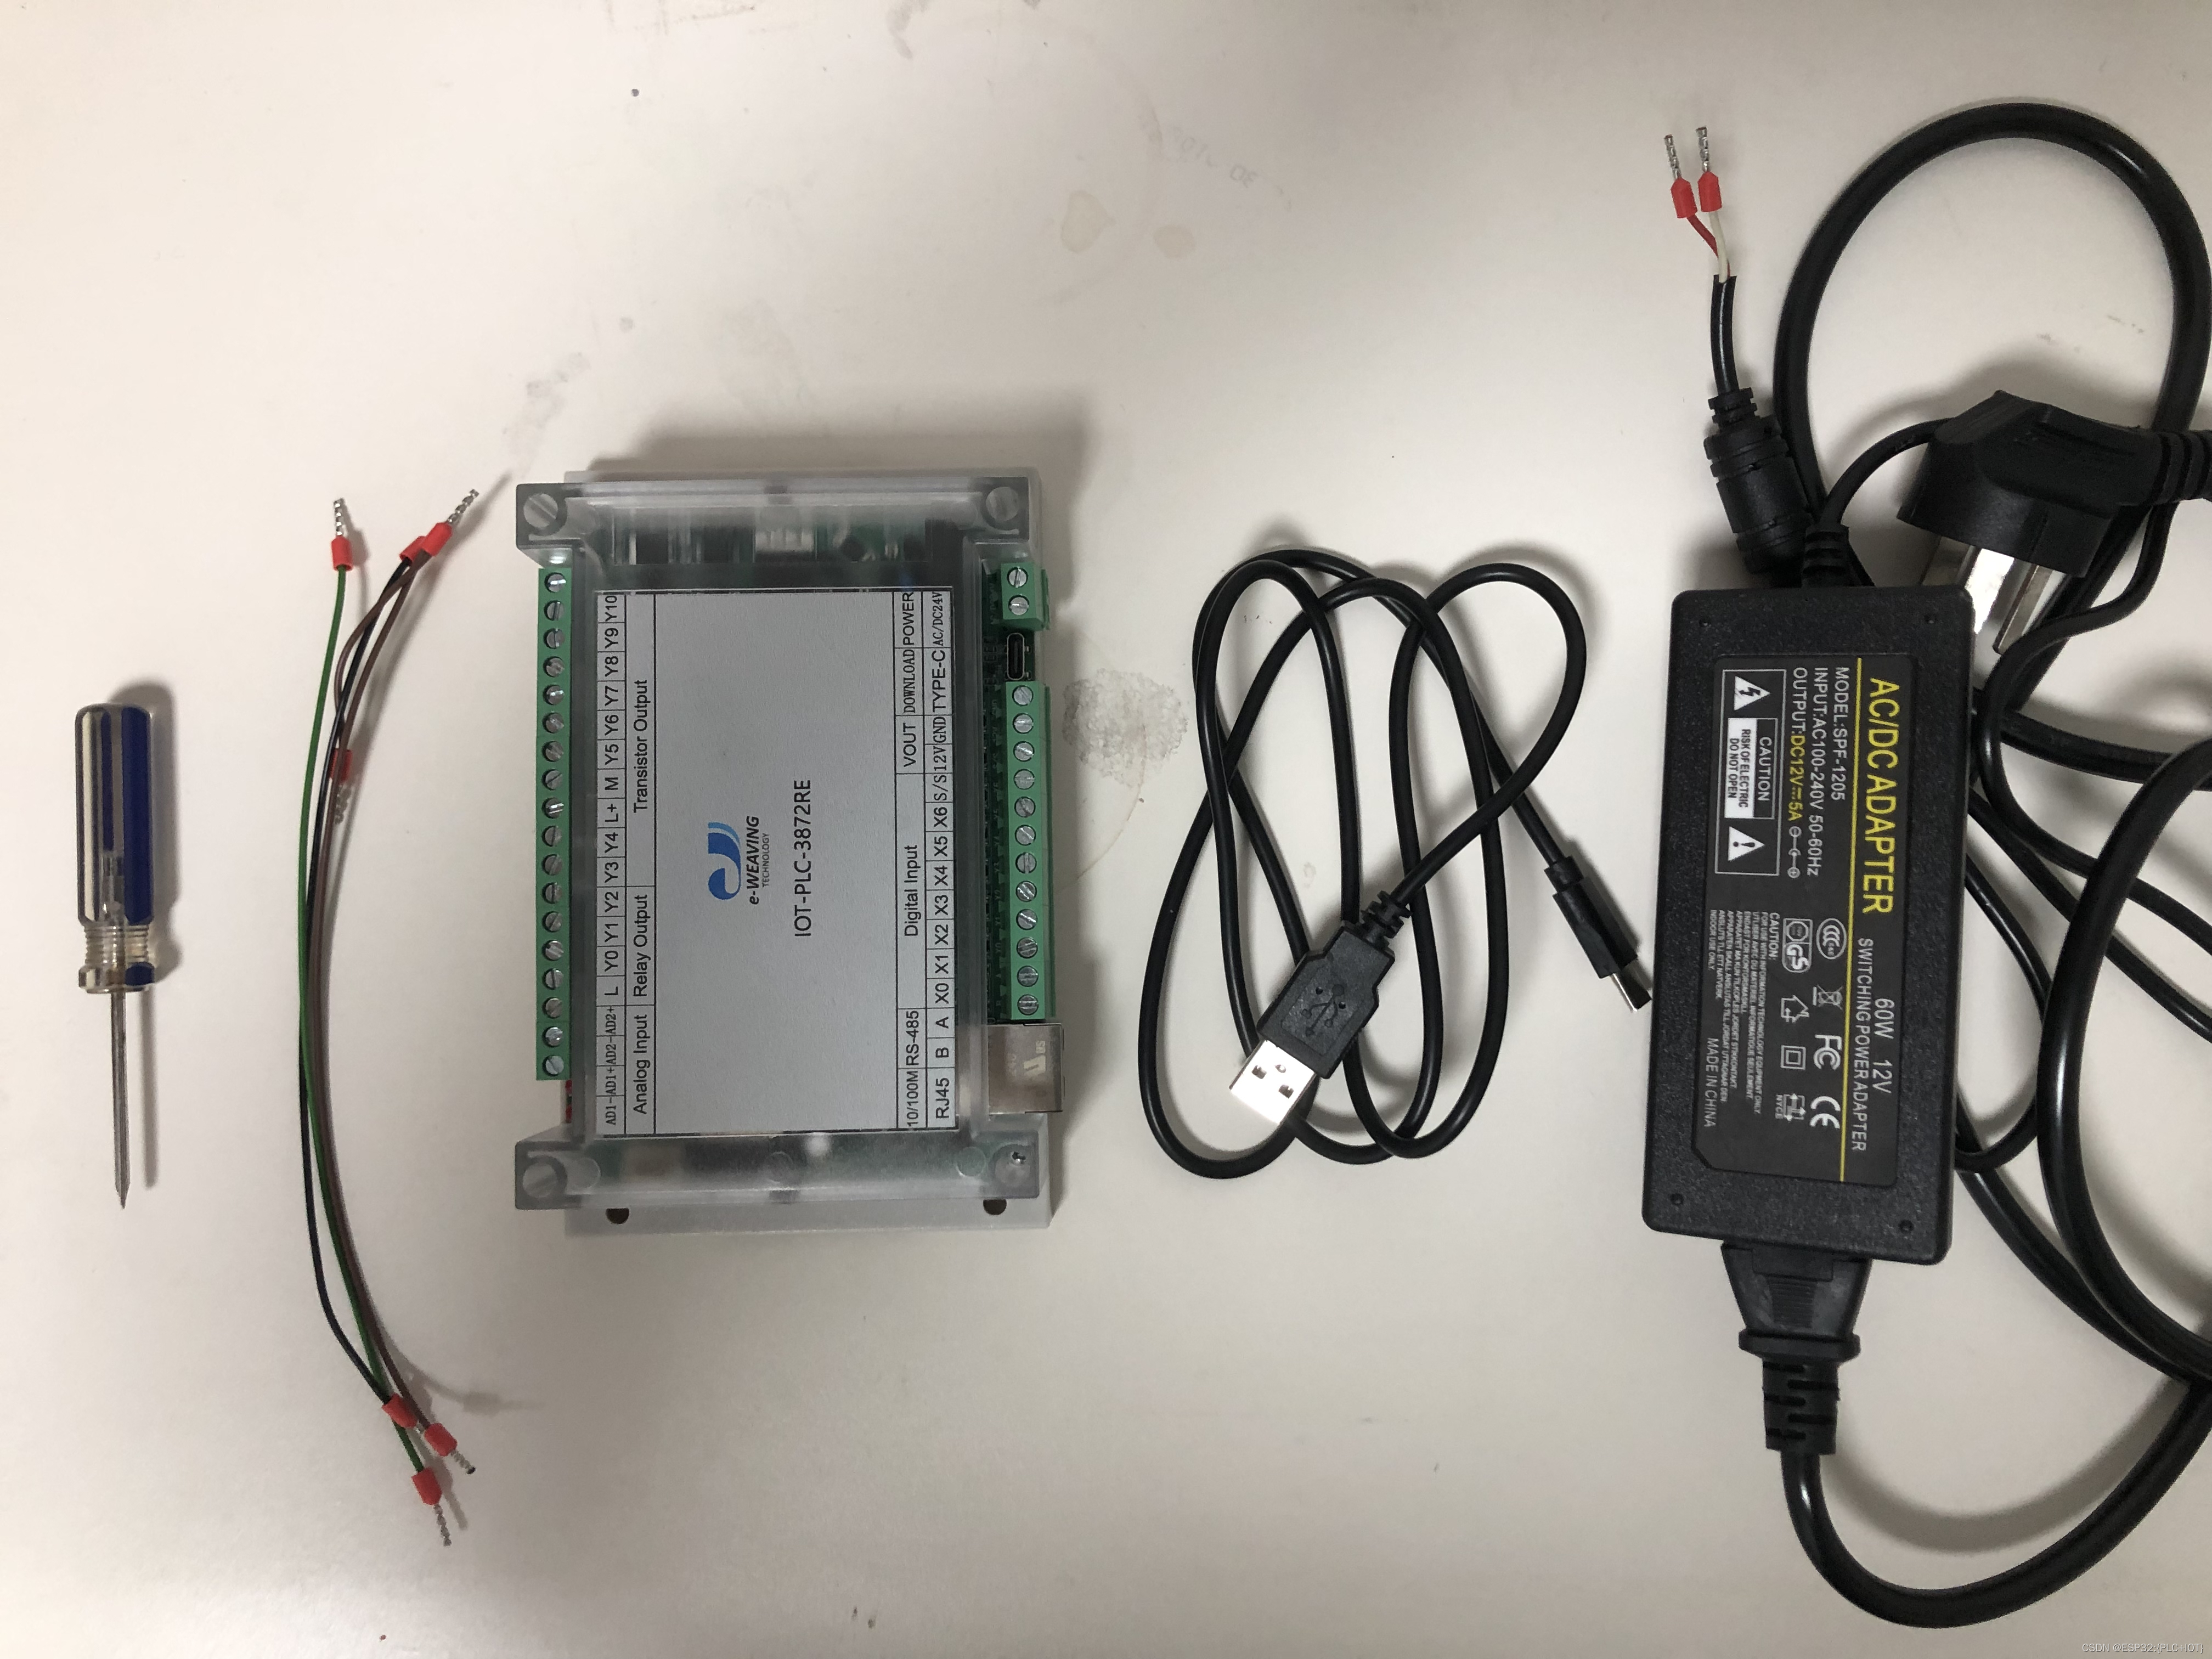
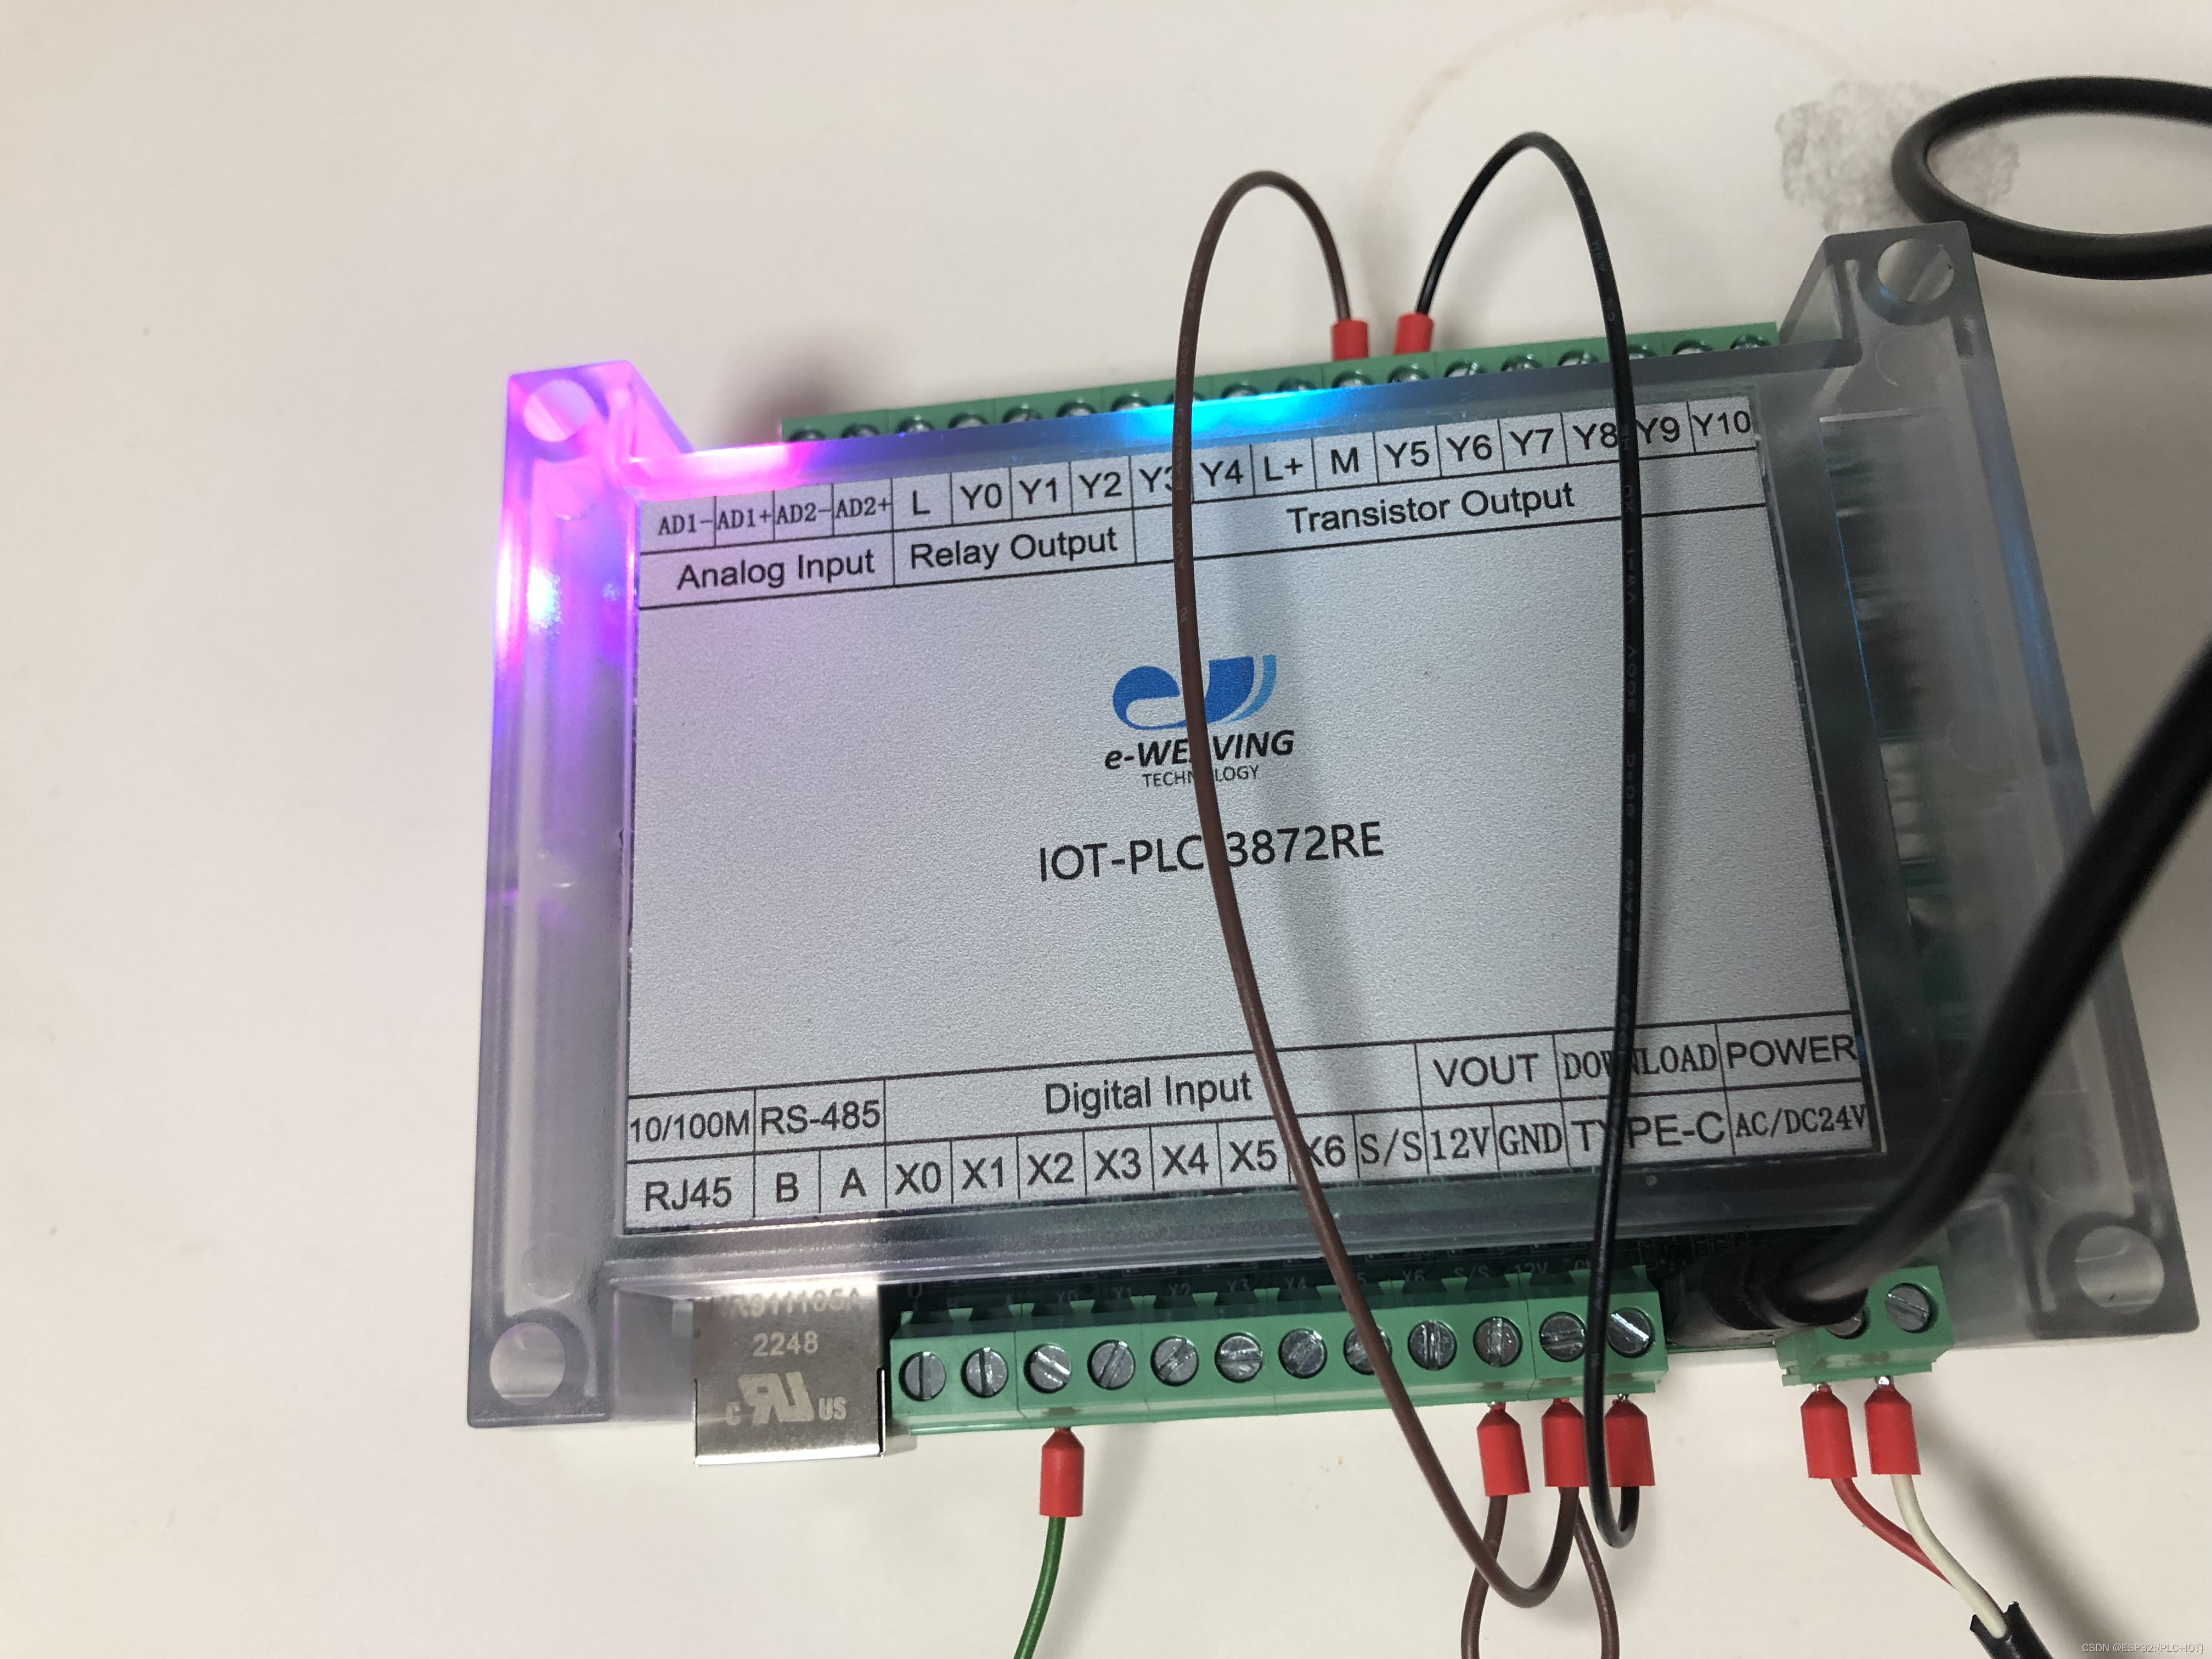
3.1.2 连接
VOUT-12V 连接Digital Input-S/S,12V电源适配器输出连接POWER,Digital Input-X0 连接测试接线,USB Type-C 数据线连接 DOWNLOAD,并将USB连接到有开发测试环境的电脑,然后12V电源适配器通电。

3.2 基本的输入和输出功能设计
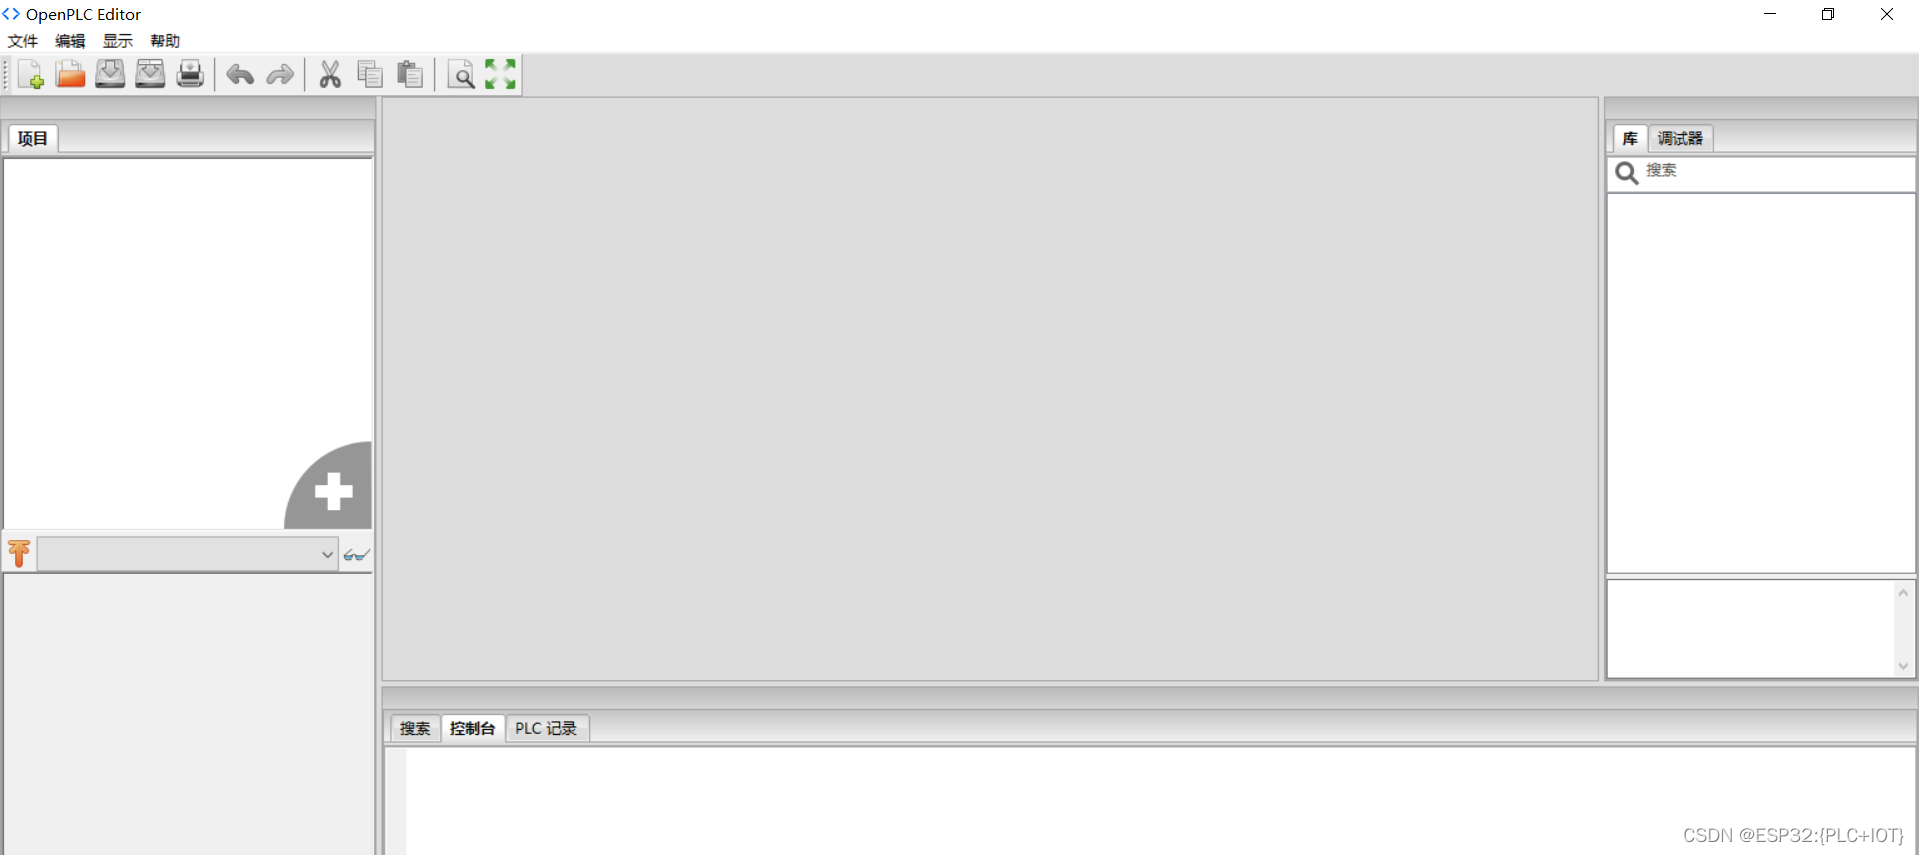
3.2.1 打开 OpenPLC Editor开发软件
3.2.2 点击【文件】->【新建】菜单,选择项目的目标文件夹
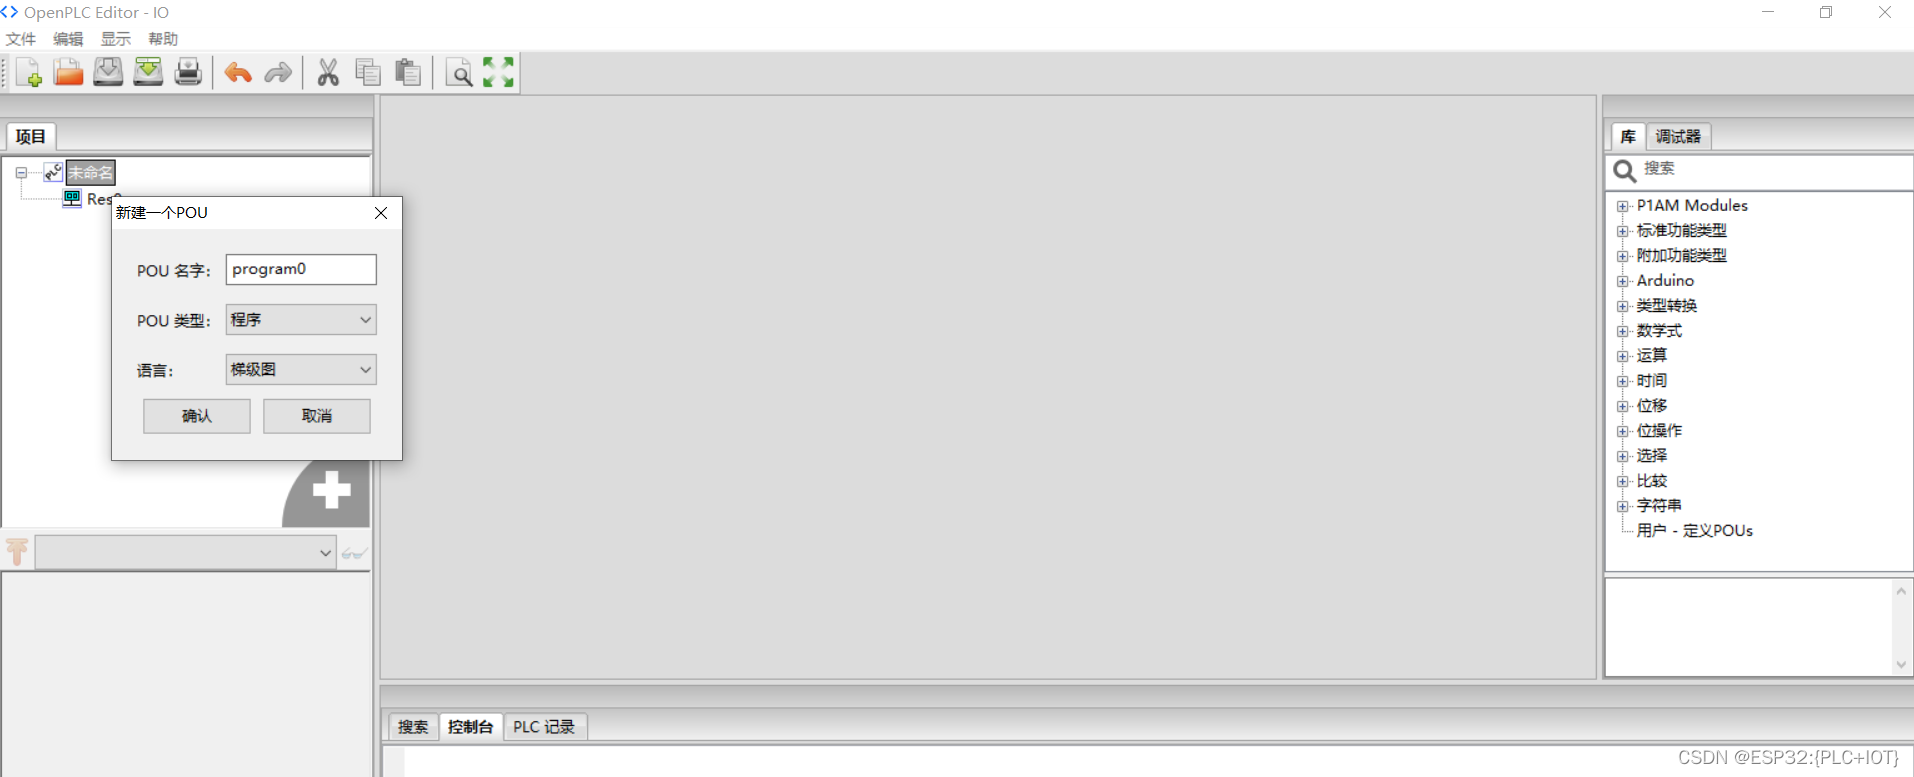
3.2.3 新建POU(Programming Organisation Unit)
将默认的POU名字改为 IO_Test,点击【确定】按钮。
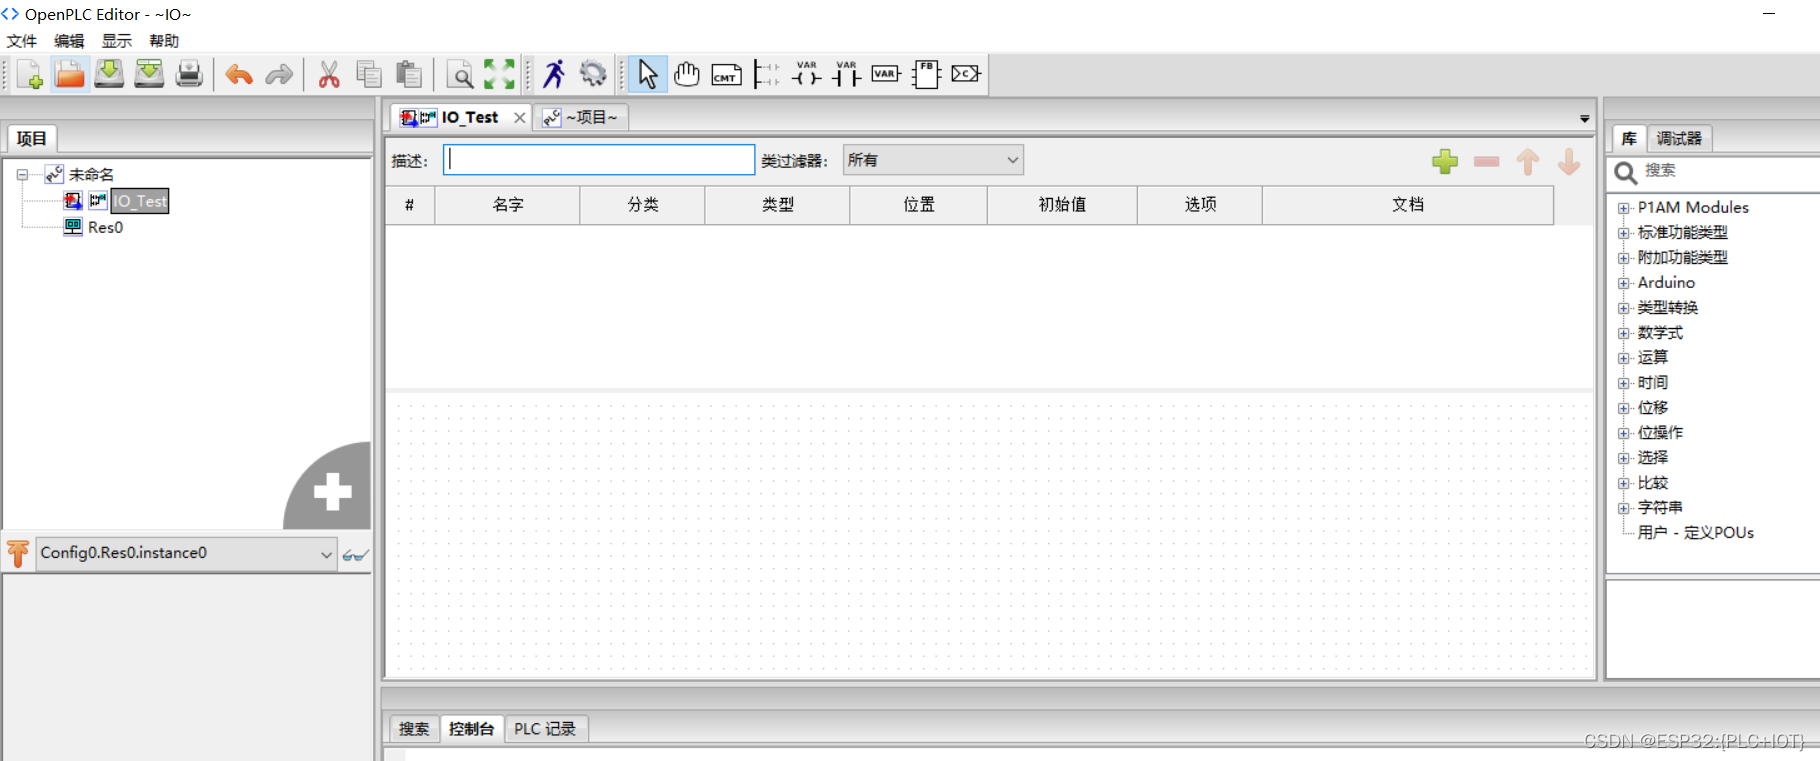
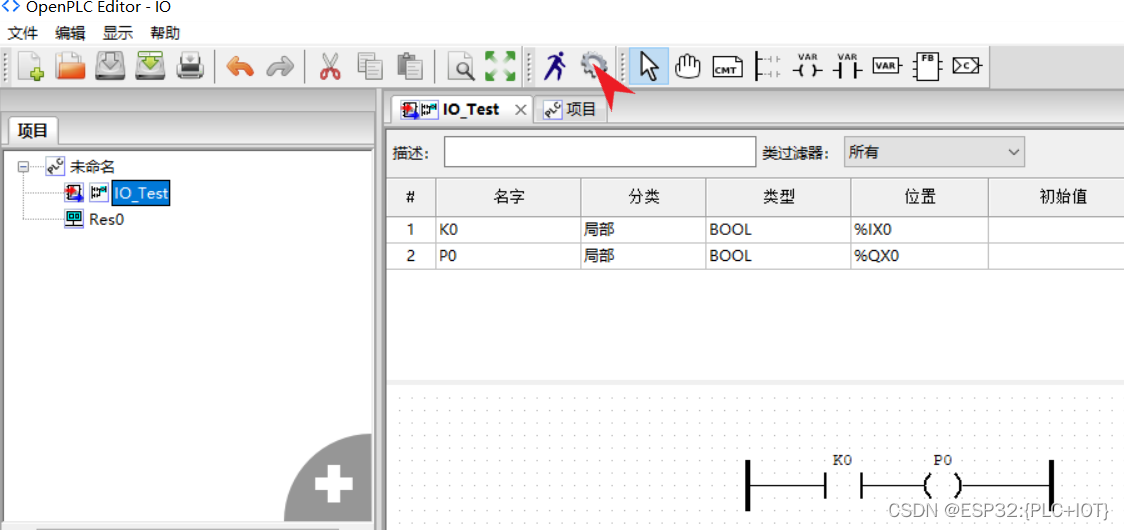
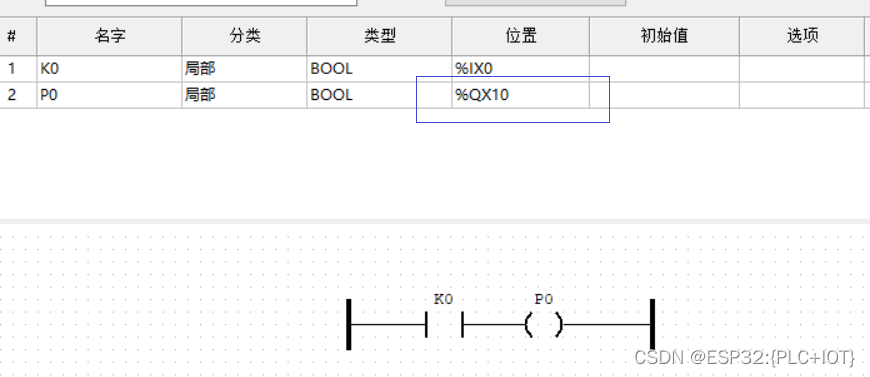
3.2.3 添加 IO 变量
点击【添加变量】按钮
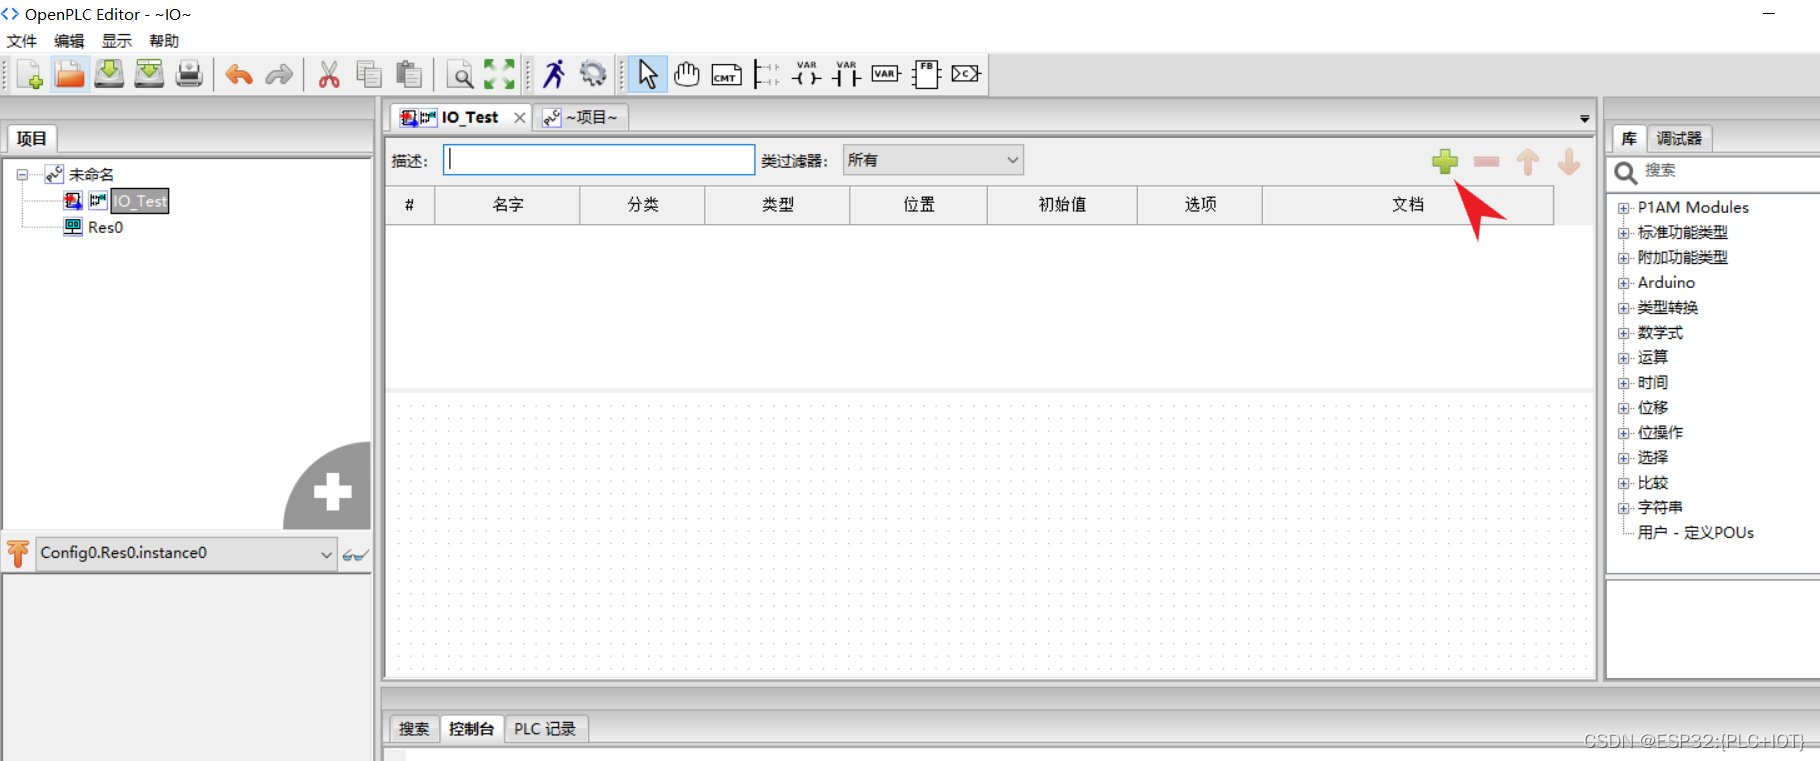
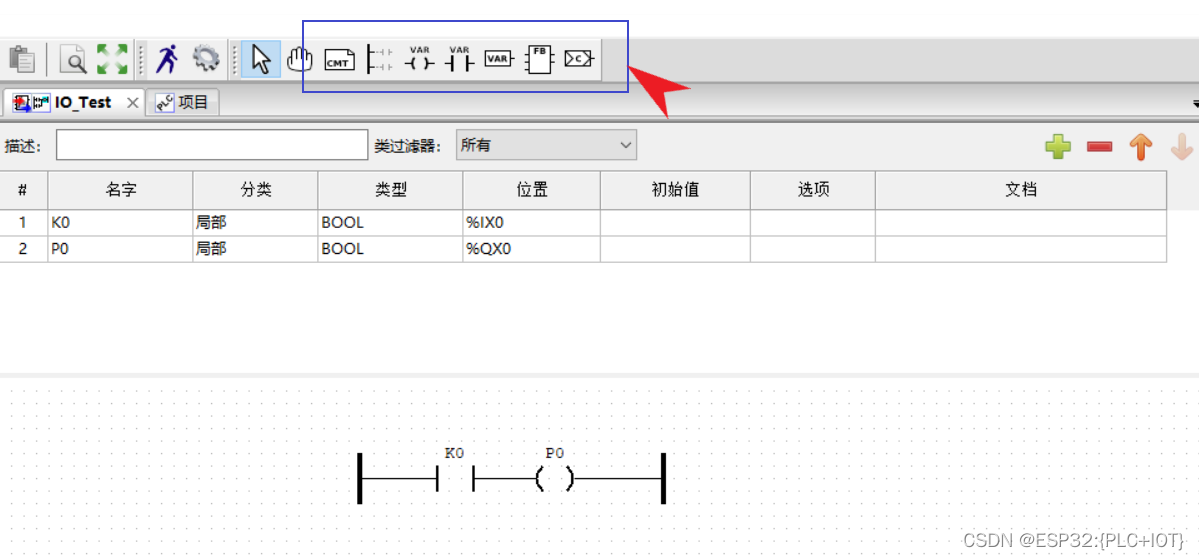
分别添加变量:
3.2.4 绘制梯形图
在工作区绘制梯形图,保存设计文件。
3.3 下载运行以及在线调试
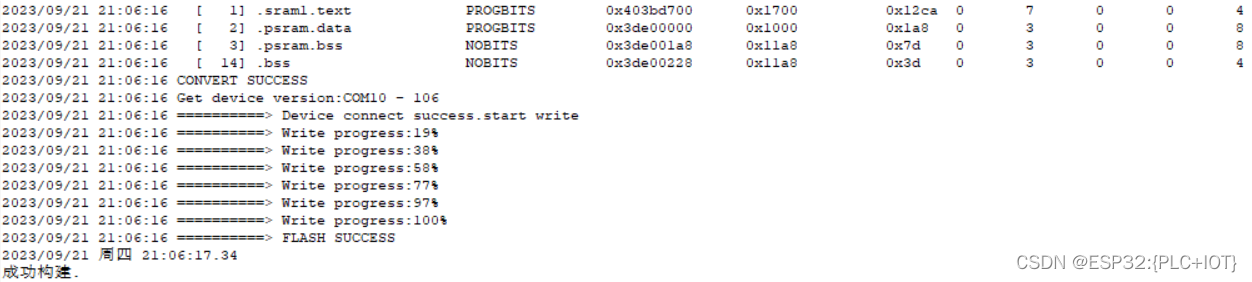
点击【编译下载】按钮
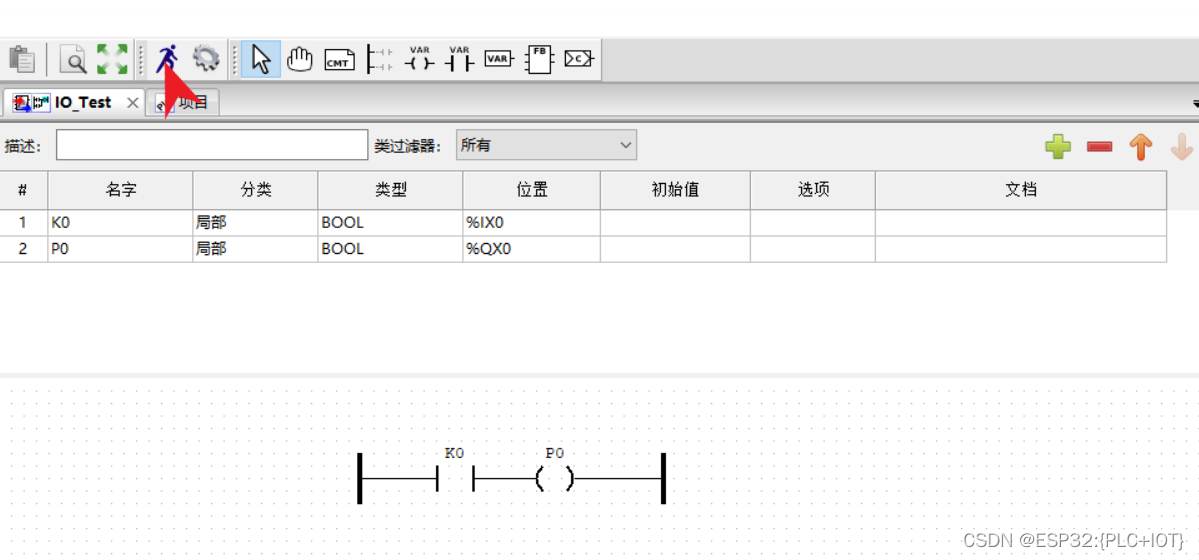
可以在状态区的【控制台】看到编译下载的过程和结果
将测试信号线和VOUT-GND接触,观察到X0的指示灯亮,可以听到IOT-PLC-3872RE的继电器发出接通的声音。
点击【设置\调试】
进入【设置/调试】界面,点击【调试】:
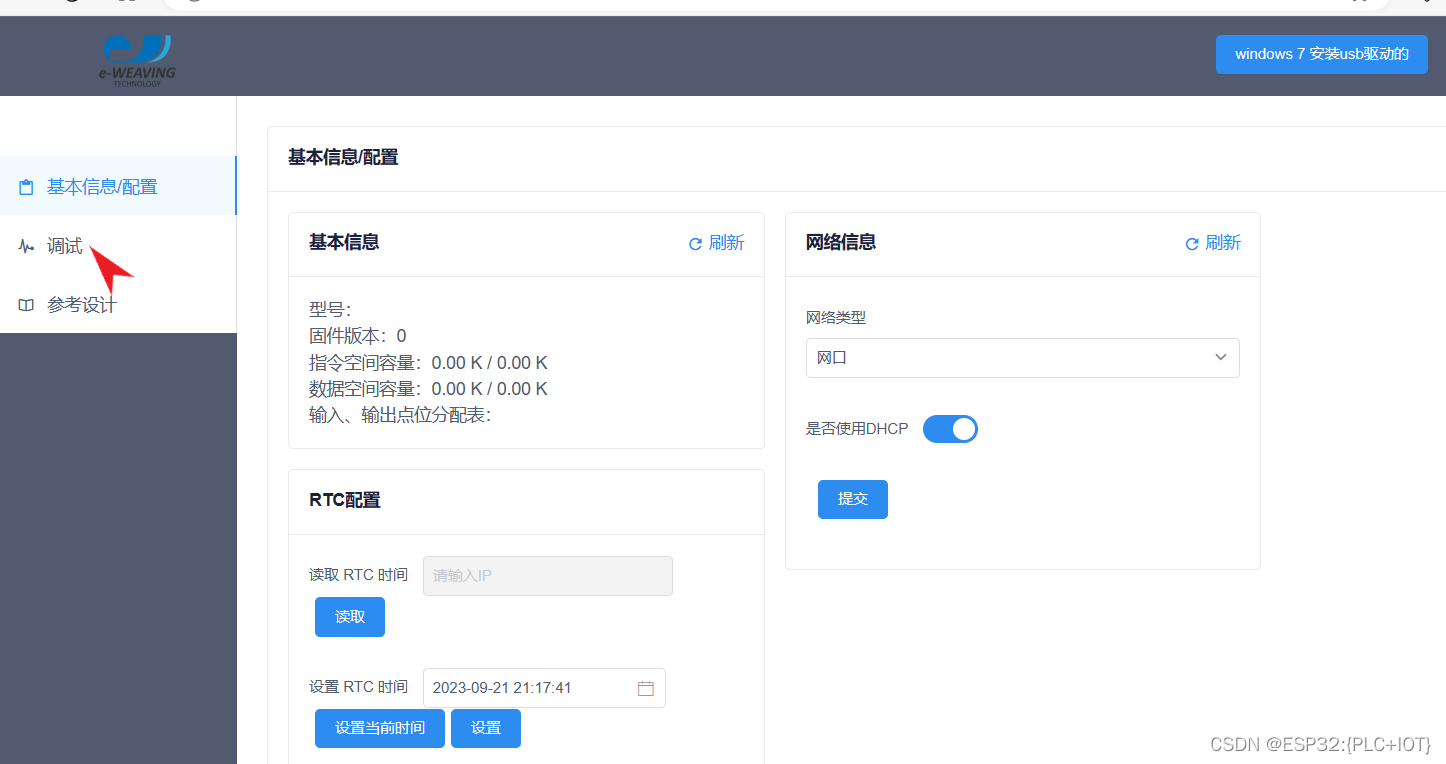
进入调试界面:
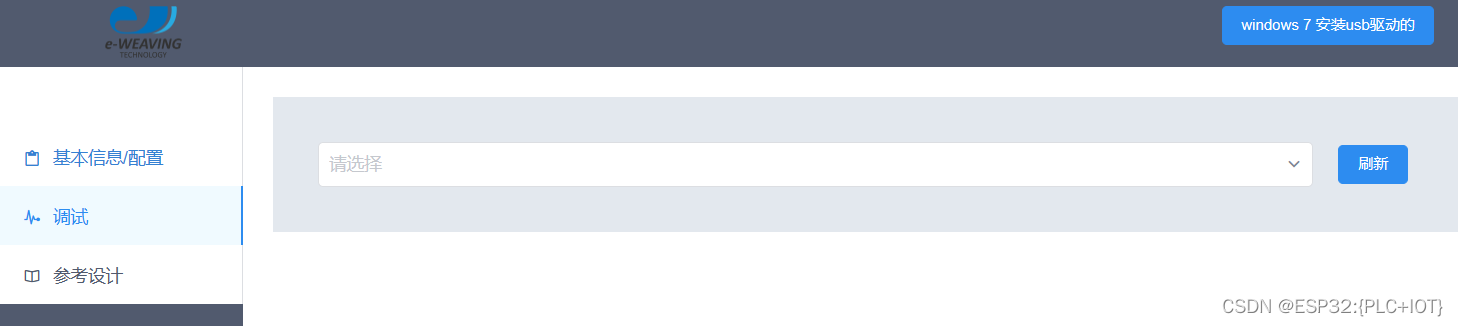
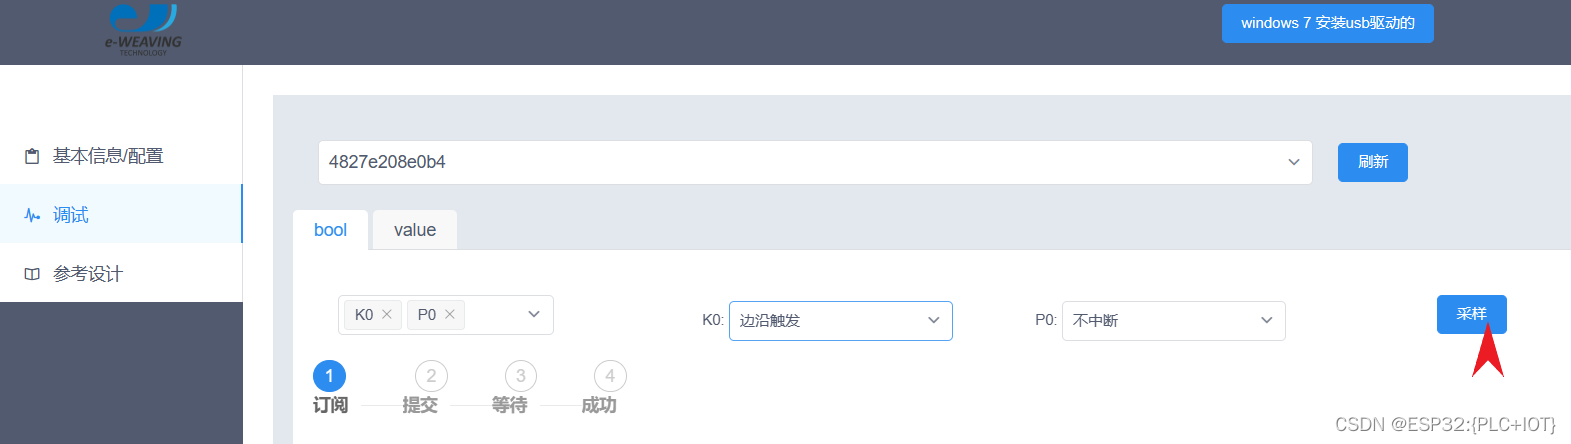
选择目标设备,观测信号,触发源以及出发类型,然后点击【采样】按钮:
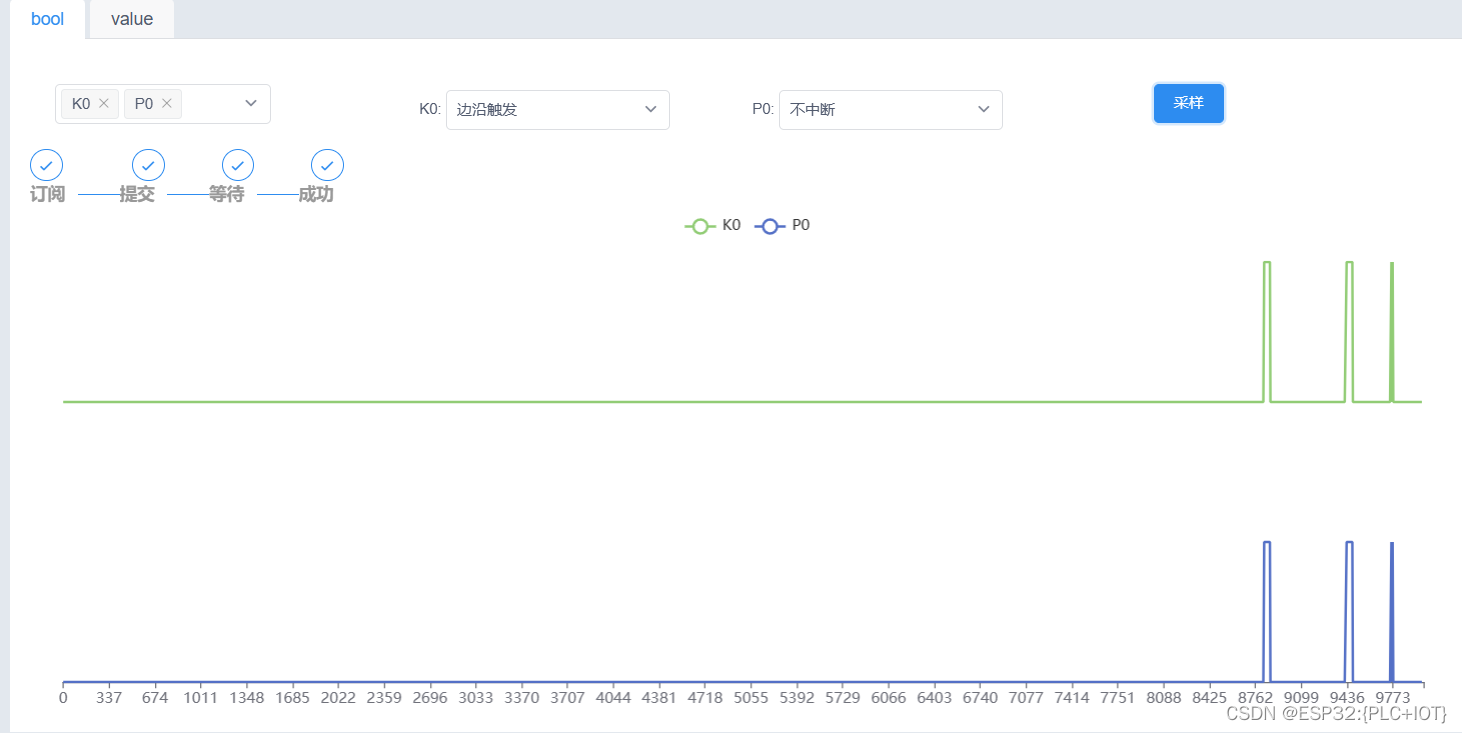
测试信号线和VOUT-GND接触并断开,观察调试波形:
3.4 继电器输出和晶体管输出的区别
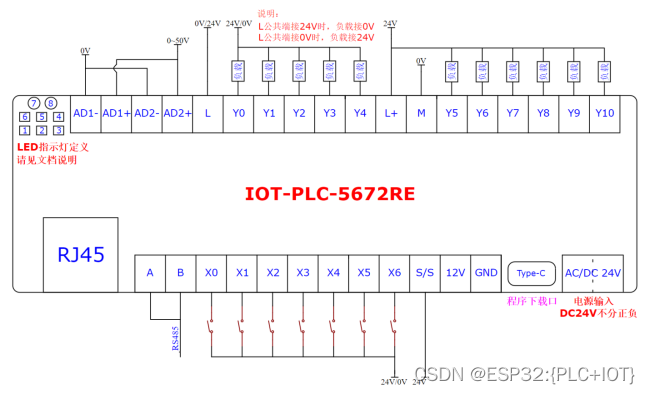
IOT-PLC-3872RE 配置 3个继电器输出、8个晶体管输出、7个光耦输入和 2个模拟输入,自带RS485接口和以太网接口。
继电器输出是将 Relay Output - L端,编程控制接通到 Y0 、Y1 或者 Y2;
晶体管输出是输出端的电压由编程控制输出为 Transister Ouput - L+ 或者 Transister Ouput - M,IOT-PLC-3872RE 的Y3~Y10 是晶体管输出,其中Y3、Y4的极性和Y5~Y10相反。IOT-PLC-3872RE的晶体管输出有指示灯。可以将实验修改为测试输出端为 Y10,观测晶体管输出。注意L+和M需要连接 12V和GND。
可以在项目文件夹找到设计代码和生成的代码:
设计代码是:
<?xml version='1.0' encoding='utf-8'?>

<project xmlns:ns1="http://www.plcopen.org/xml/tc6.xsd" xmlns:xhtml="http://www.w3.org/1999/xhtml" xmlns:xsd="http://www.w3.org/2001/XMLSchema" xmlns="http://www.plcopen.org/xml/tc6_0201">

  <fileHeader companyName="未知" productName="未命名" productVersion="1" creationDateTime="2023-09-21T20:43:02"/>

  <contentHeader name="未命名" modificationDateTime="2023-09-21T20:57:04">

    <coordinateInfo>

      <fbd>

        <scaling x="10" y="10"/>

      </fbd>

      <ld>

        <scaling x="10" y="10"/>

      </ld>

      <sfc>

        <scaling x="10" y="10"/>

      </sfc>

    </coordinateInfo>

  </contentHeader>

  <types>

    <dataTypes/>

    <pous>

      <pou name="IO_Test" pouType="program">

        <interface>

          <localVars>

            <variable name="K0" address="%IX0">

              <type>

                <BOOL/>

              </type>

            </variable>

            <variable name="P0" address="%QX0">

              <type>

                <BOOL/>

              </type>

            </variable>

          </localVars>

        </interface>

        <body>

          <LD>

            <leftPowerRail localId="1" height="40" width="20">

              <position x="270" y="60"/>

              <connectionPointOut formalParameter="">

                <relPosition x="20" y="20"/>

              </connectionPointOut>

            </leftPowerRail>

            <contact localId="2" height="20" width="30" negated="false">

              <position x="350" y="70"/>

              <connectionPointIn>

                <relPosition x="0" y="10"/>

                <connection refLocalId="1">

                  <position x="350" y="80"/>

                  <position x="290" y="80"/>

                </connection>

              </connectionPointIn>

              <connectionPointOut>

                <relPosition x="30" y="10"/>

              </connectionPointOut>

              <variable>K0</variable>

            </contact>

            <coil localId="3" height="20" width="30" negated="false">

              <position x="430" y="70"/>

              <connectionPointIn>

                <relPosition x="0" y="10"/>

                <connection refLocalId="2">

                  <position x="430" y="80"/>

                  <position x="380" y="80"/>

                </connection>

              </connectionPointIn>

              <connectionPointOut>

                <relPosition x="30" y="10"/>

              </connectionPointOut>

              <variable>P0</variable>

            </coil>

            <rightPowerRail localId="4" height="40" width="80">

              <position x="530" y="60"/>

              <connectionPointIn>

                <relPosition x="0" y="20"/>

                <connection refLocalId="3">

                  <position x="530" y="80"/>

                  <position x="460" y="80"/>

                </connection>

              </connectionPointIn>

            </rightPowerRail>

          </LD>

        </body>

      </pou>

    </pous>

  </types>

  <instances>

    <configurations>

      <configuration name="Config0">

        <resource name="Res0">

          <task name="task0" priority="0" interval="T#20ms">

            <pouInstance name="instance0" typeName="IO_Test"/>

          </task>

        </resource>

      </configuration>

    </configurations>

  </instances>

</project>
生成代码是:
PROGRAM IO_Test
  VAR
    K0 AT %IX0 : BOOL;
    P0 AT %QX10 : BOOL;
  END_VAR

  P0 := K0;
END_PROGRAM


CONFIGURATION Config0

  RESOURCE Res0 ON PLC
    TASK task0(INTERVAL := T#20ms,PRIORITY := 0);
    PROGRAM instance0 WITH task0 : IO_Test;
  END_RESOURCE
END_CONFIGURATION


 1118
1118

 被折叠的 条评论
为什么被折叠?
被折叠的 条评论
为什么被折叠?
 到【灌水乐园】发言


