


Spring Security(Spring安全框架)学习笔记(一)简介、自定义登录页面、放过静态资源
Spring Security(Spring安全框架)学习笔记(二)登录接口,登录参数,登录回调,注销登录
Spring Security(Spring安全框架)学习笔记(三)返回json格式数据,适用前后端分离场景
Spring Security(Spring安全框架)学习笔记(四)授权操作、权限继承
Spring Security(Spring安全框架)学习笔记(五)整合Mysql数据库
一、SpringSecurity介绍
- 简介:是为基于J2EE企业应用软件提供了全面安全服务。
- 发展:Acigi Security -> Spring Security,配置繁琐门槛高,springboot简化配置。
- 核心功能:
- 认证(登录)
- 授权(权限鉴别)
Spring Security 目前支持认证一体化如下认证技术:
HTTP BASIC authentication headers (一个基于IEFT RFC 的标准)
HTTP Digest authentication headers (一个基于IEFT RFC 的标准)
HTTP X.509 client certificate exchange (一个基于IEFT RFC 的标准)
LDAP (一个非常常见的跨平台认证需要做法,特别是在大环境)
Form-based authentication (提供简单用户接口的需求)
OpenID authentication
Computer Associates Siteminder
JA-SIG Central Authentication Service (CAS,这是一个流行的开源单点登录系统)
Transparent authentication context propagation for Remote Method Invocation and HttpInvoker (一个Spring远程调用协议)
二、第一个springSecurity程序
- 新建Maven工程 -> 导入相关依赖
<?xml version="1.0" encoding="UTF-8"?>
<project xmlns="http://maven.apache.org/POM/4.0.0"
	xmlns:xsi="http://www.w3.org/2001/XMLSchema-instance"
	xsi:schemaLocation="http://maven.apache.org/POM/4.0.0 https://maven.apache.org/xsd/maven-4.0.0.xsd">
	<modelVersion>4.0.0</modelVersion>
	<parent>
		<groupId>org.springframework.boot</groupId>
		<artifactId>spring-boot-starter-parent</artifactId>
		<version>2.3.0.RELEASE</version>
		<relativePath /> <!-- lookup parent from repository -->
	</parent>
	<groupId>com.hx</groupId>
	<artifactId>springSecurity_03</artifactId>
	<version>0.0.1-SNAPSHOT</version>
	<name>springSecurity_01</name>
	<description>springSecurity_03</description>

	<properties>
		<java.version>1.8</java.version>
	</properties>

	<dependencies>
		<dependency>
			<groupId>org.springframework.boot</groupId>
			<artifactId>spring-boot-starter-security</artifactId>
		</dependency>
		<dependency>
			<groupId>org.springframework.boot</groupId>
			<artifactId>spring-boot-starter-web</artifactId>
		</dependency>
		<dependency>
			<groupId>org.springframework.boot</groupId>
			<artifactId>spring-boot-starter-jdbc</artifactId>
		</dependency>
		<dependency>
			<groupId>mysql</groupId>
			<artifactId>mysql-connector-java</artifactId>
		</dependency>

		<dependency>
			<groupId>org.springframework.boot</groupId>
			<artifactId>spring-boot-starter-test</artifactId>
			<scope>test</scope>
			<exclusions>
				<exclusion>
					<groupId>org.junit.vintage</groupId>
					<artifactId>junit-vintage-engine</artifactId>
				</exclusion>
			</exclusions>
		</dependency>
		<dependency>
			<groupId>org.springframework.security</groupId>
			<artifactId>spring-security-test</artifactId>
			<scope>test</scope>
		</dependency>
	</dependencies>

	<build>
		<plugins>
			<plugin>
				<groupId>org.springframework.boot</groupId>
				<artifactId>spring-boot-maven-plugin</artifactId>
			</plugin>
		</plugins>
	</build>
</project>
- 新建Controller层
package com.hx.security;

import org.springframework.web.bind.annotation.GetMapping;
import org.springframework.web.bind.annotation.RestController;

@RestController
public class HelloController {
	@GetMapping("/hello")
	public String hello() {
		return "<h1>HELLO</h1>";
	}
}
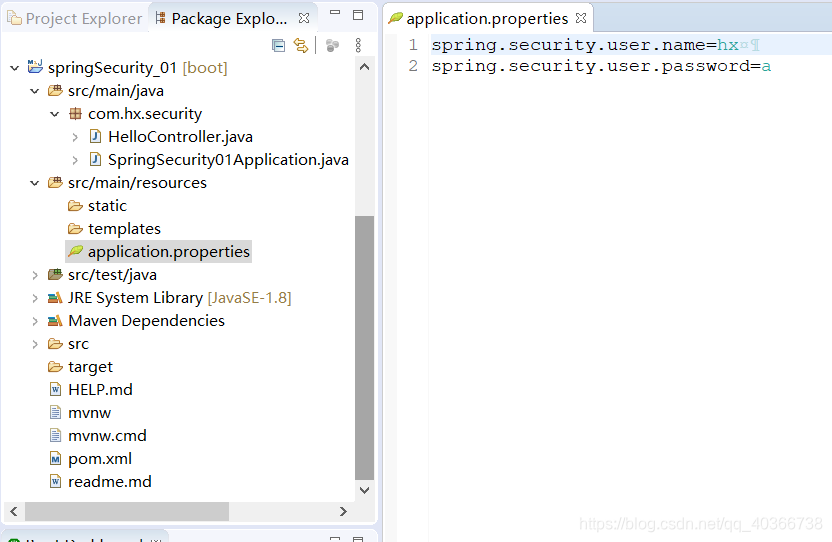
- 运行项目,输入地址 http://127.0.0.1:8080/hello 访问,跳转到 http://127.0.0.1:8080/login 输入账号
user和控制台输出的随机密码在Using generated security password:后面登录即可访问 ,亦可手动配置,如下图所示。 - 目录结构与账号密码配置:
springSecurity加密方案,配置类配置账号密码方法
package com.hx.security;

import org.springframework.context.annotation.Bean;
import org.springframework.context.annotation.Configuration;
import org.springframework.security.config.annotation.authentication.builders.AuthenticationManagerBuilder;
import org.springframework.security.config.annotation.web.configuration.WebSecurityConfigurerAdapter;
import org.springframework.security.crypto.password.NoOpPasswordEncoder;
import org.springframework.security.crypto.password.PasswordEncoder;

@Configuration
public class SecurityConfig extends WebSecurityConfigurerAdapter {
	@Bean // 密码加密实例
	PasswordEncoder passwordEncoder() {
		return NoOpPasswordEncoder.getInstance(); // 采用不加密方式
	}

	@Override
	protected void configure(AuthenticationManagerBuilder auth) throws Exception { // 配置用户名,密码
		//这里的配置会覆盖properties配置文件中配置的账号密码
		auth.inMemoryAuthentication().withUser("whx").password("a").roles("admin")
			.and().withUser("hx").password("a").roles("user"); // 配置多个使用and连接,一个就不用加and()
	}
}
三、自定义登录页面,与放过无关安全静态资源
- 在SecurityConfig中增加配置
package com.hx.security;

import org.springframework.context.annotation.Bean;
import org.springframework.context.annotation.Configuration;
import org.springframework.security.config.annotation.authentication.builders.AuthenticationManagerBuilder;
import org.springframework.security.config.annotation.web.builders.HttpSecurity;
import org.springframework.security.config.annotation.web.builders.WebSecurity;
import org.springframework.security.config.annotation.web.configuration.WebSecurityConfigurerAdapter;
import org.springframework.security.crypto.password.NoOpPasswordEncoder;
import org.springframework.security.crypto.password.PasswordEncoder;

@Configuration
public class SecurityConfig extends WebSecurityConfigurerAdapter {
	@Bean // 密码加密实例
	PasswordEncoder passwordEncoder() {
		return NoOpPasswordEncoder.getInstance(); // 采用不加密方式
	}

	@Override
	protected void configure(AuthenticationManagerBuilder auth) throws Exception { // 配置用户名,密码
		//这里的配置会覆盖properties配置文件中配置的账号密码
		auth.inMemoryAuthentication().withUser("whx").password("a").roles("admin")
			.and().withUser("hx").password("a").roles("user"); // 配置多个使用and连接,一个就不用加and()
	}

	@Override
	public void configure(WebSecurity web) throws Exception {
		web.ignoring().antMatchers("/js/**","/css/**","images/**");		//放过静态资源下的js,css,img资源,否则css无法作用
	}

	@Override
	protected void configure(HttpSecurity http) throws Exception {	//http安全配置
	//authorizeRequests开启配置	//anyRequest所有请求都拦截	//formLogin表单配置	//loginPage指定登录页面(登录接口)	//permitAll放过相关页面	//关闭csrf
		http.authorizeRequests().anyRequest().authenticated().and().formLogin().loginPage("/login.html").permitAll().and().csrf().disable();
	}

}
- 登录页面代码
<!DOCTYPE html>
<html>
<head>
<meta charset="UTF-8">
<title>Insert title here</title>
</head>
<body>
	<form action="/login.html" method="post">	<!-- 必须指定为post请求,地址为login.html -->
		用户名:<input name="username"> <br>	<!-- 指定名称username,遵循规范 -->
		密码:<input name="password"> <br>	<!-- 指定名称password,遵循规范 -->
		<button type="submit">提交</button>
	</form>
</body>
</html>


 3719
3719

 被折叠的 条评论
为什么被折叠?
被折叠的 条评论
为什么被折叠?
 到【灌水乐园】发言


