


Spring Security(Spring安全框架)学习笔记(一)简介、自定义登录页面、放过静态资源
Spring Security(Spring安全框架)学习笔记(二)登录接口,登录参数,登录回调,注销登录
Spring Security(Spring安全框架)学习笔记(三)返回json格式数据,适用前后端分离场景
Spring Security(Spring安全框架)学习笔记(四)授权操作、权限继承
1. 开始使用
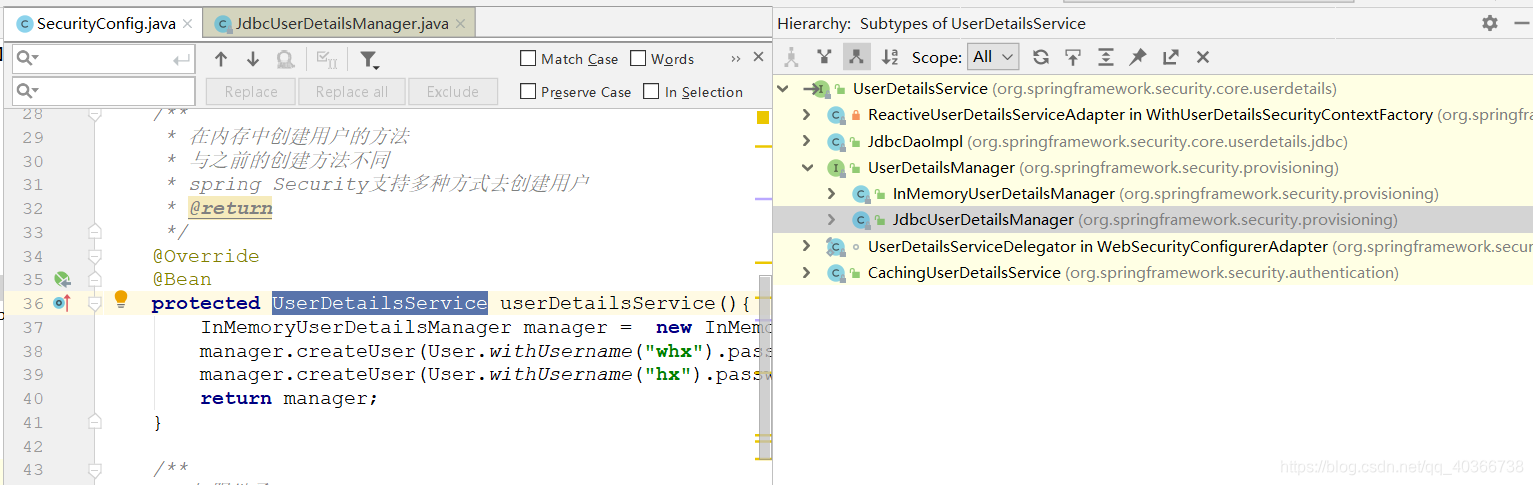
- 首先通过选中UserDetailsService,按Navigate -》Type Hierarchy,可以看到UserDetailsService的继承关系。
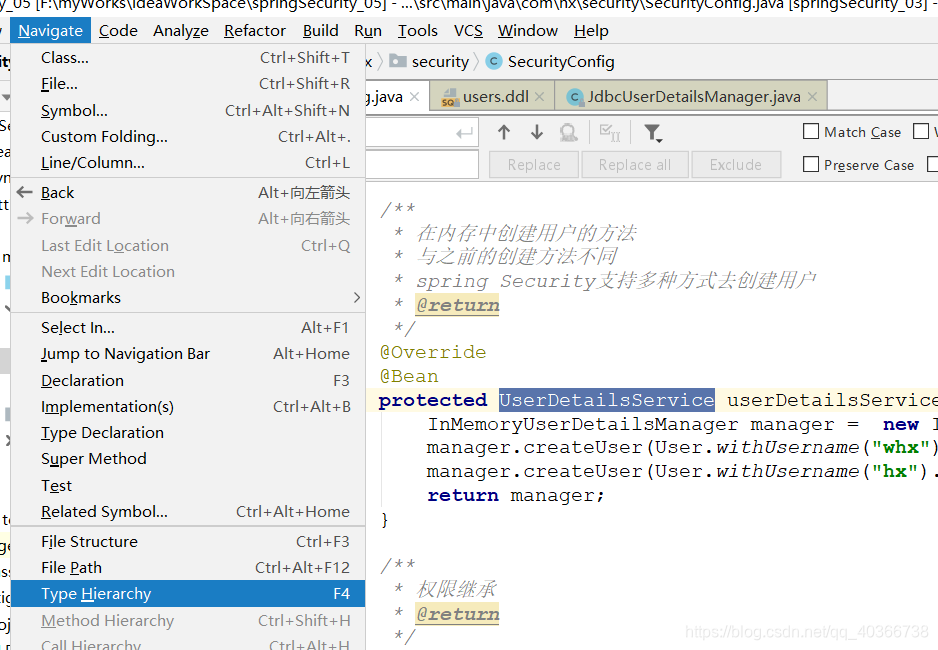
- 可以看到有JdbcUserDetailsManager继承该接口。通过名称可以知道这个类就是Spring为我们提供的数据库操作相关的。点进去可以可以看到该类具体是通过调用JdbcTemplate实现的。
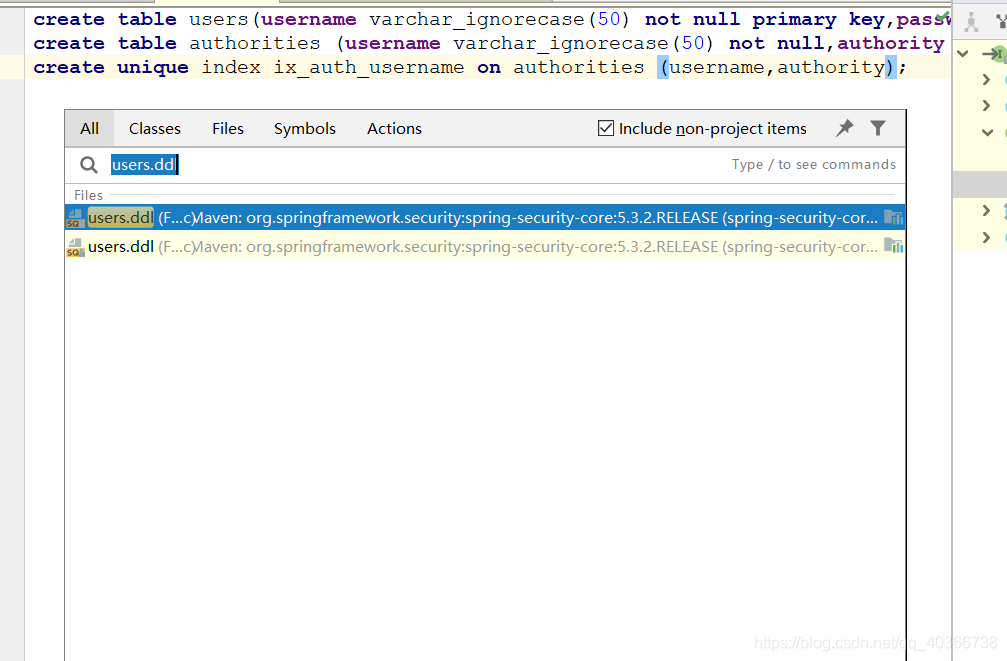
- 双击shift,打开全局搜索,检索users.ddl文件,复制粘贴到mysql中执行,创建好表
2. 编码
2.1添加依赖pom.xml
<dependency>
	<groupId>org.springframework.boot</groupId>
		<artifactId>spring-boot-starter-jdbc</artifactId>
	</dependency>
	<dependency>
		<groupId>mysql</groupId>
	<artifactId>mysql-connector-java</artifactId>
</dependency>
2.2 配置数据源
spring.datasource.username=root
spring.datasource.password=a
spring.datasource.url=jdbc:mysql:///test?useUnicode=true&characterEncoding=UTF-8&serverTimezone=Asia/Shanghai
2.3 SecurityConfig.java
package com.hx.security;

import com.fasterxml.jackson.databind.ObjectMapper;
import org.springframework.beans.factory.annotation.Autowired;
import org.springframework.boot.autoconfigure.security.SecurityProperties;
import org.springframework.context.annotation.Bean;
import org.springframework.context.annotation.Configuration;
import org.springframework.security.access.hierarchicalroles.RoleHierarchy;
import org.springframework.security.access.hierarchicalroles.RoleHierarchyImpl;
import org.springframework.security.config.annotation.web.builders.HttpSecurity;
import org.springframework.security.config.annotation.web.builders.WebSecurity;
import org.springframework.security.config.annotation.web.configuration.WebSecurityConfigurerAdapter;
import org.springframework.security.core.userdetails.User;
import org.springframework.security.core.userdetails.UserDetailsService;
import org.springframework.security.crypto.password.NoOpPasswordEncoder;
import org.springframework.security.crypto.password.PasswordEncoder;
import org.springframework.security.provisioning.InMemoryUserDetailsManager;
import org.springframework.security.provisioning.JdbcUserDetailsManager;

import javax.sql.DataSource;
import java.io.PrintWriter;

/**
* @Author Huathy
* @CSDN https://blog.csdn.net/qq_40366738
*/
@Configuration
public class SecurityConfig extends WebSecurityConfigurerAdapter {
    @Bean
        // 密码加密实例
    PasswordEncoder passwordEncoder() {
        return NoOpPasswordEncoder.getInstance(); // 采用不加密方式
    }

    /**
     * 在数据库中创建用户的方法
     * 与之前的创建方法不同
     * spring Security支持多种方式去创建用户
     * @return
     */

    @Autowired
    DataSource dataSource;  //注入数据源
    @Override
    @Bean
    protected UserDetailsService userDetailsService(){
        JdbcUserDetailsManager manager = new JdbcUserDetailsManager(dataSource);
        //这里的创建用户会在数据库中创建,调用该方法,会执行封装好的sql语句
        //问题:每次启动代码自动执行,会造成用户重复?用户名为外键!
        //为解决用户重复问题,需判断用户是否存在
        if( !manager.userExists("whx") ){
            manager.createUser(User.withUsername("whx").password("a").roles("admin").build());
        }
        if( !manager.userExists("hx") ){
            manager.createUser(User.withUsername("hx").password("a").roles("user").build());
        }
        return manager;
    }

    /**
     * 权限继承
     * @return
     */
    @Bean
    RoleHierarchy roleHierarchy(){
        RoleHierarchyImpl hierarchy = new RoleHierarchyImpl();
        hierarchy.setHierarchy("ROLE_admin > ROLE_user");   //设置权限继承,管理员权限>用户权限
        return hierarchy;
    }

    /**
     * 放过资源
     * @param web
     * @throws Exception
     */
    @Override
    public void configure(WebSecurity web) throws Exception {
        web.ignoring().antMatchers("/js/**", "/css/**", "images/**");      //放过静态资源下的js,css,img资源
    }

    /**
     * http安全配置
     * @param http
     * @throws Exception
     */
    @Override
    protected void configure(HttpSecurity http) throws Exception {
        //authorizeRequests开启配置
        http.authorizeRequests()
                .antMatchers("/admin/**").hasRole("admin")  //从上往下依次匹配
                .antMatchers("/user/**").hasRole("user")
                .anyRequest()           //拦截规则:anyRequest所有请求都拦截,必须写在前边两个的后边
                .authenticated()
                .and()
                .formLogin()                        //formLogin表单配置
                .loginProcessingUrl("/doLogin")     //指定登录请求接口,若不配置则与指定的loginPage相同
                //登录成功的回调
                .successHandler((req,resp,authentication) -> {  //authentication:存储用户信息
                    resp.setContentType("application/json;charset=utf-8");
                    PrintWriter out = resp.getWriter();
                    //将用户信息以json格式返回给前端
                    out.write(new ObjectMapper().writeValueAsString(authentication.getPrincipal()));
                    out.flush();
                    out.close();
                })
                //登录失败的回调
                .failureHandler((req,resp,exception) -> {
                    resp.setContentType("application/json;charset=utf-8");
                    PrintWriter out = resp.getWriter();
                    //将错误信息以json格式返回给前端
                    out.write(new ObjectMapper().writeValueAsString(exception.getMessage()));
                    out.flush();
                    out.close();
                })
                .permitAll()
                .and()
                .logout()
                .logoutUrl("/logout")       //配置退出登录地址
                .logoutSuccessHandler((req,resp,authentication) -> {
                    resp.setContentType("application/json;charset=utf-8");
                    PrintWriter out = resp.getWriter();
                    //将错误信息以json格式返回给前端
                    out.write(new ObjectMapper().writeValueAsString("loginout success"));
                    out.flush();
                    out.close();
                })
                .and()
                .csrf().disable()                  //关闭csrf
                .exceptionHandling()
                .authenticationEntryPoint((req,resp,e) -> {
                    resp.setContentType("application/json;charset=utf-8");
                    resp.setStatus(401);    //设置响应状态码,401
                    PrintWriter out = resp.getWriter();
                    //将错误信息以json格式返回给前端
                    out.write(new ObjectMapper().writeValueAsString("unlogin"));
                    out.flush();
                    out.close();
                });
    }
}
3. 测试
这里使用postman进行测试
- 访问地址1:http://127.0.0.1:8080/doLogin?username=hx&password=a
请求方式POST,测试结果1:
{
    "password": null,
    "username": "hx",
    "authorities": [
        {
            "authority": "ROLE_user"
        }
    ],
    "accountNonExpired": true,
    "accountNonLocked": true,
    "credentialsNonExpired": true,
    "enabled": true
}
- 测试地址2:http://127.0.0.1:8080/admin/hello
测试结果2:
{
    "timestamp": "2020-06-10T15:40:08.348+00:00",
    "status": 403,
    "error": "Forbidden",
    "message": "",
    "path": "/admin/hello"
}
- 测试地址3:http://127.0.0.1:8080/user/hello
测试结果3:
<h1>HELLO USER</h1>
- 测试4:将当前用户的权限enable修改为0,禁用该用户
再次访问登录:http://127.0.0.1:8080/doLogin?username=hx&password=a
请求方式POST,测试结果4:"用户已失效"


 2510
2510

 被折叠的 条评论
为什么被折叠?
被折叠的 条评论
为什么被折叠?
 到【灌水乐园】发言


