


初步了解JetPack中的Room(4)
本文为学习类文档,通过学习B站up主longway777的视频,再加上自己的总结与理解的学习类文章,如有侵权,请联系博主进行删除
初步了解JetPack中的Room(4)
关于使用版本迁移
在上次的项目中添加一个开关使其能够切换开关关闭单词的中文意思
打开上次的项目
- 在Entity中添加一个列Colunm
在word(属Entity)中创建一个列并添加他的getter和setter方法:
@ColumnInfo(name = "foo_data")
    private boolean foo;

    public boolean isFoo() {
        return foo;
    }

    public void setFoo(boolean foo) {
        this.foo = foo;
    }
- 在database中更改版本version(version = 2),并将migration迁移( .fallbackToDestructiveMigration()):设置迁移策略
import android.content.Context;
import androidx.room.Database;
import androidx.room.Room;
import androidx.room.RoomDatabase;

@Database(entities = {Word.class}, version = 2, exportSchema = false)  //三个参数分别为数据库中的表、数据库版本号和导出模式
public abstract class WordDatabase extends RoomDatabase {
    //变更为Singleton模式
    private static WordDatabase INSTANCE;

    static synchronized WordDatabase getDatabase(Context context) {  //synchronized避免碰撞冲突
        if (INSTANCE == null) {
            INSTANCE = Room.databaseBuilder(context.getApplicationContext(), WordDatabase.class, "word_database")
                    .fallbackToDestructiveMigration() //破坏式迁移(捣碎再创建,之前的数据不会再存在)
                    .build();
        }
        return INSTANCE;
    }

    public abstract WordDao getWordDao(); //只需写一个函数原型即可
}
运行后发现应用程序数据已经被删除,就是因为使用了fallbackDestructiveMigration()

3. 上述使用的方法为破环式迁移,对用户极不友好,尽量不适用,下面采用自定义版本迁移方法:
先在Word的entity类中定义一个列并写getter与setter方法:
    @ColumnInfo(name = "bar_data")
    private boolean bar;

    public boolean isBar() {
        return bar;
    }

    public void setBar(boolean bar) {
        this.bar = bar;
    }
对database版本号进行更改,并自创自定义migration方法,使用自定义migrantion(.addMigrations())
        import android.content.Context;
        import androidx.annotation.NonNull;
        import androidx.room.Database;
        import androidx.room.Room;
        import androidx.room.RoomDatabase;
        import androidx.room.migration.Migration;
        import androidx.sqlite.db.SupportSQLiteDatabase;

@Database(entities = {Word.class}, version = 3, exportSchema = false)  //三个参数分别为数据库中的表、数据库版本号和导出模式
public abstract class WordDatabase extends RoomDatabase {
    //变更为Singleton模式
    private static WordDatabase INSTANCE;

    static synchronized WordDatabase getDatabase(Context context) {  //synchronized避免碰撞冲突
        if (INSTANCE == null) {
            INSTANCE = Room.databaseBuilder(context.getApplicationContext(), WordDatabase.class, "word_database")
                    .addMigrations(MIGRATION_2_3)  //自定义版本迁移
                    .build();
        }
        return INSTANCE;
    }
    public abstract WordDao getWordDao(); //只需写一个函数原型即可

    //自创迁移策略
    static final Migration MIGRATION_2_3 = new Migration(2,3) {
        @Override
        public void migrate(@NonNull SupportSQLiteDatabase database) {
            database.execSQL("ALTER TABLE word ADD COLUMN bar_data INTEGER NOT NULL DEFAULT 1");
        }
    };
}
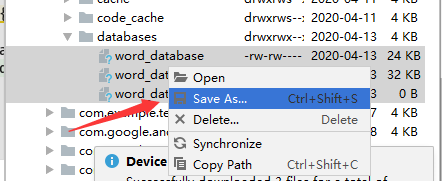
- 使用数据库浏览器浏览添加的列:
将explorer中的数据库表导出,使用DB browser浏览数据:

- 如果是删除字段,SQLite并不能直接对sql语句执行DROP操作,其基本操作为:根据旧表创建新表,对新表创建需求字段,将旧表数据移植到新表中,删除旧表,更改新表名。
删除刚刚创建的列foo_data与bar_data的具体操作如下:
首先在Entity中删除对应字段名(foo_data和bar_data,包括getter和setter方法)——注意entity已经改变,后续要改变数据库的版本号
创建新的migration:
 /*
    * 删除单列操作
    * SQLite并不能直接对单列执行sql语句的DROP操作,具体删除操作为:
    * 1. 根据旧表创建临时表,对临时表创建需求字段
    * 2. 从旧表中寻找需求字段移植添加到临时表中
    * 3. 删除旧表
    * 4. 更改临时表名为原表名
    * */
    static final Migration MIGRATION_3_4 = new Migration(3,4) {
        @Override
        public void migrate(@NonNull SupportSQLiteDatabase database) {
            database.execSQL("CREATE TABLE word_temp (id INTEGER PRIMARY KEY NOT NULL," +
                    "english_word TEXT," +
                    "chinese_meaning TEXT)");
            database.execSQL("INSERT INTO word_temp (id,english_word,chinese_meaning) " +
                    "SELECT id,english_word,chinese_meaning FROM word");
            database.execSQL("DROP TABLE word");
            database.execSQL("ALTER TABLE word_temp RENAME TO word");
        }
    };
更改版本号,执行自定义版本迁移操作:
@Database(entities = {Word.class}, version = 4, exportSchema = false)  //三个参数分别为数据库中的表、数据库版本号和导出模式
public abstract class WordDatabase extends RoomDatabase {
    //变更为Singleton模式
    private static WordDatabase INSTANCE;

    static synchronized WordDatabase getDatabase(Context context) {  //synchronized避免碰撞冲突
        if (INSTANCE == null) {
            INSTANCE = Room.databaseBuilder(context.getApplicationContext(), WordDatabase.class, "word_database")
                    //.fallbackToDestructiveMigration() //破坏式迁移(捣碎再创建,之前的数据不会再存在)
                    .addMigrations(MIGRATION_3_4)  //自定义版本迁移
                    .build();
        }
        return INSTANCE;
    }
运行后观察数据库表的情况:
只剩我们选择的三列了

以上操作都是在保留原有数据的情况下的操作,如果卸载程序来修改数据库,就无需上述费事操作
UI界面上的体现
添加switch按钮实现中文隐藏
- 在数据库添加开关字段并添加getter和setter方法:
 @ColumnInfo(name = "chinese_invisible")
    private boolean chineseInvisible;

    public boolean isChineseInvisible() {
        return chineseInvisible;
    }

    public void setChineseInvisible(boolean chineseInvisible) {
        this.chineseInvisible = chineseInvisible;
    }
- 新创建一个migration填写数据将新创建的字段加入数据表中
static final Migration MIGRATION_4_5 = new Migration(4,5) {
        @Override
        public void migrate(@NonNull SupportSQLiteDatabase database) {
            database.execSQL("ALTER TABLE word ADD COLUMN chinese_invisible INTEGER NOT NULL DEFAULT 0"); //SQLite中没有布尔值,用Int类型表示,缺省值为0表示可见
        }
    };
- 改变版本号并应用migration,运行程序通过DB browser查看数据库是否正确添加字段
@Database(entities = {Word.class}, version = 5, exportSchema = false)  //三个参数分别为数据库中的表、数据库版本号和导出模式
public abstract class WordDatabase extends RoomDatabase {
    //变更为Singleton模式
    private static WordDatabase INSTANCE;

    static synchronized WordDatabase getDatabase(Context context) {  //synchronized避免碰撞冲突
        if (INSTANCE == null) {
            INSTANCE = Room.databaseBuilder(context.getApplicationContext(), WordDatabase.class, "word_database")
                    .addMigrations(MIGRATION_4_5)  //自定义版本迁移
                    .build();
        }
        return INSTANCE;
    }

4. 保留原有布局文件,新建普通列表和卡片列表
cell_normal2.layout:
<?xml version="1.0" encoding="utf-8"?>
<androidx.constraintlayout.widget.ConstraintLayout xmlns:android="http://schemas.android.com/apk/res/android"
    xmlns:app="http://schemas.android.com/apk/res-auto"
    xmlns:tools="http://schemas.android.com/tools"
    android:layout_width="match_parent"
    android:layout_height="70dp">

    <View
        android:id="@+id/divider"
        android:layout_width="1dp"
        android:layout_height="match_parent"
        android:layout_marginTop="8dp"
        android:layout_marginBottom="8dp"
        android:background="?android:attr/listDivider"
        app:layout_constraintBottom_toBottomOf="parent"
        app:layout_constraintEnd_toEndOf="@+id/constraintLayout"
        app:layout_constraintStart_toStartOf="@+id/guideline6"
        app:layout_constraintTop_toTopOf="parent" />

    <androidx.constraintlayout.widget.ConstraintLayout
        android:id="@+id/constraintLayout"
        android:layout_width="0dp"
        android:layout_height="match_parent"
        app:layout_constraintBottom_toBottomOf="parent"
        app:layout_constraintEnd_toStartOf="@+id/guideline6"
        app:layout_constraintStart_toStartOf="parent"
        app:layout_constraintTop_toTopOf="parent">

        <androidx.constraintlayout.widget.Guideline
            android:id="@+id/guideline7"
            android:layout_width="wrap_content"
            android:layout_height="wrap_content"
            android:orientation="vertical"
            app:layout_constraintGuide_percent="0.15" />

        <TextView
            android:id="@+id/textViewNumber"
            android:layout_width="wrap_content"
            android:layout_height="wrap_content"
            app:layout_constraintBottom_toBottomOf="parent"
            app:layout_constraintEnd_toStartOf="@+id/guideline7"
            app:layout_constraintStart_toStartOf="parent"
            app:layout_constraintTop_toTopOf="parent"
            tools:text="1" />

        <TextView
            android:id="@+id/textViewEnglish"
            android:layout_width="wrap_content"
            android:layout_height="wrap_content"
            android:layout_marginTop="8dp"
            android:text="TextView"
            android:textSize="24sp"
            app:layout_constraintBottom_toTopOf="@+id/textViewChinese"
            app:layout_constraintStart_toStartOf="@+id/textViewChinese"
            app:layout_constraintTop_toTopOf="parent" />

        <TextView
            android:id="@+id/textViewChinese"
            android:layout_width="wrap_content"
            android:layout_height="wrap_content"
            android:layout_marginStart="16dp"
            android:layout_marginBottom="8dp"
            android:text="TextView"
            app:layout_constraintBottom_toBottomOf="parent"
            app:layout_constraintEnd_toEndOf="parent"
            app:layout_constraintHorizontal_bias="0.0"
            app:layout_constraintStart_toStartOf="@+id/guideline7"
            app:layout_constraintTop_toBottomOf="@+id/textViewEnglish" />
    </androidx.constraintlayout.widget.ConstraintLayout>

    <androidx.constraintlayout.widget.ConstraintLayout
        android:layout_width="0dp"
        android:layout_height="match_parent"
        app:layout_constraintBottom_toBottomOf="parent"
        app:layout_constraintEnd_toEndOf="parent"
        app:layout_constraintStart_toStartOf="@+id/guideline6"
        app:layout_constraintTop_toTopOf="parent">

        <Switch
            android:id="@+id/switchChineseInvisible"
            android:layout_width="wrap_content"
            android:layout_height="0dp"
            android:paddingStart="40dp"
            android:paddingEnd="20dp"
            app:layout_constraintBottom_toBottomOf="parent"
            app:layout_constraintEnd_toEndOf="parent"
            app:layout_constraintStart_toStartOf="parent"
            app:layout_constraintTop_toTopOf="parent" />
    </androidx.constraintlayout.widget.ConstraintLayout>

    <androidx.constraintlayout.widget.Guideline
        android:id="@+id/guideline6"
        android:layout_width="wrap_content"
        android:layout_height="wrap_content"
        android:orientation="vertical"
        app:layout_constraintGuide_percent="0.8" />

</androidx.constraintlayout.widget.ConstraintLayout>
cell_card2.layout:
<?xml version="1.0" encoding="utf-8"?>
<LinearLayout xmlns:android="http://schemas.android.com/apk/res/android"
    xmlns:app="http://schemas.android.com/apk/res-auto"
    xmlns:tools="http://schemas.android.com/tools"
    android:layout_width="match_parent"
    android:layout_height="80dp"
    android:orientation="vertical">

    <androidx.cardview.widget.CardView
        android:layout_width="match_parent"
        android:layout_height="match_parent"
        android:layout_marginStart="8dp"
        android:layout_marginTop="8dp"
        android:layout_marginEnd="8dp"
        android:layout_marginBottom="4dp">

        <androidx.constraintlayout.widget.ConstraintLayout
            android:layout_width="match_parent"
            android:layout_height="match_parent">

            <View
                android:id="@+id/divider2"
                android:layout_width="2dp"
                android:layout_height="match_parent"
                android:layout_marginTop="8dp"
                android:layout_marginBottom="8dp"
                android:background="?android:attr/listDivider"
                app:layout_constraintBottom_toBottomOf="parent"
                app:layout_constraintEnd_toStartOf="@+id/guideline8"
                app:layout_constraintStart_toStartOf="@+id/guideline8"
                app:layout_constraintTop_toTopOf="parent" />

            <androidx.constraintlayout.widget.ConstraintLayout
                android:id="@+id/constraintLayout3"
                android:layout_width="0dp"
                android:layout_height="match_parent"
                android:background="?attr/selectableItemBackground"
                app:layout_constraintBottom_toBottomOf="parent"
                app:layout_constraintEnd_toStartOf="@+id/guideline8"
                app:layout_constraintStart_toStartOf="parent"
                app:layout_constraintTop_toTopOf="parent">

                <androidx.constraintlayout.widget.Guideline
                    android:id="@+id/guideline9"
                    android:layout_width="wrap_content"
                    android:layout_height="wrap_content"
                    android:orientation="vertical"
                    app:layout_constraintGuide_percent="0.15" />

                <TextView
                    android:id="@+id/textViewNumber"
                    android:layout_width="wrap_content"
                    android:layout_height="wrap_content"
                    app:layout_constraintBottom_toBottomOf="parent"
                    app:layout_constraintEnd_toStartOf="@+id/guideline9"
                    app:layout_constraintStart_toStartOf="parent"
                    app:layout_constraintTop_toTopOf="parent"
                    tools:text="1" />

                <TextView
                    android:id="@+id/textViewEnglish"
                    android:layout_width="wrap_content"
                    android:layout_height="wrap_content"
                    android:layout_marginStart="16dp"
                    android:layout_marginTop="8dp"
                    android:text="TextView"
                    android:textSize="24sp"
                    app:layout_constraintBottom_toTopOf="@+id/textViewChinese"
                    app:layout_constraintEnd_toEndOf="parent"
                    app:layout_constraintHorizontal_bias="0.0"
                    app:layout_constraintStart_toStartOf="@+id/guideline9"
                    app:layout_constraintTop_toTopOf="parent" />

                <TextView
                    android:id="@+id/textViewChinese"
                    android:layout_width="wrap_content"
                    android:layout_height="wrap_content"
                    android:layout_marginBottom="8dp"
                    android:text="TextView"
                    app:layout_constraintBottom_toBottomOf="parent"
                    app:layout_constraintStart_toStartOf="@+id/textViewEnglish"
                    app:layout_constraintTop_toBottomOf="@+id/textViewEnglish" />
            </androidx.constraintlayout.widget.ConstraintLayout>

            <androidx.constraintlayout.widget.ConstraintLayout
                android:id="@+id/constraintLayout2"
                android:layout_width="0dp"
                android:layout_height="match_parent"
                app:layout_constraintBottom_toBottomOf="parent"
                app:layout_constraintEnd_toEndOf="parent"
                app:layout_constraintStart_toStartOf="@+id/guideline8"
                app:layout_constraintTop_toTopOf="parent">

                <Switch
                    android:id="@+id/switchChineseInvisible"
                    android:layout_width="wrap_content"
                    android:layout_height="0dp"
                    android:paddingStart="40dp"
                    android:paddingEnd="20dp"
                    app:layout_constraintBottom_toBottomOf="parent"
                    app:layout_constraintEnd_toEndOf="parent"
                    app:layout_constraintStart_toStartOf="parent"
                    app:layout_constraintTop_toTopOf="parent" />
            </androidx.constraintlayout.widget.ConstraintLayout>

            <androidx.constraintlayout.widget.Guideline
                android:id="@+id/guideline8"
                android:layout_width="wrap_content"
                android:layout_height="wrap_content"
                android:orientation="vertical"
                app:layout_constraintGuide_begin="185dp"
                app:layout_constraintGuide_percent="0.8" />
        </androidx.constraintlayout.widget.ConstraintLayout>
    </androidx.cardview.widget.CardView>
</LinearLayout>
- 逻辑代码在MyAdapter(管理RecyclerView)中添加:
MyViewHolder类中
 static class MyViewHolder extends RecyclerView.ViewHolder {
     ...
        Switch aSwitchChineseInvisible;
        MyViewHolder(@NonNull View itemView) {  //自带View类型的itemView
            super(itemView);
           ...
            aSwitchChineseInvisible  = itemView.findViewById(R.id.switchChineseInvisible);
        }
    }
onCreateViewHolder做更改视图操作
@NonNull
    @Override
    public MyViewHolder onCreateViewHolder(@NonNull ViewGroup parent, int viewType) {
        /*
        * 当创建ViewHolder时
        * 从Layout文件中
        * 加载View
        * */
        LayoutInflater layoutInflater = LayoutInflater.from(parent.getContext());
        View itemView;
        if (useCardView) {  //实现加载不同视图
            itemView = layoutInflater.inflate(R.layout.cell_card_2,parent,false);  //卡片模式界面
        } else {
            itemView = layoutInflater.inflate(R.layout.cell_normal_2,parent,false);  //普通模式界面
        }
        return new MyViewHolder(itemView);
onBindViewHolder中
 @Override
    public void onBindViewHolder(@NonNull final MyViewHolder holder, int position) {
       ...
        if (word.isChineseInvisible()) {
            holder.textViewChinese.setVisibility(View.GONE); //中文不可视
            holder.aSwitchChineseInvisible.setChecked(true);//设置开关为开
        } else {
            holder.textViewChinese.setVisibility(View.VISIBLE);
            holder.aSwitchChineseInvisible.setChecked(false);
        }
      ...
    }
设置动作监听器:
先添加变量(由于数据库在MyAdapter中未曾使用,需要在构造方法中加入第二个参数WordViewModel)
private WordViewModel wordViewModel;

    MyAdapter(boolean useCardView,WordViewModel wordViewModel) {
        this.useCardView = useCardView;
        this.wordViewModel = wordViewModel;
    }
由于加入了第二个参数,在MainAcitvity中adapter中添加第二个参数
 @Override
    protected void onCreate(Bundle savedInstanceState) {
	...
        wordViewModel = new ViewModelProvider(this).get(WordViewModel.class);  //先获得ViewModel,再传递值

        myAdapter1 = new MyAdapter(false,wordViewModel);
        myAdapter2 = new MyAdapter(true,wordViewModel);
	...
    }
设置开关动作监听器:
@Override
    public void onBindViewHolder(@NonNull final MyViewHolder holder, int position) {
        ...
        holder.aSwitchChineseInvisible.setOnCheckedChangeListener(new CompoundButton.OnCheckedChangeListener() {
            @Override
            public void onCheckedChanged(CompoundButton buttonView, boolean isChecked) {
                if (isChecked) {
                    holder.textViewChinese.setVisibility(View.GONE);
                    word.setChineseInvisible(true);
                    wordViewModel.updateWords(word);
                } else {
                    holder.textViewChinese.setVisibility(View.VISIBLE);
                    word.setChineseInvisible(false);
                    wordViewModel.updateWords(word);
                }
            }
        });
    }
处理因界面滚动导致回收开关设置的bug:
holder.aSwitchChineseInvisible.setOnCheckedChangeListener(null);
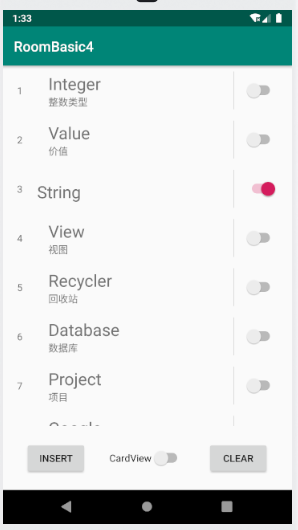
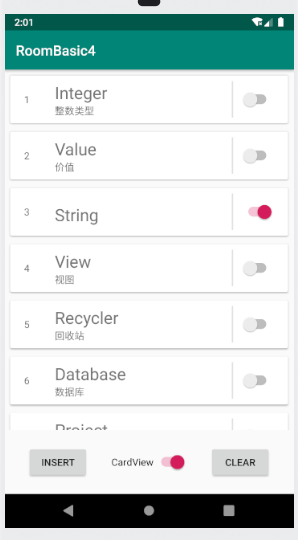
运行界面:
处理switch边界处的点击连带开关
在开关的属性设置中搜索一个属性(padding),设置参数即可填满


 461
461


 被折叠的 条评论
为什么被折叠?
被折叠的 条评论
为什么被折叠?
 到【灌水乐园】发言


