


-
我们都知道,在使用注解方式时,我们需要在启动类中加上@ComponentScan注解,在注解中,我们可以设置扫描或者不扫描某些类,比如:
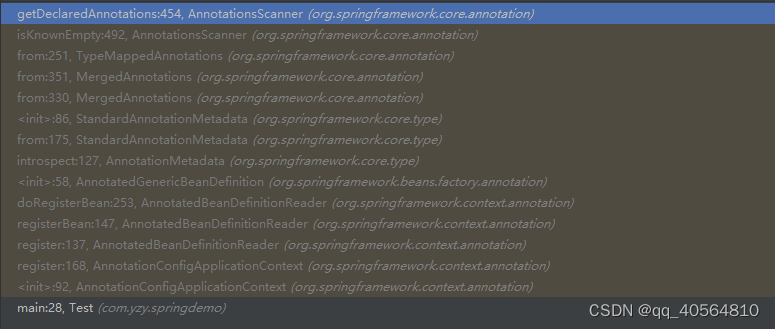
@ComponentScan(value = "com.yzy.other",
excludeFilters = {@ComponentScan.Filter(type = FilterType.ASSIGNABLE_TYPE,classes = {OtherEntity.class})},
includeFilters =@ComponentScan.Filter(type = FilterType.ASSIGNABLE_TYPE,classes = {Other1Entity.class}))
然后在spring启动过程中。首先会先通过方法AnnotationsScanner.getDeclaredAnnotations()方法扫描启动类的注解,代码如下:

调用链如下:
到这里,我们就能拿到哪些包下的类需要被扫描,哪些类不用被扫描 -
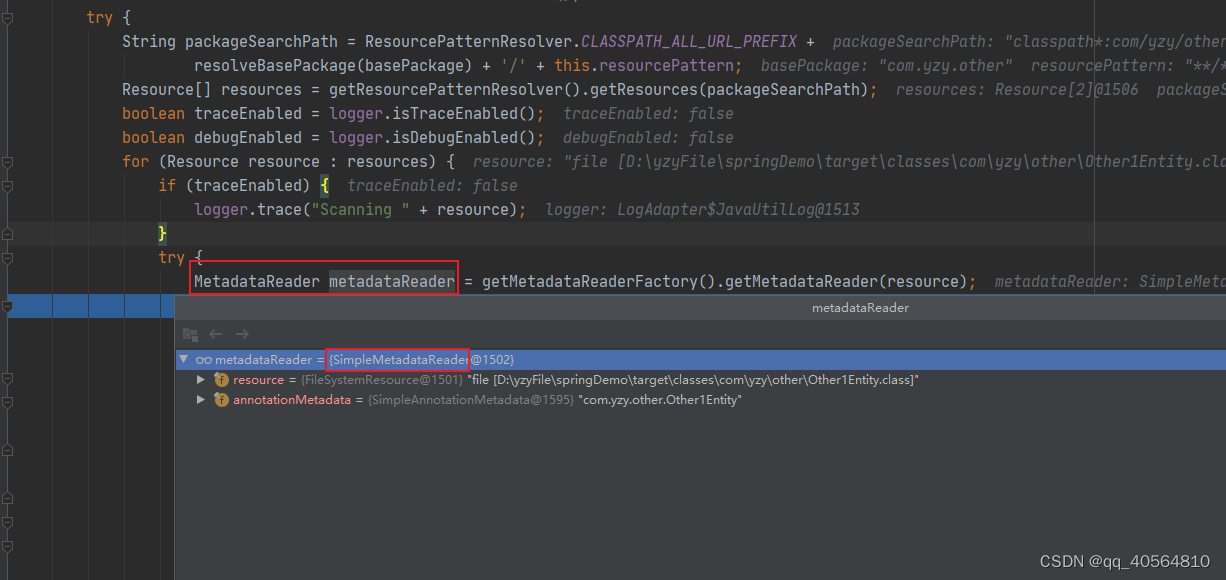
通过ResourcePatternResolver的getResources()方法获取到Resources[] 对象:

也就是在扫描路径下,只扫描到这两个Resource。也就是说这两个类最终有可能会成为bean对象。但是还要做下一步验证,如果@ComponentScan上配置了excludeFilters和includeFilters,则需要再进行排除或添加bean。注意excludeFilters和includeFilters指定的class必须要在扫描路径下。 -
遍历Resources[] 对象,通过MetadataReaderFactory的getMetadataReader方法获取MetadataReader对象。
-
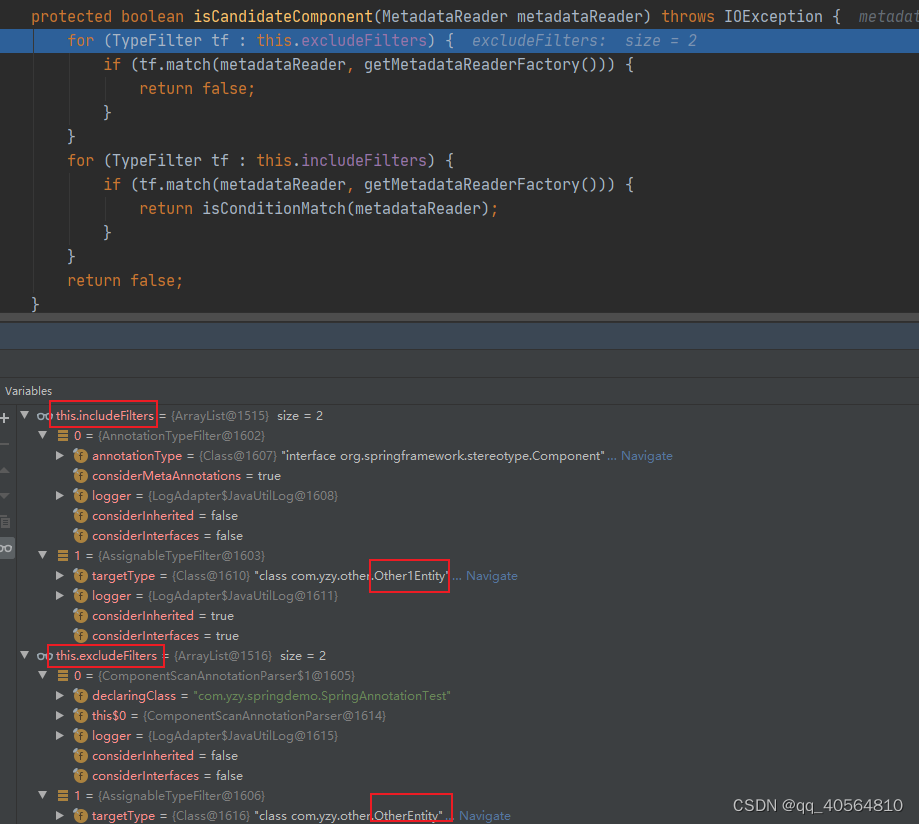
通过isCandidateComponent()方法判断MetadataReader是否满足成为Bean的条件,其实也就是检查其是否满足excludeFilters和includeFilters。
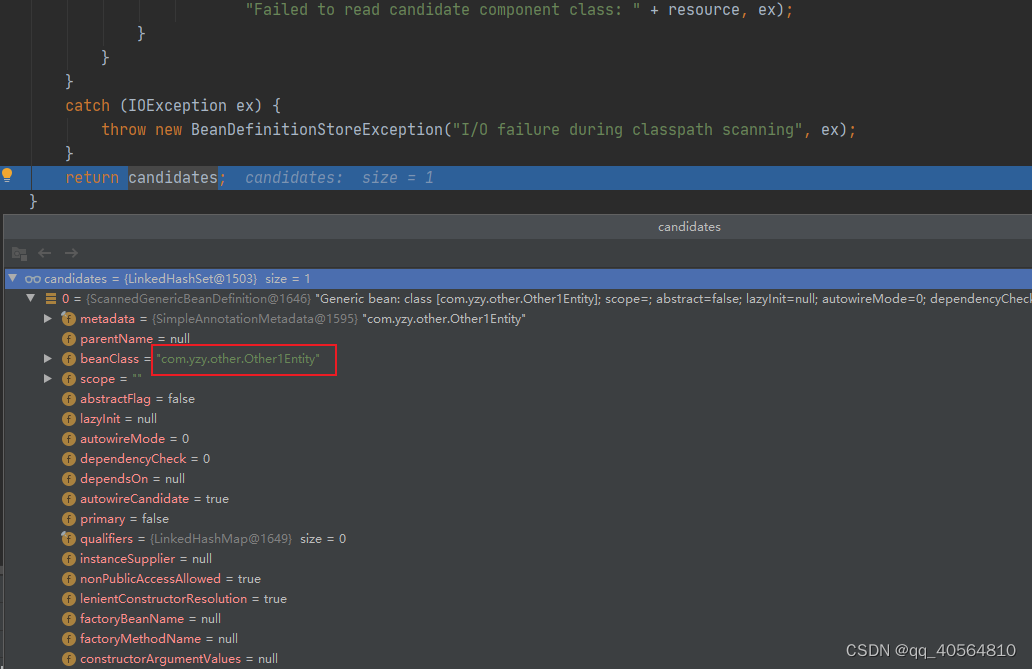
最后返回:
虽然OtherEntity在扫描路径下,并且类上加上了@Component注解,但是因为配置了excludeFilters = {@ComponentScan.Filter(type = FilterType.ASSIGNABLE_TYPE,classes = {OtherEntity.class})},因此最终不会成为bean对象。 -
筛选通过后,基于metadataReader生成ScannedGenericBeanDefinition

-
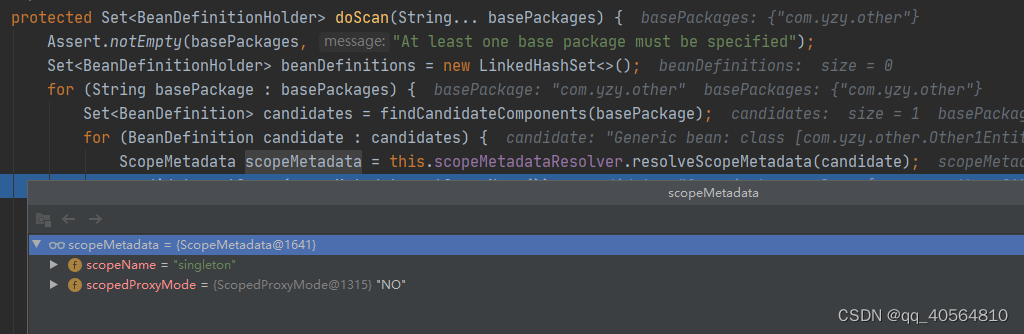
解析ScannedGenericBeanDefinition的作用范围,也就是看是单例的还是原型的(明显这里是单例的,因为没配置@Scope,所以默认是单例的)

-
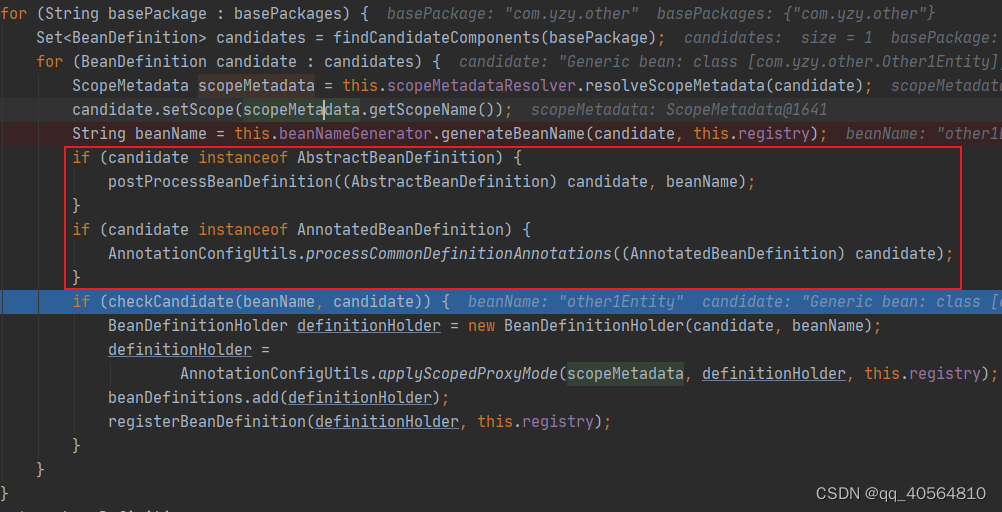
获取beanName

-
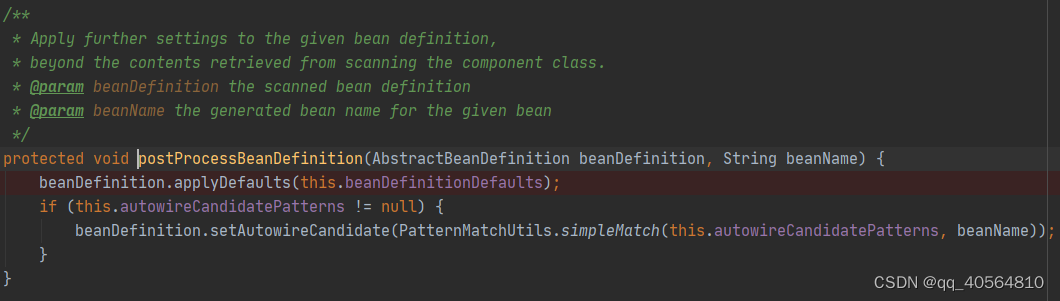
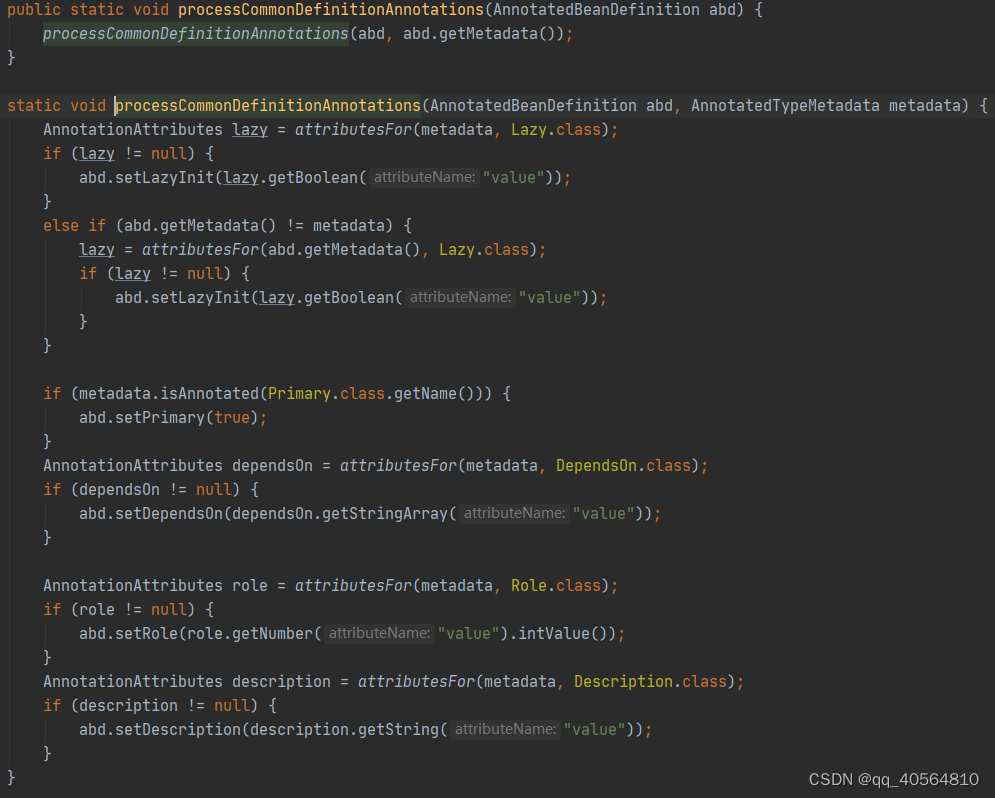
初始化BeanDefinition,也就是检查是否是懒加载,是否加了@Primary,@DependsOn等注解
-
检查BeanDefinitionRegistry是否已经包含了这个BeanDefinition,如果已经包含了,则不再进行处理,不包含的话,需要进行处理
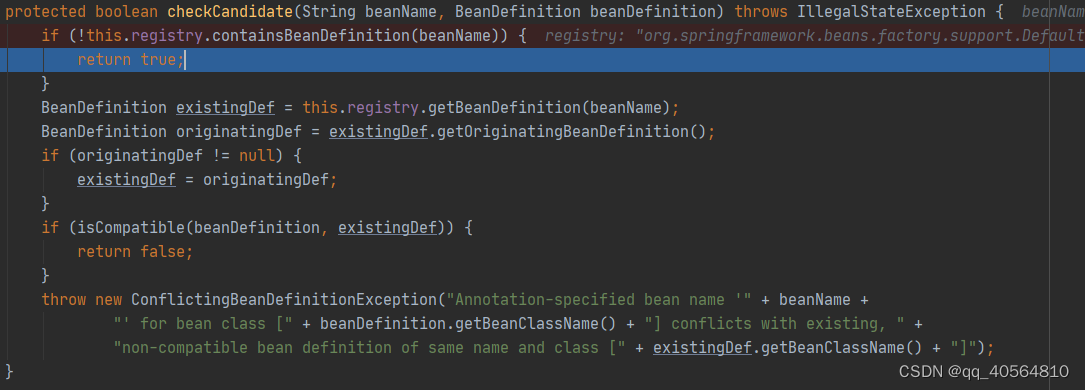
返回true -
新建BeanDefinitionHolder,并且添加到Set<BeanDefinitionHolder>中,最后通过registerBeanDefinition()方法把BeanDefinitionHolder注册成为BeanDefinition。

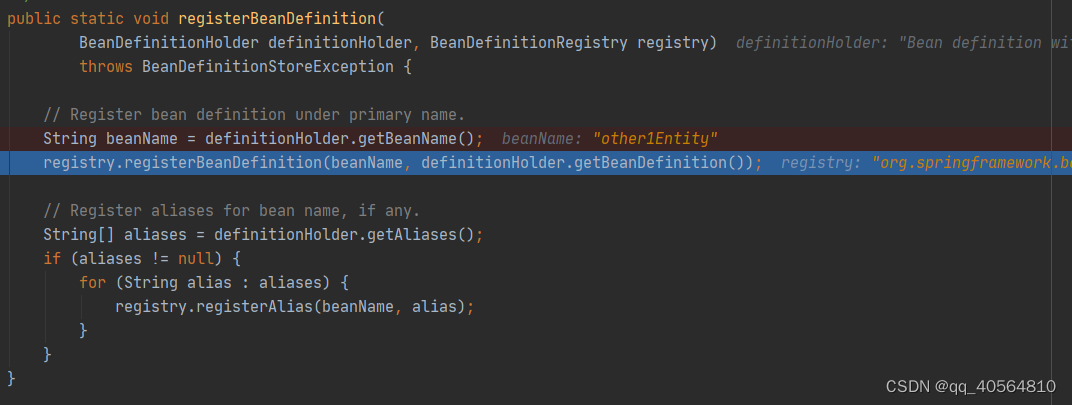

到这里,other1Entity正式成为了BeanDefinition
spring生成BeanDefinition过程
最新推荐文章于 2024-07-11 14:56:13 发布


 1743
1743


 被折叠的 条评论
为什么被折叠?
被折叠的 条评论
为什么被折叠?
 到【灌水乐园】发言


