


Webpack的使用(三)
一、html-webpack-plugin插件的使用
1、在cmd中输入npm i html-webpack-plugin --save-dev下载开发依赖。该插件的作用是,可以根据某一个模板页(html)去生成一个新的html到相应的文件夹中去。
2、新建一个src文件夹,将index.html、entry.js放入其中,并在webpack.config.js进行如下配置:
<!--src/index.html-->
<!DOCTYPE html>
<html>
	<head>
		<meta charset="utf-8">
		<title>webpack</title>
	</head>
	<body>
	</body>
</html>
//entry.js
document.write("Hello world!");
//在webpack.config.js中进行如下配置:
var path = require('path');
const HtmlWebpackPlugin = require('html-webpack-plugin');//引入html-webpack-plugin
module.exports = {
	//入口
	entry: {
		//可以有多个入口,也可以有一个,如果有一个就默认从这个入口开始解析
		"entry": "./src/entry.js"//根据src下的entry.js生成bundle.js
	},
	output: {
		path: path.resolve('./dist'), //将bundle.js放到dist目录中
		filename: './bundle.js',
	},
	plugins:[
		//HtmlWebpackPlugin插件的配置
		new HtmlWebpackPlugin({
            //根据index.html生成一个新的index.html到dist中
			template:'./src/index.html',
		})
	],
}
3、在cmd中输入webpack命令即可,直接输入webpack会直接去读取webpack.config.js中的配置信息。
4、如果已经安装了html-webpack-loader插件,但是运行时还报了Error: Cannot find module 'webpack/lib/node/NodeTemplatePlugin这个错误,那么可以看看是否在package.json中没有webpack开发依赖,如果没有,**安装(npm i webpack)**后,重新编译即可。
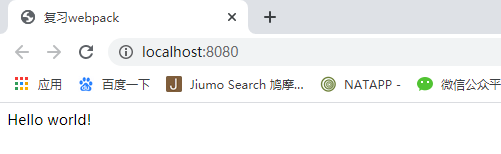
5、如下图,可看到dist中生成了一个index.html和运行结果如下所示:

二、webpack-dev-server的使用
1、在cmd中输入npm install webpack-dev-server --save-dev下载开发依赖。常用的配置参数有:
(1)–open 自动打开浏览器。
(2)–hot 热更新 ,只要一保存修改了的代码,就会自动更新页面。
(3)–inline 自动刷新。
2、在package.json文件的"script"对象中输入**“dev”: “webpack-dev-server --open --hot --inline --config webpack.config.js”**,再在cmd中输入npm run dev编译项目,即可看到项目自动运行在浏览器中,如下图:
3、在entry.js文件中再新增一行document.write(“Hello world666!”),可看到页面中输出这段代码:
[外链图片转存失败,源站可能有防盗链机制,建议将图片保存下来直接上传(img-JGgtBcYe-1581950037311)(G:\MyProject\Vue.js\Vue练习\Vue实践文档\assets\webpack-dev-server2.jpg)]
三、单文件引入
1、在cmd中输入npm install vue-loader vue-template-compiler -D下载webpack打包单文件需要的依赖。
2、在src中创建一个App.vue、entry.js、index.html文件,webpack.configjs的文件内容如下:
//entry.js
import Vue from 'vue' //如果使用npm命令下载vue环境,那么就可以这样去引用,此时vue在node_modules目录中,否则就使用  某个目录/vue.js去引用vue

import App from './App.vue'//引入App组件
new Vue({
	el:'#app',
	components:{
		App
	},
	template:'<App/>'
});
<!--index.html-->
<!DOCTYPE html>
<html>
	<head>
		<meta charset="utf-8">
		<title>单文件</title>
	</head>
	<body>
		<div id="app"></div>
	</body>
</html>
<!-- App.vue -->
<template>
	<!--当前组件的结构,可以将其他组件插入到这个位置-->
	<div>{{msg}}</div>
</template>

<script>
	//抛出当前对象、实现组件的业务逻辑
	export default{
		data(){
			return{
				msg:"I'm App.vue"
			}
		}
	}
</script>

<style>
	/* 设置当前组件的样式 */
	body{
		background: skyblue;
	}
</style>
var path = require('path');
const HtmlWebpackPlugin = require('html-webpack-plugin');//引用html-webpack-plugin对象
const VueLoaderPlugin = require('vue-loader/lib/plugin');//引用VueLoaderPlugin对象  这个对象是在下面进行渲染时用到的,否则可能会报错
module.exports = {
	//入口
	entry:{
		"entry":"./src/entry.js"  //../表示的是父级目录
	},
	//出口
	output:{
		path:path.resolve('./dist'),//将bundle.js放到dist目录中
		filename:"./bundle.js",

	},
	module:{
		rules:[
			{
			    test: /\.css$/,  // 正则表达式,指明要处理的文件类型
			    use: ['style-loader', 'css-loader']  // 处理资源所使用的loader, 要注意loader的顺序,从右向左执行
			},
			{
				test:/\.vue$/,
				loader:'vue-loader'//依赖于 vue-template-compiler
			}
		]
	},
	plugins:[
		//根据某个模板生成页面
		new HtmlWebpackPlugin({
			template:'./src/index.html',//根据src下面的html生成一个html到dist目录中
		}),
		new VueLoaderPlugin(),//这段代码可以解决以下错误:You may need an additional loader to handle the result of these loaders.
	]
};
3、如果已经下载了loader并且在webpack.config.js中进行配置后还出现了You may need an additional loader to handle the result of these loaders.错误,则配置第二步中的new VueLoaderPlugin()在plugins中。
4、如果编译后报了如下错误:vue.runtime.esm.js:620 [Vue warn]: You are using the runtime-only build of Vue where the template compiler is not available. Either pre-compile the templates into render functions, or use the compiler-included build,则需要将entry.js中的代码更改为:
import Vue from 'vue' //如果使用npm命令下载vue环境,那么就可以这样去引用,此时vue在node_modules目录中

import App from './App.vue'//引入App组件
new Vue({
	el:'#app',
	//vue2.0新增  使用虚拟dom
	render:c=>c(App)
});
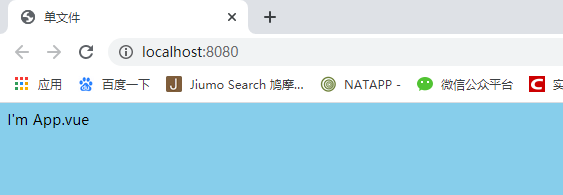
5、在cmd中输入npm run dev编译项目,即可看到项目自动运行在浏览器中,如下图:
四、CommonsChunkPlugin的使用
1、在src目录下创建entry1.js、entry2.js、common.js,并在webpack.config.js中填写如下内容:
// entry1.js
import {comm} from './common.js'
import Vue from 'vue'
console.log(Vue,'entry1 ${comm}');
// entry2.js
import {comm} from './common.js'
import Vue from 'vue'
console.log(Vue,'entry2 ${comm}');
//common.js
import Vue from 'vue'
//webpack.config.js
var path = require('path');
module.exports = {
	//入口
	entry:{
		"entry1":"./src/entry1.js",
		"entry2":"./src/entry2.js",
	},
	//出口
	output:{
		path:path.resolve('./dist'),//将bundle.js放到dist目录中
		filename:"./bundle.js",

	}
};
2、在cmd中输入npm run dev编译项目,出现了**ERROR in chunk entry2 [entry] Conflict: Multiple chunks emit assets to the same filename ./bundle.js (chunks 0 and 1)**错误,原因是当前项目有两个入口文件,但是只有一个出口文件。
3、将webpack.config.js的output对象中的filename更改为**"[name].js"**,这里改为[name].js则会自动根据entry的入口文件个数输出相应的出口文件,重新npm run dev编译项目后,可看到项目编译成功。此时在dist文件夹中成功地新增了entry1.js和entry2.js文件。

4、此时entry1.js和entry2.js中都引用了公用的文件:common.js和vue.js,接下来我们使用chunk来分离公用部分。webpack.config.js文件的内容更改如下:
//webpack.config.js
var path = require('path');
const webpack = require('webpack');
const packagejson = require('./package.json');
module.exports = {
	//入口
	entry: {
		"entry1": "./src/entry1.js",
		"entry2": "./src/entry2.js",
		// "comm": Object.keys(packagejson.dependencies) //获取生产环境依赖的库   4.0+后不要写这段代码,否则会报错
	},
	//出口
	output: {
		path: path.resolve('./dist'), //将bundle.js放到dist目录中
		// filename:"./bundle.js",
		filename: '[name].js', //这里改为[name].js则会自动根据entry的入口文件个数输出相应的出口文件
	},
optimization: {
        splitChunks: {
            cacheGroups: {
                commons: {
                    name: "comm",//公用文件名
                    chunks: "initial",
                    minChunks: 2
                }
            }
        }
    },

	// plugins: [
	// 	// new webpack.optimize.CommonsChunkPlugin
	// 	// new webpack.optimize.SplitChunksPlugin({
	// 	// 	name:['comm'],//公用文件的名
	// 	// 	filename:'[name].js'
	// 	// })
	//
	// ]
};
5、webpack 4.+版本后,如果使用new webpack.optimize.CommonsChunkPlugin去配置公用文件的话,会出现 webpack.optimize.CommonsChunkPlugin has been removed, please use config.optimization.splitChunks instead.这个错误,原因是在4.+版本后,已经舍弃了webpack.optimize.CommonsChunkPlugin这个方法,这时,应使用如下代码去替换(第四步的代码是已处理了该错误的代码):
//这段代码与output模块同级
optimization: {
        splitChunks: {
            cacheGroups: {
                commons: {
                    name: "commons",
                    chunks: "initial",
                    minChunks: 2
                }
            }
        }
    }
6、配置完成后,在cmd中运行npm run dev(或webpack)命令,可看到dist文件夹中新增了commons.js文件,且entry1.js和entry2.js比原来小了许多,原因是公共部分(common.js和vue.js)被抽离出来,如下:

7、接下来,我们先单独抽离出webpack运行文件,然后再抽离第三方库,在webpack.config.js中进行如下配置(配置参考网址: https://survivejs.com/webpack/optimizing/separating-manifest/ ):
var path = require('path');
const webpack = require('webpack');
const packagejson = require('./package.json');
module.exports = {
	//入口
	entry: {
		"entry1": "./src/entry1.js",
		"entry2": "./src/entry2.js",
	},
	//出口
	output: {
		path: path.resolve('./dist'), //将bundle.js放到dist目录中
		// filename:"./bundle.js",
		filename: '[name].js', //这里改为[name].js则会自动根据entry的入口文件个数输出相应的出口文件
	},
	//optimization与entry/plugins同级
optimization: {
        splitChunks: {
            cacheGroups: {
                commons: {
                    name: "commons",
                    chunks: "initial",
                    minChunks: 2
                }
            }
        },
		runtimeChunk: {//配置抽离运行时的文件
        name: "runtime",
      },
    },
};
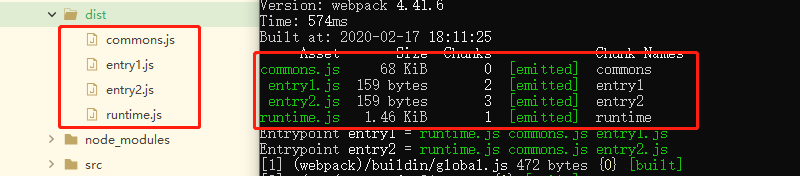
8、配置完成后,重新编译项目,可看到entry1.js和entry2.js文件比第6步中生成的小了,说明已经将运行时的抽离出来,如下图:


 1万+
1万+


 被折叠的 条评论
为什么被折叠?
被折叠的 条评论
为什么被折叠?
 到【灌水乐园】发言


