


项目基于uniapp做的app端,需要实现在线签名功能,找了很多文档学习参考,特此记录。
template中,
<view class="onevalue">
                   // 展示签好的图片
					<view class="clickimg" v-for="(item, index) in samplerSignList">
						<image :src="item" class="qmimg" @click="previewImage(item)"></image>
						<image src="../../static/images/delimg.png" class="delimg" @click="delQmimg(1, index)"></image>
					</view>
                    //点击签名部分
					<view class="clickQm" @click="createCanvas(1)">
						<image src="../../static/images/qm.png"></image>
						<text class="clickQm_text">点击签名</text>
					</view>
				</view>


           <!-- 签名弹窗 -->
			<uni-popup ref="qmPopup" background-color="#fff" type="bottom">
			   <view class="popupheight">
			     <view class="qmpopup_title">
			       签字
				   <image src="/static/images/false.png" class="qmpopup_false" @click="closeQmPopup"></image>
			     </view>
			     <view class="qmpopup_cont">
					 <canvas class="mycanvas" canvas-id="mycanvas" @touchstart="touchstart" @touchmove="touchmove" @touchend="touchend"></canvas>
				 </view>
				 <!-- 底部操作按钮 -->
				 <view class="qmpopup_footer">
					 <view class="left" @click="clear">重置</view>
					 <view class="right" @click="finish">确定</view>
				 </view>
			   </view>
			</uni-popup>
script中,需要引入base64位图像路径转换方法
<script>
const api = require('@/utils/api.js');
const util = require("@/utils/util.js");
// 需要引入图片路径base64转换方法,方法可以直接网上搜
import { pathToBase64, base64ToPath } from '@/js_sdk/mmmm-image-tools/index.js'
export default {
data() {
return {
//绘图图像
ctx: '',
//路径点集合
points: [],
hasSign: false,
signType: 1,
samplerSignList: [],
showOrNot: true, // 判断查看图片等事件触发onshow
}
},
methods: {
// 签名
createCanvas(type) {
this.signType = type;
this.$refs.qmPopup.open();
//创建绘图对象
this.ctx = uni.createCanvasContext('mycanvas', this);
//设置画笔样式
this.ctx.lineWidth = 4;
this.ctx.lineCap = 'round';
this.ctx.lineJoin = 'round';
/* 将canvas背景设置为 白底,不设置 导出的canvas的背景为透明 */
this.$nextTick(() => {
uni
.createSelectorQuery()
.select('.qmpopup_cont')
.boundingClientRect((rect) => {
this.ctx.rect(0, 0, rect.width, rect.height - 4);
this.ctx.setFillStyle('#fff');
this.ctx.fill(); //设置填充
this.ctx.draw(); //开画
})
.exec()
})
},
touchstart(e) {
let startX = e.changedTouches[0].x;
let startY = e.changedTouches[0].y;
let startPoint = { X: startX, Y: startY };
this.points.push(startPoint);
//每次触摸开始,开启新的路径
this.ctx.beginPath();
},
touchmove(e) {
let moveX = e.changedTouches[0].x;
let moveY = e.changedTouches[0].y;
let movePoint = { X: moveX, Y: moveY };
this.points.push(movePoint); //存点
let len = this.points.length;
if (len >= 2) {
this.draw(); //绘制路径
}
},
touchend() {
this.points = [];
},
draw() {
let point1 = this.points[0];
let point2 = this.points[1];
this.points.shift();
this.ctx.moveTo(point1.X, point1.Y);
this.ctx.lineTo(point2.X, point2.Y);
this.ctx.stroke();
this.ctx.setFillStyle('#ffffff');
this.ctx.draw(true);
this.hasSign = true;
},
clear() {
this.hasSign = false;
let that = this;
uni.getSystemInfo({
success: function(res) {
let canvasw = res.windowWidth;
let canvash = res.windowHeight;
that.ctx.clearRect(0, 0, canvasw, canvash);
/* 清除后重新设置m将canvas背景设置为 白底,不设置 导出的canvas的背景为透明 */
that.$nextTick(() => {
uni
.createSelectorQuery()
.select('.qmpopup_cont')
.boundingClientRect((rect) => {
that.ctx.rect(0, 0, rect.width, rect.height - 4);
that.ctx.setFillStyle('#fff');
that.ctx.fill(); //设置填充
that.ctx.draw(); //开画
})
.exec()
})
}
});
},
finish() {
if (!this.hasSign) {
uni.showToast({
title: '签名为空不能保存',
icon: 'none',
duration: 2000
})
return
}
let that = this;
uni.canvasToTempFilePath({
canvasId: 'mycanvas',
success: function(res) {
if(!res || !res.tempFilePath) {
//这里的res.tempFilePath就是生成的签字图片
if(that.signType == 1) {
that.samplerSignList.push(res.tempFilePath);
} else {
that.companySignList.push(res.tempFilePath);
}
that.closeQmPopup();
}else{
//用来解决安卓真机获取到的是canvas图片的临时路径,转成base64格式
pathToBase64(res.tempFilePath).then(re => {
if(that.signType == 1) {
that.samplerSignList.push(re);
} else {
that.companySignList.push(re);
}
that.closeQmPopup();
})
}
}
});
},
closeQmPopup() {
this.clear();
this.$refs.qmPopup.close();
},
previewImage(url) {
uni.previewImage({
urls: [url],
current: 0
});
},
delQmimg(type, num) {
if(type == 1) {
this.samplerSignList.splice(num, 1);
} else {
this.companySignList.splice(num, 1);
}
},
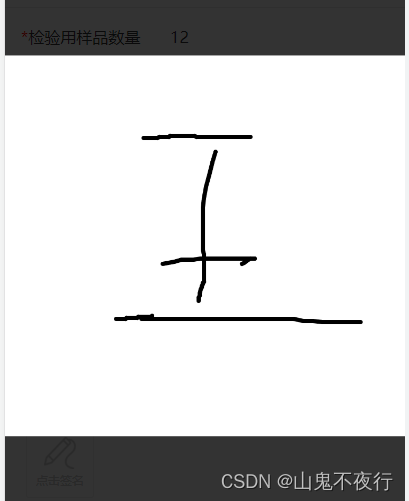
}效果:签名的时候和查看的时候,注意要设置画布背景为白色,不然签名是黑色的看不见


 1269
1269


 被折叠的 条评论
为什么被折叠?
被折叠的 条评论
为什么被折叠?
 到【灌水乐园】发言


