


介绍
CAS(Central Authentication Service)中心授权/认证服务,是由耶鲁大学发起的一个开源项目,距今已有20年之久,功能相当丰富,目的在于为Web应用系统提供一种可靠且稳定的单点登录解决方案。
CAS分为两个模块:一个是CAS Server,认证服务器,主要用于票据颁发以及进行票据校验;CAS Client为客户端,当有服务组件需接入CAS时,引入客户端并做一些简单的配置就可以接入了CAS。
前言
本文主要阐述CAS Server服务端Maven构建以及自定义扩展使用。对于CAS Server的执行流程以及原理本文就不详细概述了。
在实际开发情况中,我们需要对CAS Server做一些自定义扩展,便于解决一些实际问题;官方提供了多种使用以及扩展方式,例如:使用cas-overlay-template或者cas-initializr进行第三方扩展;但是都是使用Gradle进行集成以及使用Tomcat容器单独部署,在一些特定的开发场景下会比较麻烦。
项目构建
构建各个版本如下:
-
CAS Server:6.5.9
-
JDK:11
-
Spring Boot:2.6.15
由于CAS官方6.5.9版本默认使用的是SpringBoot 2.6.x和JDK11版本,大多数模块包根据这个版本进行的开发,如果降低版本的话,可能会存在一些不兼容问题。
Maven依赖
如下:
<properties>
<maven.compiler.source>11</maven.compiler.source>
<maven.compiler.target>11</maven.compiler.target>
<jdk.version>11</jdk.version>
<cas.version>6.5.9</cas.version>
<spring-boot.version>2.6.15</spring-boot.version>
</properties>
<dependencyManagement>
<dependencies>
<dependency>
<groupId>org.springframework.boot</groupId>
<artifactId>spring-boot-dependencies</artifactId>
<version>${spring-boot.version}</version>
<scope>import</scope>
<type>pom</type>
</dependency>
</dependencies>
</dependencyManagement>
<dependencies>
<!-- CAS server dependencis start -->
<dependency>
<groupId>org.apereo.cas</groupId>
<artifactId>cas-server-webapp-init</artifactId>
<version>${cas.version}</version>
</dependency>
<dependency>
<groupId>org.apereo.cas</groupId>
<artifactId>cas-server-webapp-config</artifactId>
<version>${cas.version}</version>
</dependency>
<dependency>
<groupId>org.apereo.cas</groupId>
<artifactId>cas-server-webapp-init-tomcat</artifactId>
<version>${cas.version}</version>
</dependency>
<dependency>
<groupId>org.apereo.cas</groupId>
<artifactId>cas-server-core</artifactId>
<version>${cas.version}</version>
</dependency>
<dependency>
<groupId>org.apereo.cas</groupId>
<artifactId>cas-server-core-cookie</artifactId>
<version>${cas.version}</version>
</dependency>
<dependency>
<groupId>org.apereo.cas</groupId>
<artifactId>cas-server-core-services</artifactId>
<version>${cas.version}</version>
</dependency>
<dependency>
<groupId>org.apereo.cas</groupId>
<artifactId>cas-server-core-web</artifactId>
<version>${cas.version}</version>
</dependency>
<dependency>
<groupId>org.apereo.cas</groupId>
<artifactId>cas-server-core-util</artifactId>
<version>${cas.version}</version>
</dependency>
<dependency>
<groupId>org.apereo.cas</groupId>
<artifactId>cas-server-core-tickets</artifactId>
<version>${cas.version}</version>
</dependency>
<dependency>
<groupId>org.apereo.cas</groupId>
<artifactId>cas-server-core-audit</artifactId>
<version>${cas.version}</version>
</dependency>
<dependency>
<groupId>org.apereo.cas</groupId>
<artifactId>cas-server-core-logout</artifactId>
<version>${cas.version}</version>
</dependency>
<!-- 前端包样式 -->
<dependency>
<groupId>org.apereo.cas</groupId>
<artifactId>cas-server-support-thymeleaf</artifactId>
<version>${cas.version}</version>
<exclusions>
<exclusion>
<artifactId>material-components-web</artifactId>
<groupId>org.webjars.npm</groupId>
</exclusion>
<exclusion>
<artifactId>css-vars-ponyfill</artifactId>
<groupId>org.webjars.npm</groupId>
</exclusion>
</exclusions>
</dependency>
<dependency>
<groupId>org.apereo.cas</groupId>
<artifactId>cas-server-support-pm</artifactId>
<version>${cas.version}</version>
</dependency>
<dependency>
<groupId>org.apereo.cas</groupId>
<artifactId>cas-server-support-json-service-registry</artifactId>
<version>${cas.version}</version>
</dependency>
<dependency>
<groupId>org.apereo.cas</groupId>
<artifactId>cas-server-support-person-directory</artifactId>
<version>${cas.version}</version>
</dependency>
<dependency>
<groupId>org.apereo.cas</groupId>
<artifactId>cas-server-support-person-directory-core</artifactId>
<version>${cas.version}</version>
</dependency>
<dependency>
<groupId>org.apereo.cas</groupId>
<artifactId>cas-server-support-validation</artifactId>
<version>${cas.version}</version>
</dependency>
<dependency>
<groupId>org.apereo.cas</groupId>
<artifactId>cas-server-core-web-api</artifactId>
<version>${cas.version}</version>
</dependency>
<dependency>
<groupId>org.apereo.cas</groupId>
<artifactId>cas-server-core-authentication-api</artifactId>
<version>${cas.version}</version>
</dependency>
<!-- CAS server dependencis end -->
<dependency>
<groupId>org.springframework.security</groupId>
<artifactId>spring-security-config</artifactId>
</dependency>
<!-- 用于自定义WebFlow流程 -->
<dependency>
<groupId>org.apereo.cas</groupId>
<artifactId>cas-server-core-webflow-api</artifactId>
<version>${cas.version}</version>
</dependency>
<!-- 控制cas server日志打印管理,默认使用自带的log4j.xml管理日志 -->
<dependency>
<groupId>org.springframework.boot</groupId>
<artifactId>spring-boot-starter-logging</artifactId>
</dependency>
<dependency>
<groupId>org.projectlombok</groupId>
<artifactId>lombok</artifactId>
<version>1.18.4</version>
</dependency>
</dependencies>
注:其实大多数依赖包存在被其他依赖引用的,但是依赖类型为runtime,会导致在自定义扩展的是时候找不到对应的扩展类。
可以使用Spring Boot Maven Plugin插件进行构建打包或者使用Maven自身打包插件也是可以的。
配置文件
spring.main.allow-bean-definition-overriding=true # 使用默认的账号名称,使用默认校验方式 cas.authn.accept.enabled=true cas.authn.accept.users=casuser::mellon cas.authn.accept.name=Static Credentials cas.tgc.secure=false # 客户端注册校验 cas.serviceRegistry.initFromJson=true cas.serviceRegistry.json.watcherEnabled=true # 指定services注解json文件地址 cas.serviceRegistry.json.location=classpath:/services # 嵌入式Tomcat配置 server.port=8443 server.servlet.context-path=/cas
配置服务认证注册文件:
在resources文件夹下新建services/${name}-${id}.json文件,name与id为内容的值,内容如下:
{
"@class": "org.apereo.cas.services.RegexRegisteredService",
"serviceId": "^(https|imaps|http)://.*",
"name": "HTTPandIMAPS",
"id": 10000001,
"description": "This service definition authorizes all application urls that support HTTP and IMAPS protocols.",
"evaluationOrder": 10000
}
该文件主要是针对其他服务注册到CAS Server中的校验。
项目启动
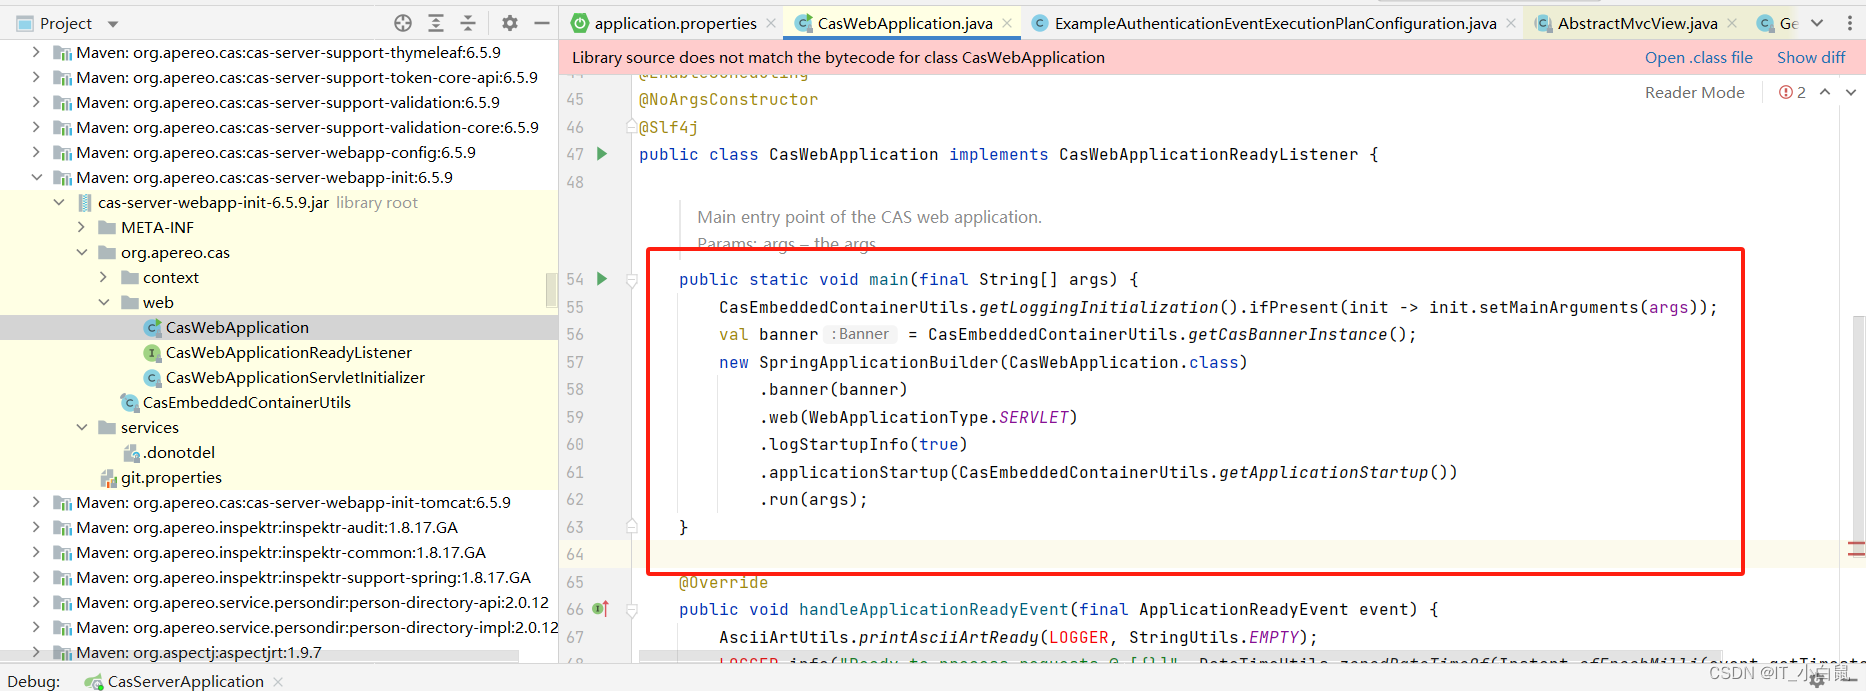
找到cas-server-webapp-init依赖包中的CasWebApplication类,直接启动即可。
自定义扩展
目前就阐述一下在开发过程中可能存在的一些扩展功能。在CAS Server中无法使用@Configuration以及类扫描方式进行注入,只能通过spring.factories文件注册的方式进行注入(即Spring Boot自定配置方式注入)。
自定义登陆校验方式
目前CAS本身也支持很多三方校验扩展,比如MySQL数据库校验、Ldap校验等等,但是那些都存在一定的限制性。
先创建一个自定义校验处理器ExampleAuthenticationHandler,该类继承AbstractUsernamePasswordAuthenticationHandler,实现对应方法即可;主要校验逻辑在authenticateUsernamePasswordInternal方法中,自定义内容如下。
    @Override
    protected AuthenticationHandlerExecutionResult authenticateUsernamePasswordInternal(UsernamePasswordCredential credential, String originalPassword) throws GeneralSecurityException, PreventedException {
        LOGGER.info("The is example authentication...");
        // 登陆校验
        // ....
        // 返回成果结果
        AuthenticationHandlerExecutionResult result = new DefaultAuthenticationHandlerExecutionResult((AuthenticationHandler) credential,
                new BasicCredentialMetaData((Credential) this.principalFactory.createPrincipal(credential.getUsername())));
        return result;
    }
在这个类中可以使用任意方式的进行校验账号密码是否可正常登录;如果校验失败,则直接报错即可(这里可以自定义一些登陆报错异常类)。
需将该校验类注入到CAS本身的校验计划中,新建一个计划配置类,实现AuthenticationEventExecutionPlanConfigurer接口,内容如下:
public class ExampleAuthenticationEventExecutionPlanConfiguration implements AuthenticationEventExecutionPlanConfigurer {
@Autowired
private ServicesManager servicesManager;
@Override
public void configureAuthenticationExecutionPlan(AuthenticationEventExecutionPlan plan) throws Exception {
ExampleAuthenticationHandler myAuthenticationHandler = new ExampleAuthenticationHandler(ExampleAuthenticationHandler.class.getName(),
servicesManager, new DefaultPrincipalFactory(), 1);
plan.registerAuthenticationHandler(myAuthenticationHandler);
}
}
需在resources下新建META-INF/spring.factories,并写入如下内容:
org.springframework.boot.autoconfigure.EnableAutoConfiguration=\
  com.example.config.ExampleAuthenticationEventExecutionPlanConfiguration
自定义API接口
在一些特定的场景下,需要CAS Server提供一些API接口,由于CAS Server使用Spring Security进行接口权限控制,如果使用Spring Security的方式进行放开的话,即继承WebSecurityConfigurerAdapter类,将放开的路径写入会发现毫无作用,只能通过CAS Server提供接口来实现接口的放开。
新建的接口类型需手动配置在配置类中。
新建类实现ProtocolEndpointWebSecurityConfigurer接口,将需要放开的API接口写入:
public class SecurityConfig implements ProtocolEndpointWebSecurityConfigurer {
@Override
public List<String> getIgnoredEndpoints() {
List<String> ignoreList = new ArrayList<>();
ignoreList.add("/web/");
return ignoreList;
}
}
将该类写入到spring.factories文件中。
org.springframework.boot.autoconfigure.EnableAutoConfiguration=\
  com.example.config.ExampleAuthenticationEventExecutionPlanConfiguration,\
  com.example.config.SecurityConfig
在服务启动的日志中,就能看到/web/开头的接口已被Spring Security放开;

自定义登录参数
当前都是使用username以及password参数进行校验的,在一些业务场景下,登录界面需要会存在需校验验证码、IP地址等一些信息,这就涉及到前端页面登陆改动,以及后端需进行参数绑定,由于CAS Server是通过Spring WebFlow进行页面参数的绑定。
前端自定义界面更改
覆盖页面
如果是界面改动较大的话,可以直接覆盖CAS本身的前端页面,前端页面文件都在cas-server-support-thymeleaf依赖中,
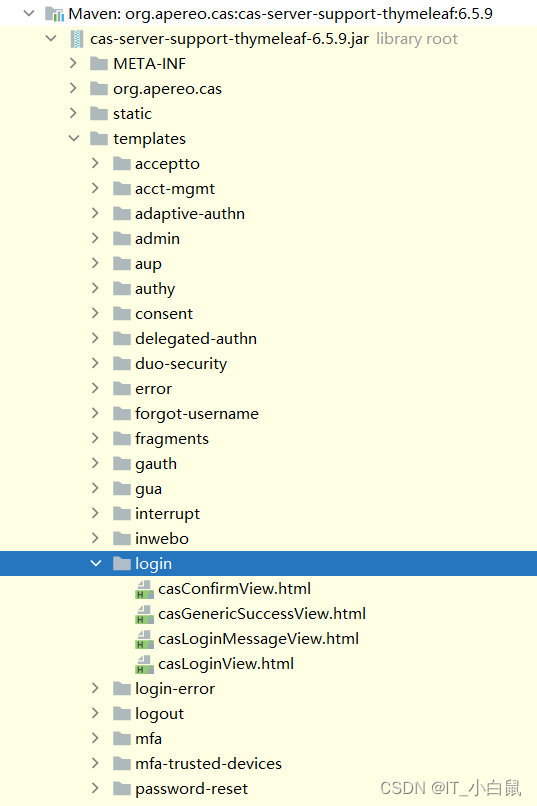
可以将其完全覆盖,如果不愿意覆盖并想修改登陆页面时,可以将登陆页面进行修改;新建一个登录页在login/casLoginView1.html,新建一个类继承DefaultLoginWebflowConfigurer类,用于指定自定义页面
public class ExampleDefaultLoginWebflowConfigurer extends DefaultLoginWebflowConfigurer {
public ExampleDefaultLoginWebflowConfigurer(FlowBuilderServices flowBuilderServices, FlowDefinitionRegistry flowDefinitionRegistry, ConfigurableApplicationContext applicationContext, CasConfigurationProperties casProperties) {
super(flowBuilderServices, flowDefinitionRegistry, applicationContext, casProperties);
}
@Override
protected void createLoginFormView(Flow flow) {
val propertiesToBind = CollectionUtils.wrapList("username", "password", "source");
val binder = createStateBinderConfiguration(propertiesToBind);
casProperties.getView().getCustomLoginFormFields()
.forEach((field, props) -> {
val fieldName = String.format("customFields[%s]", field);
binder.addBinding(new BinderConfiguration.Binding(fieldName, props.getConverter(), props.isRequired()));
});
// 指定登录页面
val state = createViewState(flow, CasWebflowConstants.STATE_ID_VIEW_LOGIN_FORM, "login/casLoginView1", binder);
state.getRenderActionList().add(createEvaluateAction(CasWebflowConstants.ACTION_ID_RENDER_LOGIN_FORM));
createStateModelBinding(state, CasWebflowConstants.VAR_ID_CREDENTIAL, UsernamePasswordCredential.class);
val transition = createTransitionForState(state, CasWebflowConstants.TRANSITION_ID_SUBMIT, CasWebflowConstants.STATE_ID_REAL_SUBMIT);
val attributes = transition.getAttributes();
attributes.put("bind", Boolean.TRUE);
attributes.put("validate", Boolean.TRUE);
attributes.put("history", History.INVALIDATE);
}
}
在配置类中将该配置注入到容器中,用于覆盖CAS原来注入的类,所以Bean的名称一定修改为defaultWebflowConfigurer。
    @Bean(name = "defaultWebflowConfigurer")
    @Order(Ordered.HIGHEST_PRECEDENCE)
    public CasWebflowConfigurer defaultWebflowConfigurer(
            final ConfigurableApplicationContext applicationContext,
            final CasConfigurationProperties casProperties,
            @Qualifier(CasWebflowConstants.BEAN_NAME_LOGIN_FLOW_DEFINITION_REGISTRY)
            final FlowDefinitionRegistry loginFlowRegistry,
            @Qualifier(CasWebflowConstants.BEAN_NAME_LOGOUT_FLOW_DEFINITION_REGISTRY)
            final FlowDefinitionRegistry logoutFlowRegistry,
            @Qualifier(CasWebflowConstants.BEAN_NAME_FLOW_BUILDER_SERVICES)
            final FlowBuilderServices flowBuilderServices) {
        val c = new ExampleDefaultLoginWebflowConfigurer(flowBuilderServices, loginFlowRegistry, applicationContext, casProperties);
        c.setLogoutFlowDefinitionRegistry(logoutFlowRegistry);
        c.setOrder(Ordered.HIGHEST_PRECEDENCE);
        return c;
    }
通过CAS本身扩展原有页面
如果前端仅仅是加一个字段或者表格,可以通过CAS本身的一个配置进行扩展
在后台配置文件中添加如下配置:
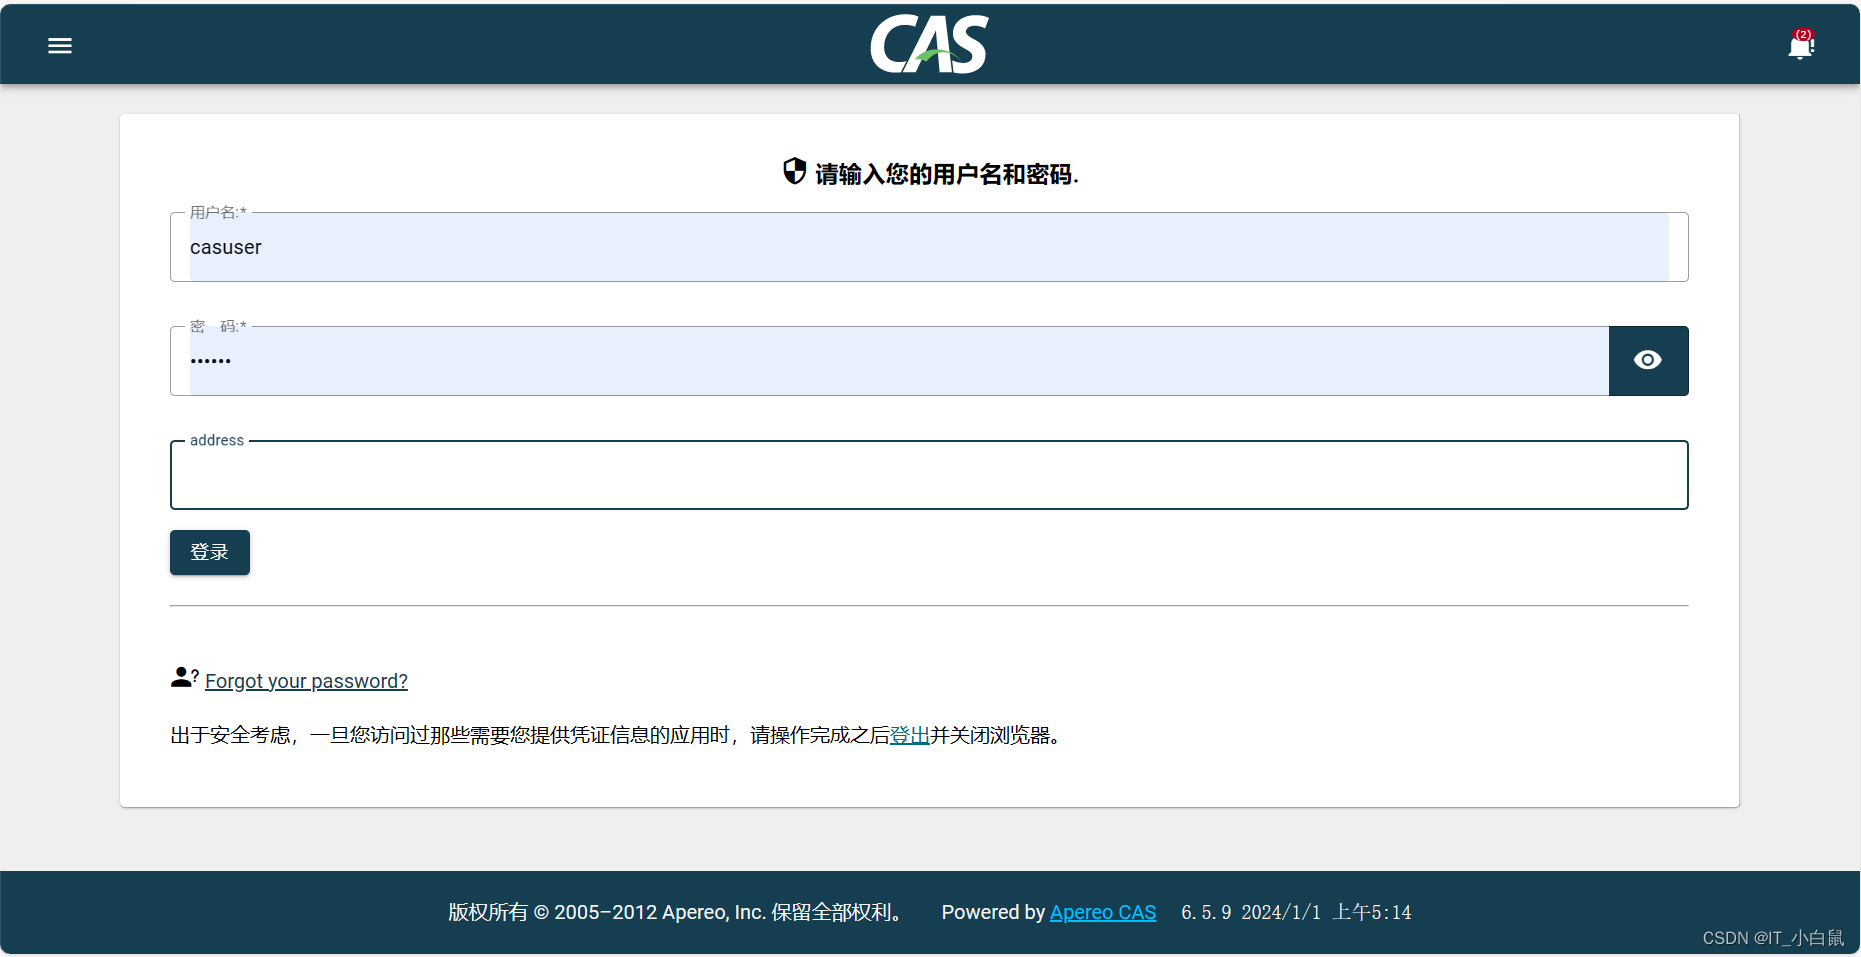
cas.view.custom-login-form-fields.address.messageBundleKey=address
cas.view.custom-login-form-fields.address.required=false
配置含义在登陆界面为扩展一个address字段,属性为非必填,但是前端输入框默认为文本框。
后端绑定自定义属性
如果前端采用扩展原有的登录页面的时候,那么提交过来的数据在后端会自定绑定在UsernamePasswordCredential.customFields中,在自定义校验处理类中,可以获取到customFields的数据。
如果前端是通过覆盖的形式新增登录表单参数时,后端需重写UsernamePasswordCredential用于新的参数绑定,
新建一个类继承UsernamePasswordCredential,并且新增自定义参数,
public class ExampleUsernamePasswordCredential extends UsernamePasswordCredential {
private String address;
public String getAddress() {
return address;
}
public void setAddress(String address) {
this.address = address;
}
public ExampleUsernamePasswordCredential(String username, String password, String address) {
super(username, password);
this.address = address;
}
@Override
public void validate(ValidationContext context) {
super.validate(context);
}
}
在之前的那个指定登录页的ExampleDefaultLoginWebflowConfigurer配置类中,需将address参数绑定到页面上,并且更改绑定的Credential
@Override
protected void createLoginFormView(Flow flow) {
val propertiesToBind = CollectionUtils.wrapList("username", "password", "source");
val binder = createStateBinderConfiguration(propertiesToBind);
casProperties.getView().getCustomLoginFormFields()
.forEach((field, props) -> {
val fieldName = String.format("customFields[%s]", field);
binder.addBinding(new BinderConfiguration.Binding(fieldName, props.getConverter(), props.isRequired()));
});
// 绑定address参数
binder.addBinding(new BinderConfiguration.Binding("address", null, false));
val state = createViewState(flow, CasWebflowConstants.STATE_ID_VIEW_LOGIN_FORM, "login/casLoginView", binder);
state.getRenderActionList().add(createEvaluateAction(CasWebflowConstants.ACTION_ID_RENDER_LOGIN_FORM));
// 更改为自定义Credential
createStateModelBinding(state, CasWebflowConstants.VAR_ID_CREDENTIAL, ExampleUsernamePasswordCredential.class);
val transition = createTransitionForState(state, CasWebflowConstants.TRANSITION_ID_SUBMIT, CasWebflowConstants.STATE_ID_REAL_SUBMIT);
val attributes = transition.getAttributes();
attributes.put("bind", Boolean.TRUE);
attributes.put("validate", Boolean.TRUE);
attributes.put("history", History.INVALIDATE);
}
// 用于更改createFlowVariable
@Override
protected void createRememberMeAuthnWebflowConfig(Flow flow) {
if (casProperties.getTicket().getTgt().getRememberMe().isEnabled()) {
createFlowVariable(flow, CasWebflowConstants.VAR_ID_CREDENTIAL, RememberMeUsernamePasswordCredential.class);
val state = getState(flow, CasWebflowConstants.STATE_ID_VIEW_LOGIN_FORM, ViewState.class);
val cfg = getViewStateBinderConfiguration(state);
cfg.addBinding(new BinderConfiguration.Binding("rememberMe", null, false));
} else {
// 更改为自定义Credential
createFlowVariable(flow, CasWebflowConstants.VAR_ID_CREDENTIAL, ExampleUsernamePasswordCredential.class);
}
}
后续还会继续分享CAS相关的东西,大家可以一起讨论


 1593
1593


 被折叠的 条评论
为什么被折叠?
被折叠的 条评论
为什么被折叠?
 到【灌水乐园】发言


