


参考资料:
electron-vue 跨平台桌面应用开发实战教程
electron-vue 中文文档
Electron-vue 开发实战
Electron 12.0 官方文档
搭建项目
vue create electron_rabbitmq
cd electron_rabbitmq
vue add electron-builder
npm i amqplib -S
主进程中初始化 RabbitMQ模块
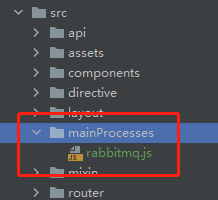
在src目录下新建文件 mainProcesses/rabbitmq.js
在主进程中与RabbitMQ进行通信, 该模块主要完成以下功能:
- 1.连接RabbitMQ服务器,并创建生产者和消费者
const amqp = require('amqplib')
const serverConfig = {
  protocol: 'amqp',
  hostname: '192.168.1.251',
  port: 5672,
  username: 'xyang',
  password: '123456',
  vhost: process.env.NODE_ENV !== 'production' ? '/dev' : '/prod'
}
amqp.connect(serverConfig).then(
      conn => {
        console.log('创建连接成功')
        conn.createChannel().then(
          ch => {
            console.log('创建Channel成功')
            //连接交换机
            ch.assertExchange('api', 'topic',{durable:true}).then(function(ex) {
             	//连接队列
            	ch.assertQueue("topic").then(function(q) {
            	 	// 交换机bind队列
            	 	//			   队列     交换机     Rounting KEY   arguments
            		ch.bindQueue(q.queue, ex.exchange, "topic", {'x-match': 'any'});
					ch.publish(ex.exchange, ’topic', Buffer.from(JSON.stringify(msgObj)));
            	})
            })
            // 设置消费者
            ch.consume('topic',
              function(msg) {
                console.log(JSON.parse(msg.content))
              },
              {
                noAck: true
              }
            )
          },
          err => {
            console.log('创建Channel 错误:' + err)
          }
        )
      },
      err => {
        console.log('连接MQ Server 错误:' + err)
      }
    )
  }
- 2.注册消息发送器,当渲染进程需要发送消息时,通过 ipcRenderer 发送消息
// 主进程注册
ipcMain.handle('SEND_MQ_ORDER_MESSAGE', async (event, msgObj) => {})

//渲染进程要发送消息的时候调用上面的Handle
ipcRenderer.invoke('SEND_MQ_MESSAGE', 'send message content')
- 3.推送消息到Windows 通知栏
let notification = new Notification({
   title: title, // 通知的标题, 将在通知窗口的顶部显示
   body: content, // 通知的正文文本, 将显示在标题或副标题下面
   silent: true // 在显示通知时是否发出系统提示音
})
notification.show()
- 4.当通知栏被点击的时候,主进程通知到渲染进程
notification.on('click', e => {
     notification.close()
     // 通知主进程通知了被点击
     webContents.send('ON_NOTIFICATION_CLICK', {
       title: e.sender.title,
       body: e.sender.body
     })
 })

// 渲染进程接收 主进程通知
ipcRenderer.on('ON_NOTIFICATION_CLICK', (event, message) => {
      window.alert('通知点击:' + message.title)
})
完整代码
const amqp = require('amqplib')
const { ipcMain, Notification } = require('electron')

const serverConfig = {
  protocol: 'amqp',
  hostname: '192.168.1.251',
  port: 5672,
  username: 'xyang',
  password: '123456',
  vhost: process.env.NODE_ENV !== 'production' ? '/dev' : '/prod'
}

module.exports = {
	init(win) {
		// 消息处理器
		function receivedCallBack(msg) {
			let notification = new Notification({
		        title: msg.title, // 通知的标题, 将在通知窗口的顶部显示
		        body: msg.content, // 通知的正文文本, 将显示在标题或副标题下面
		        silent: true // 在显示通知时是否发出系统提示音
		    })
			notification.show()
			// 任务栏闪烁,当获取焦点后取消闪烁
	      	win.once('focus', () => win.flashFrame(false))
	      	win.flashFrame(true)
	      	// 通知主进程
	      	win.webContents.send('ON_NEW_NOTIFICATION', {msg: msg});
	      	// 被点击之后通知渲染进程
		    notification.on('click', e => {
		    	notification.close()
		        console.log(e)
		        win.webContents.send('ON_NOTIFICATION_CLICK', {
		          title: e.sender.title,
		          body: e.sender.body,
		          msg: msg
		        })
		    })

		}
		// 链接MQ
		amqp.connect(serverConfig).then(
	      conn => {
	        console.log('创建连接成功')
	        conn.createChannel().then(
	          ch => {
	            console.log('创建Channel成功')
	            //连接交换机
	            ch.assertExchange('api', 'topic',{durable:true}).then(function(ex) {
	             	//连接队列
	            	ch.assertQueue("topic").then(function(q) {
	            	 	// 交换机bind队列
	            	 	//			   队列     交换机     Rounting KEY   arguments
	            		ch.bindQueue(q.queue, ex.exchange, "topic", {'x-match': 'any'});
	            		// 注册消息发送器
	            		ipcMain.handle('SEND_MQ_ORDER_MESSAGE', async (event, msgObj) => {
							ch.publish(ex.exchange, ’topic', Buffer.from(JSON.stringify(msgObj)));
						))
	            	})
	            })
	            // 设置消费者
	            ch.consume('topic',
	              function(msg) {
	                receivedCallBack(JSON.parse(msg.content))
	              },
	              {
	                noAck: true
	              }
	            )
	          },
	          err => {
	            console.log('创建Channel 错误:' + err)
	          }
	        )
	      },
	      err => {
	        console.log('连接MQ Server 错误:' + err)
	      }
	    )
	  }

	}
}
初始化RabbitMQ
background.js 中加入:
const rabbitmq = require('./mainProcesses/rabbitmq')

app.on('ready', async () => {
  createWindow()
  // win 为创建的窗口,定义为全局变量
  rabbitmq.init(win)
})
App.vue页面监听
<template>
  <div id="app">
    <p>标题: <input type="text " v-model="title" /></p>
    <p>内容: <input type="text " v-model="content" /></p>
    <p><button @click="sendMsg">发送消息</button></p>
  </div>
</template>
const { ipcRenderer } = window.require('electron')
export default {

  name: 'App',
  data() {
    return {
      title: '',
      content: ''
    }
  },
  created() {
  	// 注册
    ipcRenderer.on('ON_NEW_NOTIFICATION', (event, message) => {
      console.log('新消息通知:' + message)
    })
    ipcRenderer.on('ON_NOTIFICATION_CLICK', (event, message) => {
      console.log('通知点击:' + message)
    })
  },
  methods: {
    sendMsg() {
      let msg = {
        title: this.title,
        content: this.content
      }
      ipcRenderer.invoke('SEND_MQ_MESSAGE', sendContent)
    }
  }
}


 4545
4545


 被折叠的 条评论
为什么被折叠?
被折叠的 条评论
为什么被折叠?
 到【灌水乐园】发言


