1. 创建vue+vite+ts项目
-
// 安装最新版版的vite
npm install -g vite@latest
// 创建项目
npm init vite@latest 项目名称(我这里叫lzj-test-npm)
npx: installed 1 in 1.364s
√ Select a framework: » Vue
√ Select a variant: » TypeScript

cd 项目名称(我这里叫lzj-test-npm)
// 在安装项目依赖之前,由于我本地运行的是node14版本,懒得切换了
// 所以我直接降低vite版本来兼容node14
// *************
"devDependencies": {
	  + "@vitejs/plugin-vue": "^4.1.2",
	  "typescript": "^5.5.3",
	  + "vite": "^4.4.0",
	  "vue-tsc": "^2.0.29"
}
// *******
pnpm install
pnpm dev
2. 创建公共组件
- 公共组件
<template>
<button class="lzj-button">
<slot v-if="slots.default"></slot>
<template v-else>按钮</template>
</button>
</template>
<script setup>
import { useSlots } from 'vue';
const slots = useSlots();
</script>
<style scoped>
.lzj-button {
padding: 8px 12px;
width: fit-content;
height: fit-content;
}
</style>
- 全局引入和按需导入实现
import type { App, Component, DefineComponent } from "vue";
import lzjButton from "@/package/lzjButton.vue";
interface comIns {
name: string;
component: Component | DefineComponent;
}
const comps: comIns[] = [{ name: "lzjButton", component: lzjButton }];
const install = function (vueIns: App) {
comps.forEach((com: comIns) => {
vueIns.component(com.name, com.component);
});
};
export {
lzjButton,
};
export default { install };
- 配置package.json
package.json 文件里面有很多字段要填写,否则不能正确发布。最重要的是以下几个:
name: 包名,该名字是唯一的。可在 npm官网搜索名字,如果存在则需换个名字。version: 版本号,不能和历史版本号相同。files: 配置需要发布的文件。main: 入口文件,默认为 index.js,这里改为 dist/dist/lzj-test-npm.umd.js。module: 模块入口,这里改为 dist/lzj-test-npm.js。- 以下是完整package.json文件
	 {
	  "name": "lzj-test-npm",
	  "private": false,
	  "version": "0.0.6",
	  "type": "module",
	  "main": "dist/lzj-test-npm.umd.js",
	  "module": "dist/lzj-test-npm.js",
	  "files": [
	    "dist",
	    "src/package/index.ts"
	  ],
	  "publishConfig": {
	    "access": "public"
	  },
	  "scripts": {
	    "dev": "vite",
	    "build": "vite build",
	    "preview": "vite preview"
	  },
	  "dependencies": {
	    "path": "^0.12.7",
	    "vue": "^3.4.35"
	  },
	  "devDependencies": {
	    "@vitejs/plugin-vue": "^4.1.2",
	    "typescript": "^5.5.3",
	    "vite": "^4.4.0",
	    "vue-tsc": "^2.0.29"
	  }
}
3. 推送npm仓库
- 前置条件,拥有npm账号
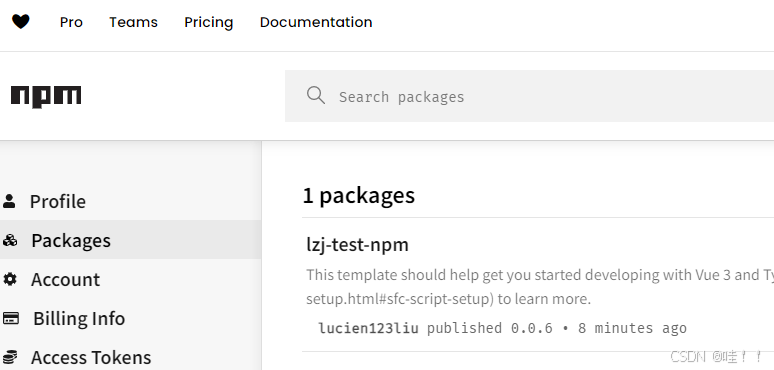
npm login登录npmnpm who am i查看登录状态npm run build打包项目准备发布, 注意打包之前要将package.json文件中的version字段+1npm publish部署发布npm view @sd_pub/sd-comp-v3 version查看是否发布成功
4. 使用组件包
npm install lzj-test-npm安装依赖包"dependencies": { ..., "lzj-test-npm": "^0.0.0", ... },
import lzjTestNpmfrom 'lzj-test-npm';
import 'lzj-test-npm/dist/style.css';
app.use(lzjTestNpm);
import {lzjButton} from "lzj-test-npm";
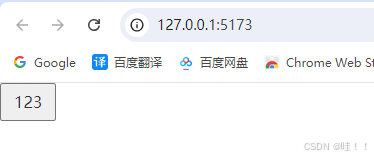
<lzjButton>123</lzjButton>

5.遇到的问题
- Q1:看到推送失败401了

原因:
- registry镜像源不是npm官方的镜像源,你需要执行
npm config set registry=https://registry.npmjs.org/
- Q2:这是我模拟的错误情况

原因:
- 是因为链接npm官网超时,这个时候只需要配置代理就行,或者等公网能正常访问npm再上传即可
- 配置代理步骤:
- 首先打开你的代理软件,找到port代理端口,我的是8972
- 执行命令
npm config set proxy=http:127.0.0.1:8972
- 这个时候推送就很顺畅了
6.源码地址
开发npm包项目源码地址
验证npm包封装使用的项目地址


 407
407

 被折叠的 条评论
为什么被折叠?


