


1、MHA简介
软件简介:MHA(Master High Availability)目前在MySQL高可用方面是一个相对成熟的解决方案,它由日本DeNA公司youshimaton(现就职于Facebook公司)开发,是一套优秀的作为MySQL高可用性环境下故障切换和主从提升的高可用软件。在MySQL故障切换过程中,MHA能做到在10~30秒之内自动完成数据库的故障切换操作,并且在进行故障切换的过程中,MHA能在最大程度上保证数据的一致性,以达到真正意义上的高可用。
MHA还提供在线主库切换的功能,能够安全地切换当前运行的主库到一个新的主库中 (通过将从库提升为主库),大概0.5-2秒内即可完成。
该软件由两部分组成:MHA Manager(管理节点)和MHA Node(数据节点)。MHA Manager可以单独部署在一台独立的机器上管理多个master-slave集群,也可以部署在一台slave节点上。MHA Node运行在每台MySQL服务器上,MHA Manager会定时探测集群中的master节点,当master出现故障时,它可以自动将最新数据的slave提升为新的master,然后将所有其他的slave重新指向新的master。整个故障转移过程对应用程序完全透明。
优点:
- 自动故障转移快
- 主库崩溃不存在数据一致性问题
- 不需要对当前mysql环境做重大修改
- 不需要添加额外的服务器(仅一台manager就可管理上百个replication)
- 性能优秀,可工作在半同步复制和异步复制,当监控mysql状态时,仅需要每隔N秒向master发送ping包(默认3秒),所以对性能无影响。你可以理解为MHA的性能和简单的主从复制框架性能一样。
- 只要replication支持的存储引擎,MHA都支持,不会局限于innodb
工作流程:
- 把宕机的master二进制日志保存下来。
- 找到binlog位置点最新的slave。
- 在binlog位置点最新的slave上用relay log(差异日志)修复其它slave。
- 将宕机的master上保存下来的二进制日志恢复到含有最新位置点的slave上。
- 将含有最新位置点binlog所在的slave提升为master。
- 将其它slave重新指向新提升的master,并开启主从复制。
2、MHA配置
实验环境说明:
| server1:192.168.1.100 | manger节点 |
| server2:192.168.1.110 | master节点 |
| server3:192.168.1.120 | slave(备用master)节点 |
| server4:192.168.1.130 | slave节点 |
2.1 配置master节点(server2)
#### 1 安装mysql服务
[root@server1 opt]# yum install -y mysql-co*
#### 2 编辑配置文件(/etc/my.cnf)
....
30 server-id=1
31 gtid_mode=ON
32 enforce-gtid-consistency=ON
33 log_slave_updates=ON
34 log-bin=binlog
...
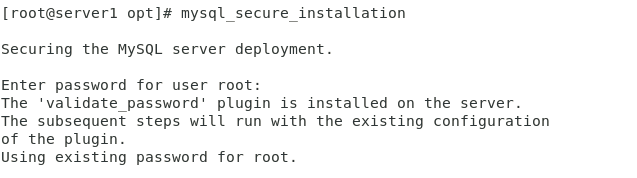
#### 3 开启服务并安全初始化
[root@server1 opt]# systemctl start mysqld
[root@server1 opt]# mysql_secure_installation
#### 4 登录数据库,进行主从配置
mysql> CREATE USER 'repl'@'192.168.1.%' IDENTIFIED BY 'Linux+755';##创建用户
mysql> GRANT REPLICATION SLAVE ON *.* TO 'repl'@'192.168.1.%'; ##授权用户
mysql> INSTALL PLUGIN rpl_semi_sync_master SONAME 'semisync_master.so';
##安装半同步复制的master插件
mysql> INSTALL PLUGIN rpl_semi_sync_slave SONAME 'semisync_slave.so';
##安装半同步复制slave的插件
mysql> SET GLOBAL rpl_semi_sync_master_enabled = 1; ##激活插件
mysql> SET GLOBAL rpl_semi_sync_slave_enabled = 1; ##激活插件
mysql> grant all on *.* to root@'%' identified by 'Linux+755'; ##对超级用户进行授权
mysql> flush privileges; ##刷新授权表


2.2 配置slave节点(server2\server3)
#### 1 安装mysql服务
[root@server1 opt]# yum install -y mysql-co*
#### 2 编辑配置文件(/etc/my.cnf)
....
30 server-id=2(3) ##server2中为2, server3中为3
31 gtid_mode=ON
32 enforce-gtid-consistency=ON
33 log_slave_updates=ON
34 log-bin=binlog
...
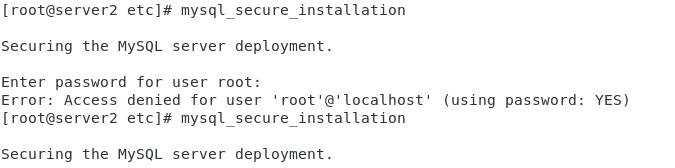
#### 3 开启服务并安全初始化
[root@server1 opt]# systemctl start mysqld
[root@server1 opt]# mysql_secure_installation
#### 4 登录数据库,进行从配置
mysql> CHANGE MASTER TO
-> MASTER_HOST = '192.168.1.110',
-> MASTER_USER = 'repl',
-> MASTER_PASSWORD = 'Linux+755',
-> MASTER_AUTO_POSITION = 1;
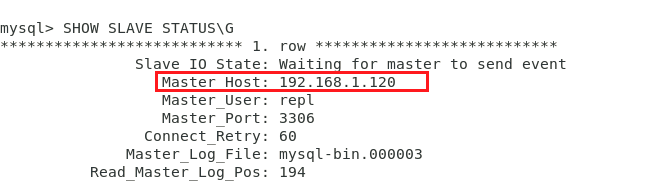
mysql> start slave; ##查看配置状态:SHOW SLAVE STATUS\G
mysql> INSTALL PLUGIN rpl_semi_sync_master SONAME 'semisync_master.so';
##安装半同步复制的master插件
mysql> INSTALL PLUGIN rpl_semi_sync_slave SONAME 'semisync_slave.so';
##安装半同步复制slave的插件
mysql> SET GLOBAL rpl_semi_sync_master_enabled = 1; ##激活插件
mysql> SET GLOBAL rpl_semi_sync_slave_enabled = 1; ##激活插件
mysql> STOP SLAVE IO_THREAD; ##重启IO线程
mysql> START SLAVE IO_THREAD;

在配置主机三时,可能出现数据GTID不能获取,此时可手动备份数据库:
事务不同步:

gtid的查看:

手动备份:
#### 备份server1 的数据
[root@server1 opt]# mysqldump --all-databases --single-transaction --triggers --routines --events --host=127.0.0.1 --port=3306 --user=root --password=Linux+755 > linux.sql


【说明】因为之前设置过master信息,所以在导入时需要清除原始信息。


2.3 配置ssh免密登录
#### 在manager节点
[root@localhost ~]# ssh-kegen
[root@localhost ~]# ssh-copy-id -i /root/.ssh/id_rsa.pub root@192.168.1.110
[root@localhost ~]# ssh-copy-id -i /root/.ssh/id_rsa.pub root@192.168.1.120
[root@localhost ~]# ssh-copy-id -i /root/.ssh/id_rsa.pub root@192.168.1.130

#### 实现server之间的通信
[root@localhost .ssh]# scp -r /root/.ssh/* 192.168.1.110:
[root@localhost .ssh]# scp -r /root/.ssh/* 192.168.1.120:
[root@localhost .ssh]# scp -r /root/.ssh/* 192.168.1.130:
2.4 配置MHA
在manager节点上:
#### 1 在manager节点上
mha4mysql-manager-0.58-0.el7.centos.noarch.rpm
mha4mysql-manager-0.58.tar.gz
mha4mysql-node-0.58-0.el7.centos.noarch.rpm
perl-Config-Tiny-2.14-7.el7.noarch.rpm
perl-Email-Date-Format-1.002-15.el7.noarch.rpm
perl-Log-Dispatch-2.41-1.el7.1.noarch.rpm
perl-Mail-Sender-0.8.23-1.el7.noarch.rpm
perl-Mail-Sendmail-0.79-21.el7.noarch.rpm
perl-MIME-Lite-3.030-1.el7.noarch.rpm
perl-MIME-Types-1.38-2.el7.noarch.rpm
perl-Parallel-ForkManager-1.18-2.el7.noarch.rpm
##安装上述软件包

##安装完成,创建并编写配置文件
[root@localhost opt]# mkdir /etc/masterha
[root@localhost opt]# vim /etc/masterha/masterha.cnf
##配置文件内容:
  1 [server default]
  2 manager_workdir=/etc/masterha                ##设置工作目录,即工作是存储路径
  3 manager_log=/var/log/manager.log             ##设置日志目录
  4 master_binlog_dir=/etc/masterha
                                                 ##设置二进制文件路径。是master保存binlog的位置,以便MHA可以找到master的日志,这里的也就是ysql的数据目录
  5 password=Linux+755                            ##编写用户登录密码
  6 user=root                                     ##指定登录用户
  7 ping_interval=1                               ##设置访问时间间隔
  8 remote_workdir=/tmp                      ##设置远端mysql在发生切换时binlog的保存位置
  9 repl_password=Linux+755                       ##远程登录用户密码
 10 repl_user=repl                                ##远程登录用户
 11 ssh_user=root                                 ##ssh连接是的用户
 12
 13 [server1]                                     ##数据库服务1
 14 hostname=192.168.1.110
 15 port=3306
 16
 17 [server2]                                     ##数据库服务2
 18 hostname=192.168.1.120
 19 port=3306
 20 candidate_master=1                            ##指定为master宕机后的备用节点
 21 check_repl_delay=0                            ##启用为master忽略复制延迟
 22
 23 [server3]                                    ##数据库服务3
 24 hostname=192.168.1.130
 25 port=3306
 26 no_master=1                                  ##不可提升为master


#### 2 在sever节点上安装MHA的node节点(分别安装)
yum install -y mha4mysql-node-0.58-0.el7.centos.noarch.rpm
完成上述配置,进行检查:
###检查ssh
[root@localhost .ssh]# masterha_check_ssh --conf=/etc/masterha/masterha.cnf

###检查主从复制

解决:在master上修改数据库配置:

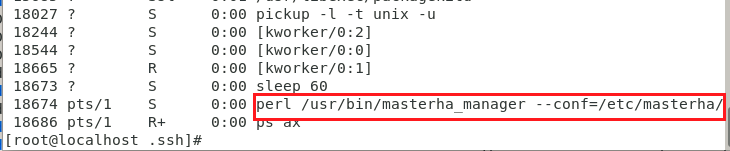
查看manger是否可以正常启动:
###查看manger是否正常启动
[root@server1 etc]# nohup masterha_manager --conf=/etc/masterha/masterha.cnf --remove_dead_master_conf --ignore_last_failover < /dev/null > /var/log/masterha.log 2>&1 &
            ##--remove_dead_master_conf --ignore_last_failover 移除上一次失败,忽略失败文件
然后关闭程序,进行手动测试:
####关闭manger
[root@localhost .ssh]# masterha_stop --conf=/etc/masterha/masterha.cnf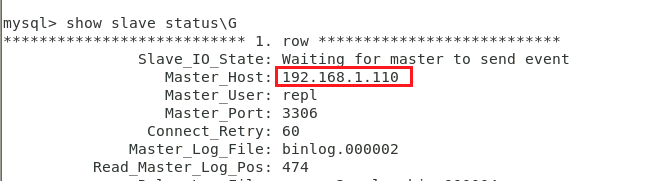
关闭server1服务器,手动切换:
####在sever1中关闭服务器
[root@localhost .ssh]# systemctl stop mysqld

####在server中手动切换
[root@localhost .ssh]# masterha_master_switch --master_state=dead --conf=/etc/masterha/masterha.cnf --dead_master_host=192.168.1.110 --dead_master_ip=192.168.1.110 --dead_master_port=3306 --new_master_host=192.168.1.120 --new_master_port=3306 --ignore_last_failover

此时seever3中,master节点为server2。
切换后查看结果,产生.complete结果文件,该文件存在时,不可再次切换。

现在考虑若server2不宕机的情况下,如何手动切换:
#### 1 开启需要加入集群的数据库
[root@server1 etc]# systemctl start mysald
#### 2 登录数据库,设置master信息;开启服务信息
-> CHANGE MASTER TO MASTER_HOST = '192.168.1.120',MASTER_USER = 'repl',MASTER_PASSWORD = 'Linux+755',MASTER_AUTO_POSITION = 1;
-> start slave;
#### 3 手动切换
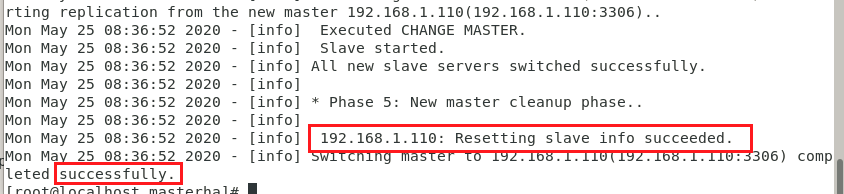
[root@localhost masterha]# masterha_master_switch --conf=/etc/masterha/masterha.cfg --master_state=alive --new_master_host=192.168.1.110 --new_master_port=3306 --orig_master_is_new_slave --running_updates_limit=10000
在要加入集群的主机中设置:

切换结果:
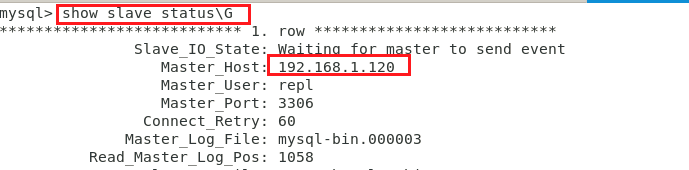
在server上查看:

自动切换:
####自动切换,且切换结果只能执行一次
[root@localhost masterha]# nohup masterha_manager --conf=/etc/masterha/masterha.cnf &> /dev/null &

当启动上述运行进程时,使server1的服务器宕机,查看服务器是否可以自动切换:
日志信息:/var/log/manger.log

2.5 VIP漂移
当数据库出现问题需要切换时,上述的切换,其IP也是会随之切换的,这很明显对用户而言是不可接受的,故考虑使用虚拟IP,实现“固定IP”。
首先对manger进行配置:
##获得配置文件,并修改
[root@localhost scripts]# mv master_ip_* /usr/local/bin/
[root@localhost scripts]# pwd
/opt/mha4mysql-manager-0.58/samples/scripts
##设置脚本的执行权限
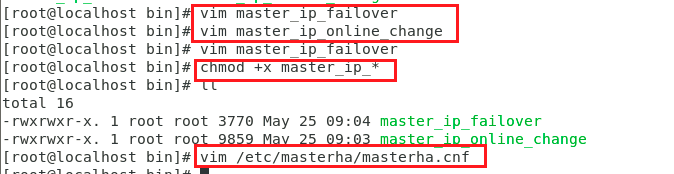
[root@localhost bin]# chmod +x master_ip_*
##设置配置文件,添加启动选项
#####添加的内容:
...
5 master_ip_failover_script=/usr/local/bin/master_ip_failover
6 master_ip_online_change_script=/usr/local/bin/master_ip_online_change
...配置文件内容:
####/usr/local/bin/master_ip_failove
#!/usr/bin/env perl
use strict;
use warnings FATAL => 'all';
use Getopt::Long;

my (
    $command,          $ssh_user,        $orig_master_host, $orig_master_ip,
    $orig_master_port, $new_master_host, $new_master_ip,    $new_master_port
);

my $vip = '192.168.1.200/24';
my $ssh_start_vip = "/sbin/ip addr add $vip dev ens33";
my $ssh_stop_vip = "/sbin/ip addr del $vip dev ens33";

GetOptions(
    'command=s'          => \$command,
    'ssh_user=s'         => \$ssh_user,
    'orig_master_host=s' => \$orig_master_host,
    'orig_master_ip=s'   => \$orig_master_ip,
    'orig_master_port=i' => \$orig_master_port,
    'new_master_host=s'  => \$new_master_host,
    'new_master_ip=s'    => \$new_master_ip,
    'new_master_port=i'  => \$new_master_port,
);

exit &main();

sub main {
    print "\n\nIN SCRIPT TEST====$ssh_stop_vip==$ssh_start_vip===\n\n";
    if ( $command eq "stop" || $command eq "stopssh" ) {
        my $exit_code = 1;
        eval {
            print "Disabling the VIP on old master: $orig_master_host \n";
            &stop_vip();
            $exit_code = 0;
        };
        if ($@) {
            warn "Got Error: $@\n";
            exit $exit_code;
        }
        exit $exit_code;
    }
    elsif ( $command eq "start" ) {
        my $exit_code = 10;
        eval {
            print "Enabling the VIP - $vip on the new master - $new_master_host \n";
            &start_vip();
            $exit_code = 0;
        };
        if ($@) {
            warn $@;
            exit $exit_code;
        }
        exit $exit_code;
    }
    elsif ( $command eq "status" ) {
        print "Checking the Status of the script.. OK \n";
        exit 0;
    }
    else {
        &usage();
        exit 1;
    }
}

sub start_vip() {
    `ssh $ssh_user\@$new_master_host \" $ssh_start_vip \"`;
}
sub stop_vip() {
     return 0  unless  ($ssh_user);
    `ssh $ssh_user\@$orig_master_host \" $ssh_stop_vip \"`;
}

sub usage {
    print
    "Usage: master_ip_failover --command=start|stop|stopssh|status --orig_master_host=host --orig_master_ip=ip --orig_master_port=port --new_master_host=host --new_master_ip=ip --new_master_port=port\n";
}
##### /usr/local/bin/master_ip_online_change
usr/bin/env perl
use strict;
use warnings FATAL =>'all';

use Getopt::Long;

my $vip = '192.168.1.200/24';  # Virtual IP
my $ssh_start_vip = "/sbin/ip addr add $vip dev ens33";
my $ssh_stop_vip = "/sbin/ip addr del $vip dev ens33";
my $exit_code = 0;

my (
  $command,              $orig_master_is_new_slave, $orig_master_host,
  $orig_master_ip,       $orig_master_port,         $orig_master_user,
  $orig_master_password, $orig_master_ssh_user,     $new_master_host,
  $new_master_ip,        $new_master_port,          $new_master_user,
  $new_master_password,  $new_master_ssh_user,
);
GetOptions(
  'command=s'                => \$command,
  'orig_master_is_new_slave' => \$orig_master_is_new_slave,
  'orig_master_host=s'       => \$orig_master_host,
  'orig_master_ip=s'         => \$orig_master_ip,
  'orig_master_port=i'       => \$orig_master_port,
  'orig_master_user=s'       => \$orig_master_user,
  'orig_master_password=s'   => \$orig_master_password,
  'orig_master_ssh_user=s'   => \$orig_master_ssh_user,
  'new_master_host=s'        => \$new_master_host,
  'new_master_ip=s'          => \$new_master_ip,
  'new_master_port=i'        => \$new_master_port,
  'new_master_user=s'        => \$new_master_user,
  'new_master_password=s'    => \$new_master_password,
  'new_master_ssh_user=s'    => \$new_master_ssh_user,
);

exit &main();

sub main {
#print "\n\nIN SCRIPT TEST====$ssh_stop_vip==$ssh_start_vip===\n\n";
if ( $command eq "stop" || $command eq "stopssh" ) {
        # $orig_master_host, $orig_master_ip, $orig_master_port are passed.
        # If you manage master ip address at global catalog database,
        # invalidate orig_master_ip here.
        my $exit_code = 1;
        eval {
            print "\n\n\n***************************************************************\n";
            print "Disabling the VIP - $vip on old master: $orig_master_host\n";
            print "***************************************************************\n\n\n\n";
&stop_vip();
            $exit_code = 0;
        };
        if ($@) {
            warn "Got Error: $@\n";
            exit $exit_code;
        }
        exit $exit_code;
}
elsif ( $command eq "start" ) {
# all arguments are passed.
        # If you manage master ip address at global catalog database,
        # activate new_master_ip here.
        # You can also grant write access (create user, set read_only=0, etc) here.
my $exit_code = 10;
        eval {
            print "\n\n\n***************************************************************\n";
            print "Enabling the VIP - $vip on new master: $new_master_host \n";
            print "***************************************************************\n\n\n\n";
&start_vip();
            $exit_code = 0;
        };
        if ($@) {
            warn $@;
            exit $exit_code;
        }
        exit $exit_code;
}
elsif ( $command eq "status" ) {
        print "Checking the Status of the script.. OK \n";
        `ssh $orig_master_ssh_user\@$orig_master_host \" $ssh_start_vip \"`;
        exit 0;
}
else {
&usage();
        exit 1;
}
}

# A simple system call that enable the VIP on the new master
sub start_vip() {
`ssh $new_master_ssh_user\@$new_master_host \" $ssh_start_vip \"`;
}
# A simple system call that disable the VIP on the old_master
sub stop_vip() {
`ssh $orig_master_ssh_user\@$orig_master_host \" $ssh_stop_vip \"`;
}

sub usage {
print
"Usage: master_ip_failover --command=start|stop|stopssh|status --orig_master_host=host --orig_master_ip=ip --orig_master_port=port --new_master_host=host --new_master_ip=ip --new_master_port=port\n";
}
因为前面实验将server1关闭,所以现在重现打开,并配置主从信息:

在server2中添加虚拟IP:

在manger中手动切换:
###手动切换
[root@localhost bin]# masterha_master_switch --master_state=dead --conf=/etc/masterha/masterha.cnf --dead_master_host=192.168.1.120 --dead_master_ip=192.168.1.120 --dead_master_port=3306 --new_master_host=192.168.1.110 --new_master_port=3306 --ignore_last_failover

查看server1 的ip

服务完成后,重新启动服务,将server2加入集群中,自动切换后IP可漂移回去。


 3195
3195


 被折叠的 条评论
为什么被折叠?
被折叠的 条评论
为什么被折叠?
 到【灌水乐园】发言


