


最近想给微信小程序做一个语音输入插件,记录一下,给以后插件制作提供指导。目前感觉微信插件官方文档不是特别全,有的接口在小程序中可以调用,但是在插件中会失效,且找不到很好的替代品,所以会感到比较头疼。
第一步:
注册一个企业账号,个人账号貌似不能开通插件。。。
第二步:
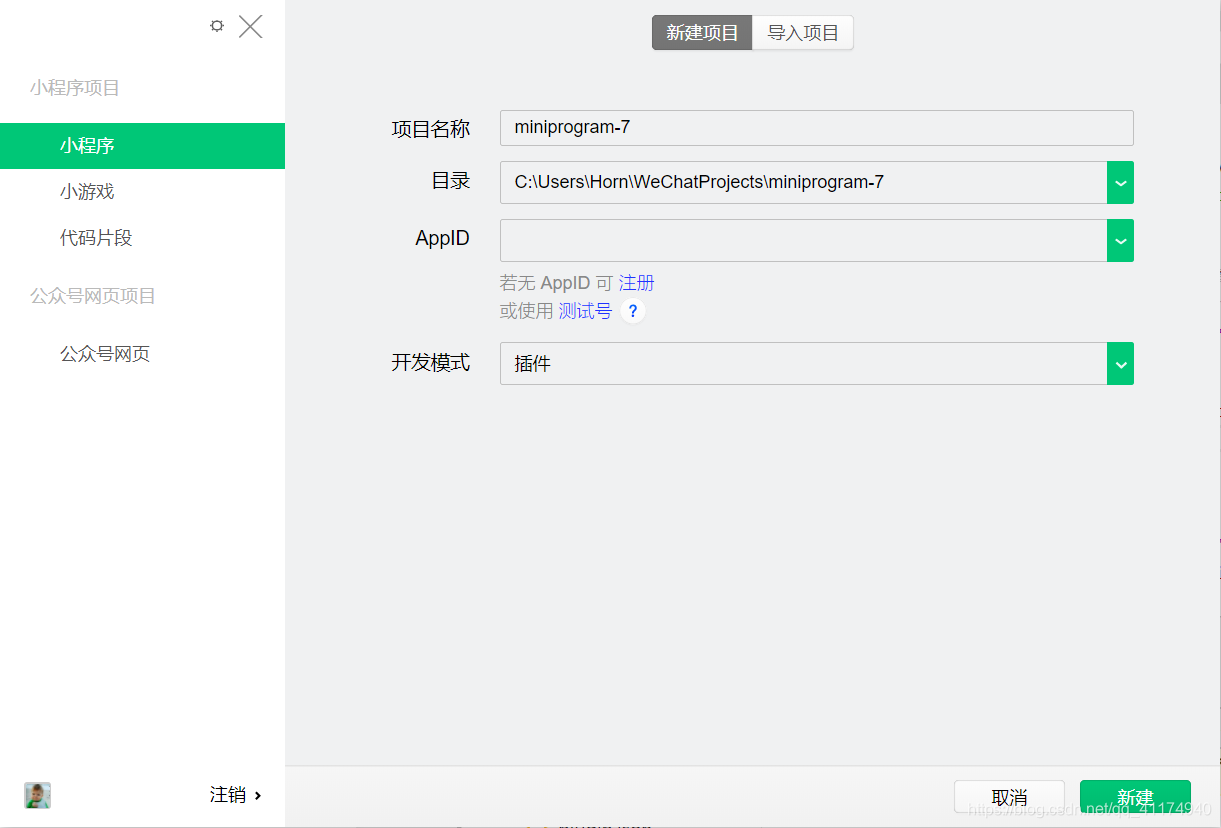
通过微信开发者工具创建一个微信小程序
项目目录如下所示:
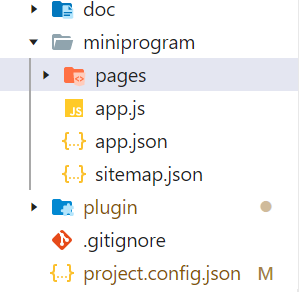
目录分析:
- miniprogram 目录:放置的是一个小程序,该小程序是用于调试、测试插件用的。
- plugin 目录:插件代码的存放目录,用于放置我们开发的插件
- doc 目录:说明文档
- api : 接口插件文件夹,可以存放插件所需的接口
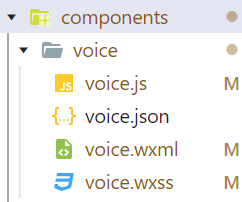
- components : 插件提供的自定义组件文件夹, 中自定义组件可以有多个
- index.js : 插件入口文件,可以在这里 export 一些js接口,供插件使用者使用
- plugin.json : 插件的配置文件,主要说明有哪些自定义组件可以供插件外部调用,并标识哪个js文件是插件的js接口文件,默认的配置形式如下:
第三步:
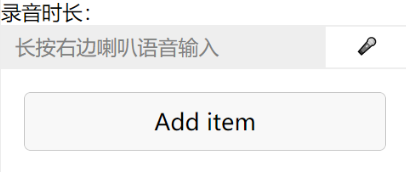
demo效果图如图所示:
具体步骤:
- 在Components下创建voice组件
voice.wxml
<view>录音时长:{{duration}}</view>
<view class="wxSearch-section">
  <view class="wxSearch-pancel">
    <input type="text" class="wxSearch-input"  placeholder="长按右边喇叭语音输入"  value="{{answer}}" />
    <button class="wxSearch-button"  bind:touchstart="startRecord" bind:touchend="stopRecord" size="mini" plain="true"><text style='font-size:32rpx'>🎤</text></button>
  </view>
</view>
voice.js
注:voice.js在编写的时候遇到几个问题:
第一是在回调函数success中使用this.setData失败,需要在函数开头声明var that = this,使用that.setData({})
第二是wx.saveFile()接口在插件中无效,官方文档中没有找到合适的替代接口,所以使用uploadFile()。
var RecorderManager = wx.getRecorderManager()
Page({
  data: {
    answer: ""
  },
  onLoad: function () {
    wx.authorize({
      scope: 'scope.record',
      success() {
      },
      fail(ex) {
        wx.hideLoading()
        wx.showModal({
          title: '提示',
          content: '请按照指示打开录音授权',
          success(res) {
            if (res.confirm) {
              wx.openSetting({
              })
            }
          }
        })
      }
    })
  },
  startRecord:function(){
    RecorderManager.start({
      duration: 600000,
      format: 'mp3',
      sampleRate: 16000,
    })
    RecorderManager.onStart(function (res) {
      console.log('开始录音')
    })
  },
  stopRecord:function(){
    var that = this
    var ans = ""
    RecorderManager.stop()
    RecorderManager.onStop(res => {
      var tempfilePath = res.tempFilePath;//音频文件地址
      wx.uploadFile({
              url: '根据实际情况',//上传的url地址
              filePath: tempfilePath,
              encoding: 'utf-8',
              name: 'file',
              header: { 'content-type': 'multipart/form-data' },
              method: 'POST',
              formData: {
                'openid': wx.getStorageSync('openid'),
              },
              success: function (res) {
                console.log(res.data)
                const ans = res.data
                that.setData({
                  answer: ans
                })
              },
              fail: function (res) {
              console.log(res.errMsg)
              }
            })
    })
  }
})
第三步:
- 将代码注册到插件配置文件中:
{
  "publicComponents": {
    "hello-component": "components/hello-component",
    "voice":"components/voice/voice"  //注册插件
  },
  "pages": {
    "hello-page": "pages/hello-page"
  },
  "main": "index.js"
}
- 在测试demo中引入插件:
首先观察app.json, 得到引擎服务以及它的版本和服务
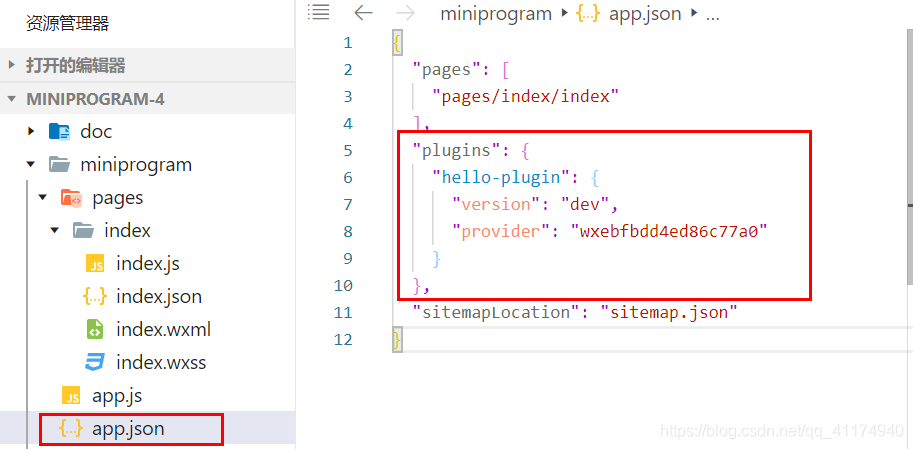
将来我们引用的插件也要在这里注册,包括插件的版本号和appid,服务名可以自定义。 - 修改index目录下的index.json
{
  "usingComponents": {
    "hello-list": "plugin://hello-plugin/hello-component",
    "voice" :"plugin://hello-plugin/voice"  //自己写的插件
  }
}
- 在index.wxml下引用插件
<voice />  //引用插件
<button id="add" bindtap="addItem">Add item</button>
效果图如下所示:

总结:
本demo机制非常简单,通过长按右侧话筒实现录音,上传到服务器由服务器翻译后获取翻译信息绑定到左侧input控件上。录音转翻译功能使用的是python代码,由于时间太久忘记原作者的git链接了,所以直接提供自己保存的代码,非常抱歉。整体效果只能说一般,初衷只是学习一下插件的使用,有较高需求的读者可以用百度,腾讯提供的语音api。
#用户初始化数据恢复
def Process_Voice(request):
    APP_ID = ''
    API_KEY = ''
    SECRET_KEY = ''
    stream = request.FILES['file']
    print(stream)
    with open('./output.mp3', 'wb') as wav:
        wav.write(stream.read())
    answer = change_to_chr('output.mp3')  #该接口可以通过上方链接获得
    return HttpResponse(answer)


 被折叠的 条评论
为什么被折叠?
被折叠的 条评论
为什么被折叠?
 到【灌水乐园】发言


