


一、学习目标
- 掌握事件处理
- 理解意图Intent
- 掌握窗口跳转与传递数据
二、新课学习
- 安卓应用往往有多个Activity,如何从一个Activity跳转到另一个Activity呢?往往要进行事件处理,并且还会用到安卓里面一个十分重要的组件——Intent,可以把它看成连接安卓不同组件之间的桥梁。
(一)三个基本控件
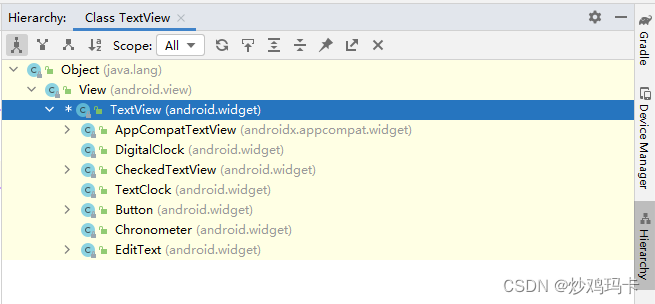
1、标签控件(TextView)
- 类层次继承图
| 属性 | 含义 |
|---|---|
| text | 文本内容 |
| textSize | 文本字号 |
| textColor | 文本颜色,单位:sp |
| layout_height | 高度,单位:dp(wrap_content,match_parent) |
| layout_width | 宽度,单位:dp(wrap_content ,match_parent) |
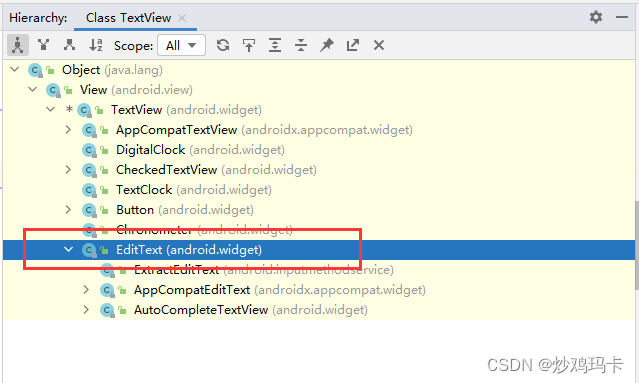
2、编辑框控件(EditText)
-
类层次继承图
-
常用属性
| 属性 | 含义 |
|---|---|
| text | 文本内容 |
| textSize | 文本字号 |
| textColor | 文本颜色,#ff0000 - 红色 |
| hint | 提示信息 |
| singleLine | 单行(true or false) |
| layout_height | 高度,单位:dp (wrap_content, match_parent) |
| layout_weight | 宽度,单位:dp (wrap_content, match_parent) |
| inputType | 输入类型(普通文本、密码、邮件……) |
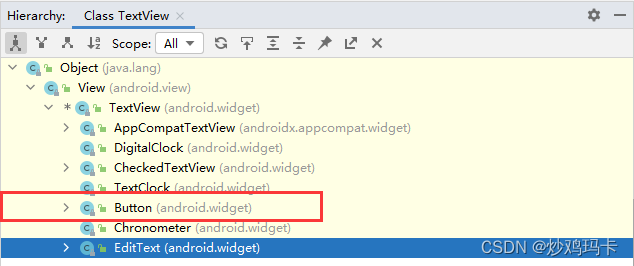
3、按钮控件(Button)
-
类层次继承图
-
常用属性
| 属性 | 含义 |
|---|---|
| text | 文本内容 |
| textSize | 文本字号 |
| textColor | 文本颜色,#ff0000 - 红色 |
| background | 背景颜色或背景图片 |
| layout_height | 高度,单位:dp (wrap_content, match_parent) |
| layout_weight | 宽度,单位:dp (wrap_content, match_parent) |
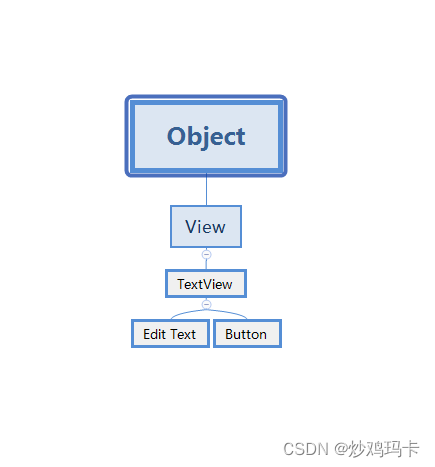
- EditText与Button是兄弟关系,它们的爹是TextView
(二)安卓事件处理机制
1、安卓事件处理概述
- 不论是桌面应用还是手机应用程序,需要对用户的动作提供响应,这种为用户动作提供响应的机制就是事件处理。
- 安卓提供了两种事件处理机制:基于回调的事件处理和基于监听的事件处理。
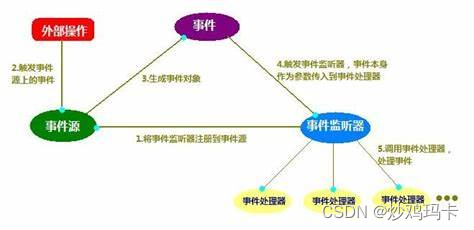
- 基于监听的事件处理是一种“面向对象”的事件处理,涉及三种对象:事件源(EventSource)、事件(Event)、事件监听器(EventListener)。
- 基于监听的事件处理流程图
2、安卓事件处理步骤
- 以按钮单击事件处理为例说明安卓事件处理步骤
| 序号 | 任务 |
|---|---|
| 1 | 在界面类里声明按钮控件变量 |
| 2 | 通过findViewById()方法得到按钮实例 |
| 3 | 利用setOnClickListener()方法给按钮注册单击事件监听器 |
| 4 | 实现单击事件监听器接口,采用匿名实现方式 |
| 5 | 在接口的抽象方法里编写事件处理代码 |
(三)案例演示:实现用户登录
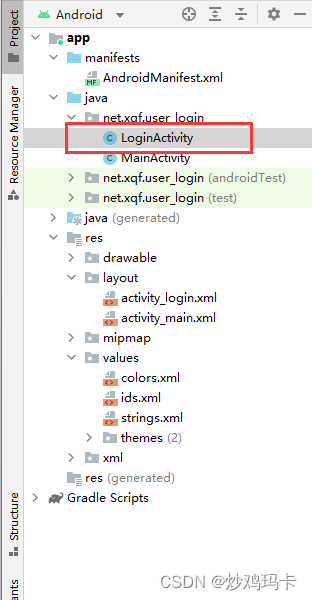
1、创建安卓应用
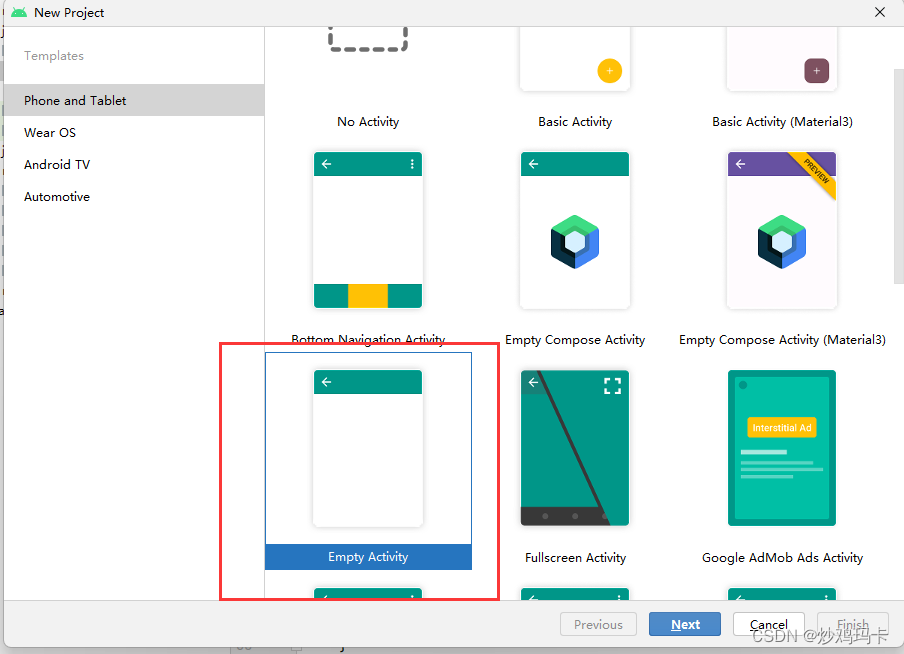
-
基于
Empty Activity模板创建安卓应用
-
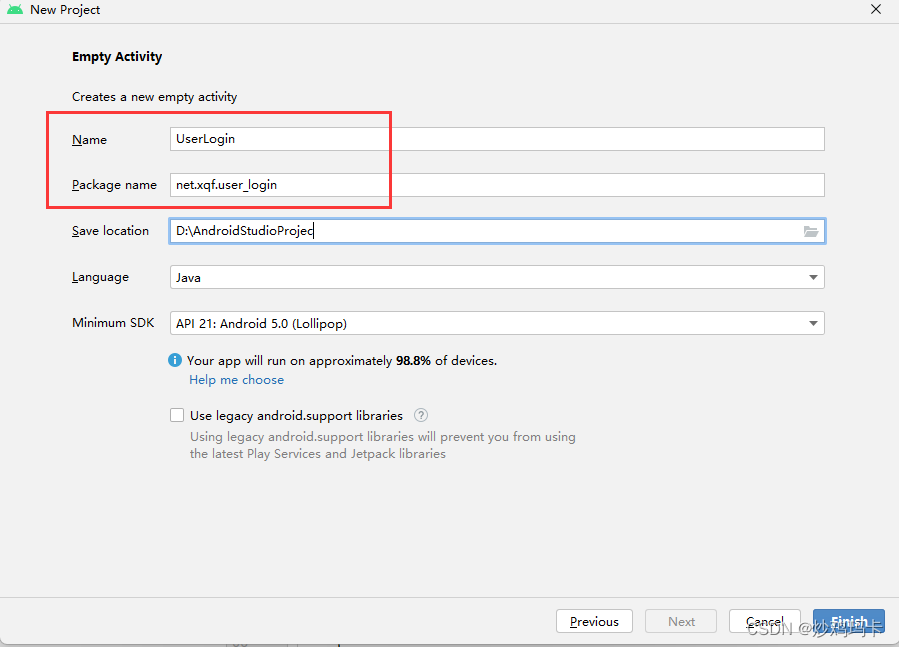
配置项目信息
-
单击【Finish】按钮
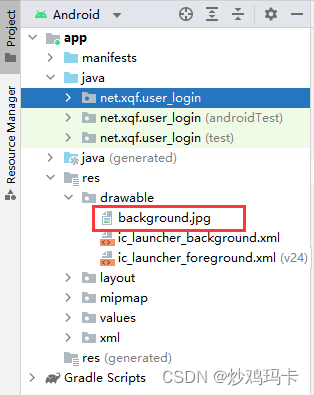
2、准备背景图片
- 将背景图片
background.png拷贝到drawable目录
3、基于模板创建登录窗口
-
基于Empty Activity模板创建LoginActivity,要生成对应的布局文件,并且要设置为启动Activity
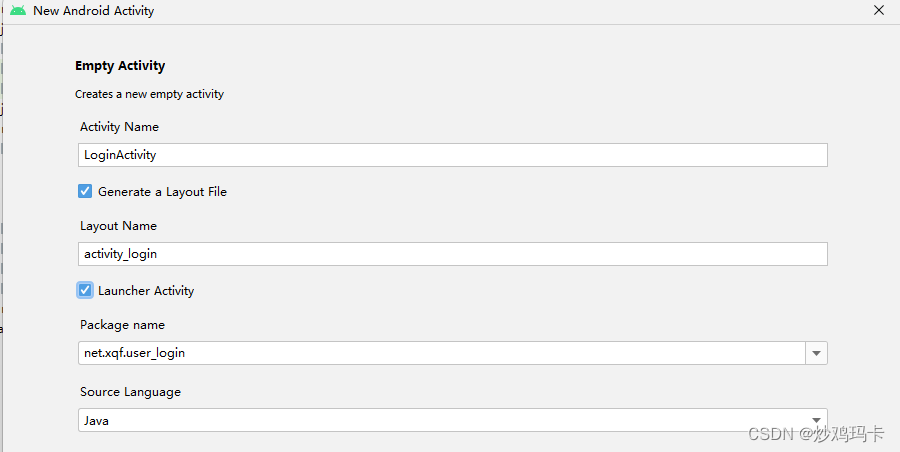
-
单击【Finish】按钮
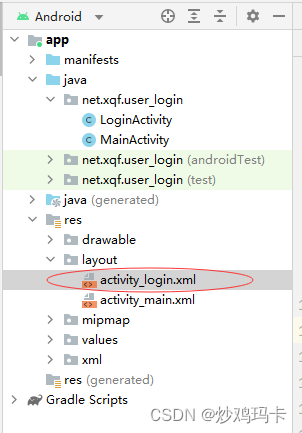
4、登录窗口布局资源文件
-
登录窗口布局资源文件 -
activity_login.xml
-
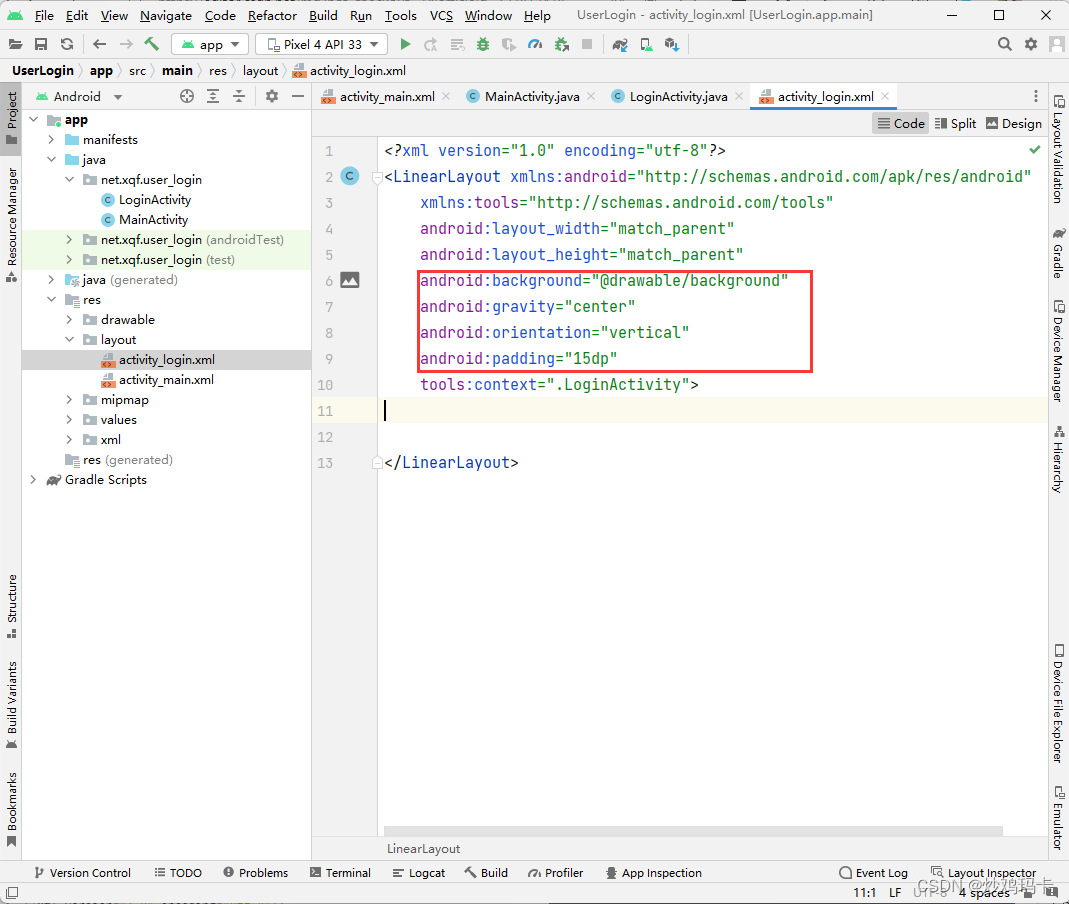
将约束布局改为线性布局,并设置相关属性
-
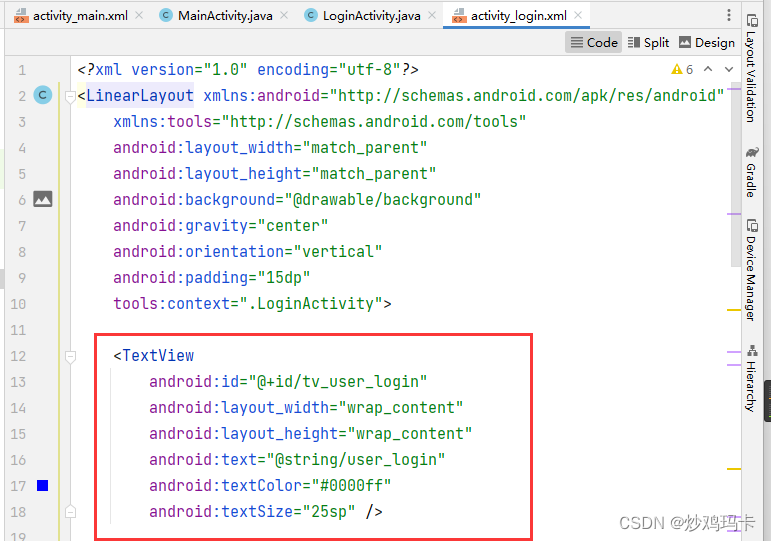
添加用户登录标签
-
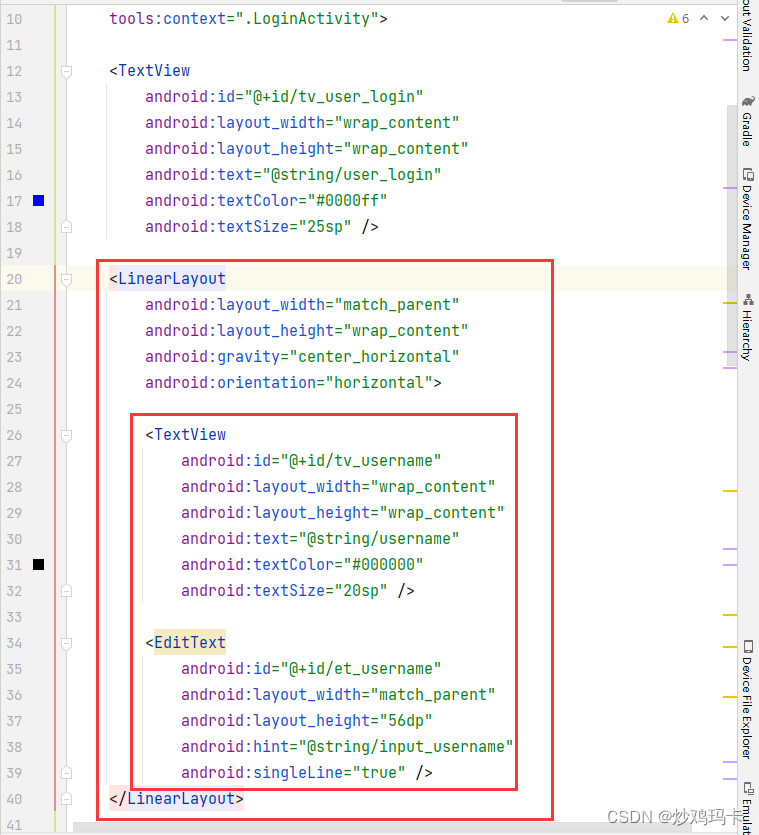
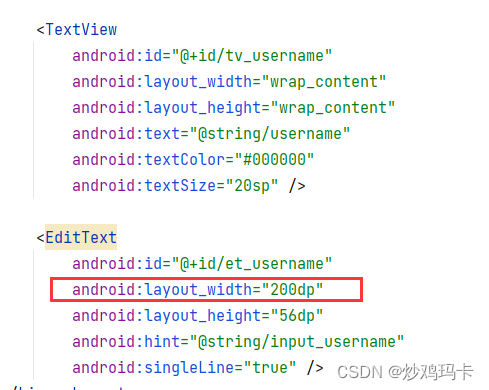
添加输入用户名的标签和编辑框,但是需要一个水平方向的线性布局把它们框起来
-
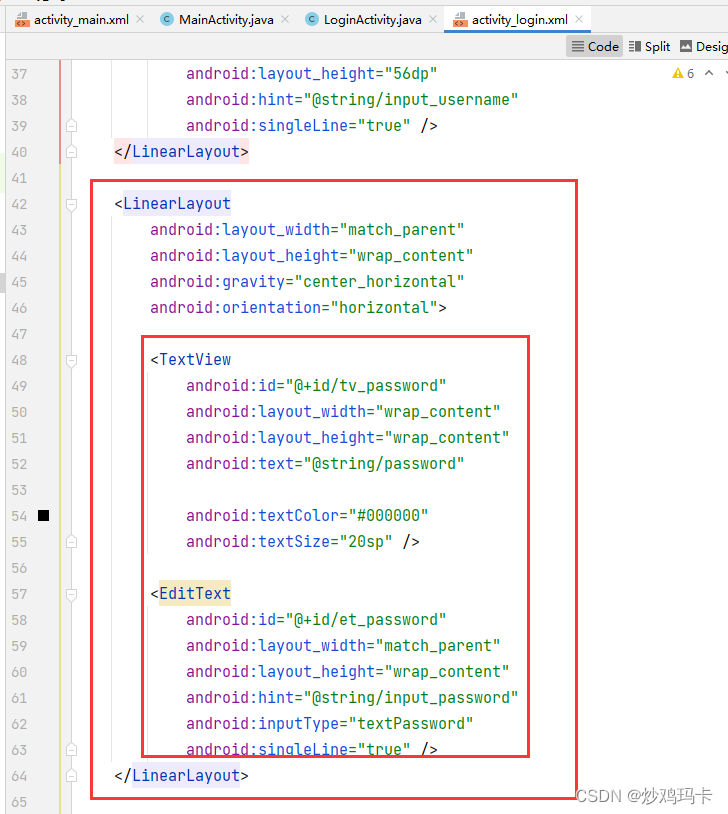
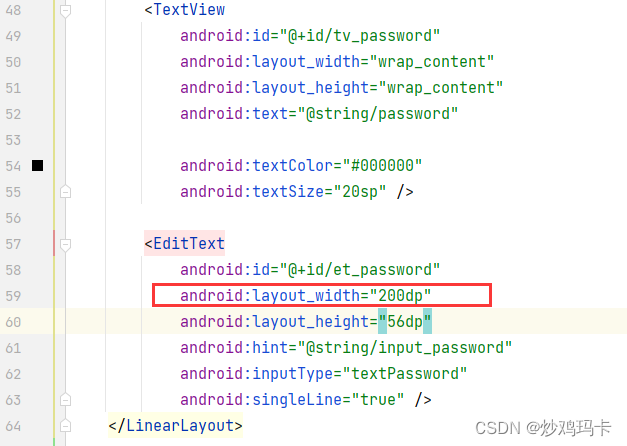
添加输入密码的标签和编辑框,但是需要一个水平方向的线性布局把它们框起来
-
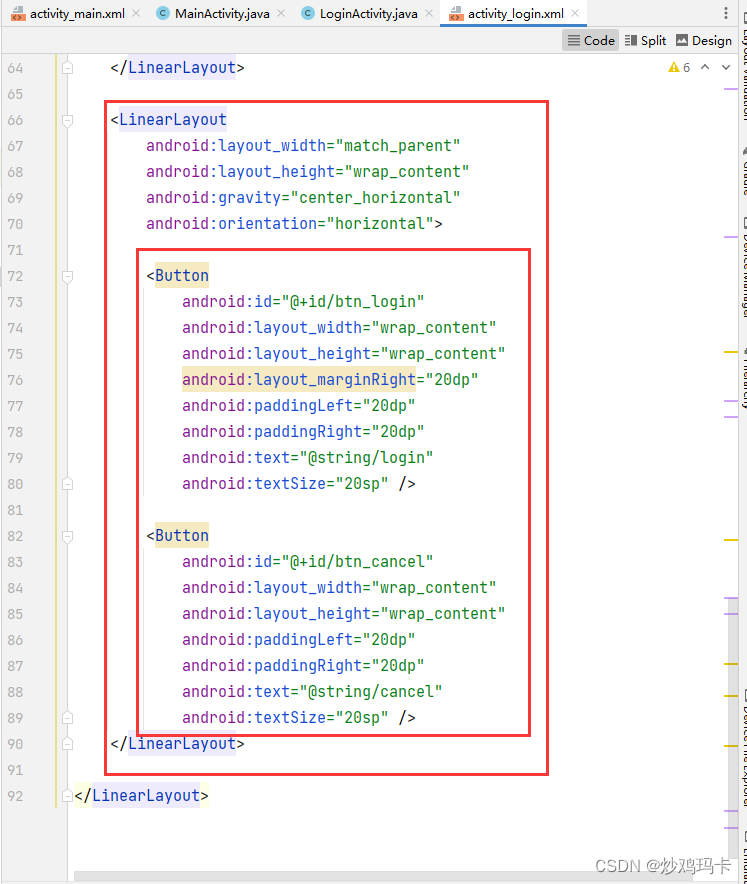
添加登录按钮和取消按钮,但是需要一个水平方向的线性布局把它们框起来
-
登录窗口布局资源文件完整代码
<?xml version="1.0" encoding="utf-8"?>
<LinearLayout xmlns:android="http://schemas.android.com/apk/res/android"
    xmlns:tools="http://schemas.android.com/tools"
    android:layout_width="match_parent"
    android:layout_height="match_parent"
    android:background="@drawable/background"
    android:gravity="center"
    android:orientation="vertical"
    android:padding="15dp"
    tools:context=".LoginActivity">

    <TextView
        android:id="@+id/tv_user_login"
        android:layout_width="wrap_content"
        android:layout_height="wrap_content"
        android:text="@string/user_login"
        android:textColor="#0000ff"
        android:textSize="25sp" />

    <LinearLayout
        android:layout_width="match_parent"
        android:layout_height="wrap_content"
        android:gravity="center_horizontal"
        android:orientation="horizontal">

        <TextView
            android:id="@+id/tv_username"
            android:layout_width="wrap_content"
            android:layout_height="wrap_content"
            android:text="@string/username"
            android:textColor="#000000"
            android:textSize="20sp" />

        <EditText
            android:id="@+id/et_username"
            android:layout_width="match_parent"
            android:layout_height="56dp"
            android:hint="@string/input_username"
            android:singleLine="true" />
    </LinearLayout>

    <LinearLayout
        android:layout_width="match_parent"
        android:layout_height="wrap_content"
        android:gravity="center_horizontal"
        android:orientation="horizontal">

        <TextView
            android:id="@+id/tv_password"
            android:layout_width="wrap_content"
            android:layout_height="wrap_content"
            android:text="@string/password"

            android:textColor="#000000"
            android:textSize="20sp" />

        <EditText
            android:id="@+id/et_password"
            android:layout_width="match_parent"
            android:layout_height="wrap_content"
            android:hint="@string/input_password"
            android:inputType="textPassword"
            android:singleLine="true" />
    </LinearLayout>

    <LinearLayout
        android:layout_width="match_parent"
        android:layout_height="wrap_content"
        android:gravity="center_horizontal"
        android:orientation="horizontal">

        <Button
            android:id="@+id/btn_login"
            android:layout_width="wrap_content"
            android:layout_height="wrap_content"
            android:layout_marginRight="20dp"
            android:paddingLeft="20dp"
            android:paddingRight="20dp"
            android:text="@string/login"
            android:textSize="20sp" />

        <Button
            android:id="@+id/btn_cancel"
            android:layout_width="wrap_content"
            android:layout_height="wrap_content"
            android:paddingLeft="20dp"
            android:paddingRight="20dp"
            android:text="@string/cancel"
            android:textSize="20sp" />
    </LinearLayout>

</LinearLayout>
| 属性 | 作用 |
|---|---|
| gravity | 用于设置容器的子控件的对齐方式,或控件的内容的对齐方式 |
| orientation | 线性布局的方向(horizontal——横向、vertical——纵向) |
| padding | 内边距,用于设置子控件与父容器边框的距离,或控件的内容与控件边框的距离;(paddingLeft、paddingRight、paddingTop、paddingBottom) |
| layout_margin | 外边距,用于设置控件之间的距离;(layout_marginLeft,layout_marginRight、layout_marginTop、layout_marginBottom) |
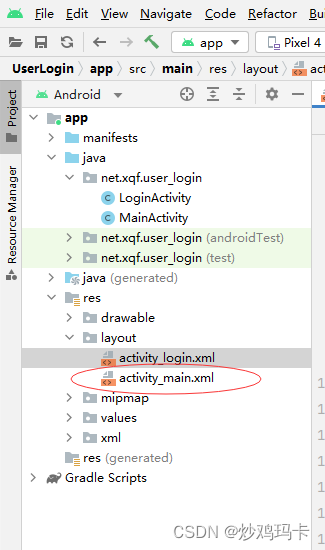
5、主窗口布局资源文件
- 主窗口布局资源文件 -
activity_main.xml
<?xml version="1.0" encoding="utf-8"?>
<LinearLayout xmlns:android="http://schemas.android.com/apk/res/android"
    xmlns:app="http://schemas.android.com/apk/res-auto"
    xmlns:tools="http://schemas.android.com/tools"
    android:layout_width="match_parent"
    android:layout_height="match_parent"
    android:orientation="vertical"
    android:gravity="center"
    tools:context=".MainActivity">

    <TextView
        android:id="@+id/tv_message"
        android:layout_width="wrap_content"
        android:layout_height="wrap_content"
        android:text="Hello World!"
        android:textSize="25dp"
        android:textColor="#0000ff"
        />

</LinearLayout>
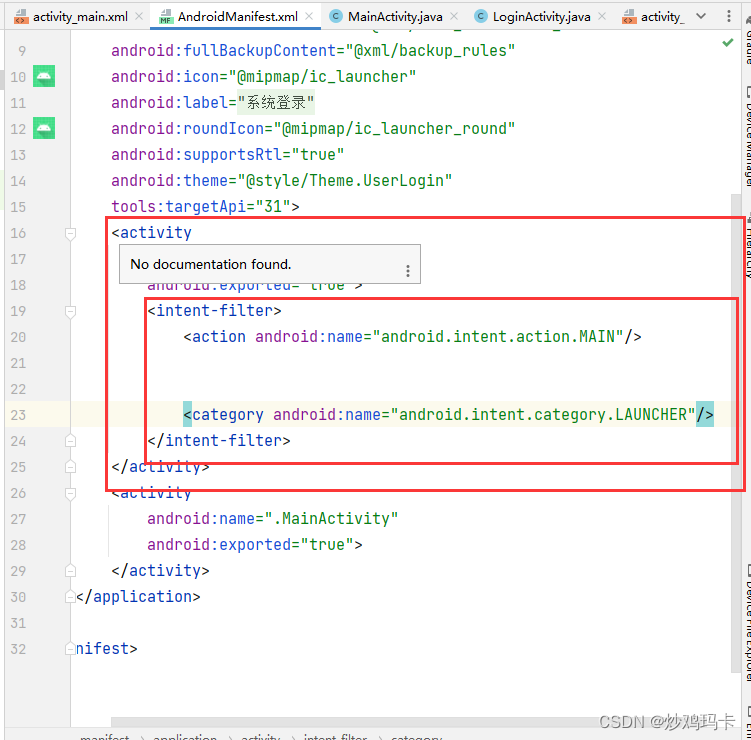
6、安卓项目清单文件
- 安卓项目清单文件AndroidManifest.xml,删除MainAcivity元素包含的意图过滤器
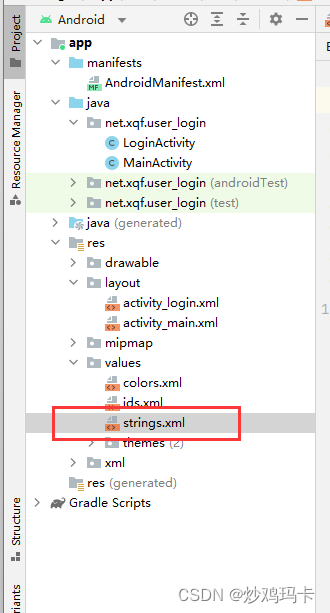
7、字符串资源文件
- 在字符串资源文件strings.xml里定义所需字符串变量
<resources>
    <string name="app_name">系统登录</string>
    <string name="user_login">用户登录</string>
    <string name="username">用户:</string>
    <string name="input_username">请输入用户名</string>
    <string name="password">密码:</string>
    <string name="input_password">请输入密码</string>
    <string name="login">登录</string>
    <string name="cancel">取消</string>
</resources>
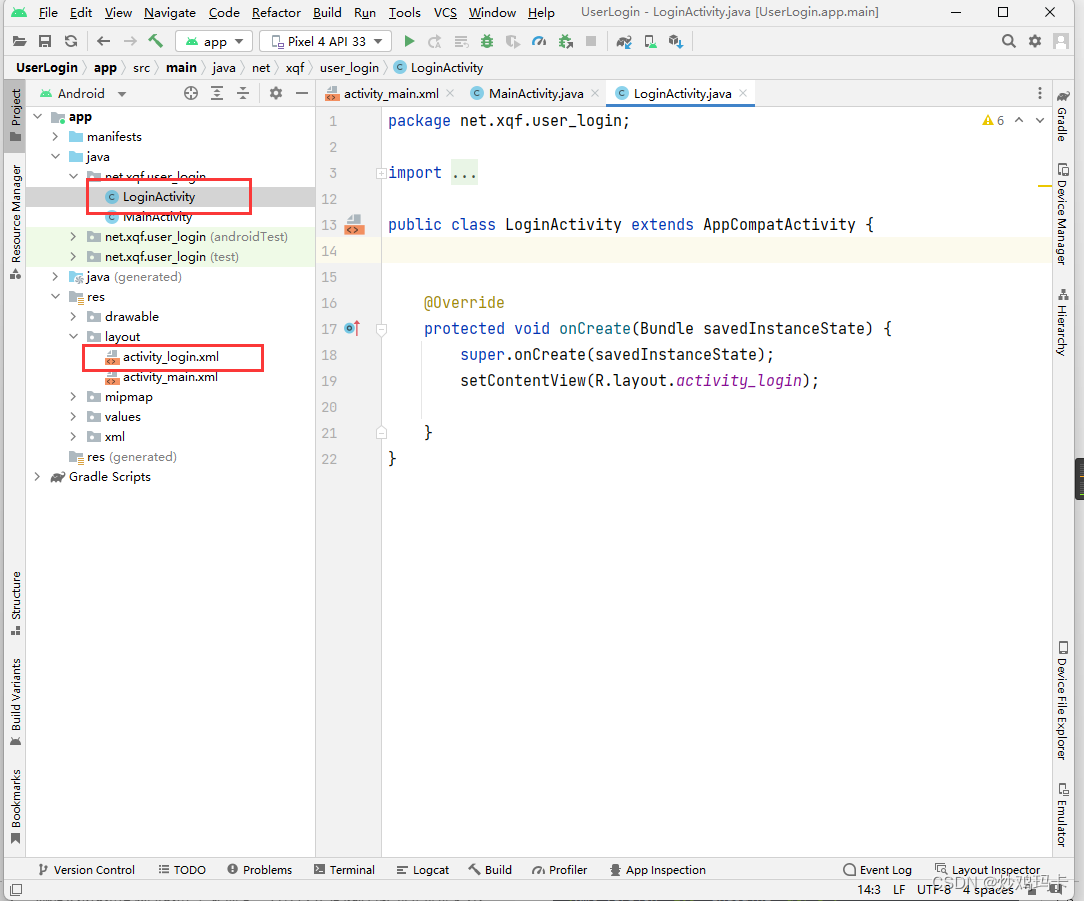
8、登录窗口功能实现
- 登录窗口 -
LoginActivity
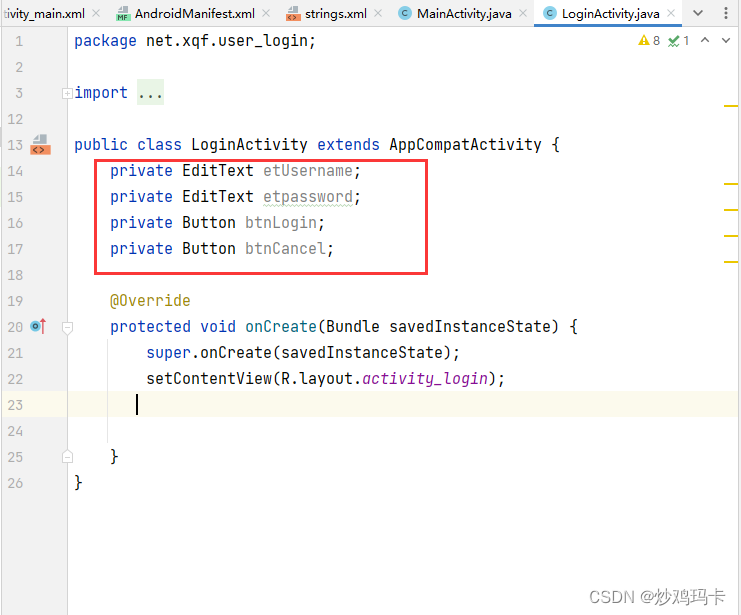
(1)声明控件变量
- 两个编辑框变量和两个按钮变量
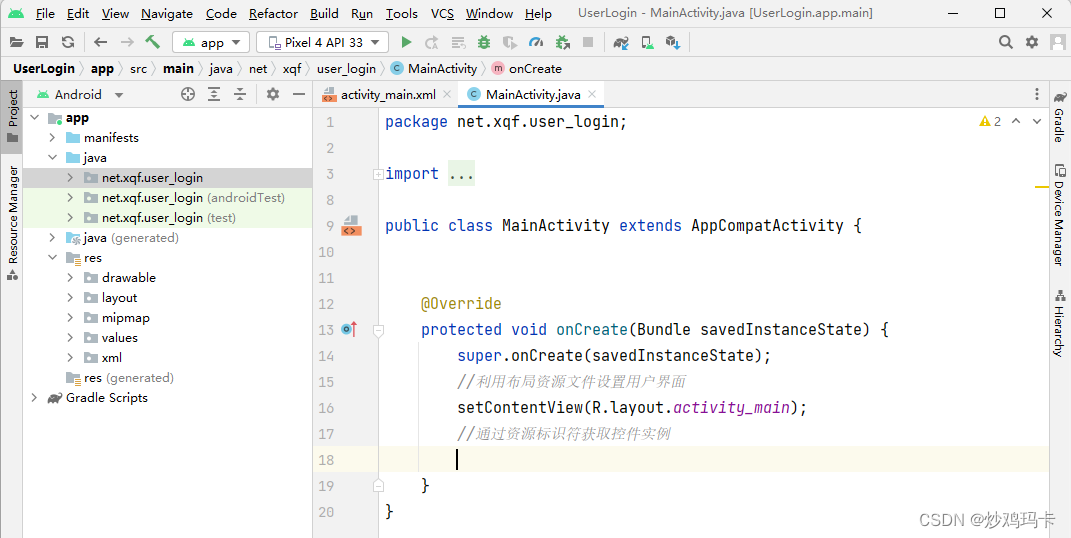
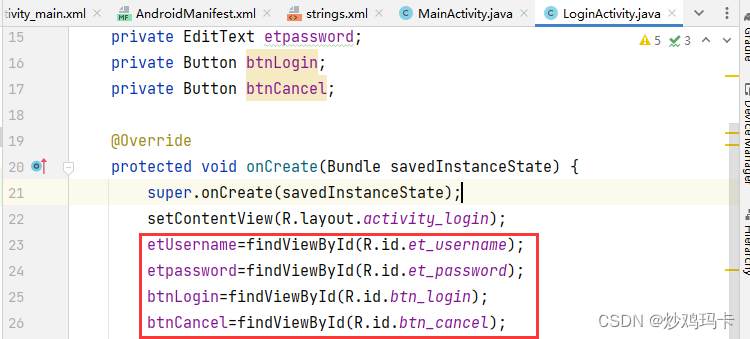
(2)通过资源标识符获取控件实例
- 通过
findViewById()方法获取控件实例(类似于JavaScript里的getElementById()方法)
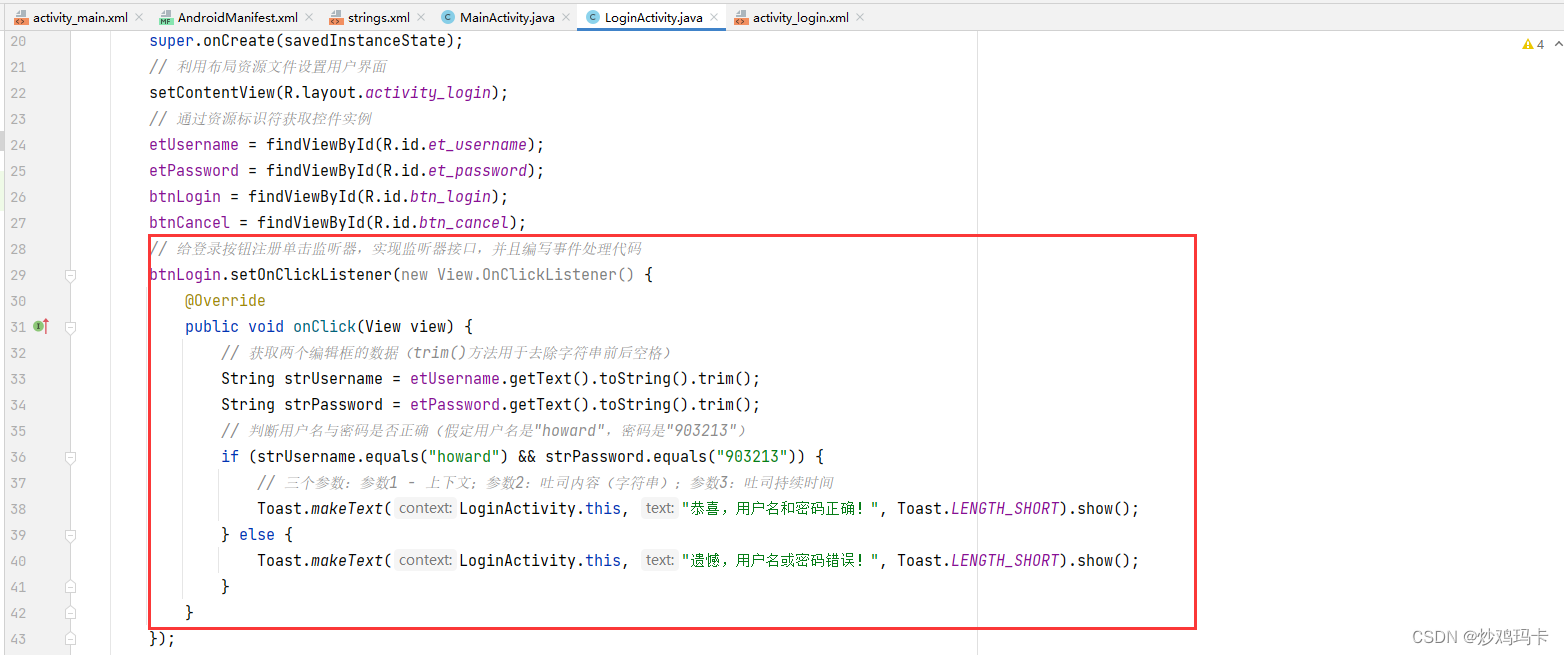
(3)登录按钮事件处理
- 给登录按钮注册单击监听器,实现监听器接口,并且编写事件处理代码
- 首先获取用户输入的用户名和密码,然后判断是否正确,弹出不同的吐司
(4)取消按钮事件处理
-
给取消按钮注册单击监听器,实现监听器接口,并且编写事件处理代码
-
单击取消按钮,关闭登录窗口(另外还有一种处理方法,只是清空两个编辑框而不关闭窗口)
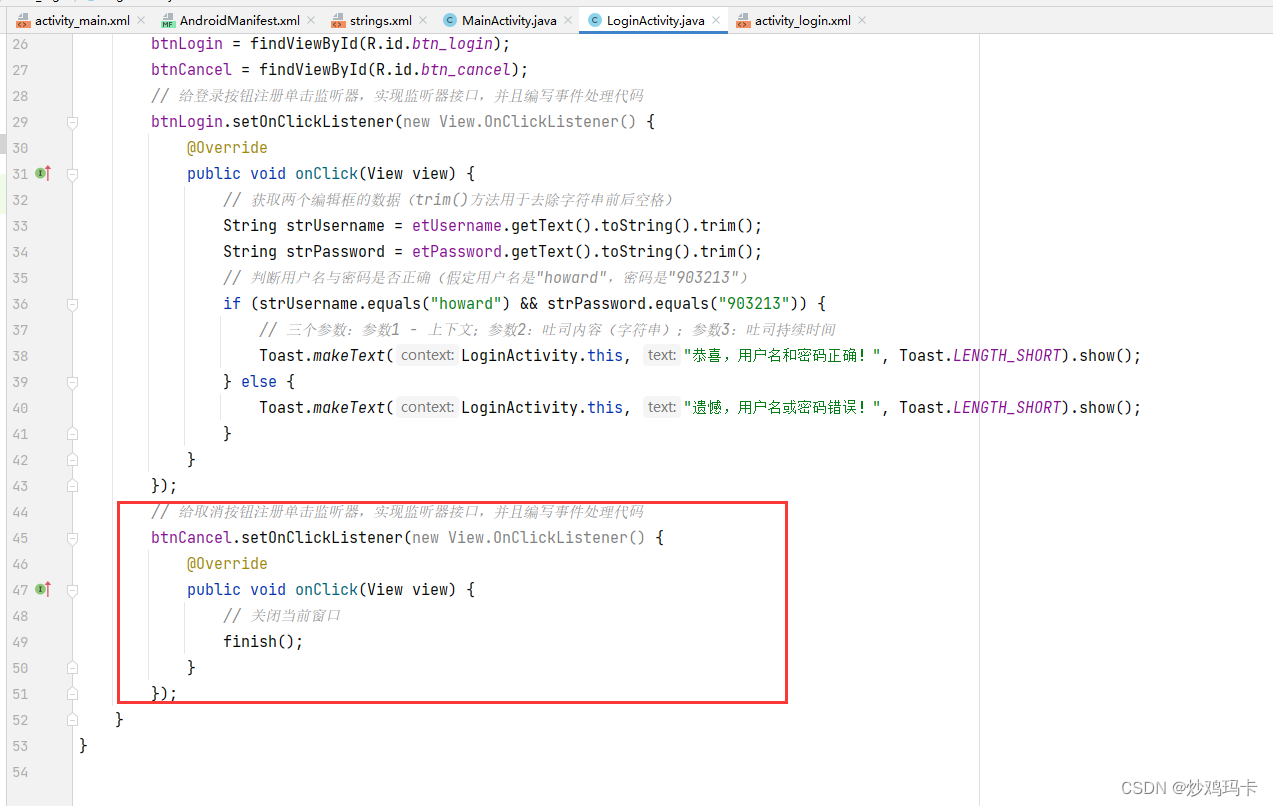
-
完整的代码
package net.xqf.user_login;

import androidx.appcompat.app.AppCompatActivity;

import android.os.Bundle;
import android.view.View;
import android.widget.Button;
import android.widget.EditText;
import android.widget.Toast;

public class LoginActivity extends AppCompatActivity {

    private EditText etUsername;
    private EditText etPassword;
    private Button btnLogin;
    private Button btnCancel;

    @Override
    protected void onCreate(Bundle savedInstanceState) {
        super.onCreate(savedInstanceState);
        // 利用布局资源文件设置用户界面
        setContentView(R.layout.activity_login);
        // 通过资源标识符获取控件实例
        etUsername = findViewById(R.id.et_username);
        etPassword = findViewById(R.id.et_password);
        btnLogin = findViewById(R.id.btn_login);
        btnCancel = findViewById(R.id.btn_cancel);
        // 给登录按钮注册单击监听器,实现监听器接口,并且编写事件处理代码
        btnLogin.setOnClickListener(new View.OnClickListener() {
            @Override
            public void onClick(View view) {
                // 获取两个编辑框的数据(trim()方法用于去除字符串前后空格)
                String strUsername = etUsername.getText().toString().trim();
                String strPassword = etPassword.getText().toString().trim();
                // 判断用户名与密码是否正确(假定用户名是"howard",密码是"903213")
                if (strUsername.equals("howard") && strPassword.equals("903213")) {
                    // 三个参数:参数1 - 上下文;参数2:吐司内容(字符串);参数3:吐司持续时间
                    Toast.makeText(LoginActivity.this, "恭喜,用户名和密码正确!", Toast.LENGTH_SHORT).show();
                } else {
                    Toast.makeText(LoginActivity.this, "遗憾,用户名或密码错误!", Toast.LENGTH_SHORT).show();
                }
            }
        });
        // 给取消按钮注册单击监听器,实现监听器接口,并且编写事件处理代码
        btnCancel.setOnClickListener(new View.OnClickListener() {
            @Override
            public void onClick(View view) {
                // 关闭当前窗口
                finish();
            }
        });
    }
}
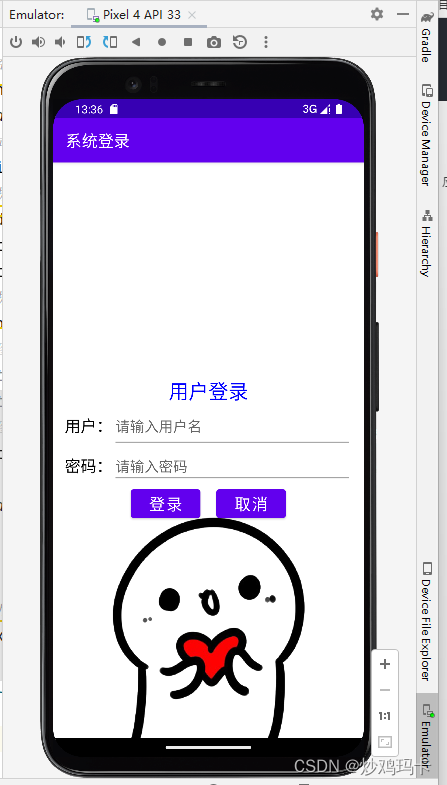
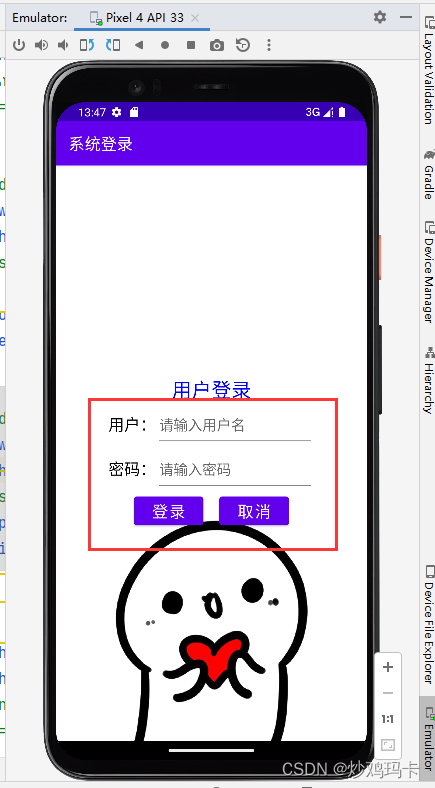
9、启动应用,查看效果
- 思考:如果希望用户登录标签与下面的输入用户名编辑隔开一点,应该怎么设置标签的属性?
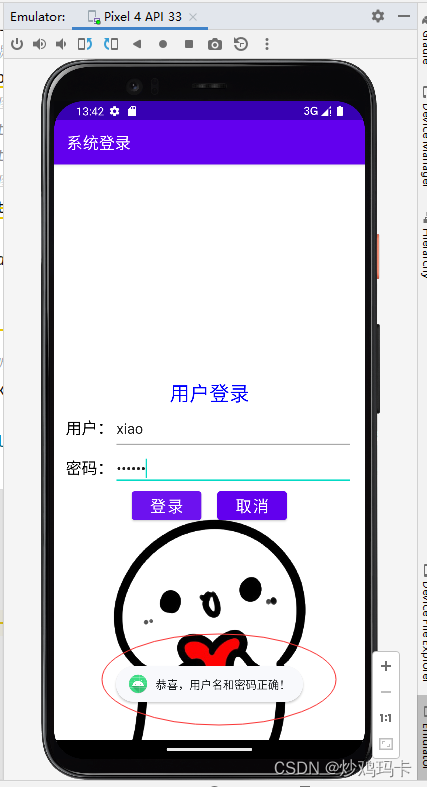
(1)输入用户名与密码正确的情况
- 用户名:xiao
- 密码:123456
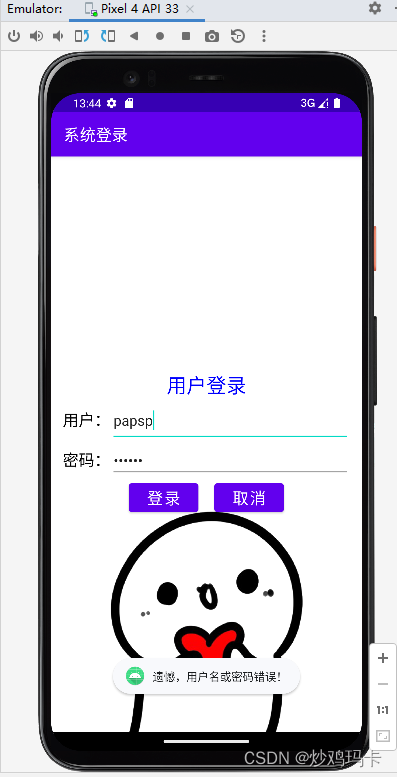
(2)输入用户名或密码错误的情况
-
用户名:papsp
-
密码:987654
-
可以指定两个编辑框的宽度,比如200dp
-
重启应用,查看效果
(四)利用意图启动组件
1、使用显式意图启动组件
- 假设有两个窗口:FirstActivity和SecondActivity
方式一
Intent intent = new Intent(FirstActivity.this, SecondActivity.class);
startActivity(intent);
方式二
Intent intent = new Intent();
intent.setClass(FirstActivity.this, SecondActivity.class);
startActivity(intent);
方式三
Intent intent = new Intent();
ComponentName component = new ComponentName(FirstActivity.this, SecondActivity.class);
intent.setComponent(component);
startActivity(intent);
2、使用隐式意图启动组件
(1)在Java代码创建隐式意图
Intent intent = new Intent();
intent.setAction("net.hw.ACTION_NEXT");
intent.addCategory(Intent.CATEGORY_DEFAULT);
startActivity(intent);
(2)在项目清单文件里设置意图过滤器
<activity android:name="net.hw.SecondActivity">
    <intent-filter>
       <action android:name="net.hw.ACTION_NEXT" />
       <category android:name="android.intent.category.DEFAULT" />
   </intent-filter>
</activity>
(五)利用意图传递数据
1、传递单项数据
- 在起始组件通过意图传递单项数据
// 通过意图传递单项数据
intent.putExtra("username", strUsername);
intent.putExtra("password", strPassword);
在目标组件通过意图获取单项数据
// 通过意图获取单项数据
String username = intent.getStringExtra("username");
String password = intent.getStringExtra("password");
2、传递数据包
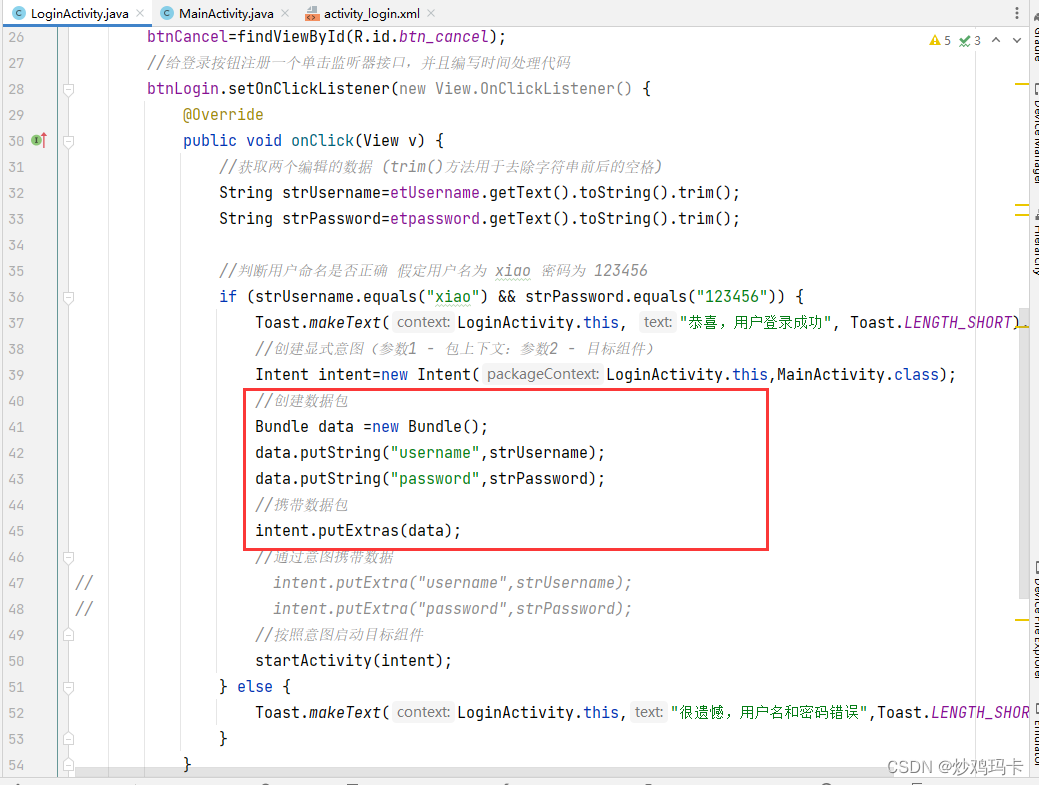
(1)在起始组件通过意图携带数据包
// 创建数据包,封装数据
Bundle data = new Bundle();
data.putString("username", strUsername);
data.putString("password", strPassword);
// 通过意图携带数据包
intent.putExtras(data);
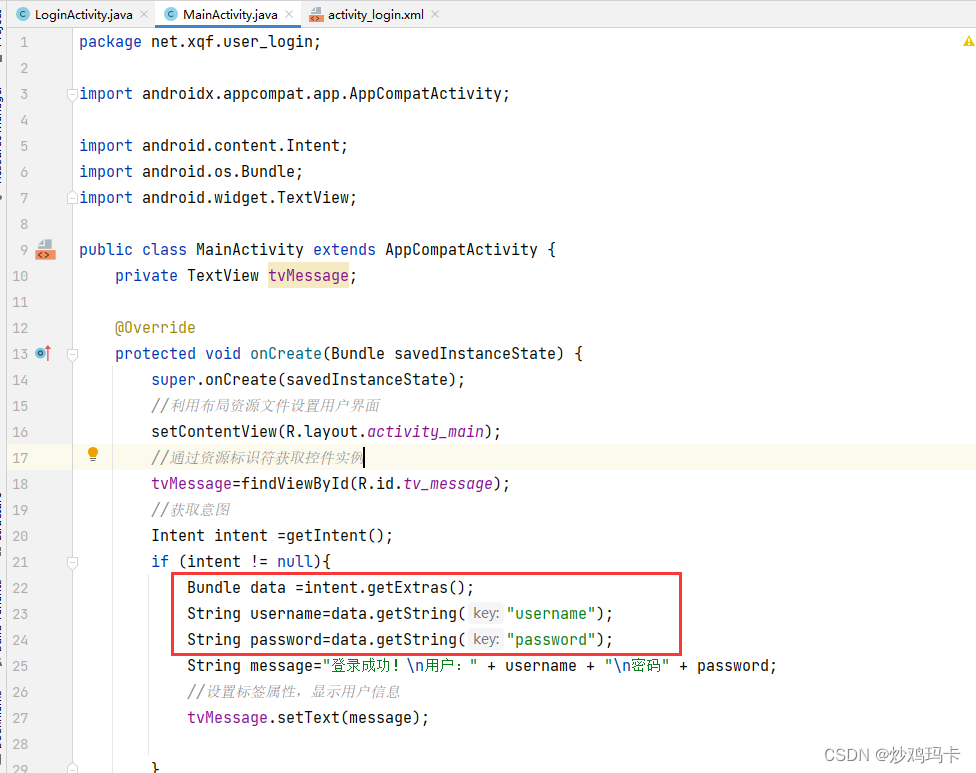
(2)在目标组件通过意图获取数据包
// 获取意图携带的数据包
Bundle data = intent.getExtras();
// 从数据包里按键取值获取各项数据
String username = data.getString("username");
String password = data.getString("password");
(六)案例演示:修改用户登录程序
- 功能要求:当登录成功,跳转到主窗口,显示用户名与密码。
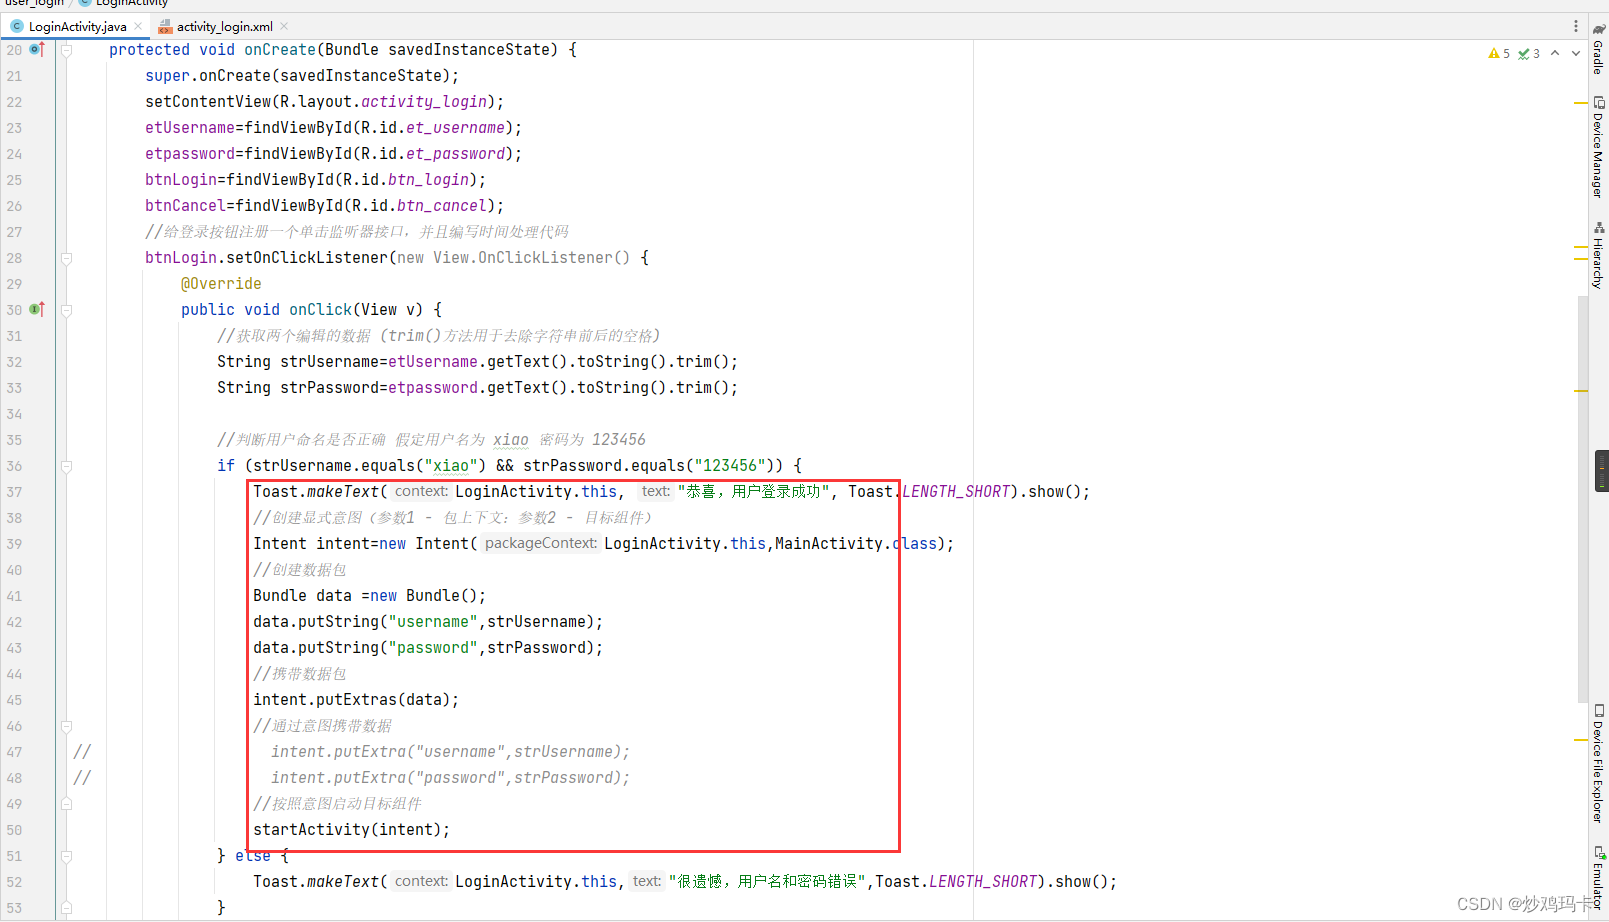
1、修改登录窗口代码
- 创建显式意图,利用意图携带数据,按照意图启动目标组件
// 创建显式意图(参数1 - 包上下文;参数2 - 目标组件)
Intent intent = new Intent(LoginActivity.this, MainActivity.class);
// 通过意图携带数据
intent.putExtra("username", strUsername);
intent.putExtra("password", strPassword);
// 按照意图启动目标组件
startActivity(intent);
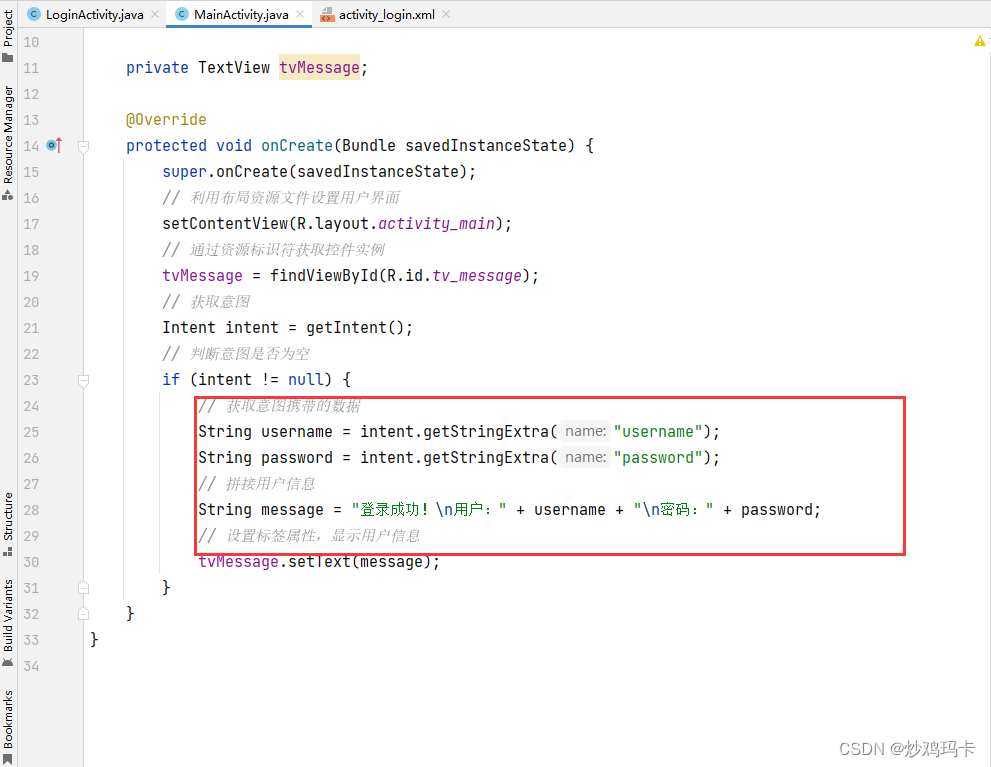
2、修改主窗口代码
- 接收登录窗口通过意图传递的数据并显示在标签里
package net.hw.user_login;

import androidx.appcompat.app.AppCompatActivity;

import android.content.Intent;
import android.os.Bundle;
import android.widget.TextView;

public class MainActivity extends AppCompatActivity {

    private TextView tvMessage;

    @Override
    protected void onCreate(Bundle savedInstanceState) {
        super.onCreate(savedInstanceState);
        // 利用布局资源文件设置用户界面
        setContentView(R.layout.activity_main);
        // 通过资源标识符获取控件实例
        tvMessage = findViewById(R.id.tv_message);
        // 获取意图
        Intent intent = getIntent();
        // 判断意图是否为空
        if (intent != null) {
            // 获取意图携带的数据
            String username = intent.getStringExtra("username");
            String password = intent.getStringExtra("password");
            // 拼接用户信息
            String message = "登录成功!\n用户:" + username + "\n密码:" + password;
            // 设置标签属性,显示用户信息
            tvMessage.setText(message);
        }
    }
}
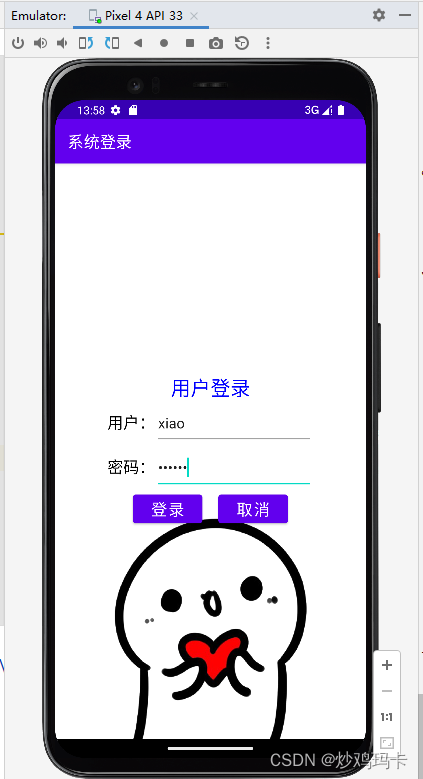
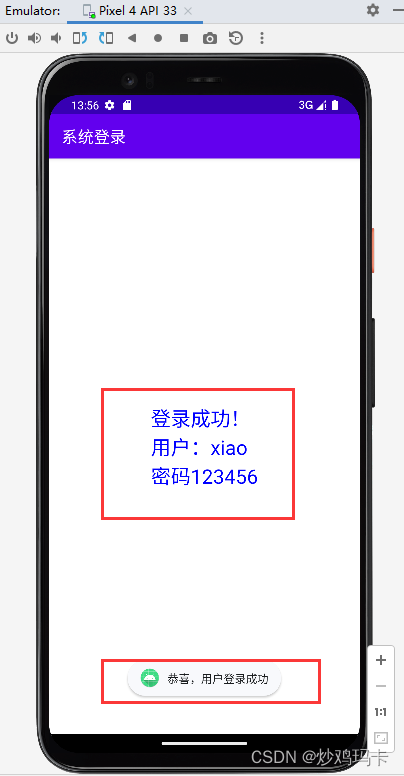
3、启动应用,查看效果
(1)输入用户名与密码正确的情况
-
用户名:xiao
-
密码:123456
-
单击【登录】按钮
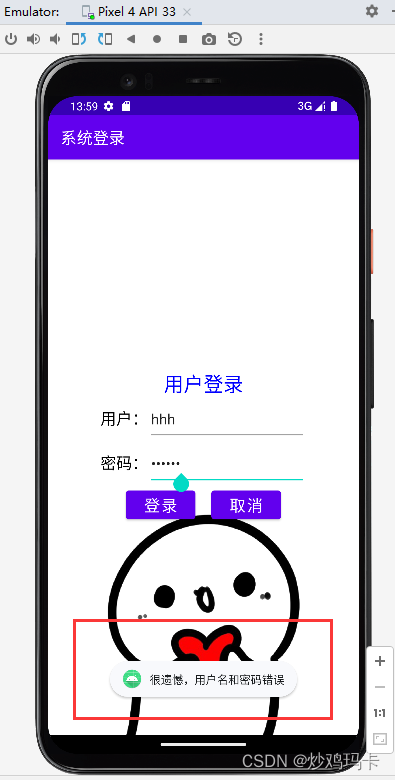
(2)输入用户名或密码错误的情况
- 用户名:hhh
- 密码:987654
4、修改登录窗口代码
- 将多项数据封装成数据包,通过意图传递数据包
5、修改主窗口功能代码
- 通过意图获取数据包,然后从数据包里按键取得各项数据
6、启动应用,测试效果
- 登录操作录屏


 1837
1837


 被折叠的 条评论
为什么被折叠?
被折叠的 条评论
为什么被折叠?
 到【灌水乐园】发言


