


1 Redux概念简述
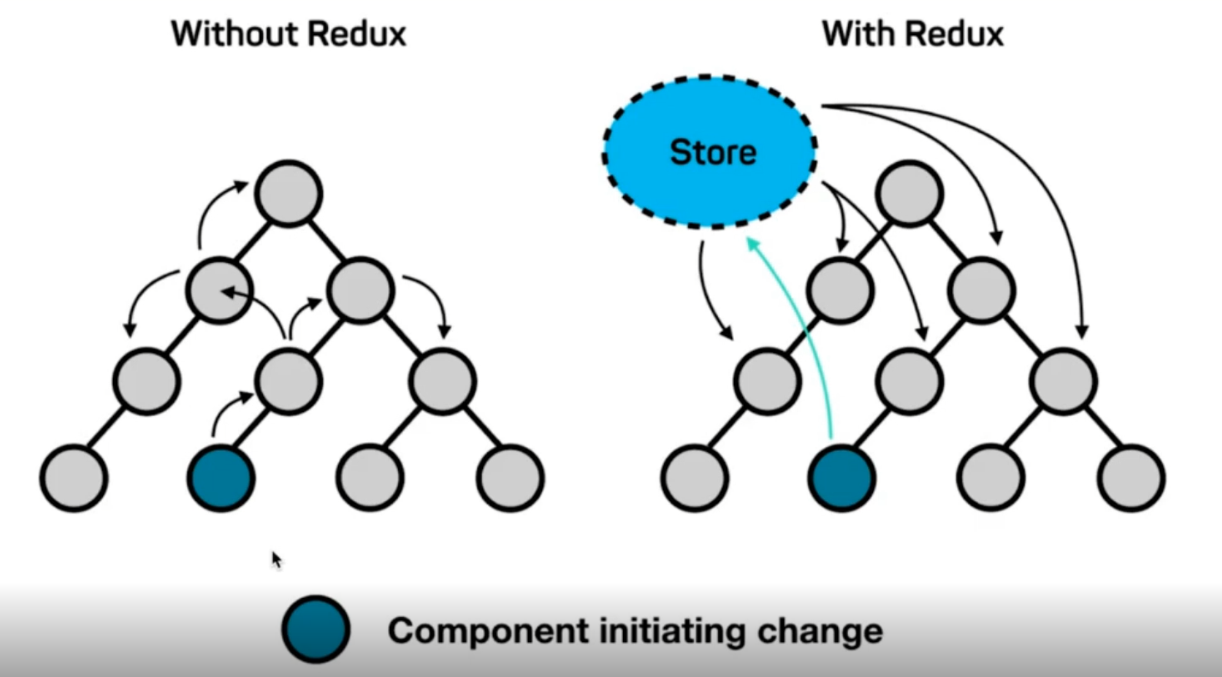
Redux = Reducer + Flux
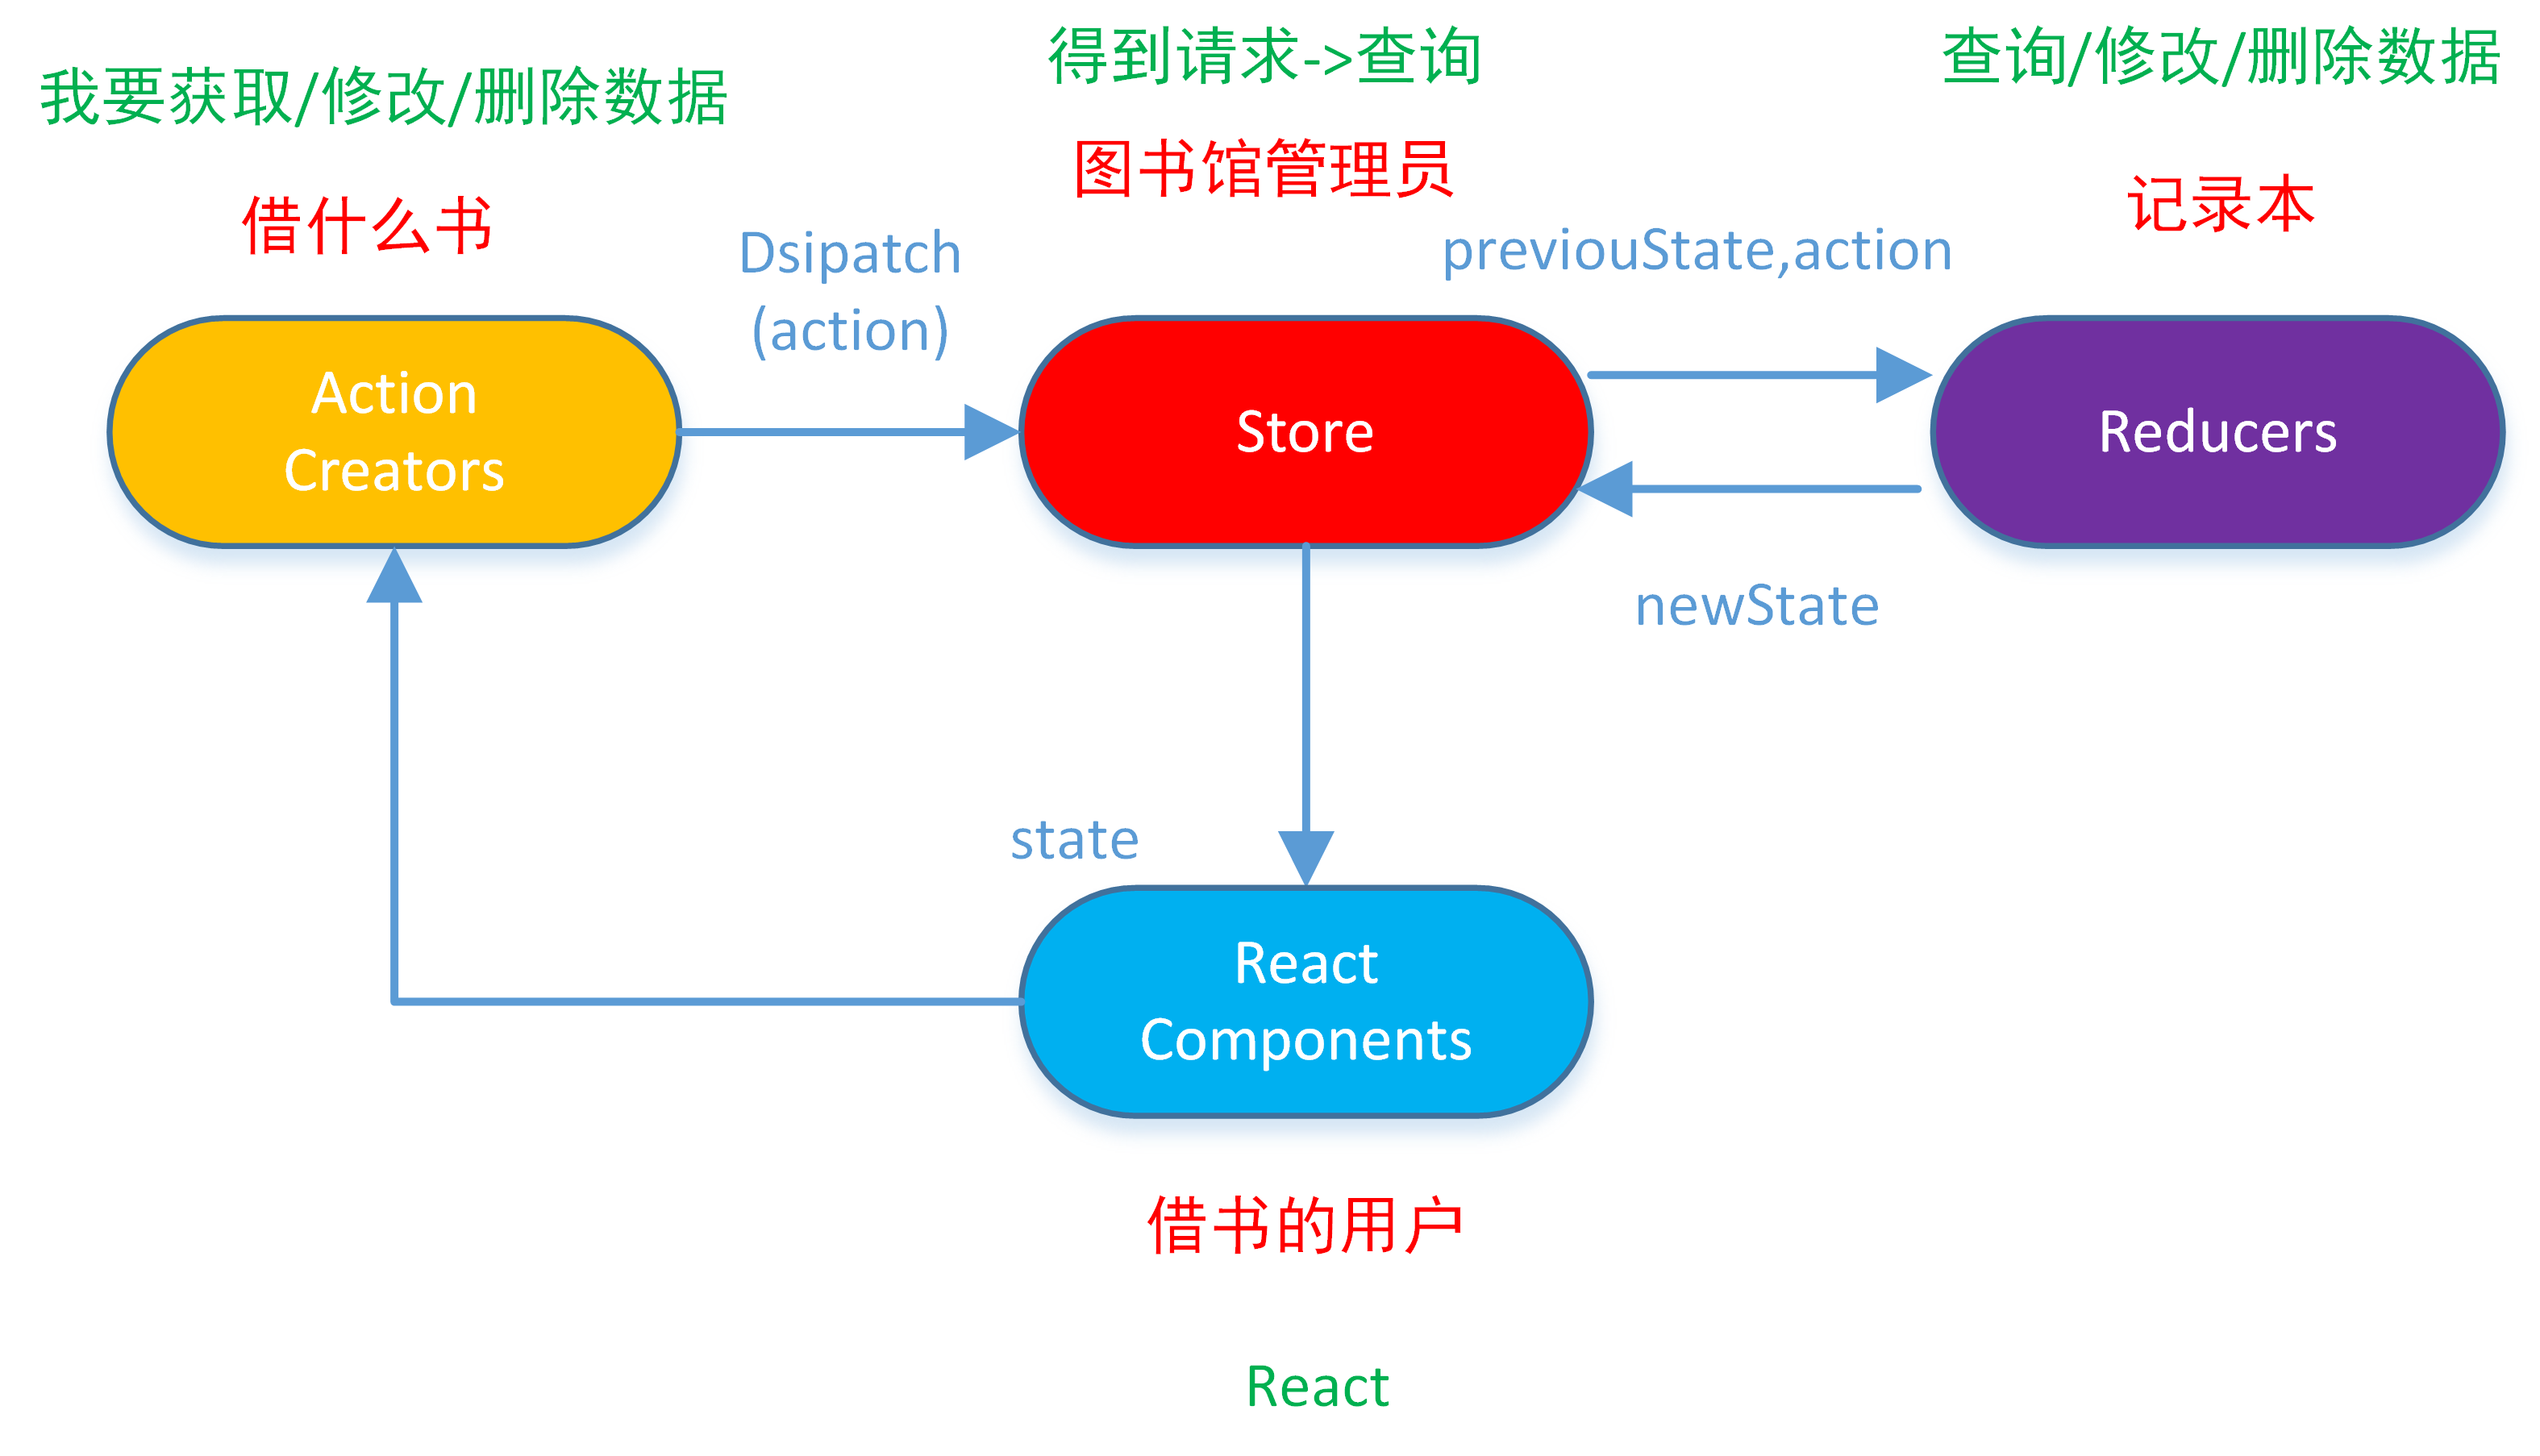
1.1 Redux的工作流程

1.2 Redux的安装
命令行:yarn add redux
2 创建redux中的store
2.1 创建Store和reducers并连接
先在react中安装redux
yarn add redux
(1)创建一个store的文件夹
在该组件所在文件夹,创建一个store的文件夹
在store文件夹里创建index.js(这个index.js就是创建store代码存放的位置)
创建出Store(管理员),我们需要创建出Reducer(记录本),把这个小本本给管理员。
所以在store文件夹里再创建一个Reducer(reducer里面导出函数),然后导入给index.js(store管理员)
index.js
import { createStore } from 'redux';         //导入Redux模块
import reducer from'./reducer'               //导入reducer

const store = createStore(reducer);           //创建store,并获取reducer中的值

export default store;                           //导出store
reducer.js
const deafultState = {				//创建一个存放数据的量
    inputValue: '123',
    list: [1,2]
}

//记录本
//state为图书馆书籍的信息 -> 存储的数据
//导出数据 接受两个参数 state和action, state指向要导出的数据
export default (state = deafultState, action) => {
    return state;
}
(2)在React中使用数据
要想在组件中使用store的数据,需要在组件中引用store,即引入上面store文件夹下的index.js文件
todolist.js
import React, {Component} from 'react';
import 'antd/dist/antd.css';
import { Input } from 'antd';
import { Button } from 'antd';
import { List, Typography} from 'antd';
import store from './store/index'; //导入store
class TodoList extends Component {
constructor(props) {
super (props);
this.state = store.getState(); // getState 是store提供的方法用来获取store中的数据,这条命令使我们组件中state(数据)为store中所取的数据
console.log(this.state);
}
render() {
return (
<div style={{marginTop: '10px',marginLeft: '20px'}}>
<div >
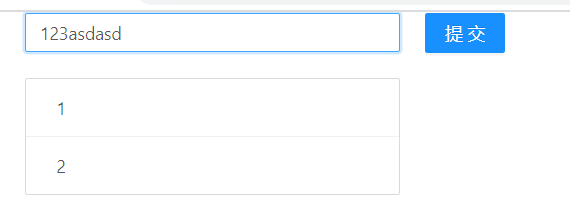
<Input value={this.state.inputValue} placeholder="todo info" style={{width: '300px'}}/> //所以这里直接使用this.state使用传过来的数据
<Button type='primary' style={{marginLeft:'20px'}}>提交</Button>
</div>
<List
style={{marginTop: '20px',width: '300px'}}
bordered
dataSource={this.state.list} //所以这里直接也使用this.state使用传过来的数据
renderItem={item => (
<List.Item>
<Typography.Text></Typography.Text> {item}
</List.Item>
)}
/>
</div>
)
}
}
export default TodoList;
以上组件中关键代码
 constructor(props) {
   super (props);
   this.state = store.getState();  //将store中的值通过方法,getState赋值给state
   console.log(this.state);					//打印下state的信息
 }
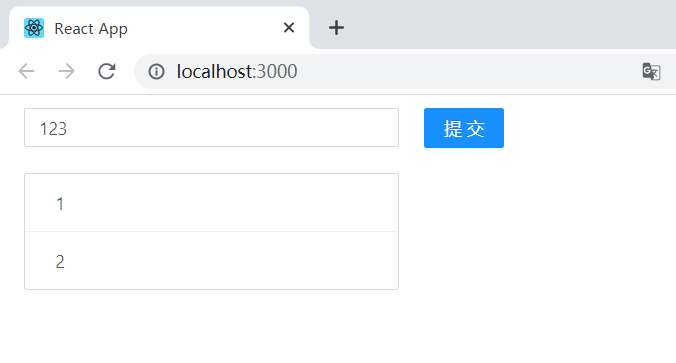
我们可以看到this.state中的信息,成功获取到了我们的数据

运行结果
3 Action和Reducer的编写
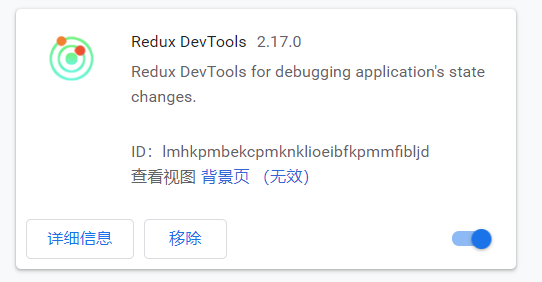
3.1 安装Redux调试工具并使用
在谷歌应用商店中安装
安装后打开浏览器,点击开发者工具中的Redux出现如下图问题
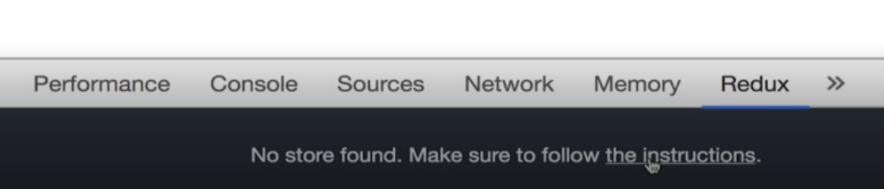
点击the instructions查看文档,为下图内容
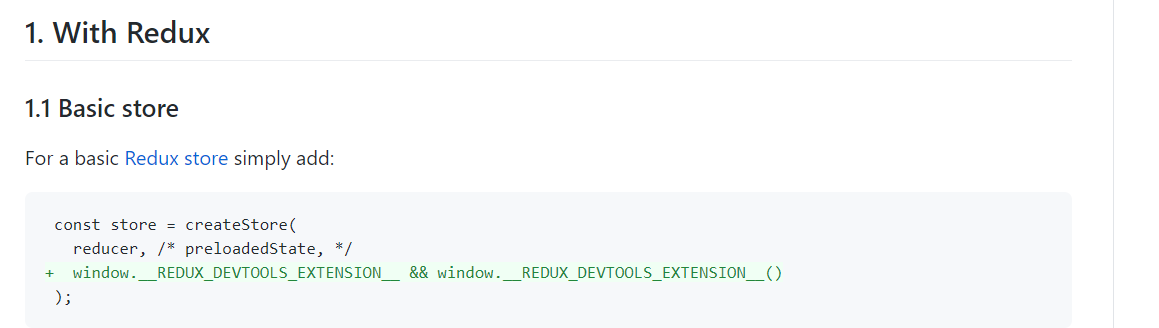
所以在我们store中的index.js中增加绿色内容
store中的index.js
import { createStore } from 'redux';
import reducer from'./reducer'

const store = createStore(
    reducer,
    window.__REDUX_DEVTOOLS_EXTENSION__ && window.__REDUX_DEVTOOLS_EXTENSION__()
    );

export default store;
即可完成配置,重新打开redux,没有问题。(注意要用新版的插件,旧版本的可能会出现问题)
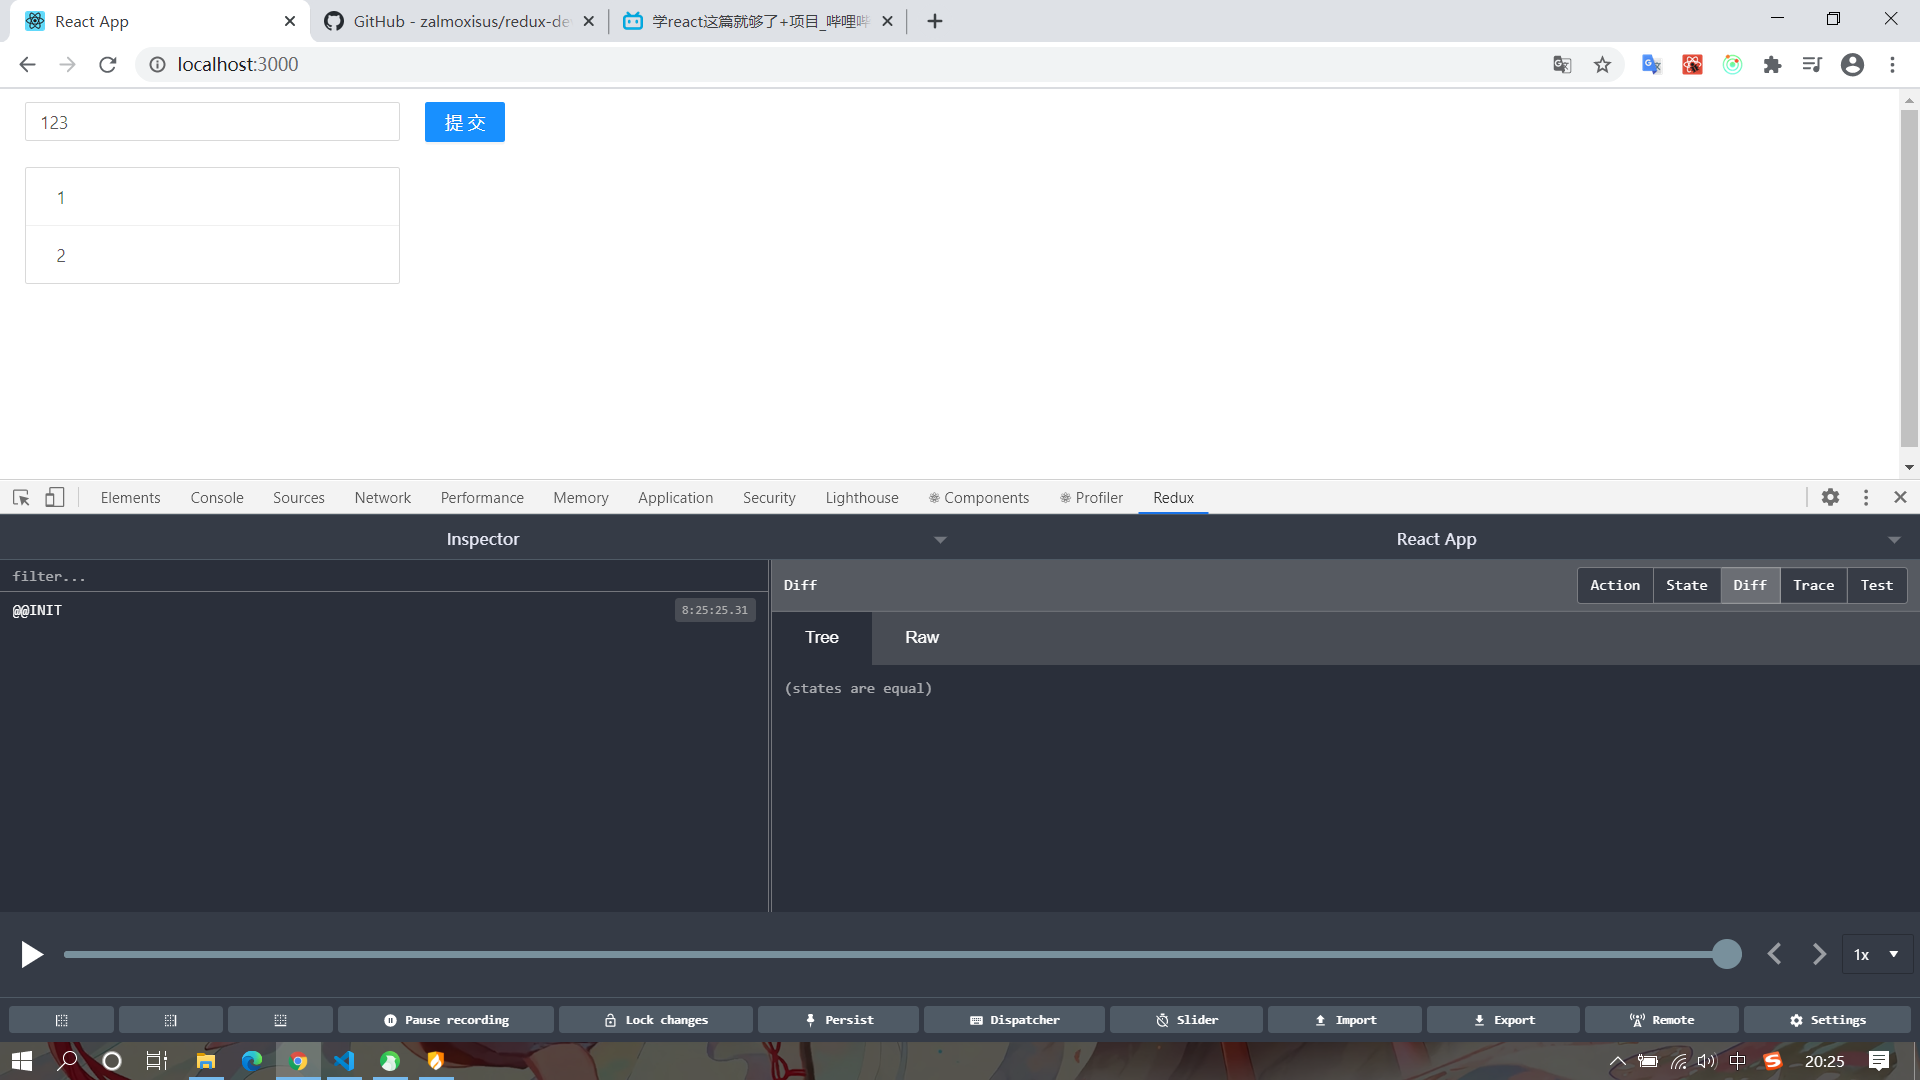
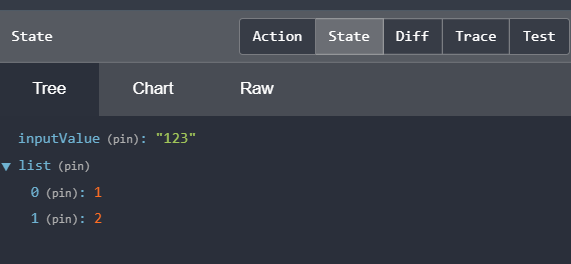
state中也可以看到我们的变量
3.2 实现input框的输入

功能一:现在我们希望当input输入框中的内容改变时,我们希望Redux中的数据inputValue也跟着变,从而实现了输入框中内容可以随输入实时更改
(1)在组件中(TodoList.js中)
首先对Input框增加onChange事件,当其值改变时调用handleInputChange函数(即:onChange={ this.handleInputChange}),并在前面constructor中进行事件绑定(即:this.handleInputChange = this.handleInputChange.bind(this))
然后在render下面写handleInputChange函数内容
handleInputChange(e) {
    const action = {                           // 创建一个action
        type: 'change_input_value',            //描述做什么事情
        value: e.target.value                  //帮我把值改为e.target.value,这里将输入框的value放入action中再传给store
    }
    store.dispatch(action);                    //dispatch也是store的一个方法,通过dispatch将要进行的行为发送给store
}
store拿到action后都会直接默认把action和previouState(之前初始数据)给reducer,所以接下来去reducer.js中
(2)在reducer中(reducer.js中)
reducer.js
const deafultState = {
    inputValue: '123',
    list: [1,2]
}

//记录本
//state 图书馆书籍的信息 -> 存储的数据
//state -> 上次存储的数据 action -> 用户传过来的那句话
//reducer 可以接受state,但是不可以修改state
export default (state = deafultState, action) => {
    if(action.type === 'change_input_value'){
        const  newState = JSON.parse(JSON.stringify(state));  //深拷贝一份初始数据为newState
        newState.inputValue = action.value;
        return newState
    }                       // return出来的数据newState返回给了store中
        return state;
}
store会默认用newState替换掉之前的state,但是此时通过redux开发者工具可以看出来state中inputValue随着输入框内容改变而变化。但是组件中数据并没更新。所以我们回到TodoList组件
(3)在组件中(在Todolist.js中)
在constructor中使用store.subscribe()函数,这是store的另一个方法。 这个函数是指,当store中数据发生变化的时候,就会执行该函数中括号中的内容。
在组件最前面的constructor(props){ }中增加以下代码:
		this.handleStoreChange = this.handleStoreChange.bind(this);
		store.subscribe(this.handleStoreChange)
并在组件render后写handleStoreChange函数内容
  handleStoreChange(){
  	this.setState(store.getState());    // store.getState表示从store中重新取数据,然后使用setState替换当前组件中的数据
  }
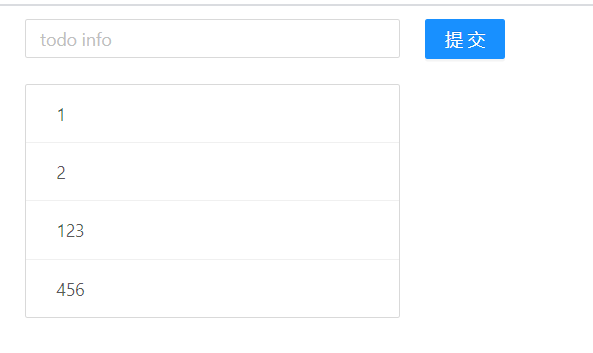
运行结果:
然后我们就实现了输入框中内容可以随输入实时更改
功能二:点击提交按钮,将输入框中的内容增加到store中的list里面,再重新渲染组件,更新下方item
(1)在组件中(TodoList.js中)
首先对button按钮增加onClick事件,当其值改变时调用handleBtnClick函数(即:onClick={ this.handleBtnClick}),并在前面constructor中进行事件绑定(即:this.handleBtnClick = this.handleBtnClick.bind(this))
然后在render下面写handleBtnClick函数内容
handleBtnClick() {
    const action = {
      type: 'add_todo_item',    // 创建action
    }
    store.dispatch(action);   // 发送给store
}
store拿到action后都会直接默认把action和previouState(之前初始数据)给reducer,所以接下来去reducer.js中
(2)在reducer中(reducer.js中)
reducer.js
const deafultState = {
    inputValue: '123',
    list: [1,2]
}
//记录本
//state 图书馆书籍的信息 -> 存储的数据
//state -> 上次存储的数据 action -> 用户传过来的那句话
//reducer 可以接受state,但是不可以修改state
export default (state = deafultState, action) => {
    if(action.type === 'change_input_value'){
        const  newState = JSON.parse(JSON.stringify(state));  //深拷贝一份初始数据为newState
        newState.inputValue = action.value;
        return newState             // return出来的数据newState返回给了store中
    }
  if(action.type === 'add_todo_item'){
        const  newState = JSON.parse(JSON.stringify(state));  //深拷贝一份初始数据为newState
        newState.list.push(newState.inputValue);
        newState.inputValue = '';
        return newState                   // return出来的数据newState返回给了store中
    }
        return state;
}
store会默认用newState替换掉之前的state,因为之前我们实现第一个功能时已经使用store.subscribe()进行数据监听,并更改数据重新渲染组件(所以第二个功能就不需要重复使用了)。那么我们第二个功能也已实现。
结果:
功能三:点击输入框下的item,实现list中item的删除
(1)在组件中(TodoList.js中)
首先对List.Item增加onClick事件(这里传item和index值给List.Item),当其值改变时调用handleItemDelete函数并进行事件绑定和拿到传进来的index(即:onClick={ this.handleItemDelete.bind(this, index)})
renderItem={(item, index) => (
                        <List.Item onClick={this.handleItemDelete.bind(this, index)}>
                        {item}
                        </List.Item>
然后在render下面写handleItemDelete函数内容,他会接收index参数。
handleItemDelete(index) {
    const action = {
      type: 'delete_todo_item',    // 创建action
      index                        // 并把index放入action中
    }
    store.dispatch(action);   // 发送给store
}
store拿到action后都会直接默认把action和previouState(之前初始数据)给reducer,所以接下来去reducer.js中
(2)在reducer中(reducer.js中)
reducer.js
const deafultState = {
    inputValue: '123',
    list: [1,2]
}
//记录本
//state 图书馆书籍的信息 -> 存储的数据
//state -> 上次存储的数据 action -> 用户传过来的那句话
//reducer 可以接受state,但是不可以修改state
export default (state = deafultState, action) => {
    if(action.type === 'change_input_value'){
        const  newState = JSON.parse(JSON.stringify(state));  //深拷贝一份初始数据为newState
        newState.inputValue = action.value;
        return newState             // return出来的数据newState返回给了store中
    }
  if(action.type === 'add_todo_item'){
        const  newState = JSON.parse(JSON.stringify(state));  //深拷贝一份初始数据为newState
        newState.list.push(newState.inputValue);
        newState.inputValue = '';
        return newState                   // return出来的数据newState返回给了store中
    }
  if(action.type === 'delete_todo_item'){
        const  newState = JSON.parse(JSON.stringify(state));  //深拷贝一份初始数据为newState
        newState.list.splice(action.index, 1);           //从action中的index下标开始删除一项
        return newState                   // return出来的数据newState返回给了store中
    }
        return state;
}
store会默认用newState替换掉之前的state,因为之前我们实现第一个功能时已经使用store.subscribe()进行数据监听,并更改数据重新渲染组件(所以第三个功能就不需要重复使用了)。那么我们第三个功能也已实现。
4 ActionTypes的拆分
之前我们运用store需要把action写在组件中(todolist.js)所需事件触发的函数中(在render下),其中包括定义action的type。之后action传给store,又默认传给reducer;所以在reducer中需要进行action的type判别,从而执行不同的操作。(可以看出这里todolist.js中的action的type需要和reducer.js中判断所需的type要一致)。
为了保证任何一方拼写错误引起的不必要麻烦,进行以下操作:
首先,在store文件夹下增加一个文件actionTypes.js并在该文件中定义常量(实际上就是action的type)
actionTypes.js
export const CHANGE_INPUT_VALUE = 'change_input_value';
export const ADD_TODO_ITEM = 'add_todo_item';
export const DELETE_TODO_ITEM= 'delete_todo_item';
然后,在todolist.js中导入actionTypes.js文件,并更改type为对应常量的名字
todolist.js
import {CHANGE_INPUT_VALUE, ADD_TODO_ITEM, DELETE_TODO_ITEM} from './store/actionTypes'


//在下面事件函数中更改为对应常量名字,以下列举一个
 handleInputChange(e) {
     const action = {
       type: CHANGE_INPUT_VALUE,            //描述做什么事情
       value: e.target.value                //帮我把值改为e.target.value
     }
     store.dispatch(action);
 }
最后,在reducer.js中也导入actionTypes.js文件,并更改type为对应常量的名字
reducer.js
import {CHANGE_INPUT_VALUE, ADD_TODO_ITEM, DELETE_TODO_ITEM} from './actionTypes'

const deafultState = {
    inputValue: '',
    list: []
}

//记录本
//state 图书馆书籍的信息-> 存储的数据
//state -> 上次存储的数据 action -> 用户传过来的那句话
//reducer 可以接受state,但是不可以修改state
export default (state = deafultState, action) => {
    if(action.type === CHANGE_INPUT_VALUE){
        const  newState = JSON.parse(JSON.stringify(state));  //深拷贝
        newState.inputValue = action.value;
        return newState
    }
    if(action.type === ADD_TODO_ITEM){
        const  newState = JSON.parse(JSON.stringify(state));  //深拷贝
        newState.list.push(newState.inputValue);
        newState.inputValue = '';
        return newState
    }
    if(action.type === DELETE_TODO_ITEM){
        const  newState = JSON.parse(JSON.stringify(state));  //深拷贝
        newState.list.splice(action.index, 1)
        return newState
    }
    return state;
}
这样如果拼写错误就会报错(之前没引入ActionTypes.js之前,拼写错误是不会报错的)

5 使用actionCreator创建统一action

之前我们是在组件中(todolist.js中创建action的),通过上面可以看出来,我们的action创建不应该都放在组件中。应该通过ActionCreators来管理和创建所有action
首先,在store文件夹下增加一个文件actionCreators.js并在该文件中封装action方法
现在文件目录如下:
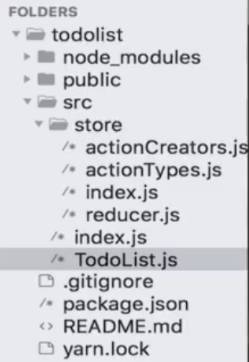
actionCreators.js
import {CHANGE_INPUT_VALUE, ADD_TODO_ITEM, DELETE_TODO_ITEM} from './actionType'


//ation  => InputChangeAction
export const getInputChangeAction = (value) => ({
    type: CHANGE_INPUT_VALUE,
    value
})

//ation  => AddItemAction
export const getAddItemAction = () => ({
    type: ADD_TODO_ITEM,
})

//ation  => DeleteItemAction
export const getDeleteItemAction = (index) => ({
    type: DELETE_TODO_ITEM,
    index
})
todolist.js
import { getInputChangeAction,getAddItemAction,getDeleteItemAction } from './store/actionCreators'

// 因此组件中创建action就变成了只需要调用actionCreators.js中封装的action方法,并传给其所需要的的值(如:下面的e.target.value值)。
// 这里列举一个事件的函数,其他的事件函数中action修改和这类似
handleInputChange(e) {
    const action = getInputChangeAction(e.target.value);
    store.dispatch(action);
}
注意:这里修改todolist.js中创建action的内容,就不需要之前引用的actionTypes中的type常量了,因此组件中的actionTypes的导入就可删掉啦!
6 Redux知识点复习补充
Redux的三个基本原则:
1.store必须唯一(在store文件夹下的index.js中创建)
2.只有store只能改变自己的内容
不是Reducer进行更新的,是store拿到reducer的newState数据,然后自己进行更新
3.Reducer必须是纯函数
纯函数指的是:给固定的输入,就一定会有固定的输出,而且不会有任何副作用。
理解:当state固定 + action固定 => 返回值固定 如设定了时间new Date() ,并返回,就不是纯函数,不能是异步操作ajax
副作用:对接受的参数进行了修改
如下面就不是纯函数
export default (state = deafultState, action) => {
    if(action.type === CHANGE_INPUT_VALUE){
      const  newState = JSON.parse(JSON.stringify(state));  //深拷贝
      newState.inputValue = action.value;
      newState.inputValue = new Date();   				// 不固定
      state.inputValue = action.value;            //副作用
      return newState
 		}
Redux中的核心API
createStore => 创建store
store.dispatch => 发送action到store
store.getState => 获取store中的所有数据内容
store.subscribe() => 监听如果store改变则执行里面的函数

本章最终代码
文件目录
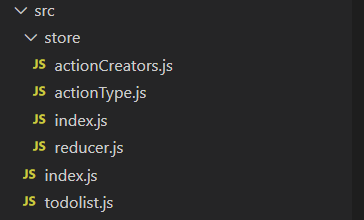
src/index.js
import React from 'react';
import ReactDOM from 'react-dom';
import TodoList from './todolist'; //自动补全js后缀

ReactDOM.render(
    <TodoList />  //JSX 语法
  document.getElementById('root')
);
//将我们APP中的节点,挂载到id=root的节点下面
src/todolist.js
import React, {Component} from 'react';
import 'antd/dist/antd.css';
import { Input } from 'antd';
import { Button } from 'antd';
import { List } from 'antd';
import store from './store/index';
import { getInputChangeAction,getAddItemAction,getDeleteItemAction } from './store/actionCreators'

class TodoList extends Component {

    constructor(props) {
        super (props);
        this.state = store.getState();
        this.handleInputChange = this.handleInputChange.bind(this);
        this.handleStoreChange = this.handleStoreChange.bind(this);
        this.handleBtnClick = this.handleBtnClick.bind(this);
        //监听store的内容只要发生改变,函数就会执行
        store.subscribe(this.handleStoreChange);
    }

    render() {
        return (
            <div style={{marginTop: '10px',marginLeft: '20px'}}>
                <div >
                    <Input
                        value={this.state.inputValue}
                        placeholder="todo info"
                        style={{width: '300px'}}
                        onChange={this.handleInputChange}
                    />
                    <Button
                        type='primary'
                        style={{marginLeft:'20px'}}
                        onClick={this.handleBtnClick}
                        >
                        提交
                    </Button>
                </div>
                <List
                    style={{marginTop: '20px',width: '300px'}}
                    bordered
                    dataSource={this.state.list}
                    renderItem={(item,index) => (
                        <List.Item onClick={this.handleItemDelete.bind(this, index)}>
                            {item}
                        </List.Item>
                    )}
                />
            </div>
        )
    }

    handleInputChange(e) {
        const action = getInputChangeAction(e.target.value);
        store.dispatch(action);
    }

    handleStoreChange() {
        console.log('store change');
        this.setState(store.getState());
    }

    handleBtnClick() {
        const action = getAddItemAction();
        store.dispatch(action);
    }

    handleItemDelete(index) {
        const action = getDeleteItemAction(index);
        store.dispatch(action)
    }
}

export default TodoList;
src/store/index.js
import { createStore } from 'redux';
import reducer from'./reducer'
const store = createStore(
    reducer,
    window.__REDUX_DEVTOOLS_EXTENSION__ && window.__REDUX_DEVTOOLS_EXTENSION__()
    );
export default store;
src/store/reducer.js
import {CHANGE_INPUT_VALUE, ADD_TODO_ITEM, DELETE_TODO_ITEM} from './actionType'

const deafultState = {
    inputValue: '',
    list: []
}

//记录本
//state 图书馆书籍的信息-> 存储的数据
//state -> 上次存储的数据 action -> 用户传过来的那句话
//reducer 可以接受state,但是不可以修改state
export default (state = deafultState, action) => {
    if(action.type === CHANGE_INPUT_VALUE){
        const  newState = JSON.parse(JSON.stringify(state));  //深拷贝
        newState.inputValue = action.value;
        return newState
    }
    if(action.type === ADD_TODO_ITEM){
        const  newState = JSON.parse(JSON.stringify(state));  //深拷贝
        newState.list.push(newState.inputValue);
        newState.inputValue = '';
        return newState
    }
    if(action.type === DELETE_TODO_ITEM){
        const  newState = JSON.parse(JSON.stringify(state));  //深拷贝
        newState.list.splice(action.index, 1)
        return newState
    }
    return state;
}
src/store/actionType.js
export const CHANGE_INPUT_VALUE = 'change_input_value';
export const ADD_TODO_ITEM = 'add_todo_item';
export const DELETE_TODO_ITEM= 'delete_todo_item';
src/store/actionCreators.js
import {CHANGE_INPUT_VALUE, ADD_TODO_ITEM, DELETE_TODO_ITEM} from './actionType'

export const getInputChangeAction = (value) => ({
    type: CHANGE_INPUT_VALUE,
    value
})

export const getAddItemAction = () => ({
    type: ADD_TODO_ITEM,
})

export const getDeleteItemAction = (index) => ({
    type: DELETE_TODO_ITEM,
    index
})


 4085
4085


 被折叠的 条评论
为什么被折叠?
被折叠的 条评论
为什么被折叠?
 到【灌水乐园】发言


